 LAMP Stands for Linux,Apache,MySQL and PHP. Most of the websites works with the above combination. if you think the above combination will be only on servers where the hosting are made, that is wrong you can made it very easily on PC when compared to other Linux environment.In other Linux environment we need to install all the above separately by separate commands. But in Ubuntu you can install the above in one command. Here i am listing the steps to install LAMP in one command.
Installing Linux:
This post is not about How to install Ubuntu. Only about the installation of AMP(Apache,MySQL,PHP).
Installing AMP(Apache,MySQL,PHP).
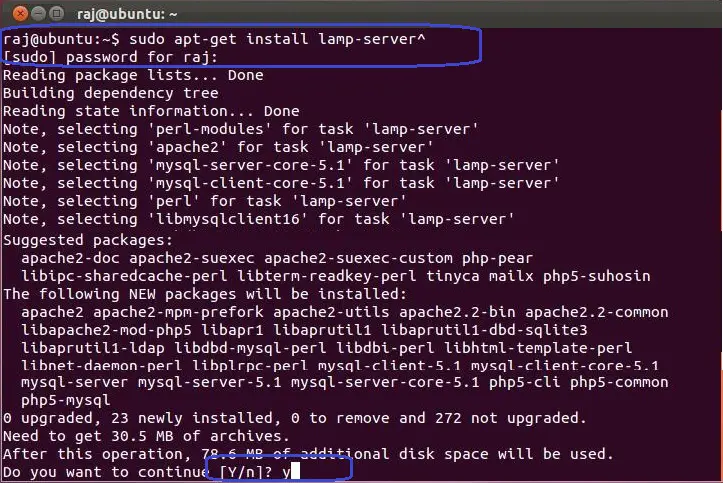
Just Copy and Paste the line in the Terminal. This will start to download and install the LAMP packages.
[raj@ubuntu$ ~]# sudo apt-get install lamp-server^
[sudo] password for raj: ————> Type the Password for user.
Once entered the above command, it will ask you to enter the password for the user.
At last it will ask you to confirm the downloading of the data, type yes and Press Enter.
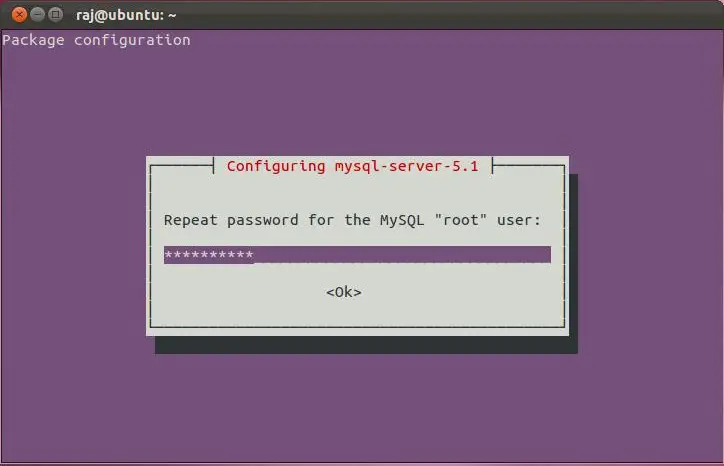
After the installation of the above it will ask you to configure the MySQL root password. Type new root password for MySQL in the Next Screen.
Repeat the root password.
After that it will continue to install the other packages that are required by the AMP.
Testing Apache:
To make sure everything installed correctly we will now test Apache to ensure it is working properly.
1. Open up any web browser and then enter the following into the web address:
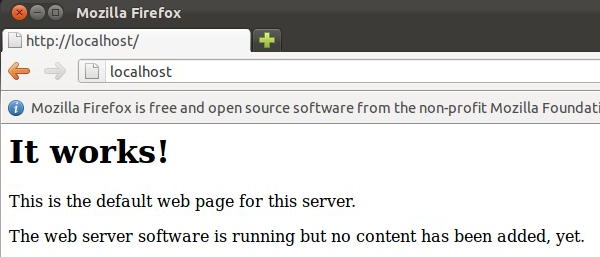
http://localhost/ or http://127.0.0.1
You will get the web page saying “It Works”. Now the Apache is working fine.
Testing PHP:
For testing the PHP, Place one PHP file on to the default directory of the Apache.
Step 1. In the terminal copy/paste the following line:
[raj@ubuntu$ ~]# sudo vi /var/www/phpinfo.php
This will open up a file called phpinfo.php.
Step 2. Copy/Paste this line into the phpinfo file:
<?php phpinfo(); ?>
Step 3. Save and close the file. use Esc + ;wq for saving the file.
Step 4. Now open you’re web browser and type the following into the web address:
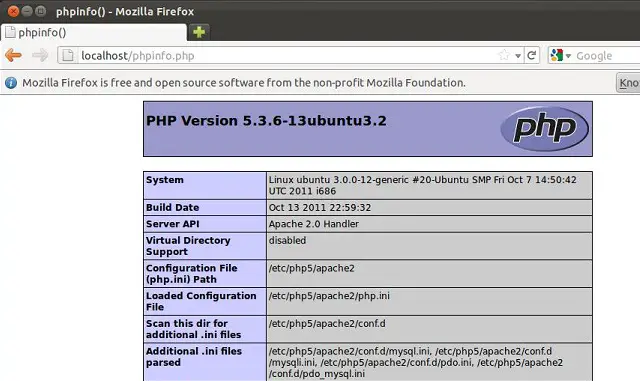
http://localhost/phpinfo.php or http://127.0.0.1/phpinfo.php
The page look like below:
Configuring MySQL:
This is optional, MySQL will normally listen on the localhost only. if you want to listen MySQL on the other IP you need to edit the /etc/mysql/my.cnf file.
[raj@ubuntu$ ~]# sudo vi /etc/mysql/my.cnf
[sudo] password for raj: ————> Type the Password for user.
Change the following line and put your ip on the place of 127.0.0.1
bind-address = 127.0.0.1 ——-> bind-address = 192.168.0.10
Installing phpMyAdmin:
Next is to install phpMyAdmin, this graphical utility will help you to manage databases very easily.
[raj@ubuntu$~]# sudo apt-get install libapache2-mod-auth-mysql php5-mysql phpmyadmin
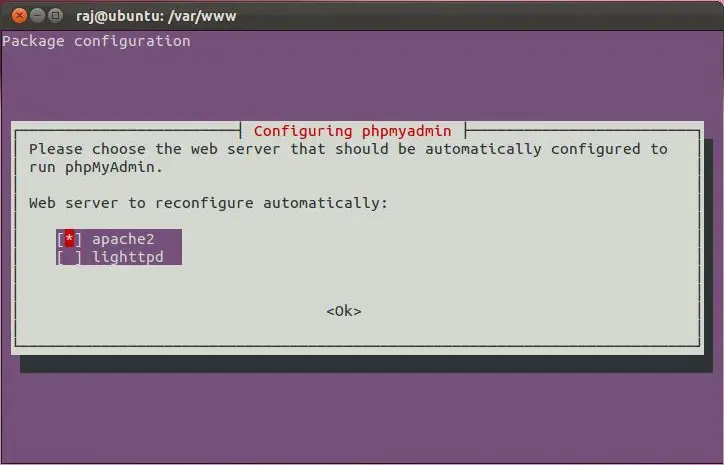
Installation will prompt you to select the web server for automatic configuration. Use space to select the web server type and then press Enter.
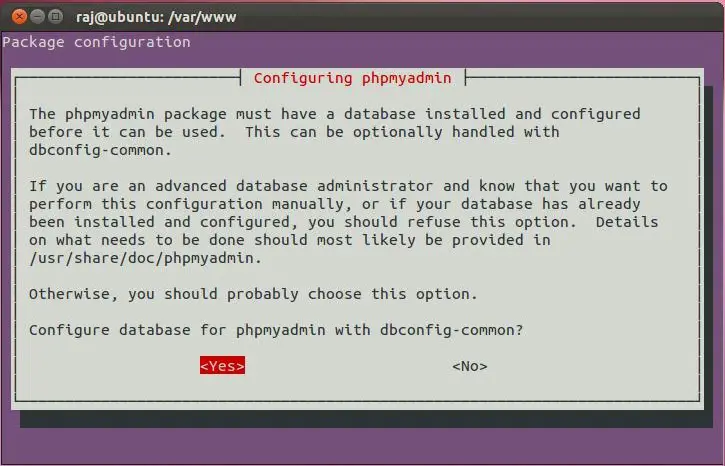
Next screen will prompt you for configuring database called db-common for phpMyAdmin. Use the tab key to select yes and Press Enter.
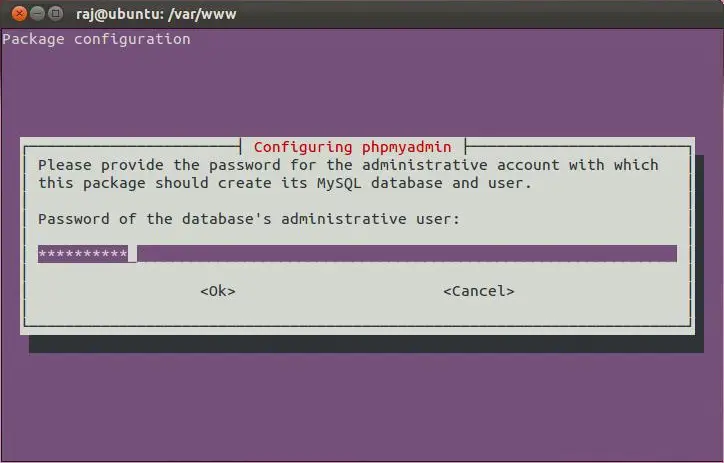
Next it will prompt you to enter the password for MySQL root user, please enter the MySQL root password that created earlier.
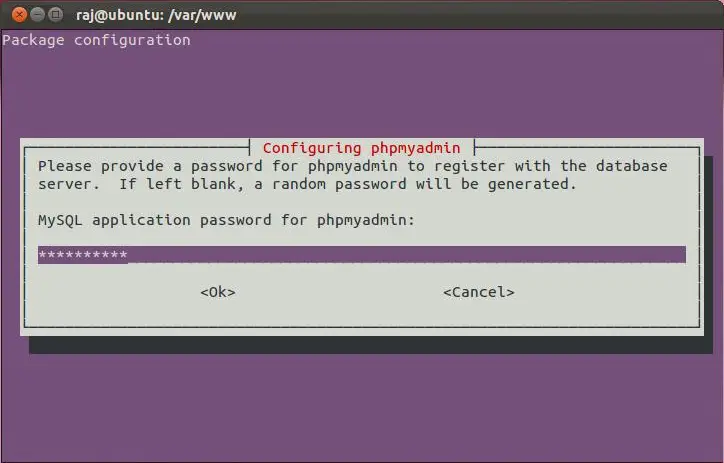
It will prompt you to type the password for MySQL application password for phpmyadmin.if you left it blank, a random password will be generated. Type the password of your wish and press Enter.
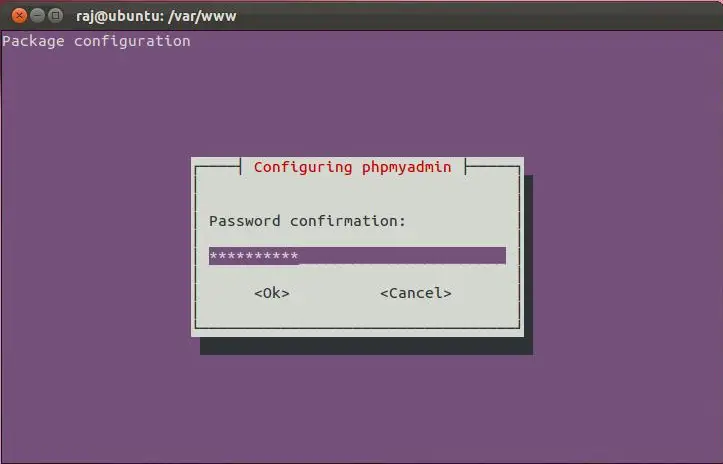
Confirm your password in the next screen.
Testing phpMyAdmin:
If would like to manage the MySQL through phpMyAdmin, Open the Mozilla Firefox and Type the following web address.
http://localhost/phpmyadmin or http://127.0.0.1/phpmyadmin
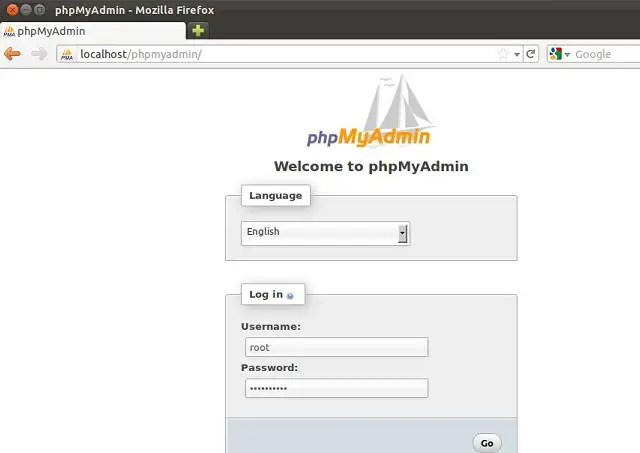
You will get MySQL login page, Please type the username and password set by you during MySQL installation.
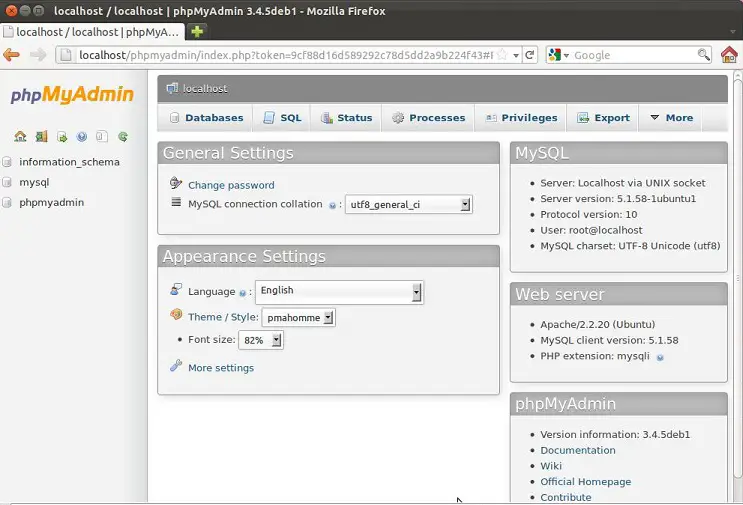
After the Log in you will get the Main Page of the phpMyAdmin. Here you can manage the database very easily.
That’s all!. Now the Ubuntu is ready with AMP. You can put your web pages in the /var/www directory for single site.

