The client configurations are stored in files called manifests, in this file, the user defines system resources and their state, either using Puppet’s declarative language or a Ruby DSL (domain-specific language). Puppet discovers the client systems information via a utility called Facter, and compiles the Puppet manifests into a system-specific catalog containing resources and resource dependency, which is applied to the target systems.
Creating first manifest
To start with, we will create a puppet manifest to install apache server on my client-server. So, create a manifest file called “site.pp” in the manifests directory.
[root@server ~]# vi /etc/puppet/manifests/site.pp
Add below content into the manifest file.
node 'client.itzgeek.local' {
              package { 'httpd' :
              ensure => installed,
                       }
}
If you see the configuration file, it is very easy to understand. The first line tells that we need to install this configuration on a client machine “client.itzgeek.local”. You can also define multiple nodes in the node statement by a comma-separated list of node names.
Next two lines tell the puppet that we need to ensure httpd is installed on a client machine.
Applying configuration on Client machine
Puppet clients pull the configurations from the puppet master once every 30 minutes, but you can pull it immediately by either restarting puppet client or running below command.
[root@client ~]# puppet agent --test

Info: Retrieving pluginfacts
Info: Retrieving plugin
Info: Caching catalog for client.itzgeek.local
Info: Applying configuration version '1445415252'
Notice: /Stage[main]/Main/Node[client.itzgeek.local]/Package[httpd]/ensure: created
Notice: Finished catalog run in 13.31 seconds
You can use below manifest incase If you want to start the apache after the installation and also want it to start automatically on system startup.
node 'client.itzgeek.local' {

              package { 'httpd' : # Package Name
              ensure => installed, # Install the package
                       } -> # Order of the execution, service will be started after the installation
              service {'httpd': # Name of the service
              ensure => running, # Start the apache service
              enable => true, # Start on system boot
                       }
}
-> (ordering arrow) — Causes the resource on the left to be applied before the resource on the right, meaning that the apache service is to be started and enabled to start automatically after the installation of apache packages. You can read more about the order of the execution here.
If you want to create a user on the client nodes, you can use below puppet manifest.
node 'client.itzgeek.local' {

                 user { "raj":  # User Name
                 ensure => "present",
                 shell => '/bin/bash', # Working Shell
                 home => '/home/raj', # Path of home directory
                 managehome => true, # Create a home directory
                 password => '$6$5G7puWSn$2yYgqu/LTHdk0oFmQIf66YE4mgEhCPV7fFZKvfRRBHdo9IRNgLRFA1BDYHRHMIyeTDeiFehBin.ciaVJUffl0/', # SHA512 Password
                      }
}
Note: The given password is SHA512 hashed, I took it from /etc/shadow. If your client uses other password hashing mechanism then make sure you generate the password hash accordingly.
Modules
Individual Puppet manifest files may be good enough for simple tasks. But, when you have a workflow to automate, it is better to create and use a Puppet module instead.
A Puppet module is just a collection of manifests with data files that those manifests require. It allows us to reuse configurations, rather than having to write configurations for every node; we can store them as a module and call them whenever we require.
To write your module, you need to create a subdirectory under the modules directory with the module name. Then, create a manifest file called init.pp, that should contain a class with the same name as the subdirectory you created just now.
Let’s say; you want to place custom Apache configuration file (Virtual Hosts), which will have specific options you choose. For this purpose, we will create the module and install the configurations on the client machine (client.itzgeek.local).
On the Puppet master, make sure you are in the modules directory: cd /etc/puppet/modules/. Then run mkdir -p httpd_itzgeek/manifests and mkdir -p httpd_itzgeek/files to create a new module directory and manifest with its data directory.
[root@server ~]# cd /etc/puppet/modules/

[root@server modules]# mkdir -p httpd_itzgeek/manifests

[root@server modules]# mkdir -p httpd_itzgeek/files

[root@server modules]# vi httpd_itzgeek/manifests/init.pp
Add below content into init.pp file.
class httpd_itzgeek {
    package { 'httpd':
      ensure => present,
    } ->
    file { "/var/www/itzgeek":  # Creating Document Root
      ensure => "directory",
      owner  => "apache",
      group  => "apache",
      mode   => 750,
    } ->
 file { '/var/www/itzgeek/index.html': # Creating Index file
     ensure  => file,
     content => "Index HTML Is Managed By Puppet",
     mode    => '0644',
   } ->
    file { '/etc/httpd/conf.d/custom_itzgeek.conf': # Path to the file on client machine
      ensure => file,
      mode   => '0600',
      source => 'puppet:///modules/httpd_itzgeek/custom_itzgeek.conf', # Path to the custom file on puppet server
    } ~>
    service { 'httpd':
      ensure => running,
      enable => true,
    }
}
~> (notification arrow) — Causes the resource on the left to be applied first, and sends a refresh event to the resource on the right if the left resource changes, meaning that the apache service is to be restarted and enabled to start automatically if there is any changes in the custom apache configuration file.
Create a custom Apache configuration file, which is having an apache alias. This custom conf file should be created under files directory of the created module (httpd_itzgeek).
[root@server ~]# echo "alias /itzgeek /var/www/itzgeek" > /etc/puppet/modules/httpd_itzgeek/files/custom_itzgeek.conf
Note: If you see the above command, “custom_itzgeek.conf” file is created under the “/etc/puppet/modules/httpd_itzgeek/files“, but where in “init.pp” of the “httpd_itzgeek” module; the path to the source file does not have parent directory “files” in the puppet url, it is because the Puppet file server takes those “puppet:///” URL and inserts an implicit “files” directory[ so you don’t need to specify that in the url]
URL like,
puppet:///modules/httpd_itzgeek/custom_itzgeek.conf
gets translated on the filesystem into,
/etc/puppet/modules/httpd_itzgeek/files/custom_itzgeek.conf
More about URL here.
It’s time to call the new module in our main manifest file,
[root@server ~]# vi /etc/puppet/manifests/site.pp

node 'client.itzgeek.local' {
         include httpd_itzgeek # This should match with the name of module directory
}
On your client machine, run following command to pull the configurations from puppet server.
[root@client ~]# puppet agent --test

Info: Retrieving pluginfacts
Info: Retrieving plugin
Info: Caching catalog for client.itzgeek.local
Info: Applying configuration version '1445471218'
Notice: /Stage[main]/Httpd_itzgeek/Package[httpd]/ensure: created
Notice: /Stage[main]/Httpd_itzgeek/File[/var/www/itzgeek]/ensure: created
Notice: /Stage[main]/Httpd_itzgeek/File[/var/www/itzgeek/index.html]/ensure: defined content as '{md5}32ecb3bc5907c078479a4d55b1ccdfde'
Notice: /Stage[main]/Httpd_itzgeek/File[/etc/httpd/conf.d/custom_itzgeek.conf]/ensure: defined content as '{md5}3cd4bca64b0a251bde0dd9064c4a89e9'
Info: /Stage[main]/Httpd_itzgeek/File[/etc/httpd/conf.d/custom_itzgeek.conf]: Scheduling refresh of Service[httpd]
Notice: /Stage[main]/Httpd_itzgeek/Service[httpd]/ensure: ensure changed 'stopped' to 'running'
Info: /Stage[main]/Httpd_itzgeek/Service[httpd]: Scheduling refresh on Service[httpd]
Notice: Finished catalog run in 27.75 seconds
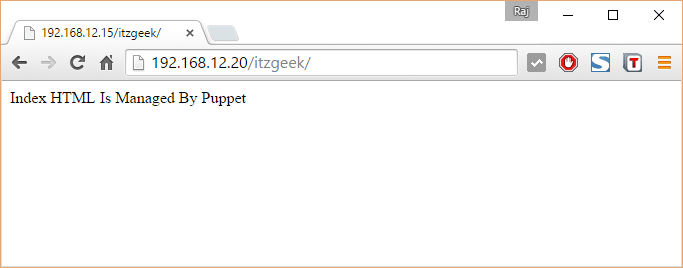
Now access your client web server (http://client-ip/itzgeek), you should get a page like below saying “Index HTML Is Managed By Puppet“.
Extras
Instaling Puppet Forge modules
You can also install predefined modules available on puppet forge. These modules are created by community members. You can use below command to install, requires an internet connection.
puppetlabs-apache is the name of the module, change it as per your requirement.
[root@server ~]# puppet module install puppetlabs-apache
Changing Interval
As I said earlier, puppet clients pull the configurations from the puppet master once every 30 minutes. To change this time interval modify the puppet.conf on clients and add below entry under [main] section.
runinterval = 3600
Note: Time in seconds
You can also use a tool called “Foreman“, it provides web GUI to manage the puppet.