OpenStack is a set of free and open-source tools for building and managing cloud computing platforms for public and private clouds.
OpenStack is mostly deployed as IaaS (infrastructure-as-a-service), where you can make resources like compute (VM), Networking, Storage, and others available to the end customer.
Though OpenStack’s core function is to provide IaaS platform, it is used as DBaaS (database-as-a-service), building Hadoop clusters, Container orchestration and much more.
In this article, we will perform Single Node OpenStack Installation on CentOS 7 using rdo repositories.
In single node OpenStack installation, all of its basic functionalities such as compute, network, storage, and dashboard are installed on the same machine. This method of installation is the best for proof of concept (POC).
If you are planning to perform Multi-Node OpenStack Installation on CentOS 7, then watch this space for our upcoming tutorial.
Environment
Hostname: server.itzgeek.local
IP Address: 192.168.1.110
Prerequisites
Hardware
Make sure your system has at least 16GB of RAM and a processor with VT support. Check the VT support using the below command.
egrep --color 'vmx|svm' /proc/cpuinfo | wc -l
Output: (should not be zero)
2
Update System
Make sure your machine has the latest version of CentOS 7 / RHEL 7 on the machine.
yum -y update
Setup RDO repositories
To begin, you need to setup RDO repositories for installing OpenStack on your system.
yum install -y https://rdoproject.org/repos/rdo-release.rpm
On RHEL 7, you would need to enable Optional, Extras, and RH common channels. Run the following command.
subscription-manager repos --enable=rhel-7-server-optional-rpms \
--enable=rhel-7-server-extras-rpms --enable=rhel-7-server-rh-common-rpms
Network
As a mandatory requirement, you would need to configure static IP address on your system in order have external network access to the servers and instances.
READ: READ: How to configure static IP address on CentOS 7 / RHEL 7
Also, disable firewall and NetworkManager.
systemctl disable firewalld
systemctl stop firewalld
systemctl disable NetworkManager
systemctl stop NetworkManager
systemctl enable network
systemctl start network
Install Packstack Installer
Let us first install the Packstack Installer that provides an easy way to install OpenStack on the system. Use YUM command to install it.
yum install -y openstack-packstack
Install OpenStack (Pike)
Running the Packstack installer with default options would setup Demo project and other stuff which are not necessary for our setup.
Generate OpenStack answer file.
packstack --gen-answer-file=/root/answer.txt
Edit the answer file.
vi answer.txt
Here, we will install the OpenStack without demo project. Also, we will create an OVS bridge called “br-ex” for external connectivity to instances (VM) through a logical segment called “extnet”.
Make sure the physical interface (ens33) you mention in this file matches the network adapter available on your system.
# Skip the provision of Demo project
CONFIG_PROVISION_DEMO=n

# Change Admin Password - Used to Login to OpenStack Dashboard
CONFIG_KEYSTONE_ADMIN_PW=xxx

# Config OpenStack Dashboard over SSL
CONFIG_HORIZON_SSL=y

# Map physical network bridge to the logical name. <Logical Name:Bridge Name>
CONFIG_NEUTRON_OVS_BRIDGE_MAPPINGS=extnet:br-ex

# Create bridge for external connectivity. <Bridge Name: NW card name>
CONFIG_NEUTRON_OVS_BRIDGE_IFACES=br-ex:ens33
extnet : Logical name for our external physical connection.
br-ex : Bridge adapter
eth0 or ens33 : Network Interface name
Run the PackStack installer with the answer file we just modified according to our requirement.
packstack --answer-file=/root/answer.txt
The installation of OpenStack will take quite a bit long time.Take a break.
On completion, you should get a message something like this.
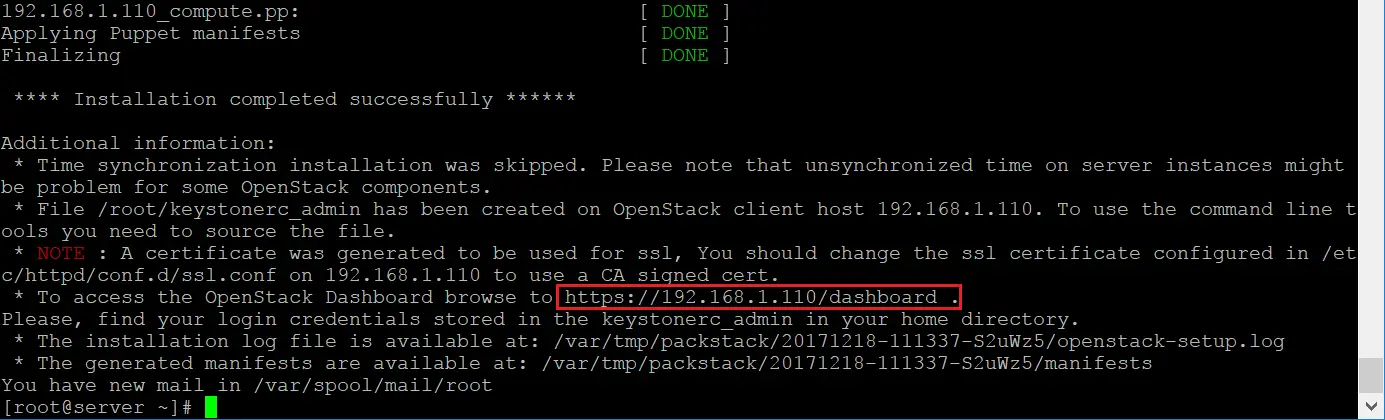
Access OpenStack Dashboard
To access OpenStack Dashboard, open up a browser and visit URL
OR
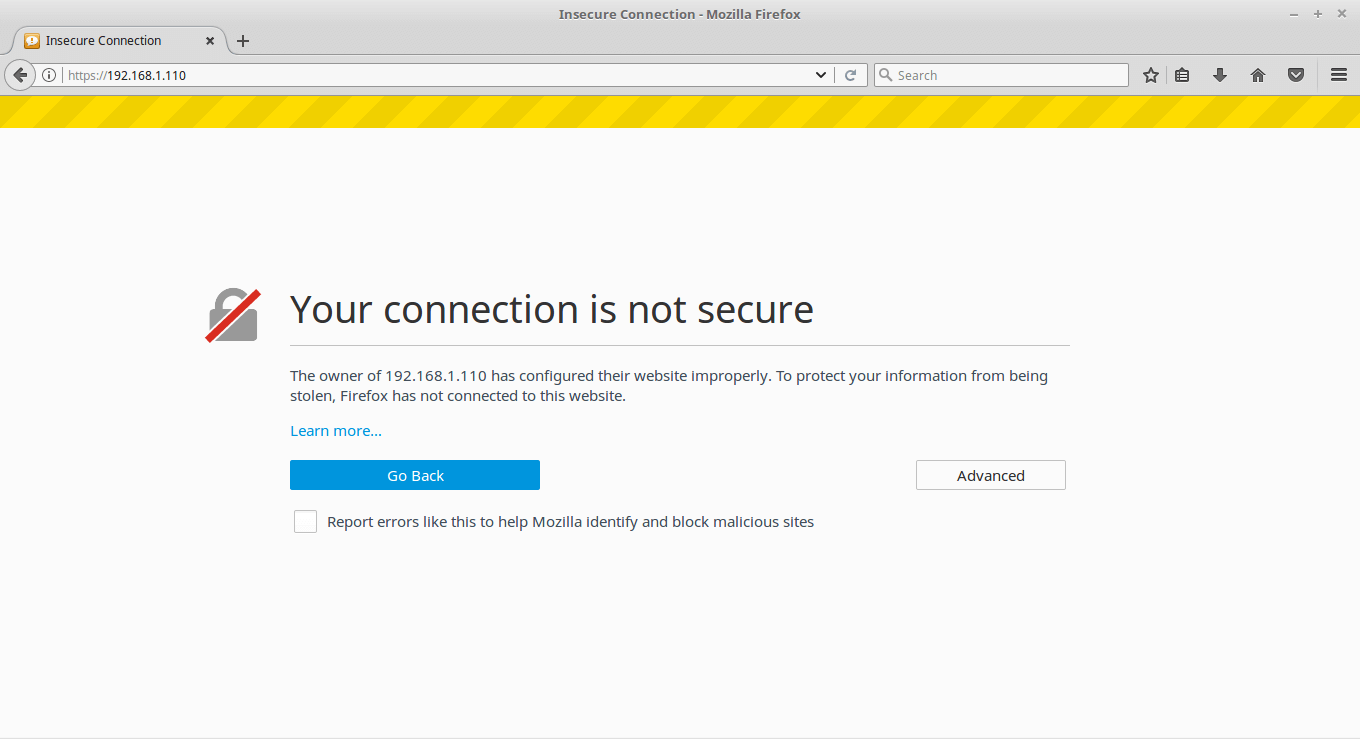
Since we have used the self signed certificate for OpenStack dashboard, you would get below page saying the page is not secure.
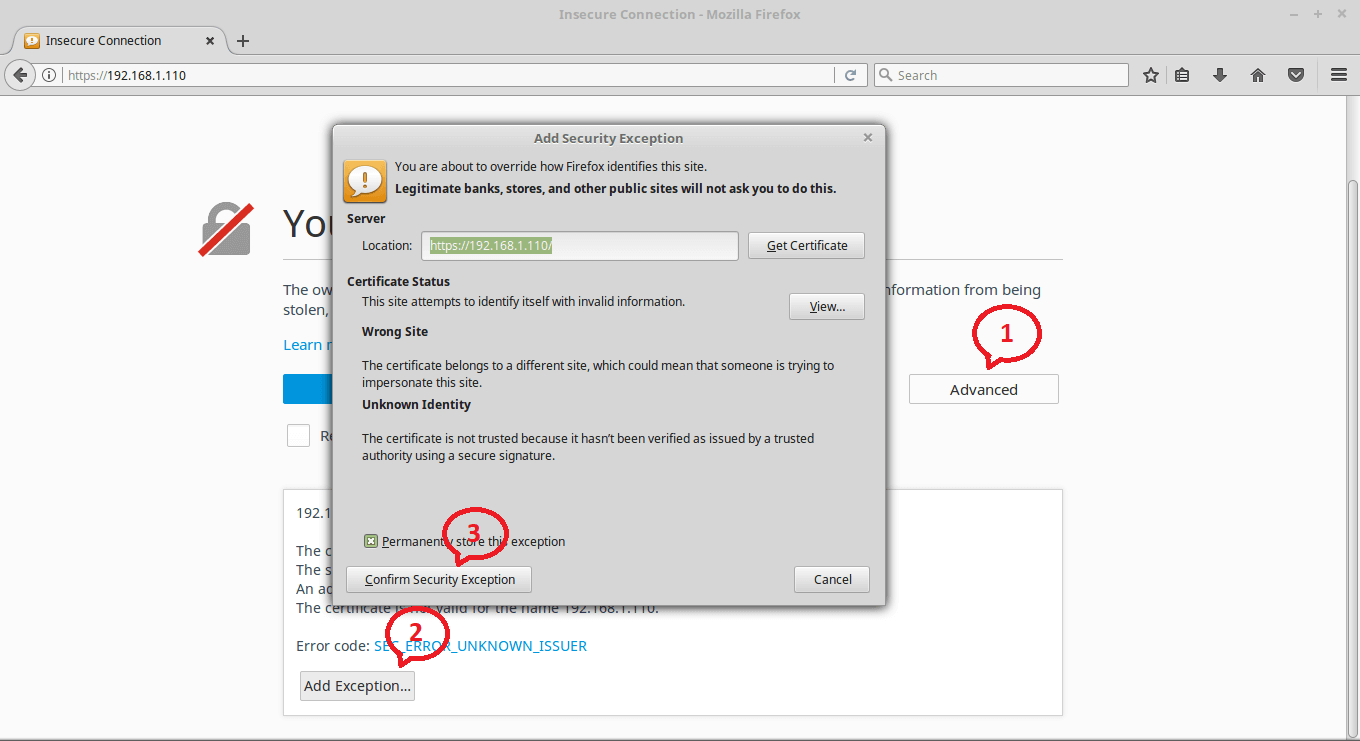
Add an exception for OpenStack dashboard in Firefox so that we can access the dashboard.
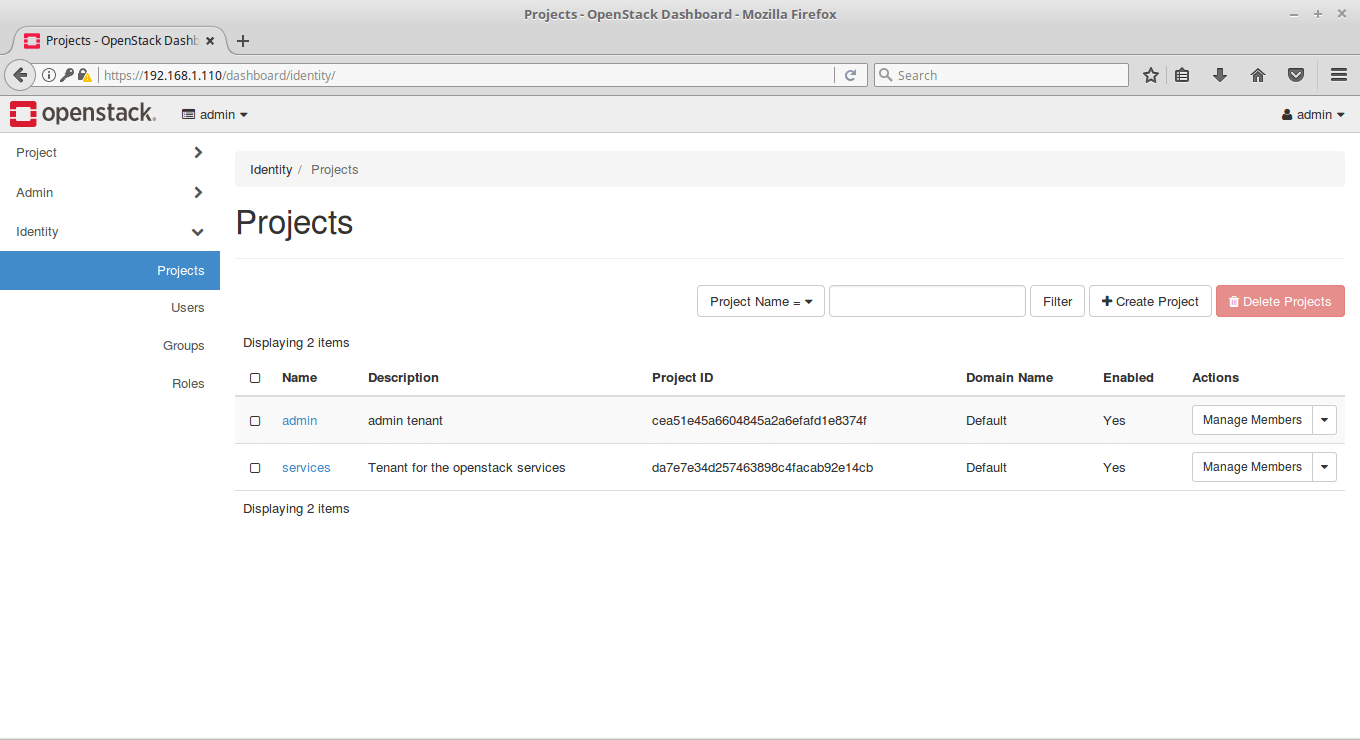
Login as user: admin with the password you set on CONFIG_KEYSTONE_ADMIN_PW parameter from the answer file.
OpenStack Dashboard will look like below: – Projects
That’s All. In our next article, we will setup OpenStack Networking to connect VM instances from an external network and Launch VM instances using OpenStack Dashboard.
I was searching for this tutorial only … for the past one week.. i mean for pike installation…
Finally I got it.
Thank you very much..