Command Line:
Open Terminal (Application —–> Accessories —–> Terminal),Switch to root user.
geeksite@geeksite-PC~/Desktop$ su -
Password:
Open printer adminstration utility
geeksite-PC~/# system-config-printer
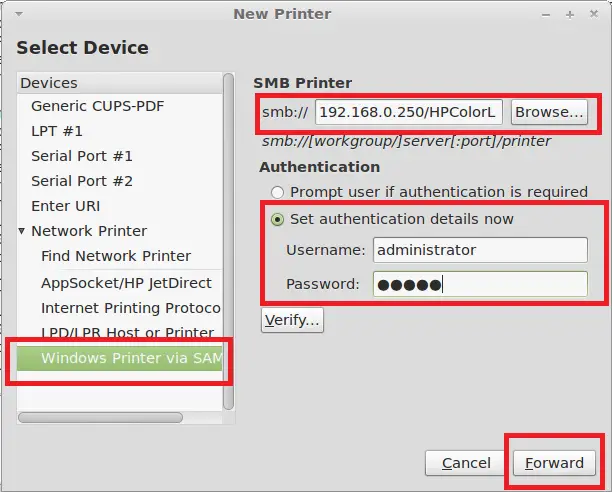
Shared Printer:
If the printer shared on windows and you want to get it installed on Linux Mint machine, click on Network Printer —-> Windows Printer Via SAMBA. In the right panel type your ip or hostname with the shared printer name (Ex. if ip = 192.168.0.250 shared name=HPColorL type 192.168.0.250/HPColorL). Below that type the authentication information to login on the shared windows machine and the click forward. Follow the on screen instruction to get it installed.
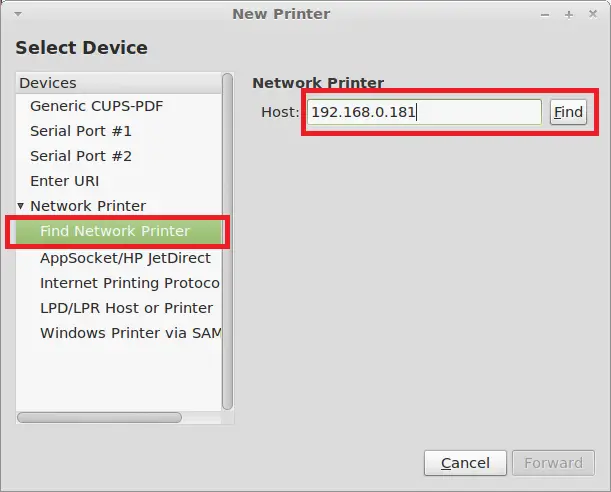
Network Printer:
If your printer has dedicated nic, please follow the instruction to install printer. This time click on find printer under network printer section, type the ip-address of the printer on the right side and then click on find. Once printer found on the specified ip, it will show the port no then click forward. Follow the on screen instruction to get it installed.
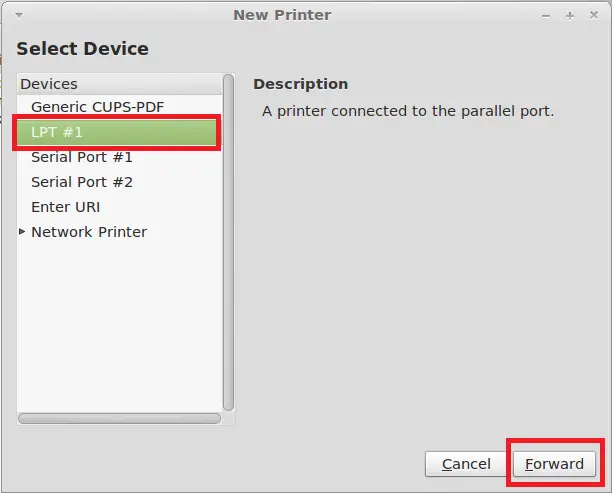
Directly Attached Printer:
Connect the printer with machine and power on the printer. Open printer administration utility through terminal, your printer should be listed there if it is a USB printer otherwise select the LPT #1 or Serial Port #1 or Serial Port #2 for installation according to communication interface of printer. once you selected your printer communication click forward and Follow the on screen instruction to get it installed.
That’s all. You have successfully installed printer on Linux Mint 12.