Here i will show you how to install VMware Workstation on Linux Mint 14.
Step 1: Go to download page of the VMware Workstation 9.
Step 2: Select and download VMware-Workstation-Full-9.x.x.x.bundle format.
Step 3: Open Terminal (Applications —–> Accessories —–> Terminal).
Step 4: Change the file permission to make it executable.
raj@itzgeek~/$ chmod 755 VMware-Workstation-Full-9.x.x.x86_64.bundle
Step 5: Install VMware Workstation 9.
## 32 Bit ##
raj@itzgeek~/$ sudo ./VMware-Workstation-Full-9.x.x.i386.bundle
## 64 Bit ##
raj@itzgeek~/$ sudo ./VMware-Workstation-Full-9.x.x.x86_64.bundle
Installer will start to extracting files for the installation, it might take some time.
Step 6: Select I Agree and click next.
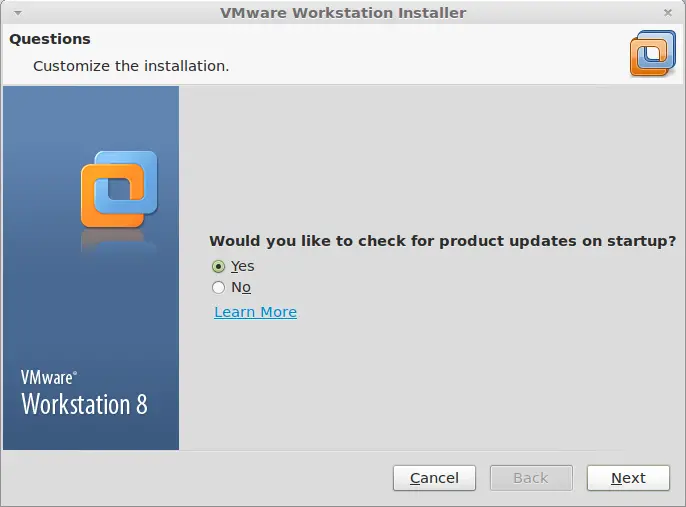
Step 7: Choose your option for update and then click next.
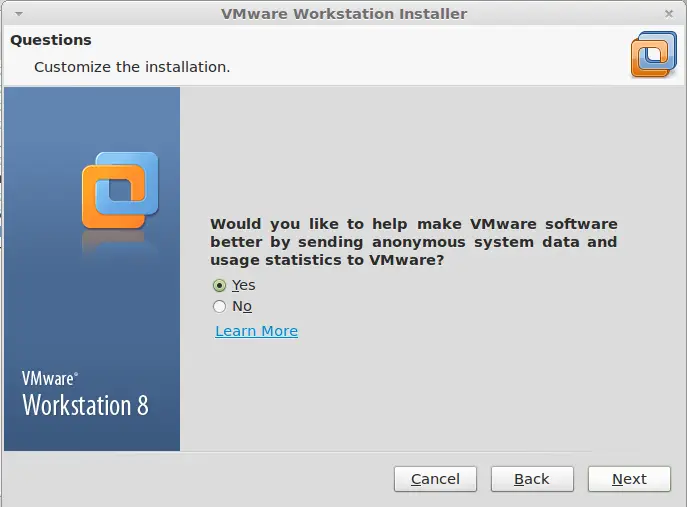
Step 8: Choose your option for sending anonymous statistics and then click Next.
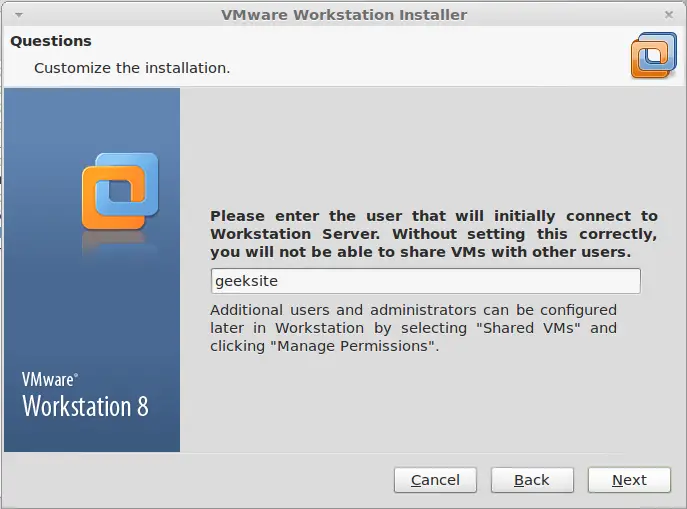
Step 9: Enter the user that will initially connect to workstation server (Leave the default user) and then click next.
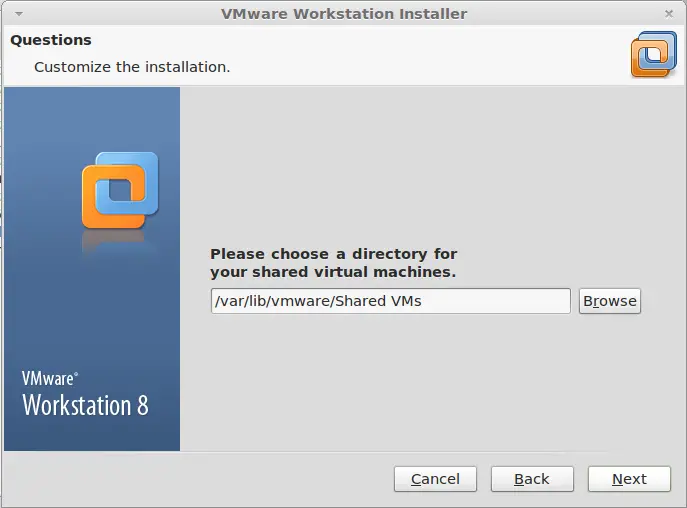
Step 10: Choose your shared directory for shared virtual machine (Leave the default) and then click next.
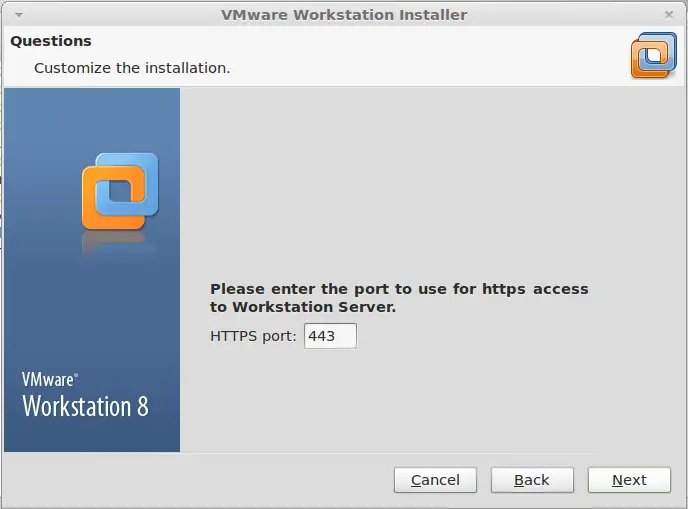
Step 11: Enter the port no to use for https access to workstation server (Leave the default).
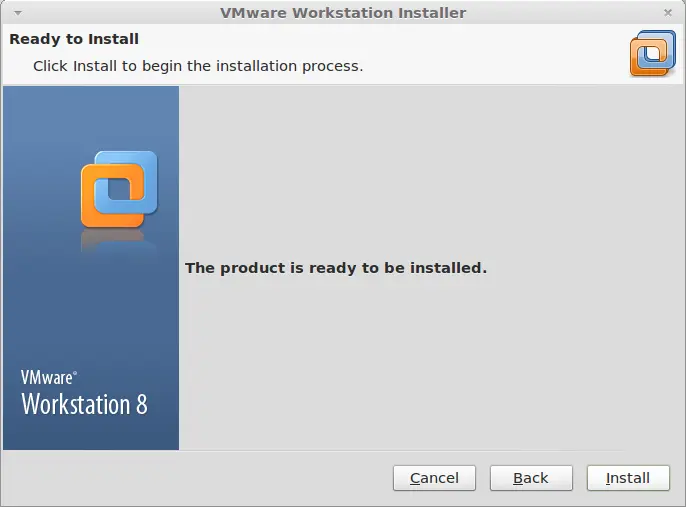
Step 12: Click on Install to begin installation.
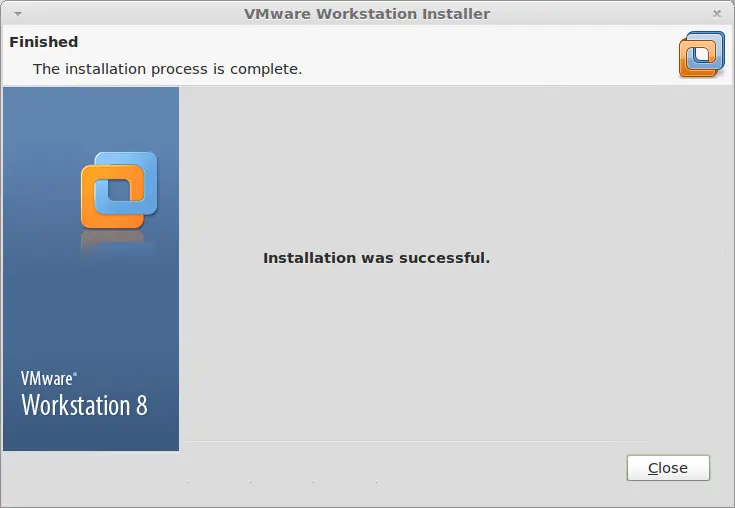
VMware installation has been started, sit back for a while.
Step 12: Click close the button to finish the installation.
Step 13: Start the VMware Workstation ( Applications —–> System Tools ——> VMware Workstation).
or
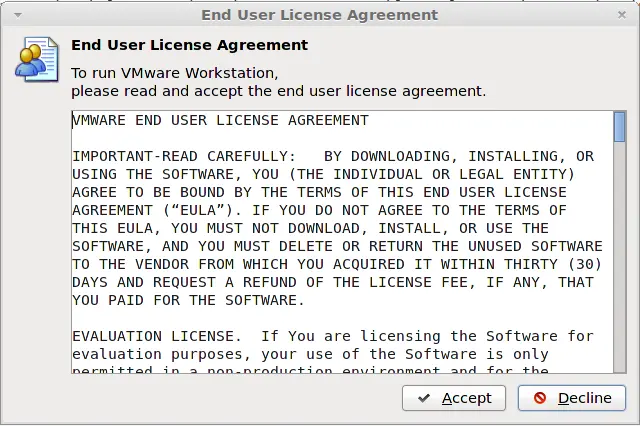
Step 14: Accept the license agreement.
Step 15: You should see the home screen of the VMware Workstation; here you can manage the Virtual Machines.
That’s all! You have successfully installed VMware Workstation on Linux Mint 14.