Ubuntu 18.04 has been released on 26th April 2018 with a support of 5 years, by Canonical. This post guides you on how to perform the installation of Ubuntu 18.04 in dual boot with a Microsoft Operating systems such as Windows 10 or Windows 8 which comes pre-installed with a laptop or desktop.
What’s new in Ubuntu 18.04
- GNOME Desktop
- Ubuntu Minimal Installation
- Xorg becomes the default display server
- Comes with Linux kernel 4.15
READ: Top 10 New Features of Ubuntu 18.04 LTS
I assume that you already have Windows operating system on your laptop or desktop. You can install Ubuntu 18.04 in dual boot with Windows 10, Windows 8.1 or Windows 8.
If your laptop or desktop doesn’t have any other operating system, then you should first install Microsoft Windows and then go for the Ubuntu 18.04 installation.
For fresh Ubuntu 18.04 OS installation,
READ: Install Ubuntu 18.04 LTS (Bionic Beaver) on UEFI and Legacy BIOS System – Step by Step Guide
1. Install Ubuntu 18.04 Alongside With Windows 10 in Dual Boot
Ubuntu 18.04 supports UEFI firmware and can boot on PCs with secure boot enabled. So, you should not face any issues while installing Ubuntu 18.04.
Step 1: Check UEFI or BIOS
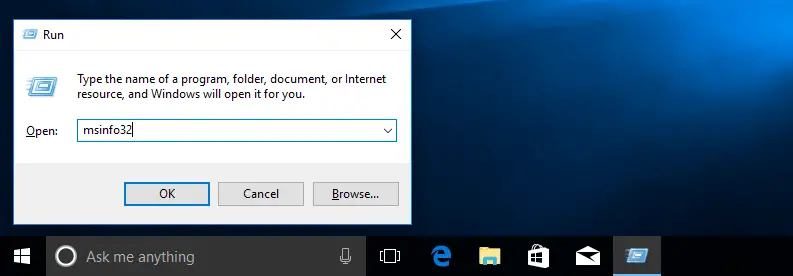
First, you need to check if your Windows is using UEFI or legacy BIOS and it is mandatory for creating bootable USB stick. Press Win + R and type msinfo32 and then hit enter.
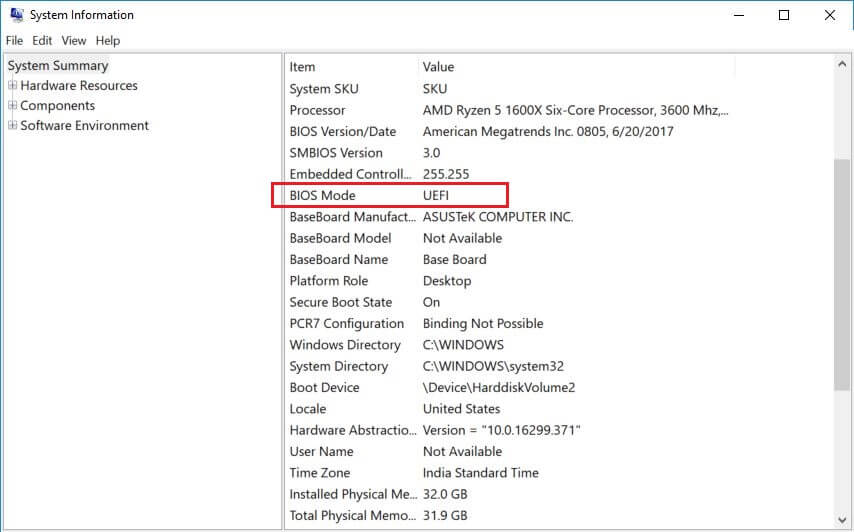
Look for BIOS Mode entry in the system information window.
Based on the Boot Mode, you would need to use software [ Universal USB Installer (BIOS compatible) or Rufus (UEFI compatible) for creating a bootable USB stick.
Step 2: Prepare Windows System for Dual-Boot
In most of the cases, OEM vendors ship machines with a pre-configured Windows system with the defined partition layout (normally, the whole disk is used for OS partition). So, machines will not have any free space (unallocated disk space) left for creating a partition for Ubuntu 18.04 installation.
If your system already has unallocated space (at least 15GB or 20GB) then you can skip this step and go directly to Installation of Ubuntu 18.04.
As a first thing, we will create at least 20GB of free disk space on the hard drive for Ubuntu 18.04 installation.
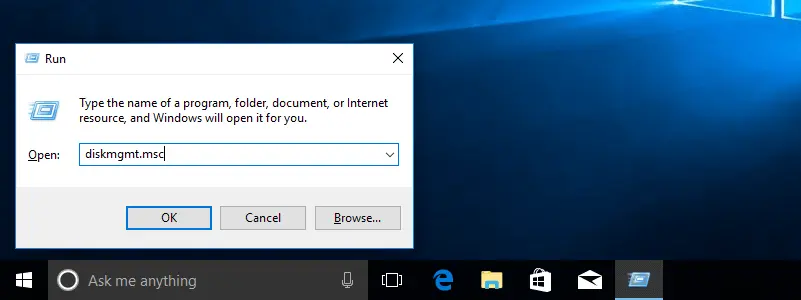
Go to Windows OS. Press Win + R. Then, type diskmgmt.msc to open Disk Management utility.
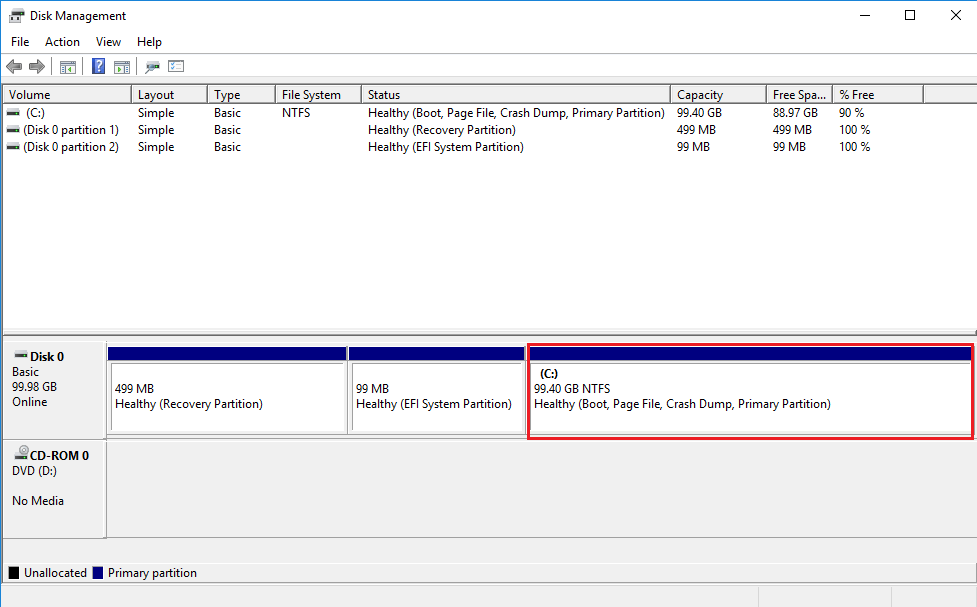
Since my machine has only one partition, i.e. C:, I will shrink it for Ubuntu installation.
Consider shrinking the last partition in case the system has more than one partition.
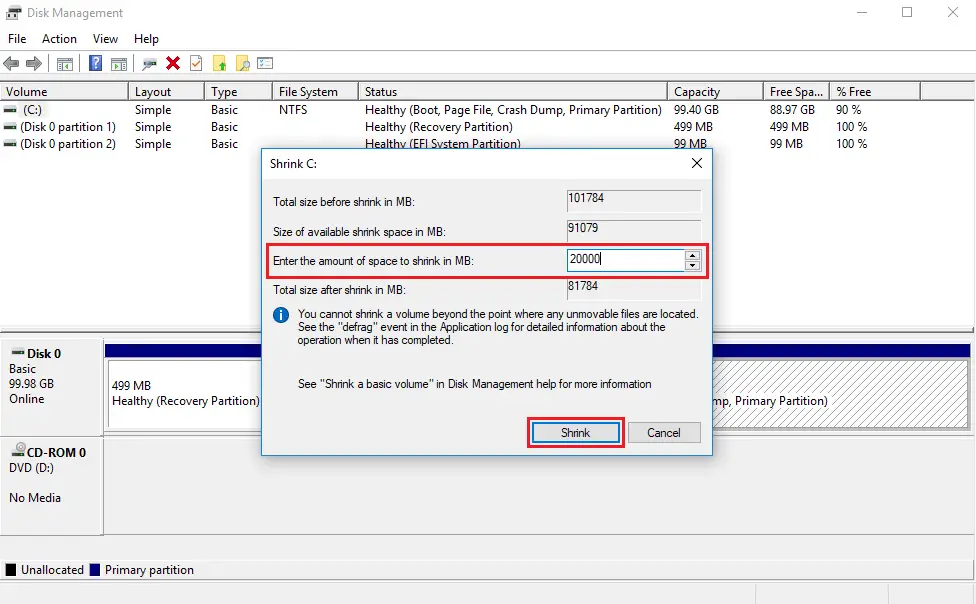
Right click on C: and then select Shrink Volume to resize the partition. Enter the amount in MB and then click Shrink to begin the shrinking operation.
For Example: To get a 20GB free disk space on the 100GB partition, you would need to enter 20000 and then click Shrink.
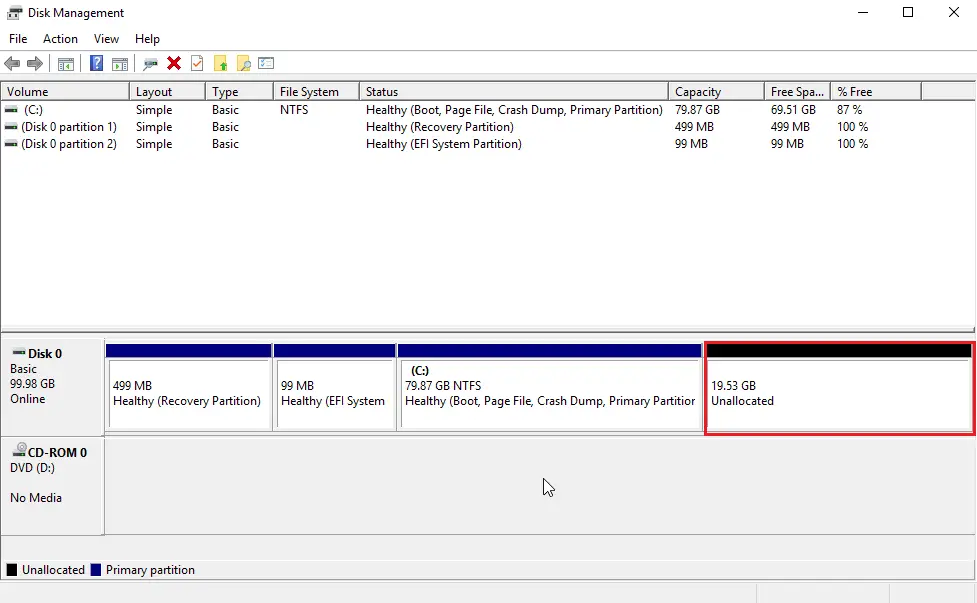
Wait for few minutes, and you will see an Unallocated Space with the size of 20GB.
Step 3: Download Ubuntu 18.04 and Create a Bootable USB Stick or DVD
Download the Ubuntu 18.04 desktop image from the Ubuntu website.
Burn the downloaded Ubuntu OS image to a DVD using your favorite DVD burner OR create a bootable USB disk using Universal USB Installer (BIOS compatible) or Rufus (UEFI compatible).
Step 4: Boot from USB Stick or CD
Insert DVD or USB stick on the system and then reboot the machine, then change the boot sequence on BIOS/UEFI to boot a system from DVD/USB by pressing F2, F10 or F12 keys (read the vendor manual for more information).
Step 5: Preparing to Install Ubuntu 18.04 LTS
UEFI System:
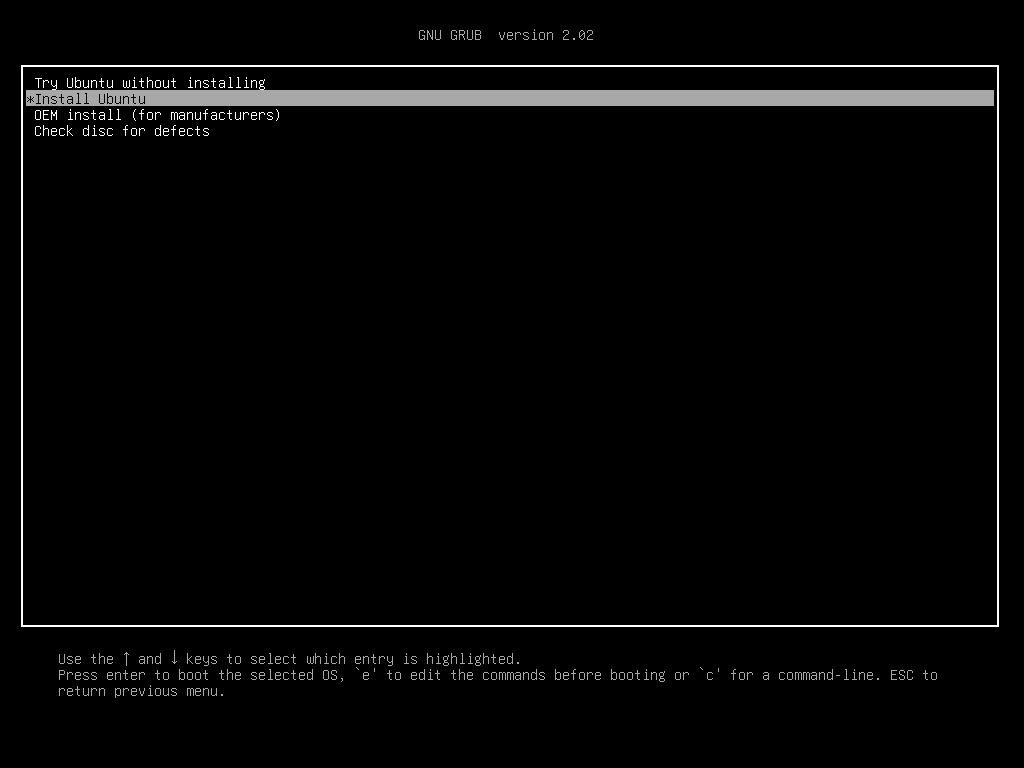
Once the system boots up from DVD/USB stick, the grub boot screen should appear on your machine. Select Install Ubuntu from the menu and then press Enter.
Wait for few minutes to let media loads into memory and bring up the Ubuntu Live system.
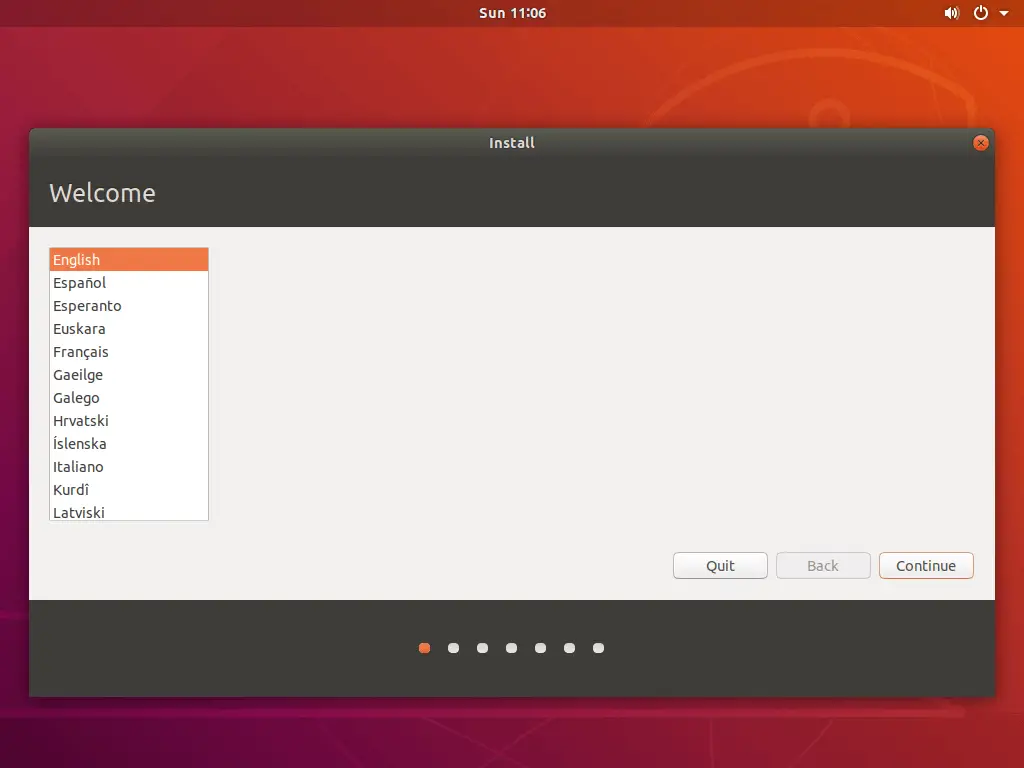
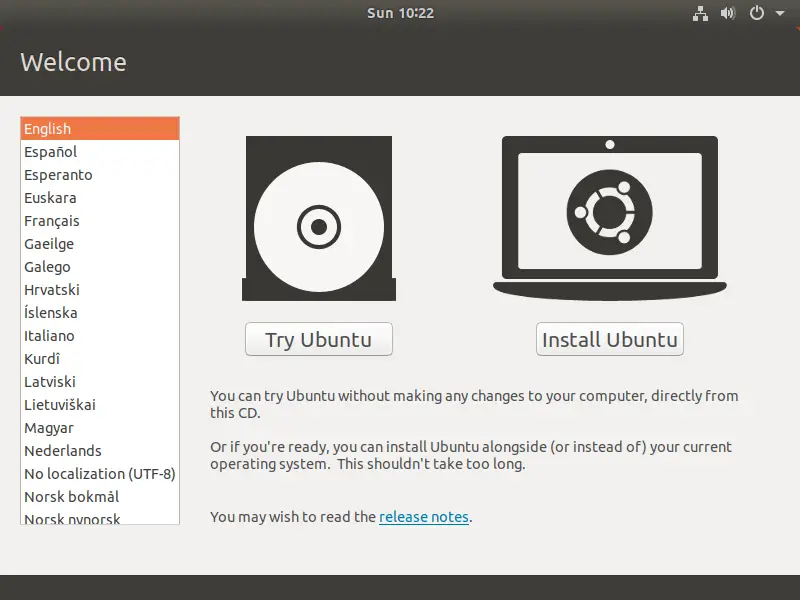
Click the Continue on the welcome screen.
Legacy BIOS System:
Do not interrupt the booting from USB or DVD.
Click Install Ubuntu on the welcome screen to install Ubuntu 18.04
Choose the Keyboard and then click on Continue button to proceed further.
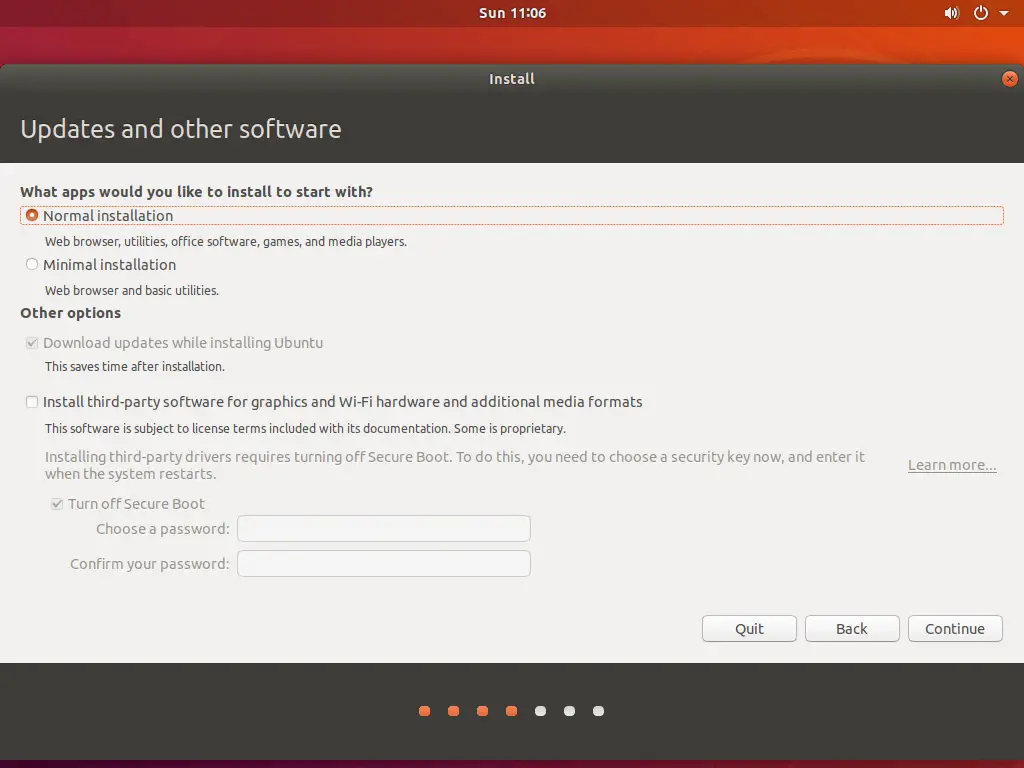
On this screen, you need to select the apps for installation.
Normal Installation – If you select this option, you will get a graphical desktop environment with all regular software.
Minimal Installation – If you select this option, you will get a basic desktop environment with a browser and core system administration utilities.
You can optionally choose to install system updates and third-party software during OS installation. This activity requires an active internet connection.
Step 6: Disk Partitioning
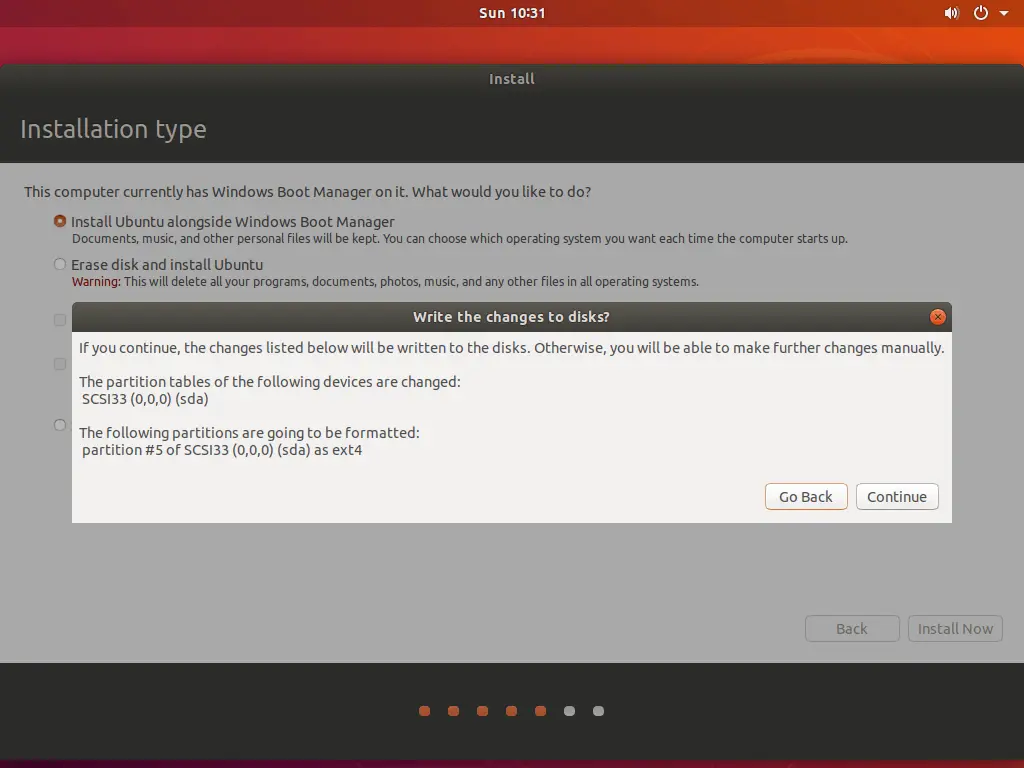
Installation type is the most important step in the Ubuntu installation. Here, select Install Ubuntu alongside Windows Boot Manager or Something else to install Ubuntu 18.04 along with Windows 10
Do not choose Erase disk and install Ubuntu as they wipe out all your data and install Ubuntu, potentially a dangerous one.
Please follow any one of the methods.
6a. Automatic Partitioning (Install Ubuntu alongside Windows Boot Manager)
If you choose to Install Ubuntu alongside Windows Boot Manager, then, the installer will take care of creating partitions and install Ubuntu 18.04 along with Windows 10. Use this option if you don’t mind about partition layout and its size.
Click the Continue to confirm the automatic partition creation.
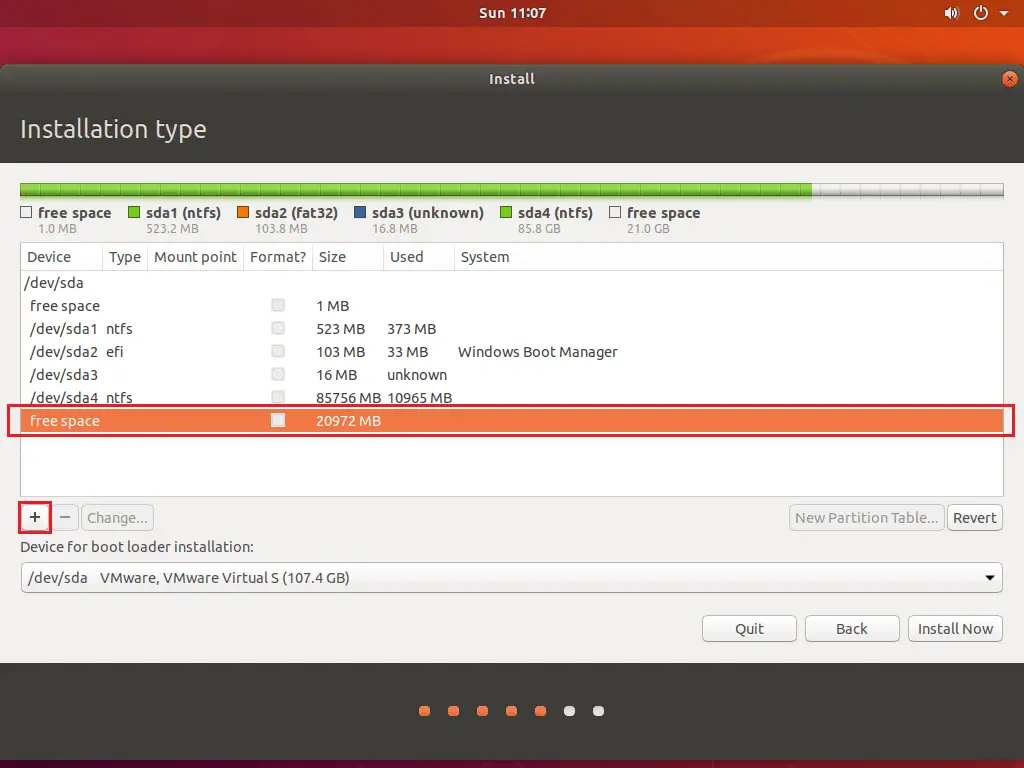
6b. Manual Partitioning (Something else)
If you want a custom partition layout, select Something else option and then click Continue to proceed further.
Here, in this step, we will create partitions for Ubuntu 18.04 installation.
We will create partitions for the below information.
/ (root) – 10 GB
SWAP – 4GB
/home – Remaining (~ 6GB)
Your system should have some free disk space (shrink space).
Select the free space and then click on the + sign.
/ (root):
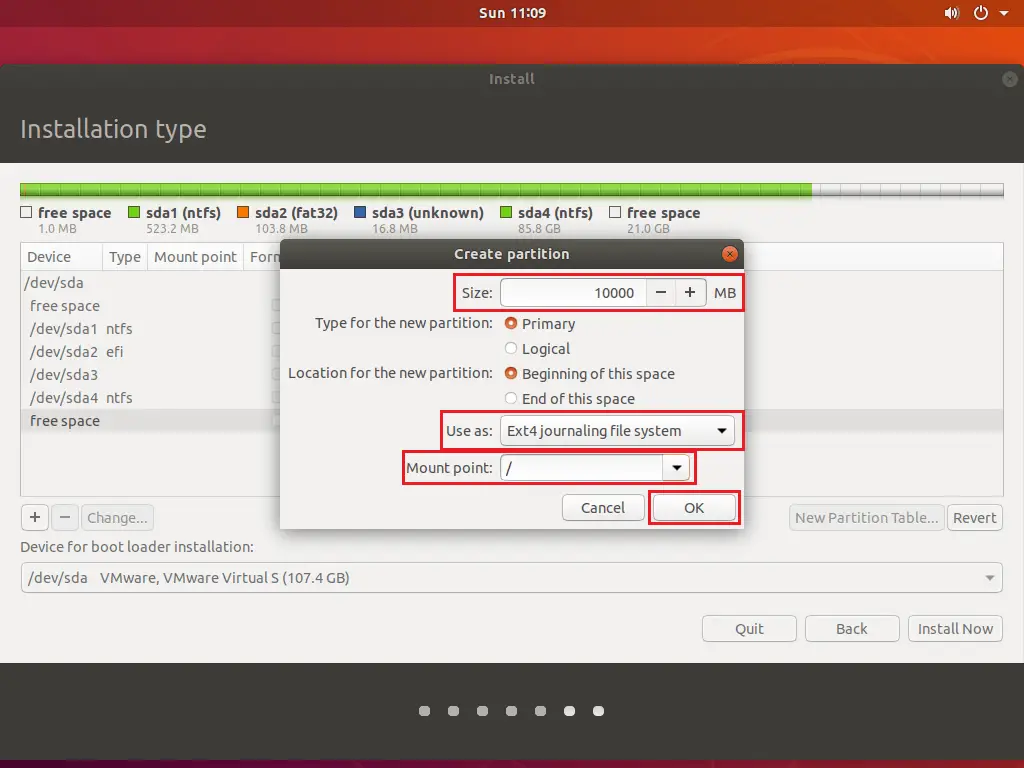
Swap:
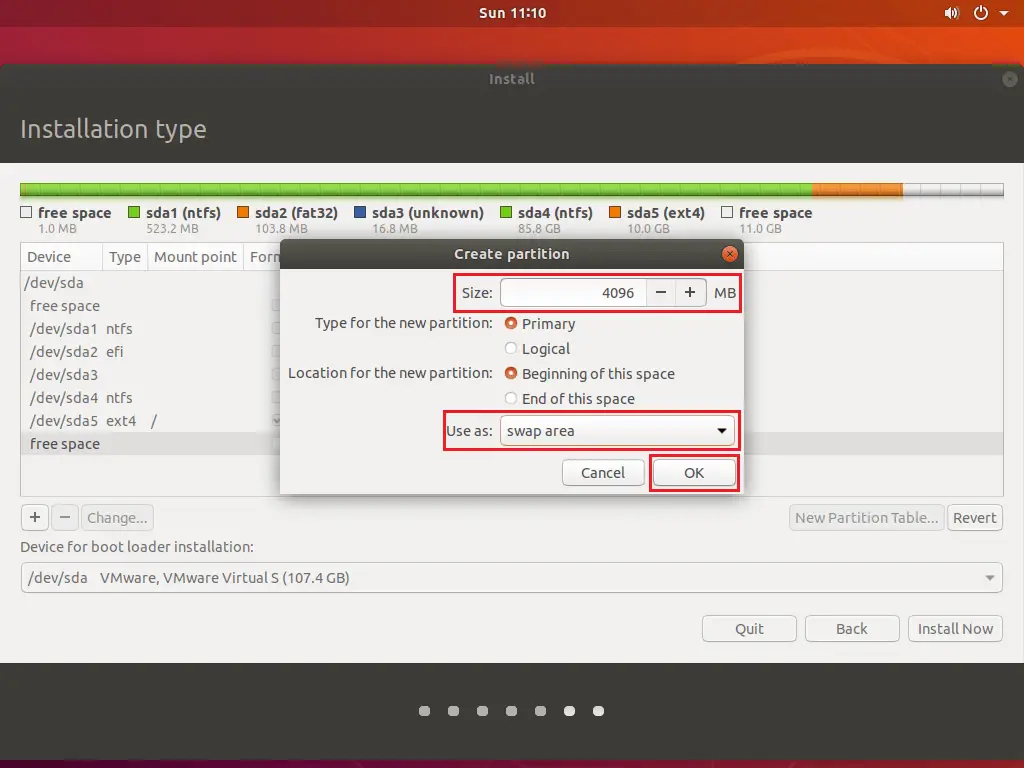
/home:
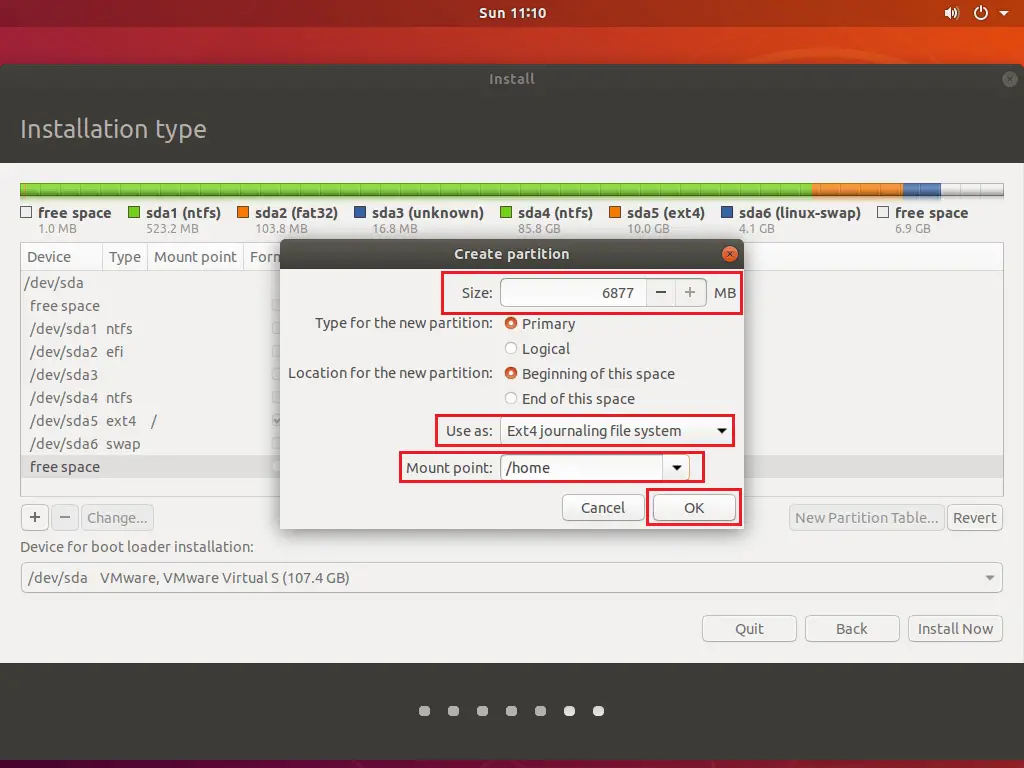
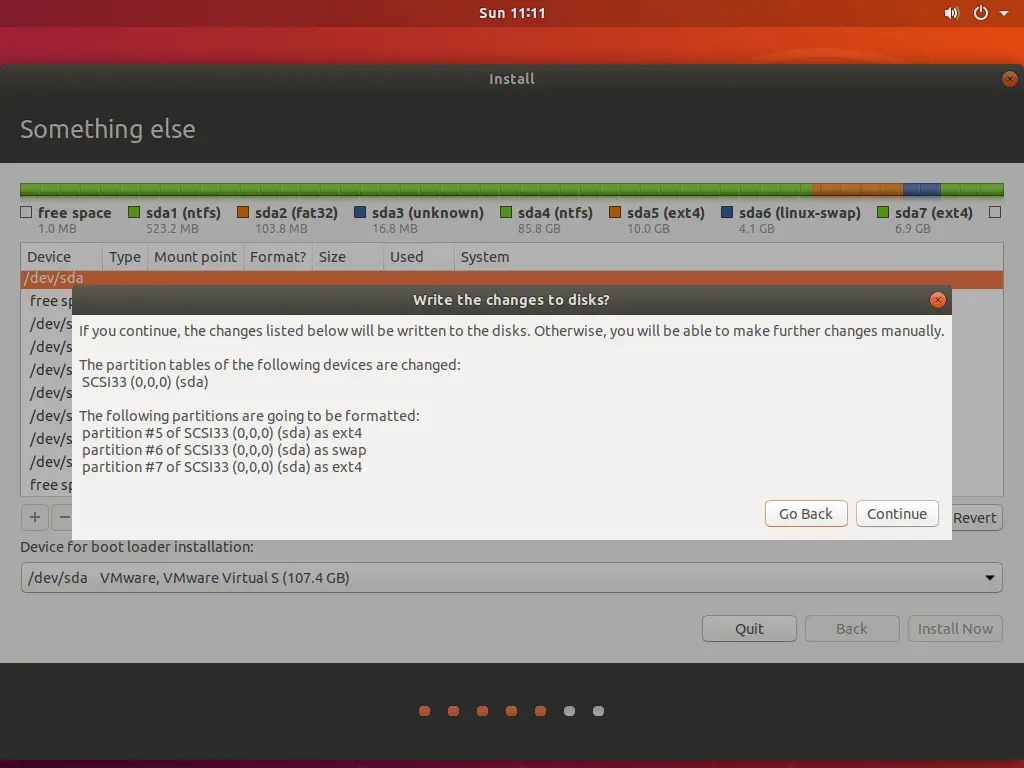
Once you have created partitions, click Install now to write the changes to disk and start the installation.
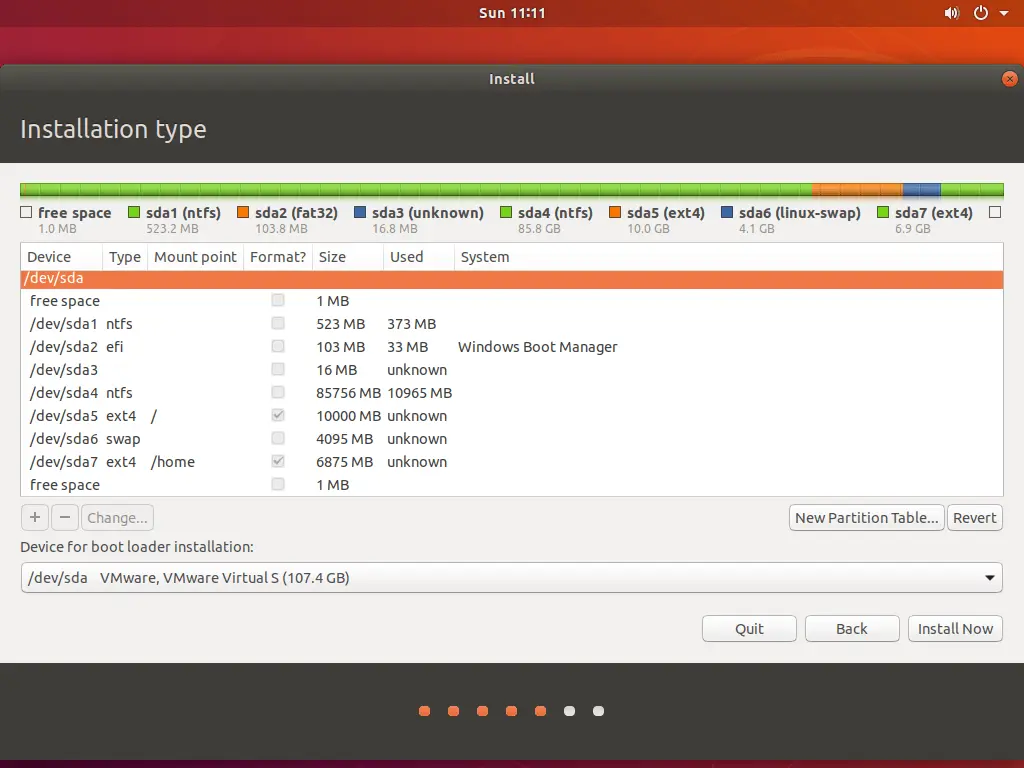
Click Continue to write the changes to disks.
Step 7: Additional Configurations
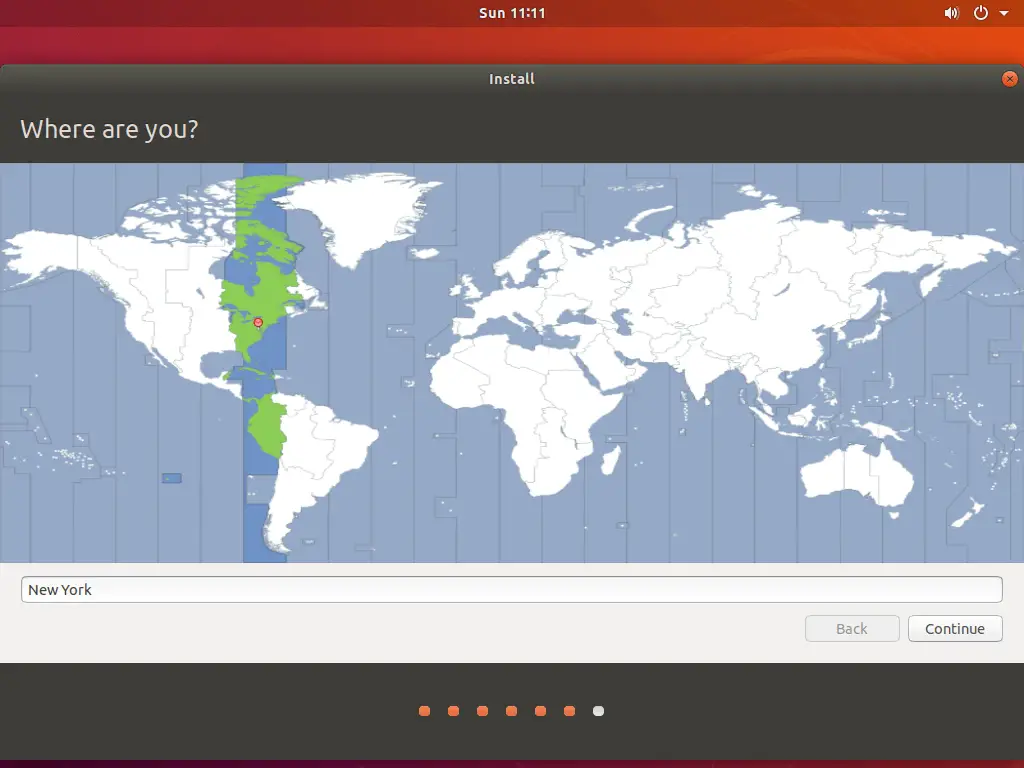
On this screen, select your location from the map and then click Continue to proceed further.
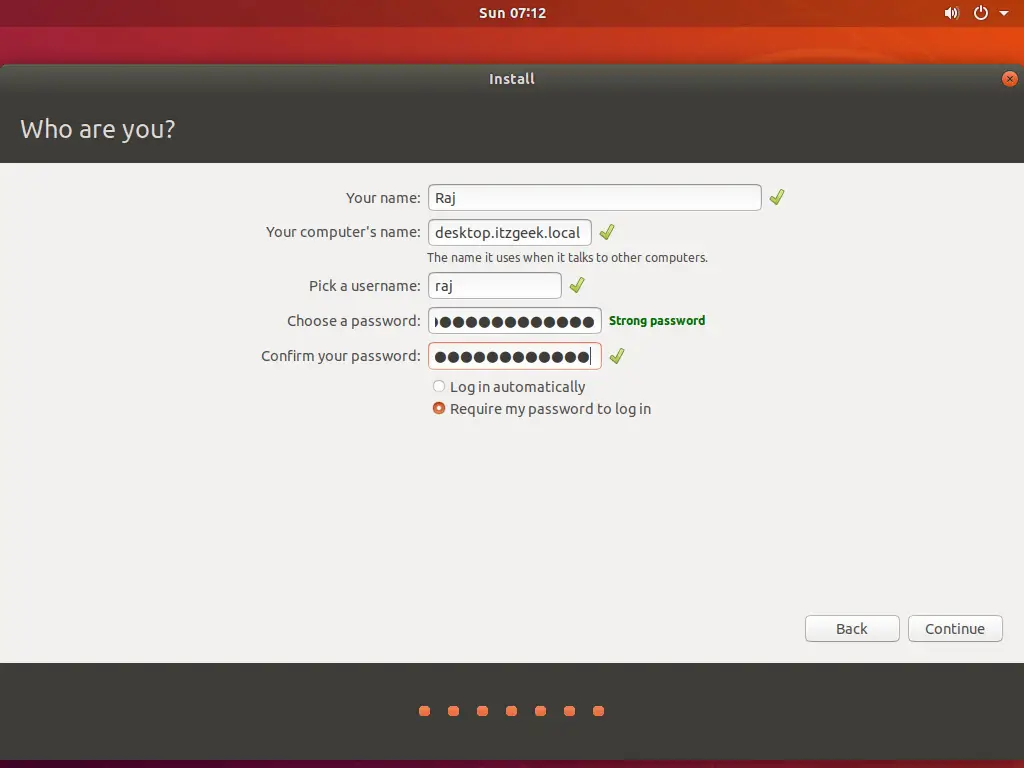
On this screen, pick a username and password (applicable for sudo as well) for your user account. Also, set a hostname for your system and then click on the Continue to start the installation.
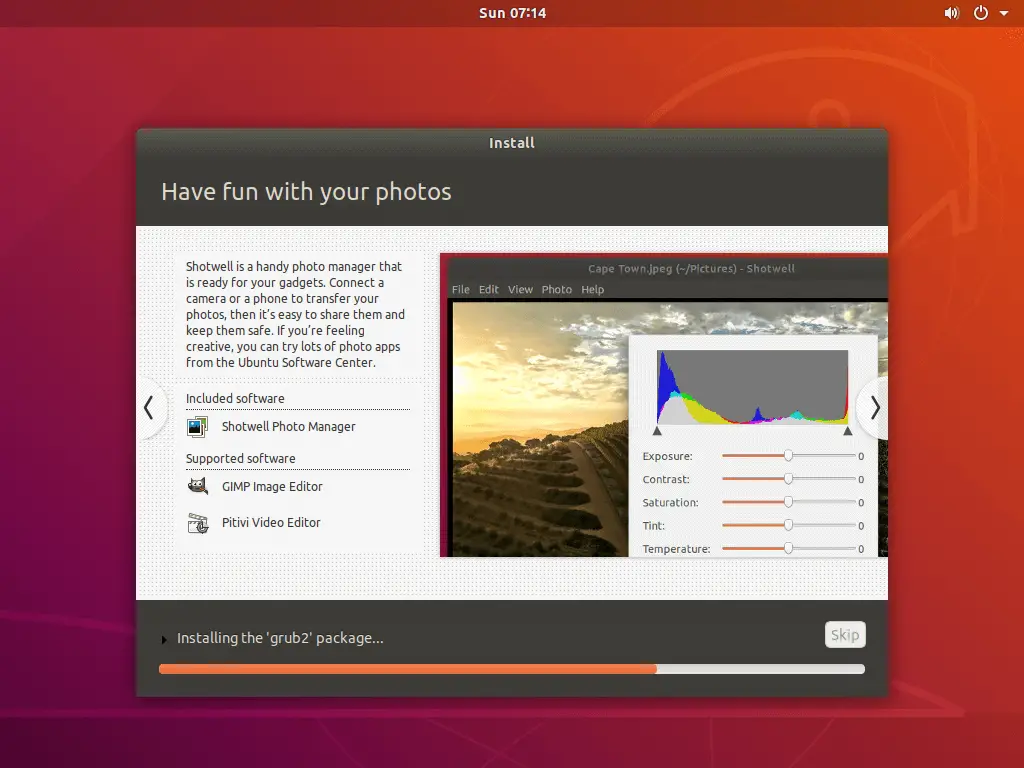
The installation will take at least 15 to 30 minutes to complete.
Once the installation is completed, click the Restart Now to reboot the machine.
2. Boot to Ubuntu 18.04
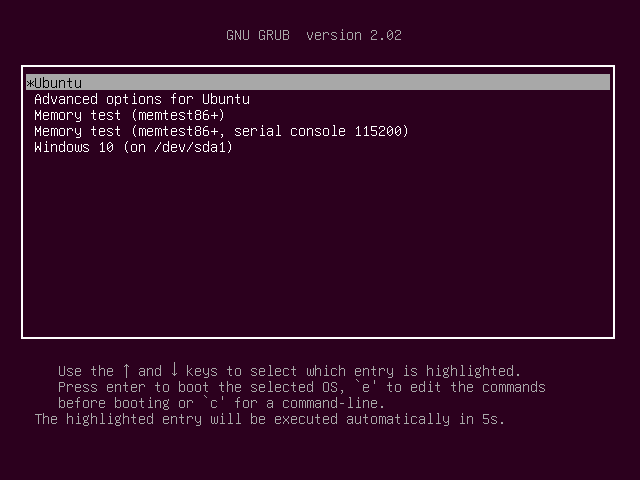
After the system reboot, you will get the Grub menu where you will see both Ubuntu and Microsoft Windows.
Default OS is Ubuntu.
Press Enter in while your selection is Ubuntu to boot into Ubuntu 18.04.
UEFI System:
Legacy BIOS System:
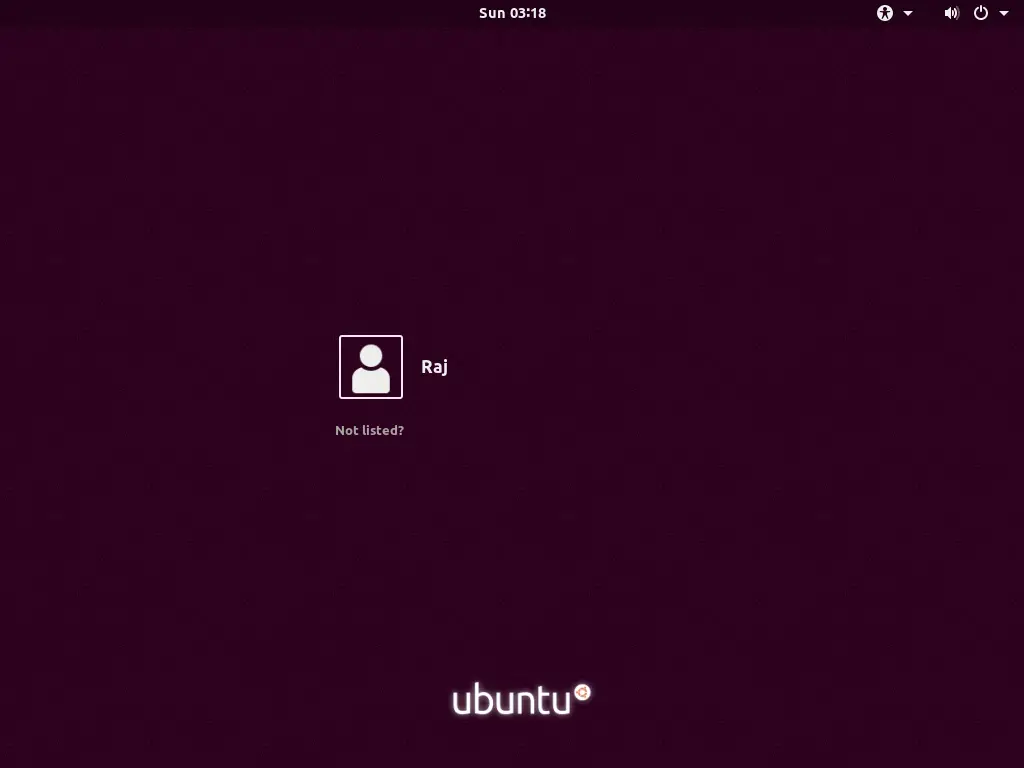
Login with your credentials to get the desktop screen.
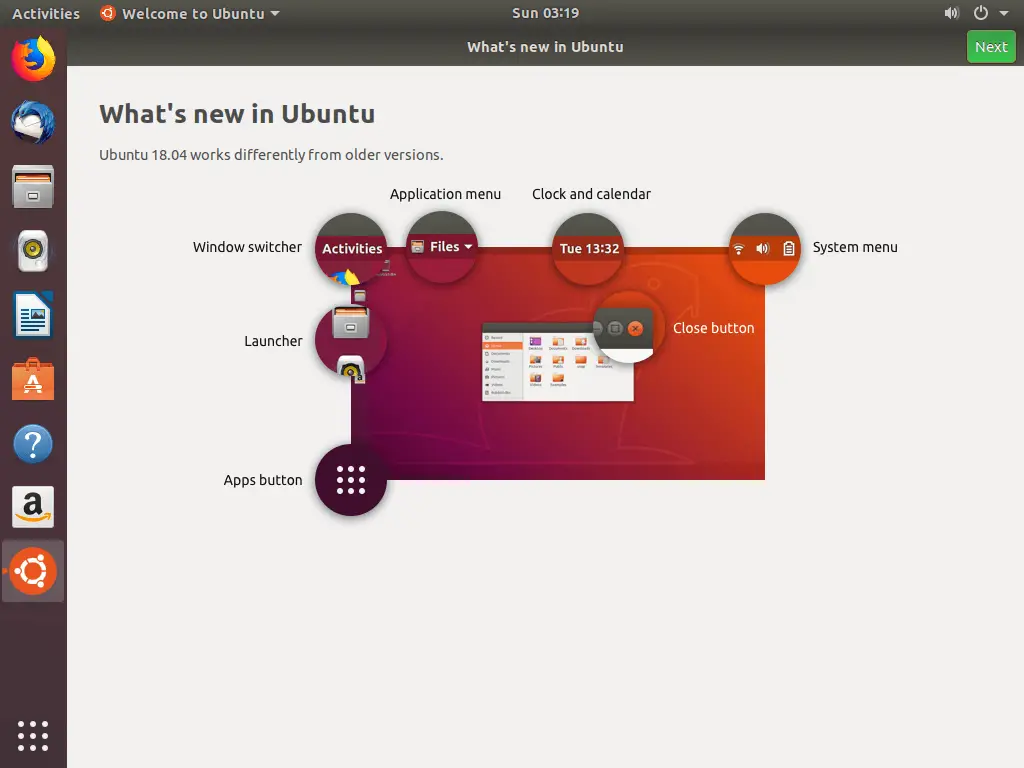
3. Ubuntu 18.04 Post-Installation
Upon successful login, you will get a post-installation screen. Click the Next on What’s is new in Ubuntu.
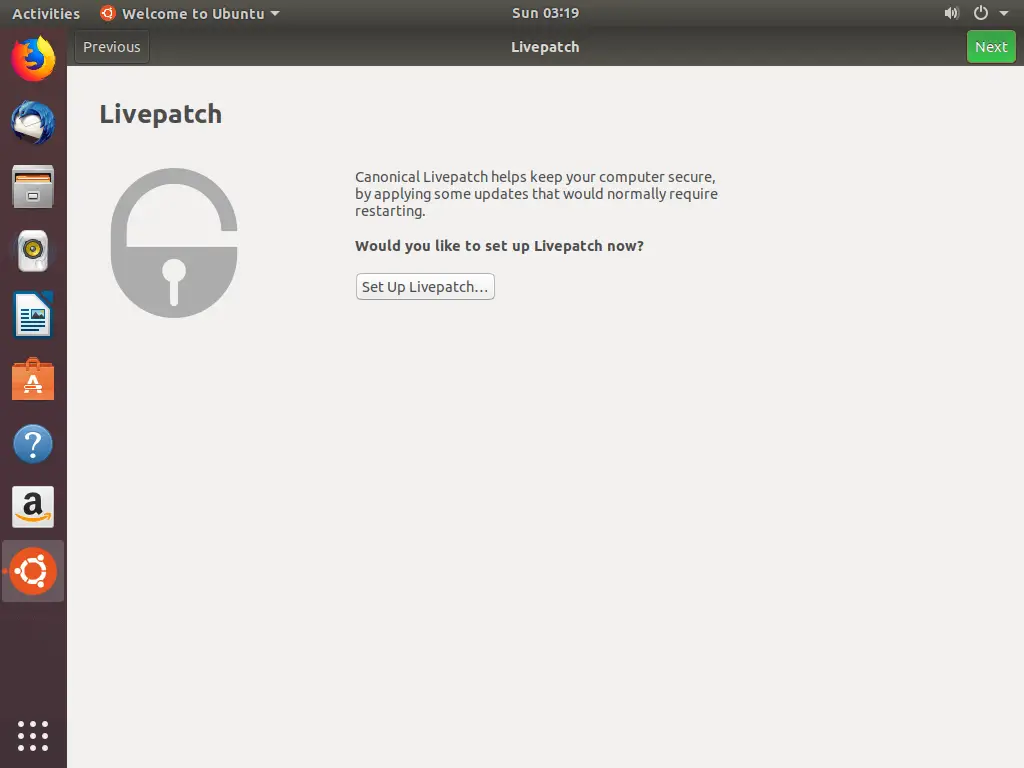
If you are a subscriber to Ubuntu Advantage, then configure Livepatch that helps you apply critical kernel security fixes without rebooting your system.
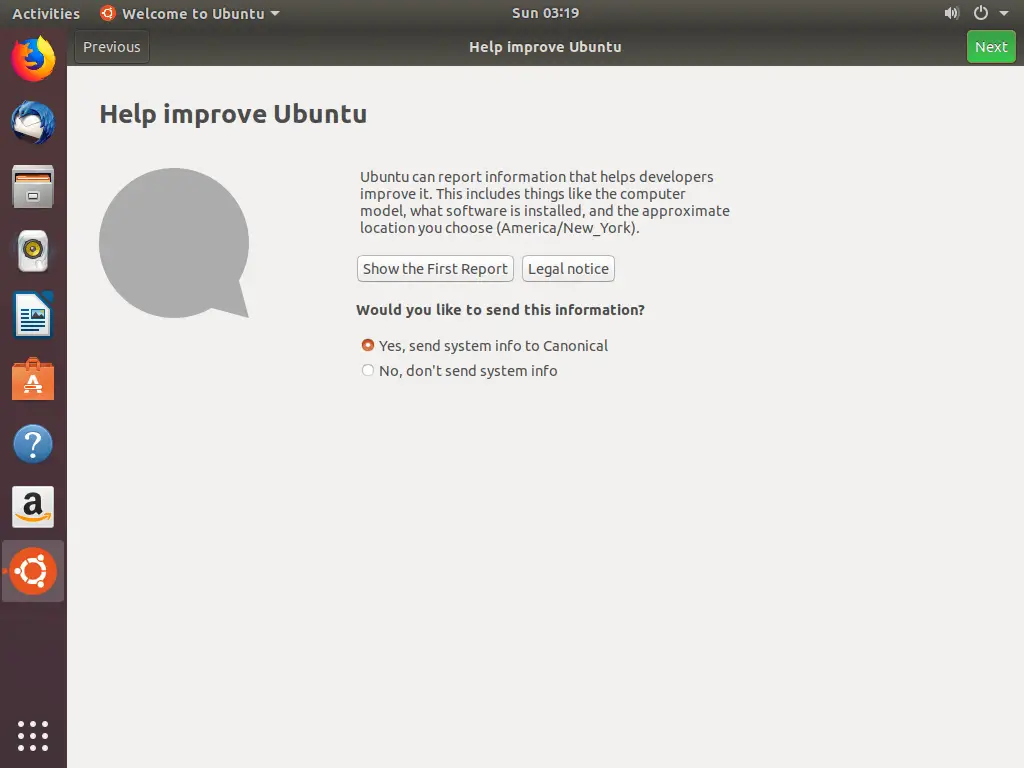
You can either choose to send or not to send your system information to Canonical.
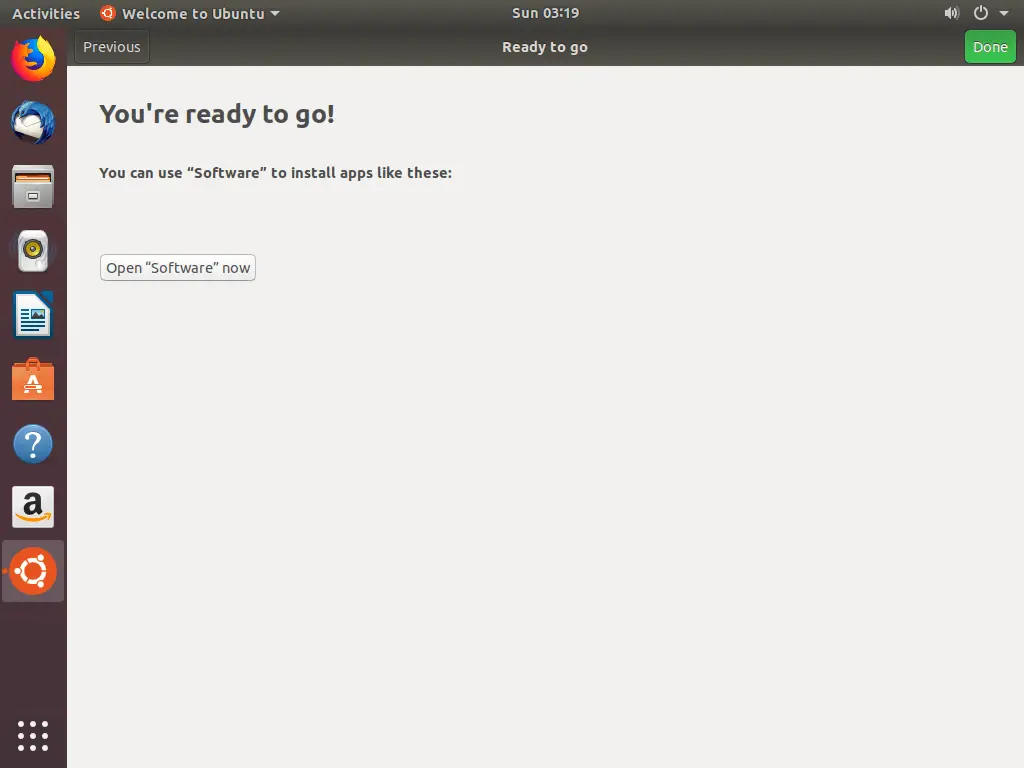
Ubuntu 18.04 is now ready for your use.
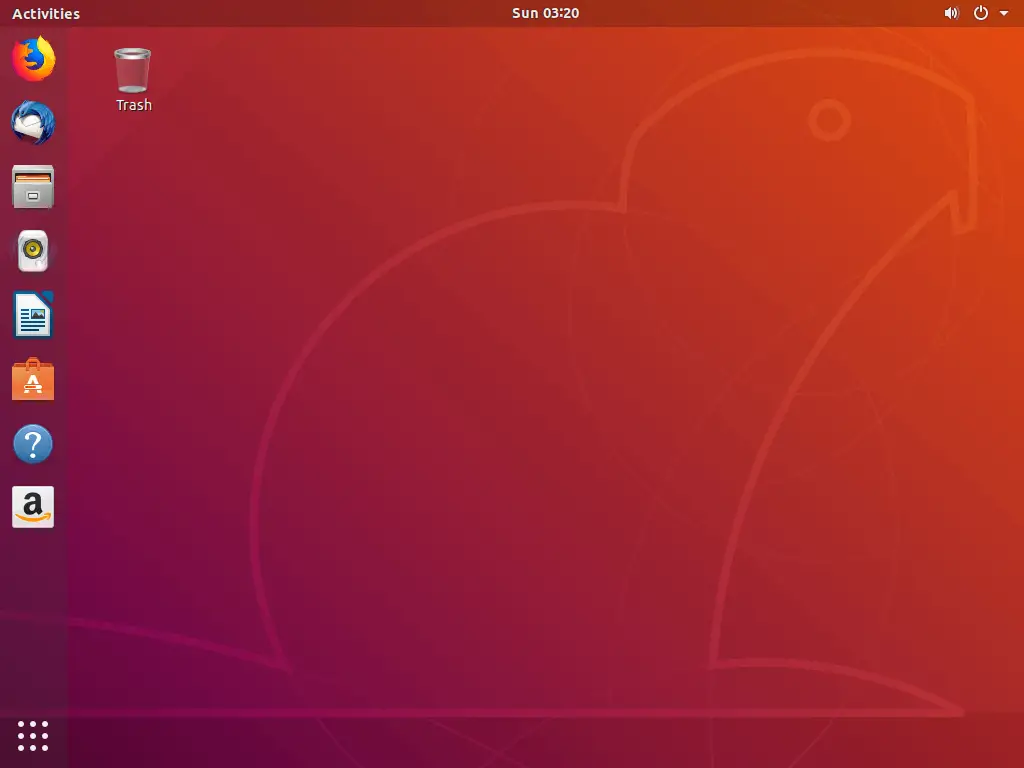
You will now get the Ubuntu 18.04 desktop.
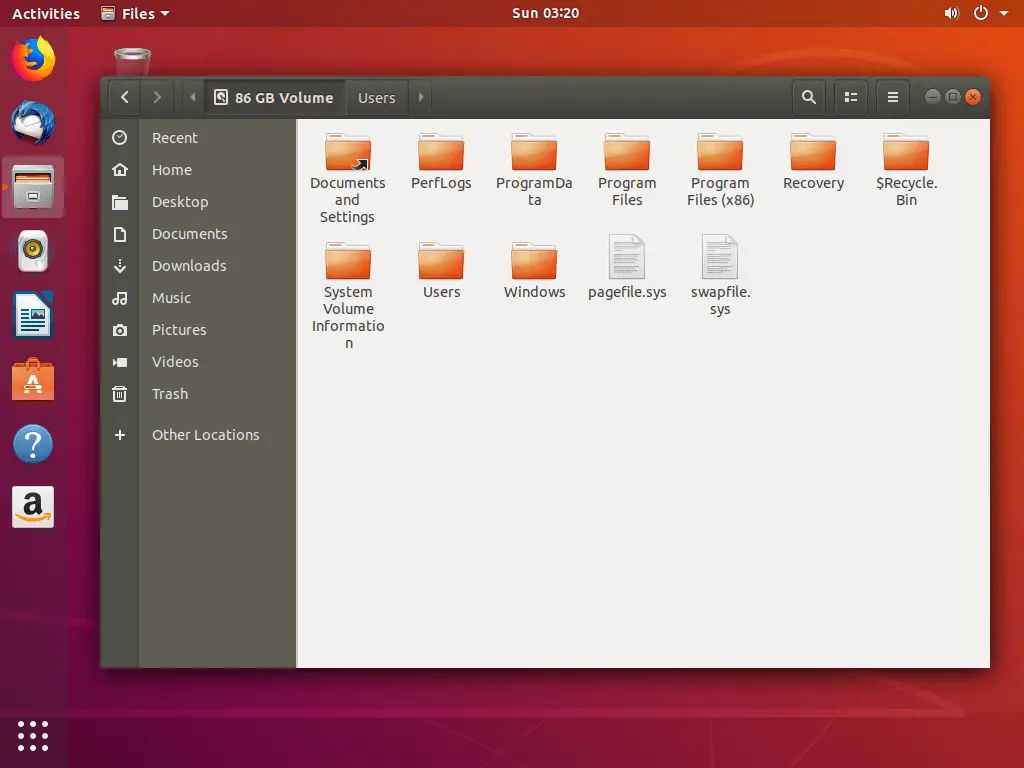
Ubuntu 18.04 supports NTFS filesystems, so you can easily access Windows partitions on Ubuntu 18.04.
4. Boot to Windows Operating System
If you want to go to Windows 10, then reboot the system and select the Windows partition.
UEFI System:
Select Windows Boot Manager (on /dev/sda2) from the GRUB menu.
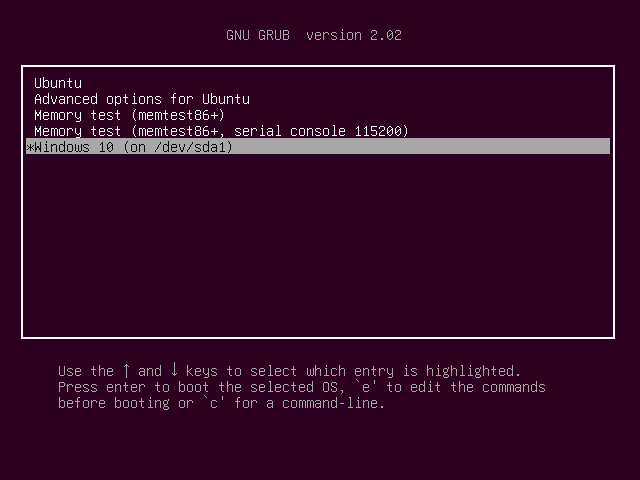
Legacy BIOS System:
Select Windows 10 (on /dev/sda1) from the GRUB menu.
If you are new to Ubuntu, then follow the below link to install necessary software for daily use and increase your productivity.
READ: Top 15 things to do after Ubuntu 18.04 Installation
That’s All.