Here is the small tutorial about the single user mode in Ubuntu 11.10.
Step 1: Power on or Reboot (if it is already running) your machine.
Step 2: While booting press and hold “Shift” key, you might see the splash screen like below with the list of kernel installed. Select the recovery kernel and press Enter.
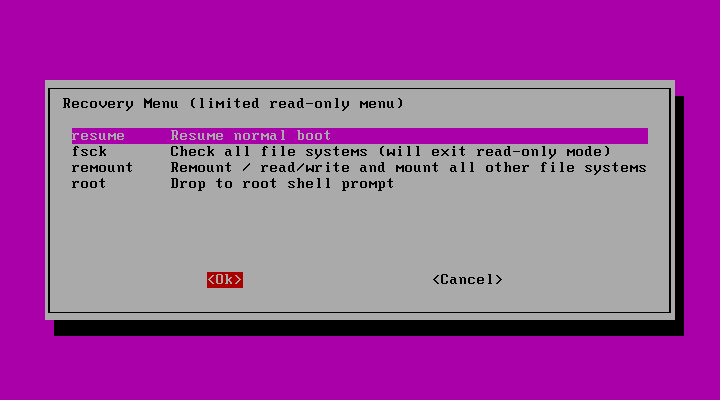
Step 3: Once the recovery kernel booted, you should see the following graphical command menu; in Ubuntu 11.10 there are two recovery menus available to recover your system, in this menu you can select any one out of four option;
Recovery Menu (limited read-only menu):
* resume Resume normal boot
* fsck Check all file systems (will exit read-only mode)
* remount Remount / read/write and mount all other file systems
* root Drop to root shell prompt
If you want recover your system, you have to enter into normal recovery menu; for that you should select either “remount” or “fsck” because other option such as “root” will mount your file system in read only mode ( No use ) and “resume“ – will resume normal boot.
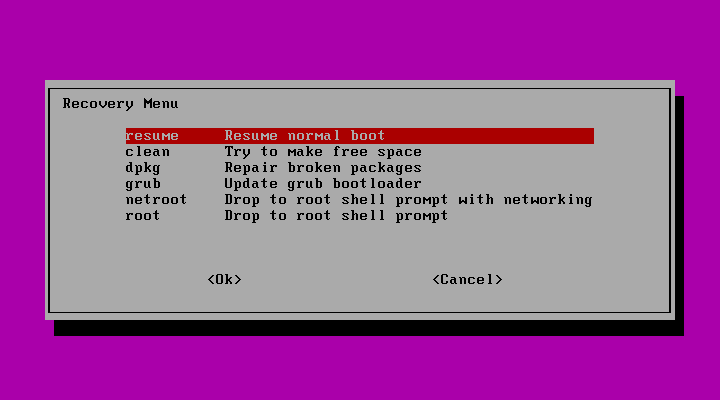
Step 4: Once you have selected either “remount” or “fsck”; you have to press “Enter” to get normal recovery menu. Here you can select the option according to your requirement, this time file systems will be mounted read- write mode if you have selected Drop to root shell prompt or other options.
Recovery Menu:
* resume Resume normal boot
* clean Try to make free space
* dpkg Repair broken packages
* grub Update grub bootloader
* netroot Drop to root shell prompt with networking
* root Drop to root shell prompt
That’s all. Now you can start do the administrative tasks.