How to Setup Android SDK 4.0.3 with NetBeans IDE 7.1 on Fedora 15/16 and CentOS 6 / RHEL 6
 This guide focusing on Android SDK with the NetBeans 7+ IDE (Integrated Development Environment) for developing apps for the Android operating system. Most of the developers uses the Eclipse for Android apps development with the help of official plugin from the Google, but still there are some developer who loves to work on NetBeans for developing Android application. Those are using different type of operating system depends on their requirements, now a days Linux distribution is more effective than windows operating system. If you look in to the Linux distribution; you might find lot of operating system based on Linux, in that Fedora is most robust operating system. Even enterprise Linux can be also used for developing apps for android.
This is how to guide about Setup Android SDKwith NetBeans IDE 7.1on Fedora 16 / 15 and CentOS 6 / RHEL 6.
Install NetBeans 7.1 IDE:
Before configuring Android SDK you must have NetBeans installed on Fedora. If you haven’t installed; here is the tutorial about installing NetBeans 7.1 IDE on Fedora 16/15.
Android SDK Manager:
Android 4.0 delivers a refined, unified UI for phones and tablets and introduces innovative features for users and developers. If you are developing the apps for the Android download the latest version of SDK. Assume that downloaded file is in ~/Downloads directory of the user “raj”.
Go to the downloads directory.
[raj@geeksite~/]$ cd ~/Downloads
Switch to root user.
[raj@geeksite~/]$ su
Extract the downloaded file.
[root@geeksite~/]# tar -zxvf android-sdk_r16-linux.tgz
Run the Android SDK manager.
[root@geeksite~/]# ./android-sdk-linux/tools/android
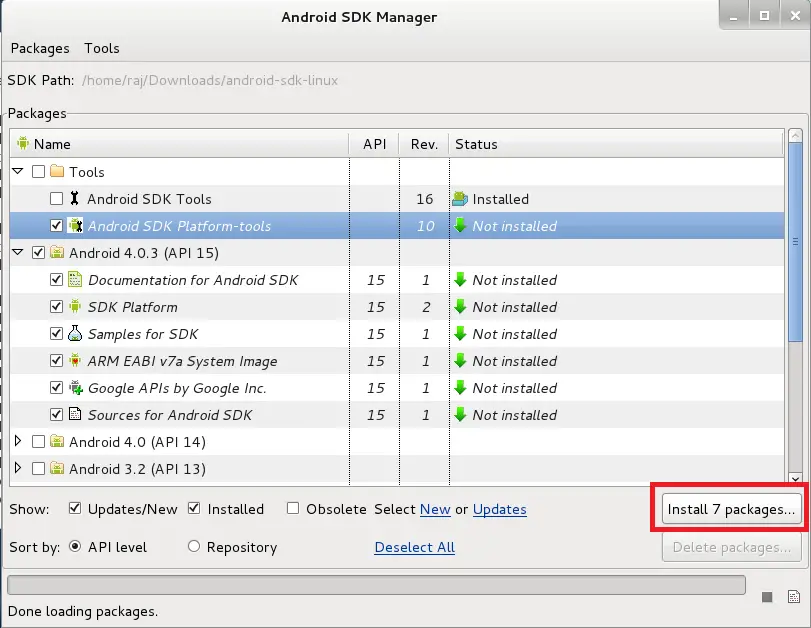
Select the version of your choice and then click on the install packages in the right side (for demonstration purpose i am installing the Android 4.0.3).
Install Android Plugin:
We need to add repository for android plugin, follow the steps to add Android plugin repository for NetBeans IDE.
Open NetBeans (Application —> Programming —> NetBeans 7.1 IDE).
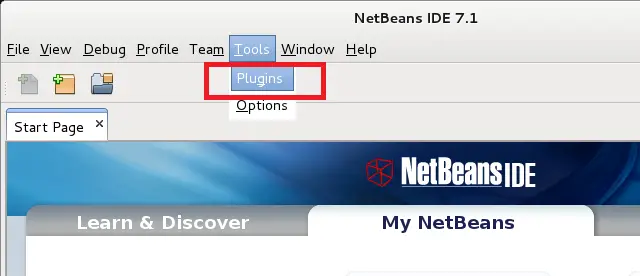
Go to Plugin (Tools —> Plugin).
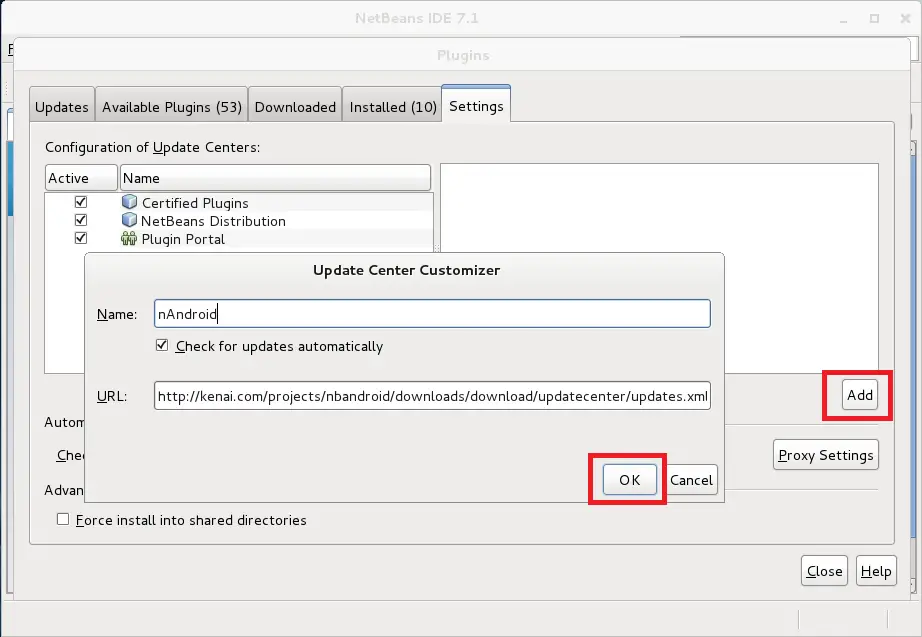
Go to the Settings tab; click on Add button to add repository.
Name: nAndroid
URL: https://kenai.com/projects/nbandroid/downloads/download/updatecenter/updates.xml
and then click on OK.
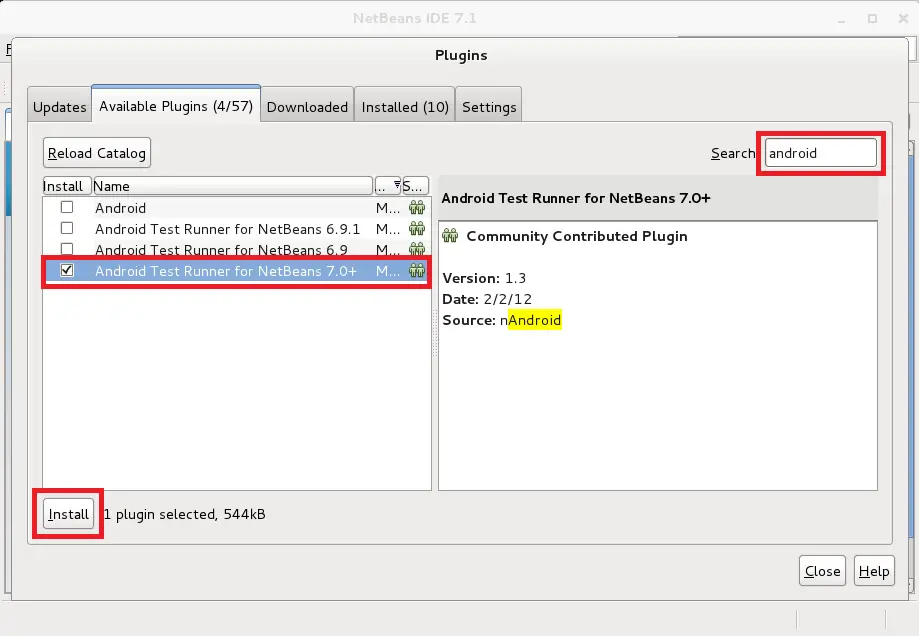
Now go to the Available Plugins tab; you should see the list of available plugins; search for android on top right, Select the Android Test Runner according to your NetBeans IDE version and then click on Install.
Note: If you couldn’t able to see the list, click on Reload Catalog button.
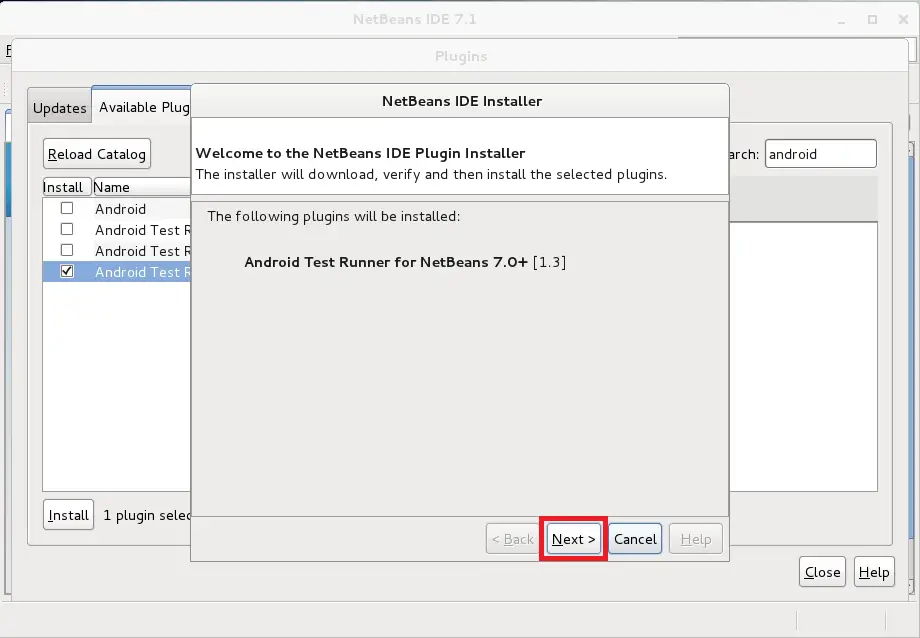
Follow the steps to install Android Test Runner, click next on the installer window.
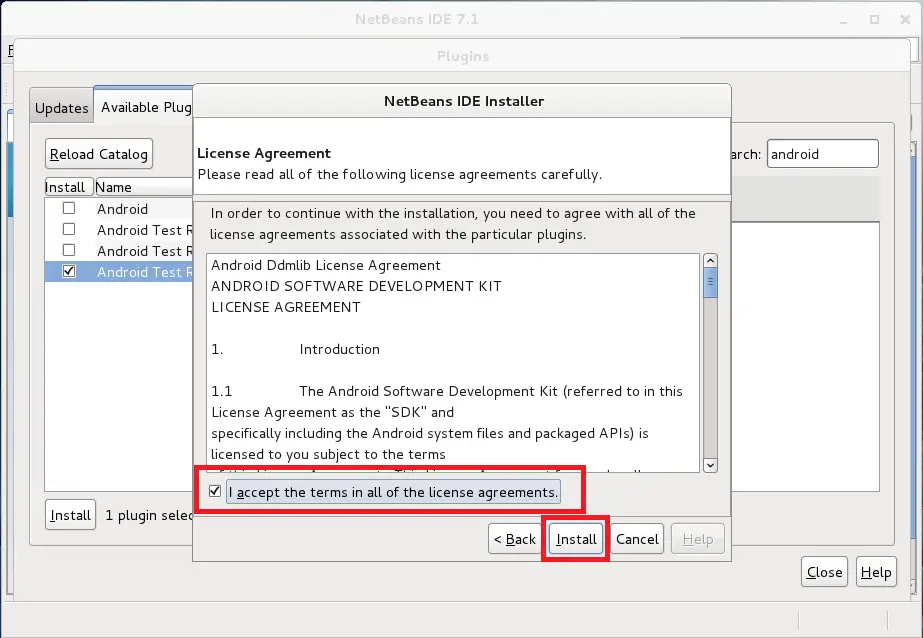
Accept the License agreement and then click on install.
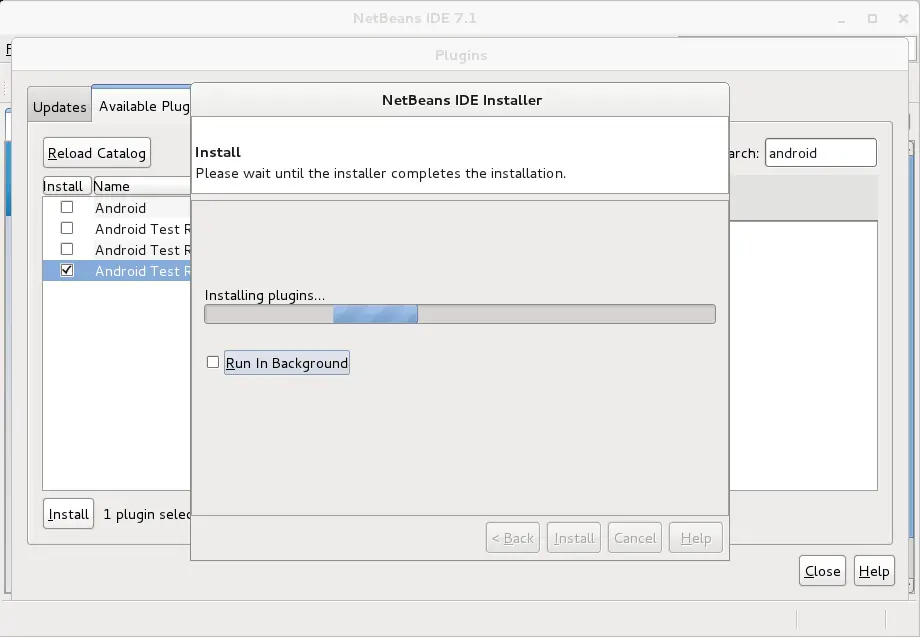
Installing plugin; this might take some time.
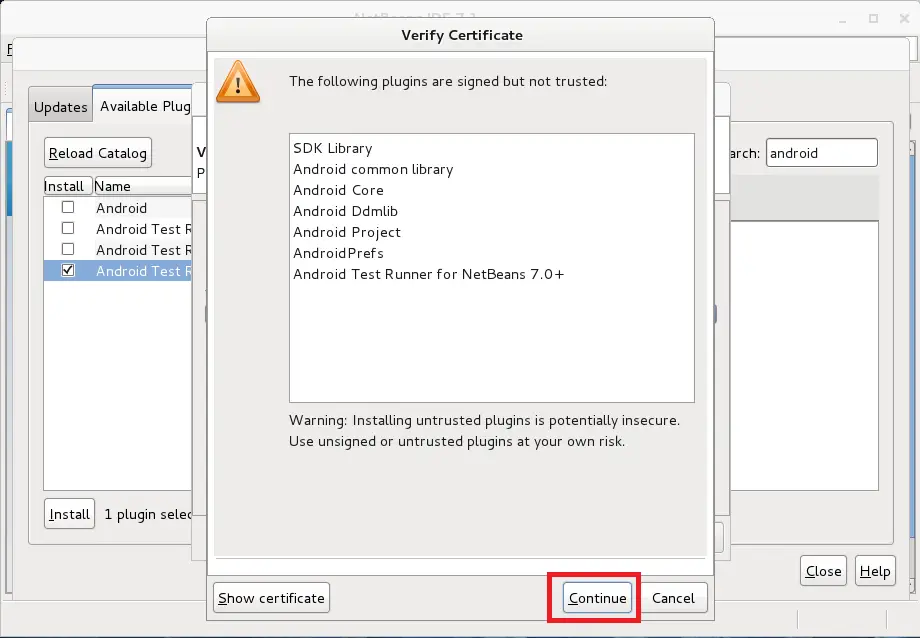
Click on continue to install the unsigned plugin.
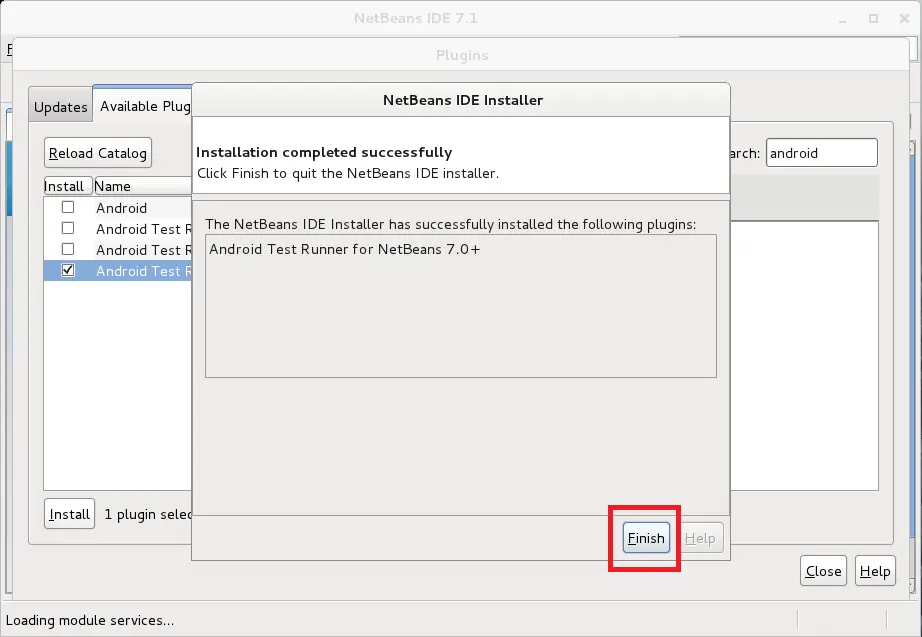
Click on Finish to complete the installation.
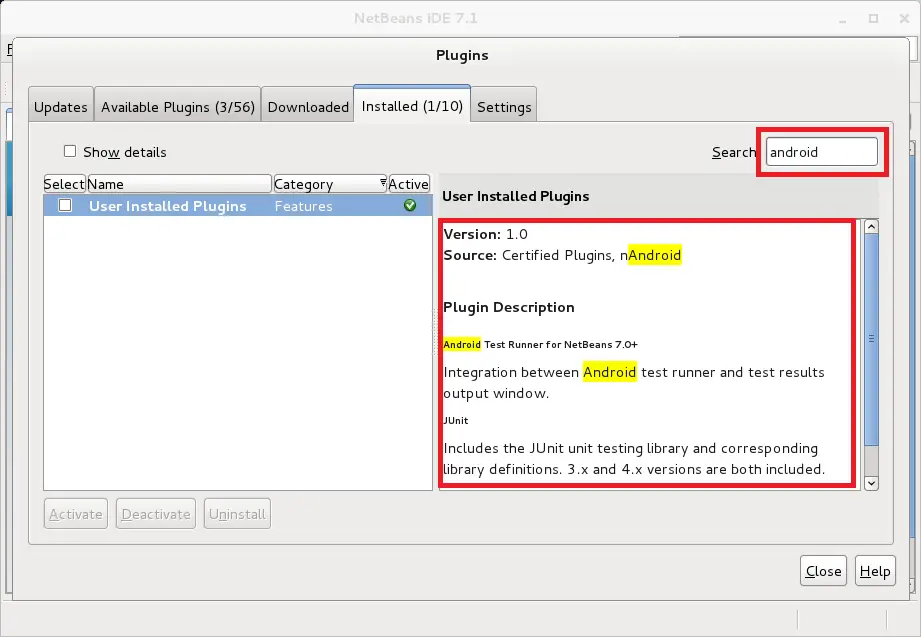
You can verify that by visiting Installed Plugins tab.
Configuring SDK Manager:
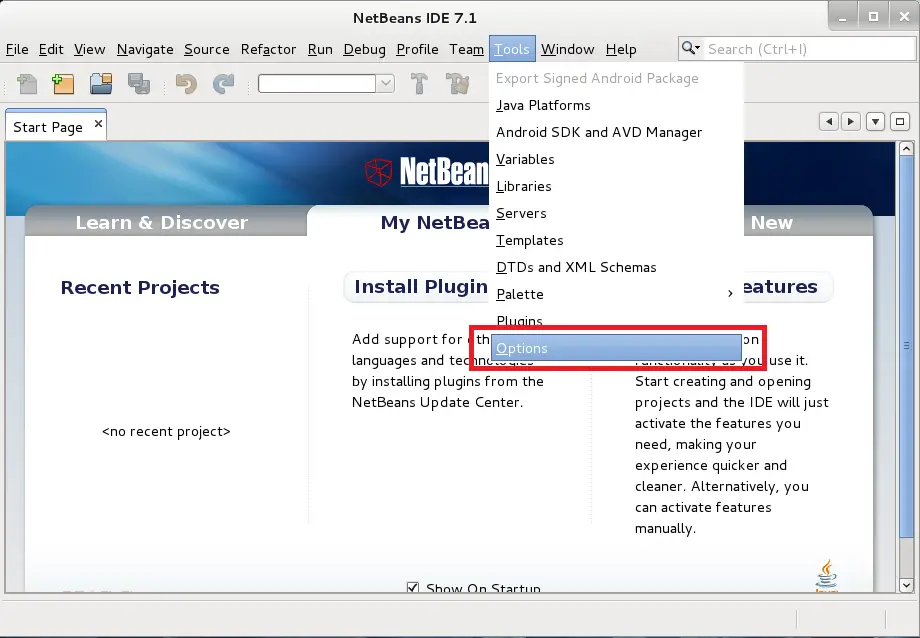
Go to Options (Tools —> Options).
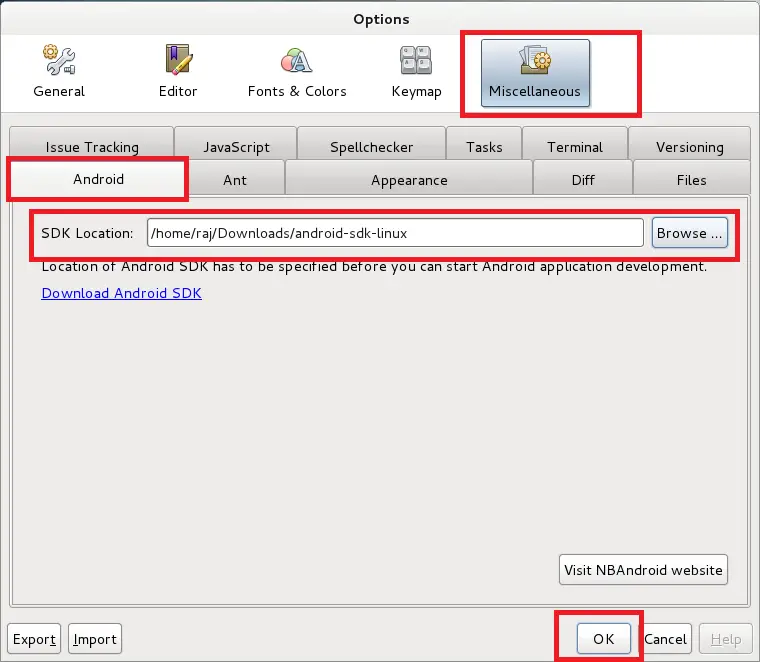
Go to Android ( Miscellaneous —> Android); browse to the existing SDK manager that we have downloaded before.
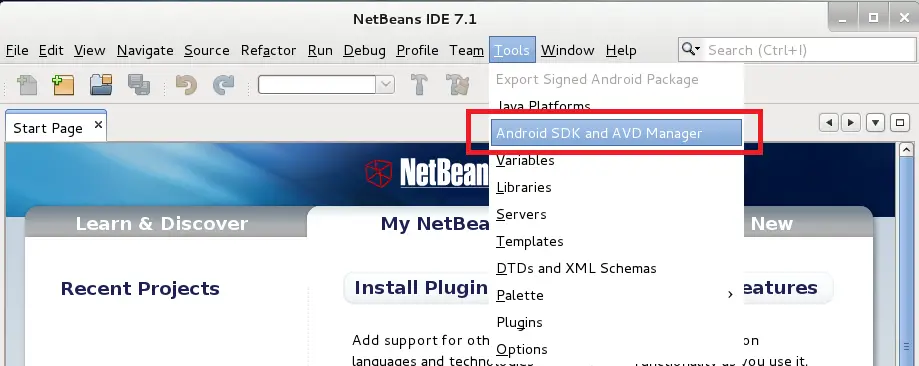
You can create Android Virtual device by going to Tools —> Android SDK and AVD Manager.
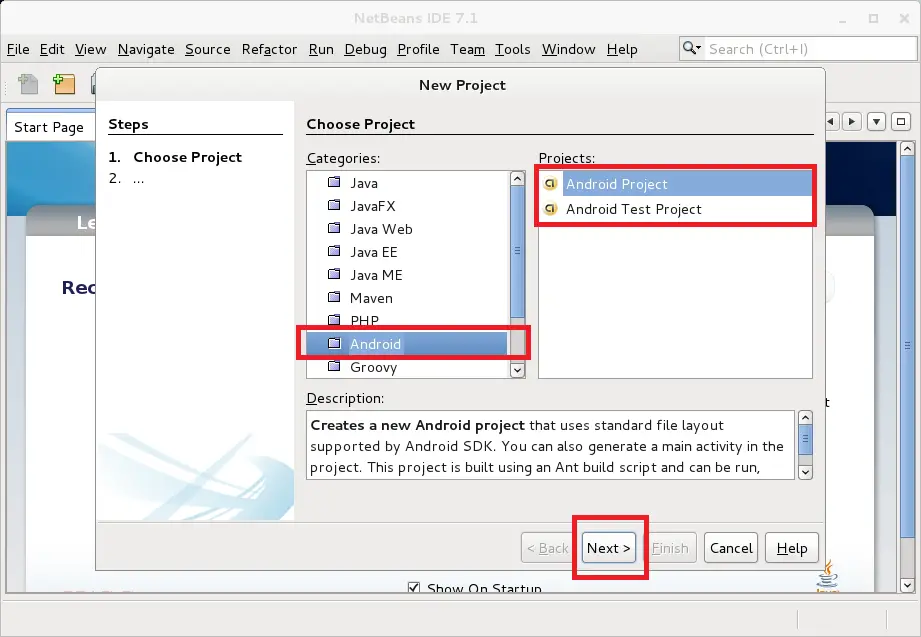
Now you can start to create Android Project by going to File —> New Project.
That’s all.

