PrestaShop is a freemium, open-source e-commerce software. It lets you start your own online store with secure payments, multiple shipping methods, custom themes, and more – no matter your level of technical know-how or previous e-commerce experience.
Small and medium-sized businesses often use it, but its features make it ideal for large e-commerce sellers as well.
While PrestaShop is available on all hosting environments or cloud, you can also install it on your Debian Linux system for free to develop your store.
Here, we will see how to install PrestaShop with Apache and Let’s Encrypt SSL on Debian 11.
Prerequisites
Install LAMP Stack
First, follow the below link to install the LAMP stack for PrestaShop installation.
Install AMP (Apache, MariaDB, and PHP) on Debian 11
Install PHP Extensions
After installing the LAMP stack, use the apt command to install the below PHP extensions for PrestaShop.
sudo apt update

sudo apt install -y php-zip php-xml php-gd php-curl php-intl php-xmlrpc php-mbstring php-imagick php-mysql
Configure PHP Settings for PrestaShop
PrestaShop recommends a few PHP configurations for the store. So, add the below PHP values in /etc/php/7.4/apache2/php.ini file. You may increase or decrease values as per your requirements.
memory_limit = 256M
upload_max_filesize = 64M
post_max_size = 64M
sudo sed -i 's/memory_limit = .*/memory_limit = 256M/' /etc/php/7.4/apache2/php.ini

sudo sed -i 's/post_max_size = .*/post_max_size = 64M/' /etc/php/7.4/apache2/php.ini

sudo sed -i 's/upload_max_filesize = .*/upload_max_filesize = 64M/' /etc/php/7.4/apache2/php.ini
Setup Apache Virtual Host for PrestaShop
We will start with creating a virtual host for the PrestaShop installation. Typically the virtual host file contains a ServerName, ServerAlias, Port number, Document root, log location, etc.
For this post, I am assuming the following:
Domain name: www.itzgeek.net
Port No: 80
Document root: /var/www/html/www.itzgeek.net/
First, create a virtual host file.
sudo nano /etc/apache2/sites-available/www.itzgeek.net.conf
Then, add the following content into the above configuration file. Change the values as per your requirement.
<VirtualHost *:80>

   ServerName itzgeek.net
   ServerAlias www.itzgeek.net
   ServerAdmin admin@itzgeek.net
   DocumentRoot /var/www/html/www.itzgeek.net


   ErrorLog ${APACHE_LOG_DIR}/www.itzgeek.net_error.log
   CustomLog ${APACHE_LOG_DIR}/www.itzgeek.net_access.log combined


   <Directory /var/www/html/www.itzgeek.net>
      Options FollowSymlinks
      AllowOverride All
      Require all granted
   </Directory>

</VirtualHost>
Create a directory to store your PrestaShop files.
sudo mkdir -p /var/www/html/www.itzgeek.net/
Next, enable the PrestaShop site and Apache modules (SSL and rewrite).
sudo a2ensite www.itzgeek.net

sudo a2enmod rewrite ssl
Finally, restart the Apache service.
sudo systemctl restart apache2
Install Let’s Encrypt SSL Certificate
Create DNS Record
Go to your domain registrar and create a DNS record [A and CNAME (optional if you do not want to use www subdomain)] record for your PrestaShop domain.
- Non-www Domain Name (Ex. itzgeek.net) >> A record point to your server IP
- www Domain Name (Ex. www.itzgeek.net) >> CNAME record point to itzgeek.net
For this demo, I created two records so that my PrestaShop website will be accessible at www.itzgeek.net.
Install Certbot client
After creating DNS records, install the Certbot client to generate and install the SSL certificate. The Certbot client is now available as a snap package for Debian operating system. So, first, you will need to install snapd on your system.
sudo apt update

sudo apt install -y snapd
After the installation, update snapd to the latest version.
sudo snap install core && sudo snap refresh core
Finally, install the Certbot using the snap command.
sudo snap install --classic certbot

sudo ln -s /snap/bin/certbot /usr/bin/certbot
Install SSL Certificate
Use the certbot command to generate and install the Let’s Encrypt SSL certificate on the Apache webserver.
sudo certbot --apache
2. Type Y and press Enter to register with the ACME server
3. Type Y or N to receive emails about EFF news, campaigns, newsletter.
4. Certbot will automatically detect the website(s) you created and ask you to activate HTTPS for it. Type 1 or appropriate numbers separated by a comma in case you have multiple websites.
Which names would you like to activate HTTPS for?
- - - - - - - - - - - - - - - - - - - - - - - - - - - - - - - - - - - - - - - -
1: itzgeek.net
2. www.itzgeek.net
- - - - - - - - - - - - - - - - - - - - - - - - - - - - - - - - - - - - - - - -
Select the appropriate numbers separated by commas and/or spaces, or leave input
blank to select all options shown (Enter 'c' to cancel): 1,2
Wait for the SSL installation to complete.
Redirect non-www HTTP requests to www HTTPS with Apache
The Certbot client will place redirect rules to redirect the traffic from HTTP to the HTTPS website like below.
1. https://itzgeek.net >> https://itzgeek.net
2. https://www.itzgeek.net >> https://www.itzgeek.net
As you can see, the first domain is not reaching the www HTTPS website. So, to fix the redirection, you will have to add one more to redirect traffic from non-www HTTP to www HTTPS domain, I.e., https://itzgeek.net >> https://www.itzgeek.net.
Auto-Renew SSL Certificate
The Certbot client includes a systemd service and it takes care of automated certificate renewals. So, you will not have to renew the certificates manually.
Install PrestaShop with Apache
Create Database for PrestaShop Installation
First, login into MariaDB/MySQL database server.
sudo mysql -u root -p
Then, create a database for PrestaShop installation with the user and password.
CREATE DATABASE prestadb;

CREATE USER 'prestauser'@'localhost' IDENTIFIED BY 'password';

GRANT ALL PRIVILEGES ON prestadb.* TO 'prestauser'@'localhost';

EXIT
Download PrestaShop Package
Download the latest version of the PrestaShop package by running the following command in the terminal.
mkdir /tmp/ps && cd /tmp/ps

wget https://download.prestashop.com/download/releases/prestashop_1.7.8.0.zip
Then, extract the downloaded file.
unzip prestashop_1.7.8.0.zip

unzip prestashop.zip
And then, move the files to the website root directory.
sudo mv * /var/www/html/www.itzgeek.net/
Update the ownership and a group of the PrestaShop website directory.
sudo chown -R www-data:www-data /var/www/html/www.itzgeek.net/
Install PrestaShop
Open your browser and visit your website to perform the PrestaShop installation.
1. Select Language for the PrestaShop installer (Only for the installer assistance, not for the store) and then click Next
2. Accept License Agreements and then click Next
3. Enter Shop name, Main activity, Install Demo data (if required), Country, Enable SSL (if required) in the information about the store. Then, enter account information for creating an administrator account in Your Account section and then click Next
4. Enter the Database details and then click Next
5. The installation will take a few mins depending on whether you have chosen to install demo data or not.
5. You can access PrestaShop’s Back Office and Front Office by clicking on Manage your store and Discover your store respectively. Note down the admin URL when you visit it for the first time, as the admin URL may change for each installation like https://www.itzgeek.net/admin145wvvep1 or https://www.itzgeek.net/admin145w3sep1.
You will need to remove the below folders for security reasons.
sudo rm -rf /var/www/html/www.itzgeek.net/{install,docs,README.md}
Access PrestaShop Store
Now, you will be able to access the PrestaShop with your domain name.
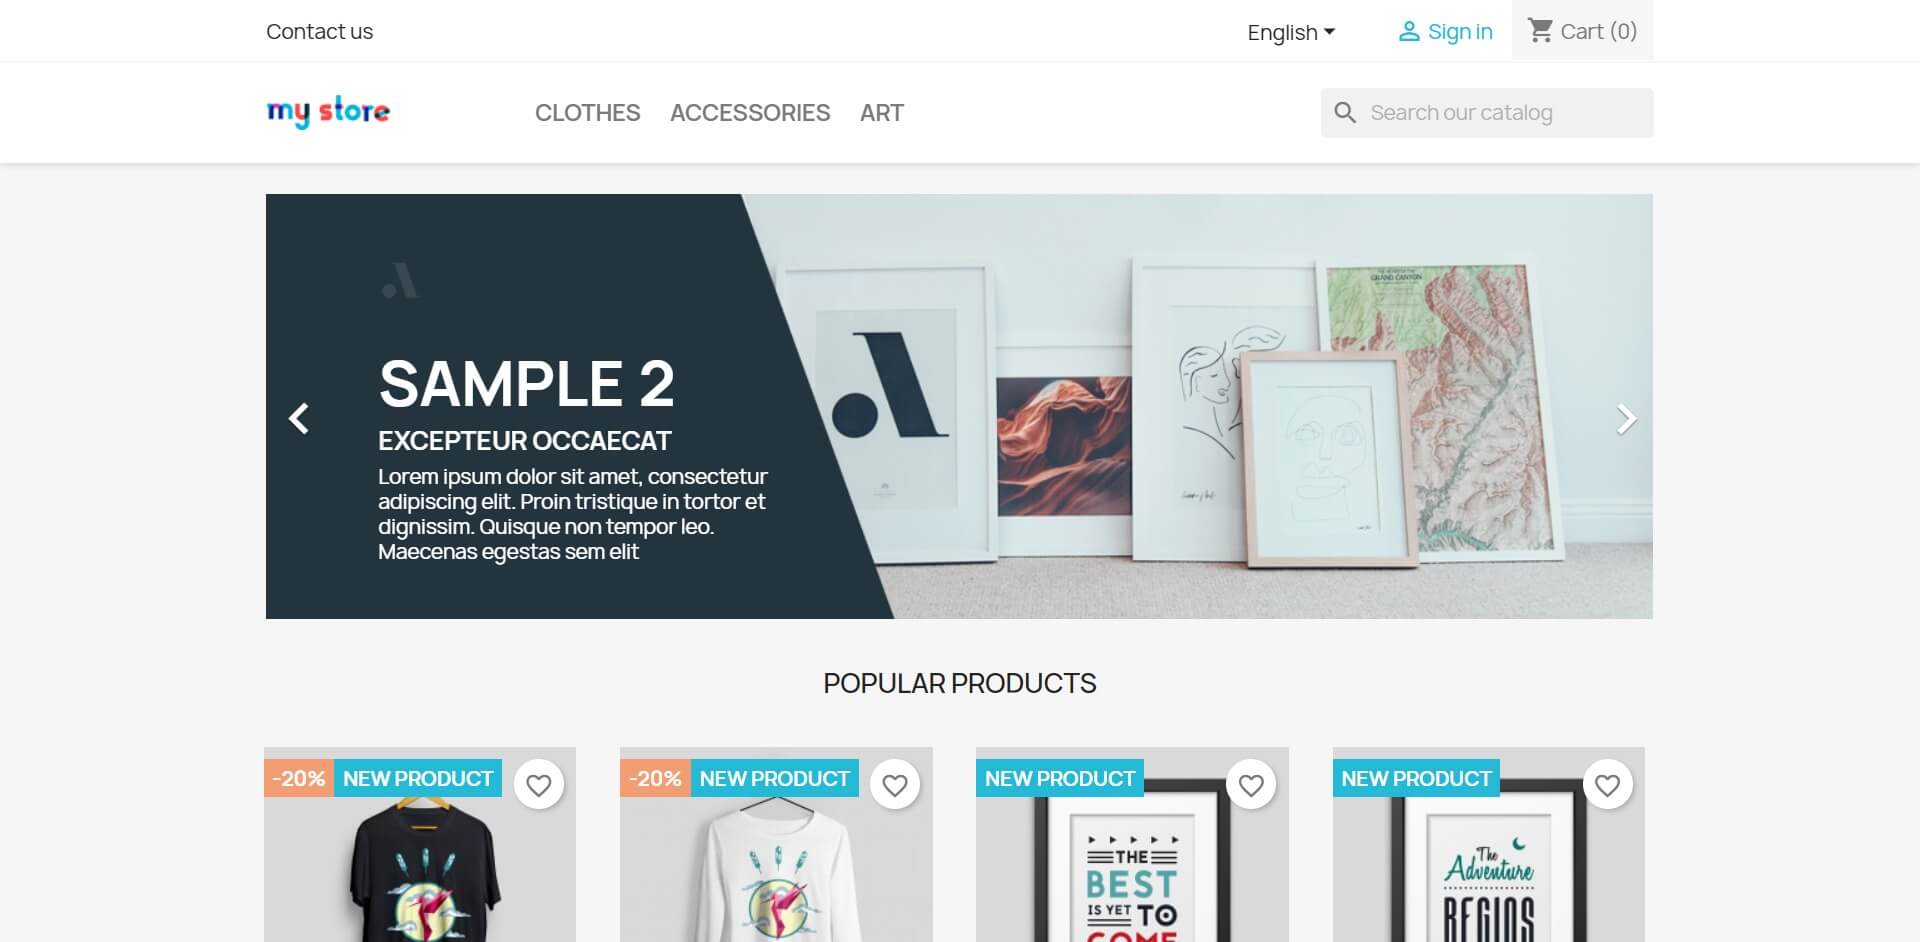
Screenshot of PrestaShop Front Office with Demo Content:
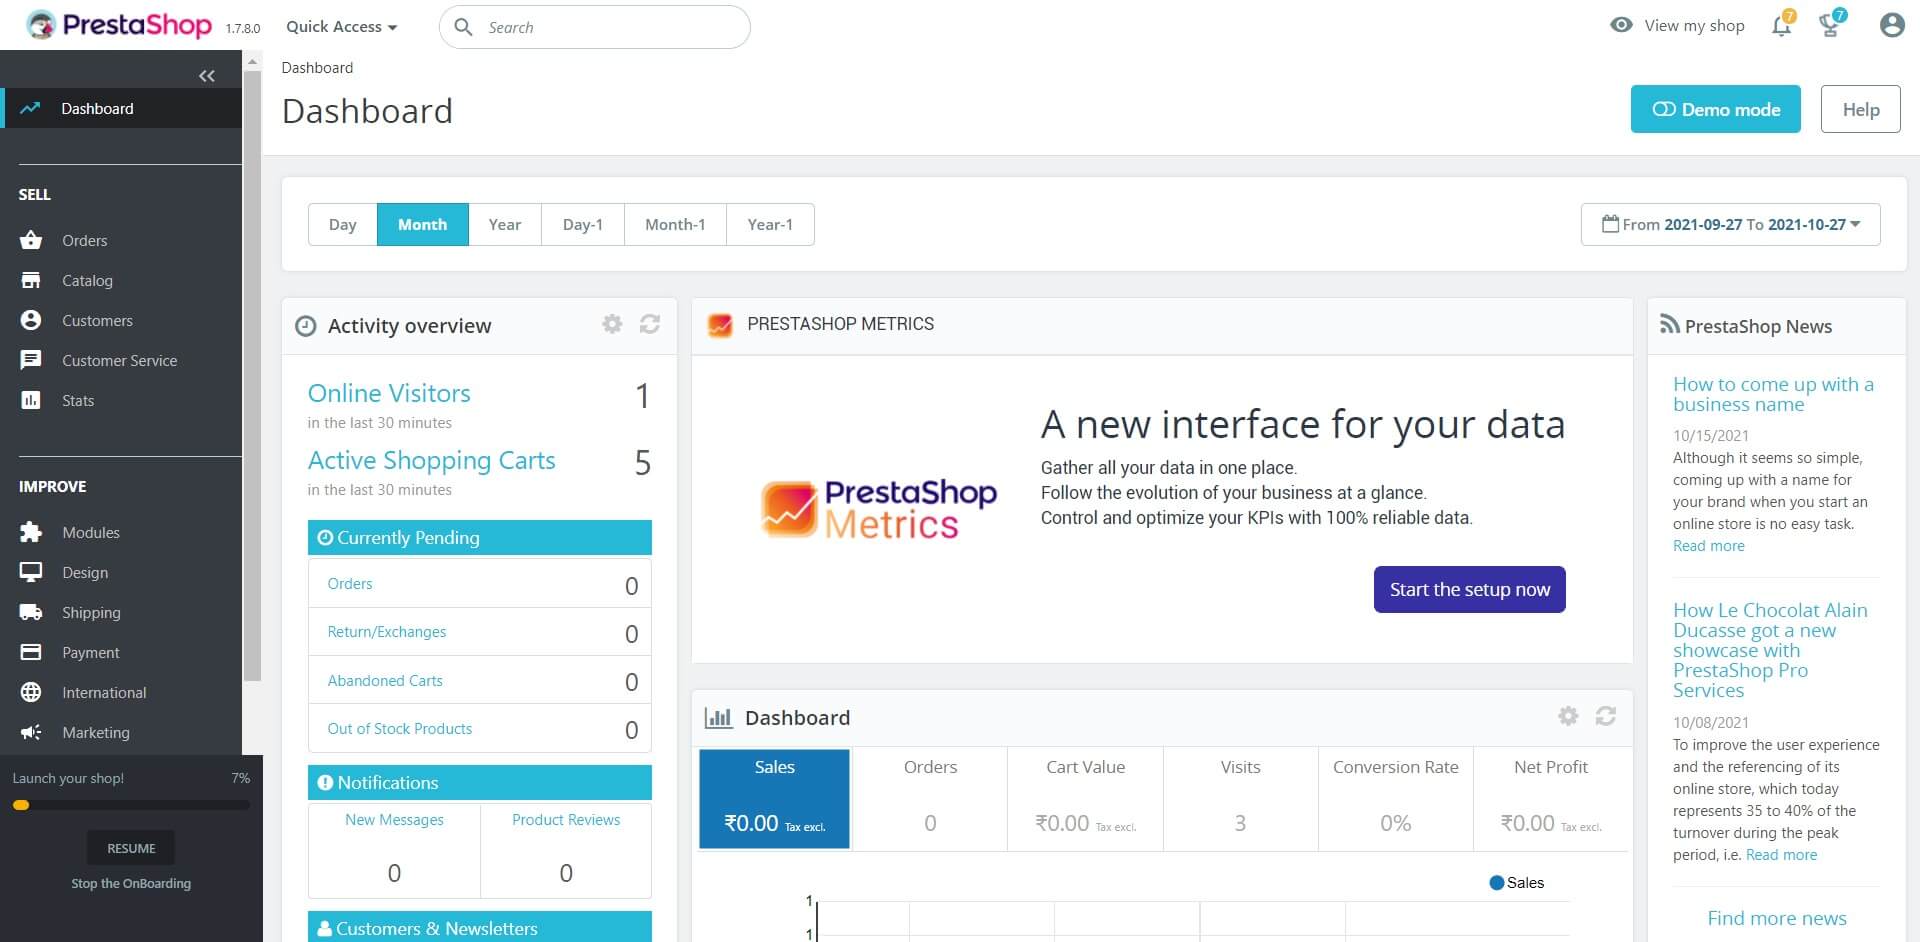
Screenshot of PrestaShop Back Office:
Conclusion
That’s All. I hope you have learned how to install PrestaShop with Apache and Let’s Encrypt SSL on Debian 11.