Cookbooks are one of the important components in Chef configuration management system; it allows us to configure and perform specialized tasks (push out the changes) on remote chef nodes.
In this guide, we will build cookbooks and then tell Chef to push those, i.e., running the steps outlined in the cookbook to nodes.
This guide assumes that you have a working Chef environment which includes a server, a workstation and atleast one node to push the configurations changes to.
READ: How To Setup a Chef 12 on CentOS 7 / RHEL 7
Cookbook:
Chef Cookbooks is a unit that holds the configuration and policy details to bring a node into a particular state. Cookbooks are created on a workstation and then uploaded to Chef server. A cookbook is then assigned to nodes “run-list” which is a sequential list of actions that are to be run on a node to bring the node into the desired state.
Create a Simple Chef Cookbooks:
In this portion, we will create a simple cookbook to install and configure an Apache web server.
READ: Configure LAMP on CentOS 7 / RHEL 7
Log into your Chef workstation, go to your ~/chef-repo/cookbooks directory.
cd ~/chef-repo/cookbooks/
Create the cookbook called “httpd“. Replace “httpd“, if you want to name it differently.
chef generate cookbook httpd
Output:
Generating cookbook httpd
- Ensuring correct cookbook file content
- Ensuring delivery configuration
- Ensuring correct delivery build cookbook content

Your cookbook is ready. Type `cd httpd` to enter it.

There are several commands you can run to get started locally developing and testing your cookbook.
Type `delivery local --help` to see a full list.

Why not start by writing a test? Tests for the default recipe are stored at:

test/recipes/default_test.rb

If you'd prefer to dive right in, the default recipe can be found at:

recipes/default.rb
Go to your newly created cookbook’s directory, i.e., httpd.
cd httpd
When you go into the directory of the new cookbook, you could see below directory structure in it.
Output:
-rw-r--r--. 1 root root   47 Nov 12 21:18 Berksfile
-rw-r--r--. 1 root root 1133 Nov 12 21:18 chefignore
-rw-r--r--. 1 root root  568 Nov 12 21:18 metadata.rb
-rw-r--r--. 1 root root   53 Nov 12 21:18 README.md
drwxr-xr-x. 2 root root   23 Nov 12 21:18 recipes
drwxr-xr-x. 3 root root   38 Nov 12 21:18 spec
drwxr-xr-x. 3 root root   20 Nov 12 21:18 test
Recipe:
A recipe consists of a series of resources which defines the state of a particular service or an application, for example, one resource could say “the NTP service should be running”, another may say “the telnet service should be stopped”
The recipe is not limited just to manage services; it can also be used to execute the commands, user management, much more.
READ: Different type of resources.
Go to the recipes directory. There you can see a file called “default.rb“. We are going to use this file to add resources for that are required for getting the Apache server running.
cd recipes
cat default.rb
Output:
By default, the file has headers lines in it.
#
# Cookbook Name:: httpd
# Recipe:: default
#
# Copyright (c) 2016 The Authors, All Rights Reserved.
Install Apache:
To begin, let’s add a resource for installing apache package.
package 'httpd' do
  action :install
end
Where,
package – Defines package resource
httpd – Name of the package you want to install, should be a legitimate package name.
action :install – This specifies the action for the resource “package“, in our case, installation of httpd.
When this recipe runs on the node the Chef will check whether the Apache is installed, if it is, it will skip this resource and go to the next resource. If not, it will install Apache using the system installer.
Manage Apache Service:
Next, make the Apache service to start automatically at the system startup and also the service should be up and running. Below code does what we required.
service 'httpd' do
  action [ :enable, :start ]
end
Where,
service – Defines service resource.
httpd – The name of the service, should be a legitimate service name.
action [ :enable, :start ] – Specify actions that you want to perform. In our case, this resource will start “httpd” and enable it on start up.
Index File:
Our next resource is for placing the index.html file on the document root of Apache server. All you need to specify the location where want the file and from where to get the file.
cookbook_file "/var/www/html/index.html" do
  source "index.html"
  mode "0644"
end
Where,
cookbook_file – Resource to transfer files from a sub-directory of httpd/files to a mentioned path located on a chef node.
source – Specify the name of the source file. Files are normally found in COOK_BOOKS/files.
mode – Sets the permissions for the file.
Creating the Index File:
Since we have defined a “cookbook_file” resource, we need to create a source file “index.html” inside files subdirectory of your cookbook.
cd ~/chef-repo/cookbooks
Create a subdirectory “files” under your cookbook.
mkdir httpd/files
Add a simple text into the index.html.
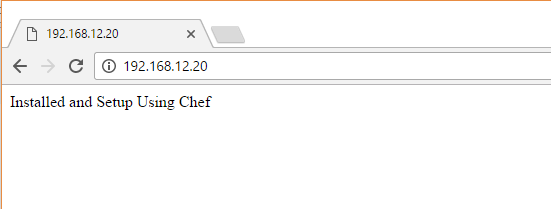
echo "Installed and Setup Using Chef" > httpd/files/index.html
Firewall:
Our last resource will be for configuring the firewall to allow http and https traffic from external machines.
execute 'httpd_firewall' do
  command '/usr/bin/firewall-cmd  --permanent --zone public --add-service http'
  ignore_failure true
end

execute 'reload_firewall' do
  command '/usr/bin/firewall-cmd --reload'
  ignore_failure true
end
Where,
execute – Resource to run a single command.
command – Defines an actual command that you want to run on the node.
ignore_failure – Continue running a recipe even if a resource fails for any reason, it will be useful when the system does not have firewallD enabled.
The final version of default.rb will look like below.
vi ~chef-repo/cookbooks/httpd/recpies/default.rb
Output:
#
# Cookbook Name:: httpd
# Recipe:: default
#
# Copyright (c) 2016 The Authors, All Rights Reserved.

package 'httpd' do
  action :install
end

service 'httpd' do
  action [ :enable, :start ]
end

cookbook_file "/var/www/html/index.html" do
  source "index.html"
  mode "0644"
end

execute 'httpd_firewall' do
  command '/usr/bin/firewall-cmd  --permanent --zone public --add-service http'
  ignore_failure true
end

execute 'reload_firewall' do
  command '/usr/bin/firewall-cmd --reload'
  ignore_failure true
end
Upload the Cookbook:
Once your cookbook is complete, you can upload them on to your Chef server.
knife cookbook upload httpd
Output:
Uploading httpd        [0.1.0]
Uploaded 1 cookbook.
Check whether you can list the cookbook that you just have been uploaded.
knife cookbook list
Output:
httpd 0.1.0
To remove the cookbook (optional).
knife cookbook delete cookbook_name
Add the Cookbook to your node:
You can add a cookbook to the run_list of a particular node using the following command. Replace chefclient.itzgeek.local with your client node name.
knife node run_list add chefclient.itzgeek.local httpd
Output:
chefclient.itzgeek.local:
  run_list: recipe[httpd]
To remove the particular recipe from run_list (optional).
knife node run_list remove chefclient.itzgeek.local recipe[cookbook_name]
Retrieving the Configuration:
Login to the client node where Chef client software is running.
READ: Bootstrapping a New Node with Knife
Run the chef-client command on the client node to check with Chef server for any new run_list and run those run_list that has been assigned to it.
chef-client
Output:
Starting Chef Client, version 12.16.42
resolving cookbooks for run list: ["httpd"]
Synchronizing Cookbooks:
  - httpd (0.1.0)
Installing Cookbook Gems:
Compiling Cookbooks...
Converging 5 resources
Recipe: httpd::default
  * yum_package[httpd] action install
    - install version 2.4.6-40.el7.centos.4 of package httpd
  * service[httpd] action enable
    - enable service service[httpd]
  * service[httpd] action start
    - start service service[httpd]
  * cookbook_file[/var/www/html/index.html] action create (up to date)
  * execute[httpd_firewall] action run
    - execute /usr/bin/firewall-cmd  --permanent --zone public --add-service http
  * execute[reload_firewall] action run
    - execute /usr/bin/firewall-cmd --reload

Running handlers:
Running handlers complete
Chef Client finished, 5/6 resources updated in 24 seconds
You can verify that this works by visiting your node’s IP address or domain name over a web browser.
Output:
Extras:
Chef Cookbook for creating a user:
You can use the following cookbook for creating a new user. Replace the green values according to your environment.
group "raj" do
  gid 9999
end


user 'raj' do
  comment 'Admin [at] ITzGeek'
  uid '9999'
  gid '9999'
  manage_home true
  home '/home/raj'
  shell '/bin/bash'
  password '$6$89lC6OcN$xGO/4ia1j8YXY5TytLFccCjeITSCkgCgQbFMloF4O/kUWFOWhQBH5/BavEkvMj.0fuGx1pMxoUkKF6s9Tpnoj/'
end
That’s All.