Basic Guide for installing the LAMP on Ubuntu
 LAMP stands for Linux,Apache, MySQL, PHP. This post shows how to setup the LAMP server on the Ubuntu 11.10. The main purpose of LAMP is testing the application locally by the programmer before going to the production.
Install Linux:
Here i am not going to show How to install Ubuntu 11.10. The main purpose of this post is to setup AMP (Apache,MySQL and PHP) only.
Install Apache:
To start off we will install Apache.
1. Open up the Terminal (Applications > Accessories > Terminal).
2. Type following Command on the Terminal and then press enter, The Terminal will ask you for you’re password, type it and then press enter.
[raj@ubuntu$ ~]# sudo apt-get install apache2
[sudo] password for raj: ————> Type the Password for user.
Testing Apache:
To make sure everything installed correctly we will now test Apache to ensure it is working properly.
1. Open up any web browser and then enter the following into the web address:
http://localhost/ or http://127.0.0.1
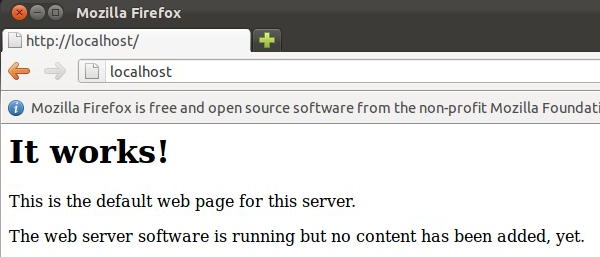
You will get the web page saying “It Works”. Now the Apache is working fine.
Install PHP:
By default Apache server supports the HTML language only, not PHP for that we need to install PHP. To install PHP please follow the steps.
Step 1. Open the Terminal again (Applications > Accessories > Terminal).
Step 2. Type following line into Terminal and press enter:
[raj@ubuntu$ ~]# sudo apt-get install php5 libapache2-mod-php5
[sudo] password for raj: ————> Type the Password for user.
Step 3. You need to restart the server after the installation of the PHP, to do that type the following on the terminal.
[raj@ubuntu$ ~]# sudo /etc/init.d/apache2 restart
[sudo] password for raj: ————> Type the Password for user.
Testing PHP:
For testing the PHP, Place one PHP file on to the default directory of the Apache.
Step 1. In the terminal copy/paste the following line:
[raj@ubuntu$ ~]# sudo vi /var/www/phpinfo.php
This will open up a file called phpinfo.php.
Step 2. Copy/Paste this line into the phpinfo file:
<?php phpinfo(); ?>
Step 3. Save and close the file. use Esc + ;wq for saving the file.
Step 4. Now open you’re web browser and type the following into the web address:
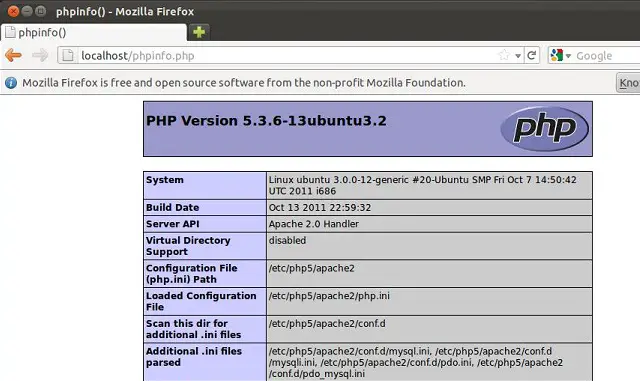
http://localhost/phpinfo.php or http://127.0.0.1/phpinfo.php
The page look like below:
We have installed both Apache and PHP!. It’s working too.
Install MySQL:
Next is to install the MySQL on the Ubuntu, follow the Steps.
Step 1: Open the Terminal and then Press Enter.
[raj@ubuntu$ ~]# sudo apt-get install mysql-server
[sudo] password for raj: ————> Type the Password for user.
Step 2: This is optional step, MySQL will normally listen on the localhost only. if you want to listen MySQL on the other IP you need to edit the /etc/my.cnf file.
[raj@ubuntu$ ~]# sudo vi /etc/mysql/my.cnf
[sudo] password for raj: ————> Type the Password for user.
Change the following line and put your ip on the place of 127.0.0.1
bind-address = 127.0.0.1 ——-> bind-address = 192.168.0.10
Step 3. Next is to enter in to the MySQL prompt for changing the password of root.
Step 2: This is optional step, MySQL will normally listen on the localhost only. if you want to listen MySQL on the other IP you need to edit the /etc/my.cnf file.
[raj@ubuntu$ ~]# mysql -u root -p
Set the Password of your choice by entering the following command.
mysql> SET PASSWORD FOR ‘root’@’localhost’ = PASSWORD(‘yourpassword’);
(PS: Make sure to change yourpassword to a password of your choice.)
Next is to get PHP to work with MySQL. for that you need to open a file called php.ini. To open it type the following in the Terminal :
[raj@ubuntu$ ~]# sudo vi /etc/php5/apache2/php.ini
[sudo] password for raj: ————> Type the Password for user.
Now we are going to have to uncomment the following line by taking out the semicolon (;).
Change following line:
;extension=mysql.so
To like this:
extension=mysql.so
Now just restart your Apache and get your work done.
[raj@ubuntu$ ~]# sudo /etc/init.d/apache2 restart
[sudo] password for raj: ————> Type the Password for user.
Install phpMyAdmin:
Next is to install phpMyAdmin, this graphical utility will help you to manage databases very easily.
[raj@ubuntu$~]# sudo apt-get install libapache2-mod-auth-mysql php5-mysql phpmyadmin
If would like to manage the MySQL through phpMyAdmin, Open the Mozilla Firefox and Type the following web address.
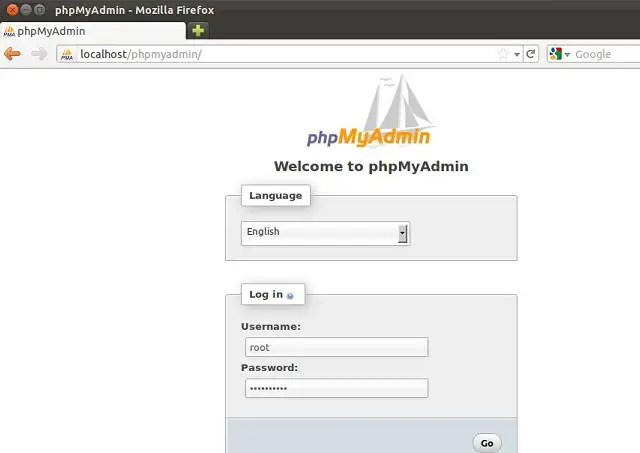
http://localhost/phpmyadmin or http://127.0.0.1/phpmyadmin
You will get the following web page and it will ask you for the root username & password. Please type the username and password set by you during MySQL installation.
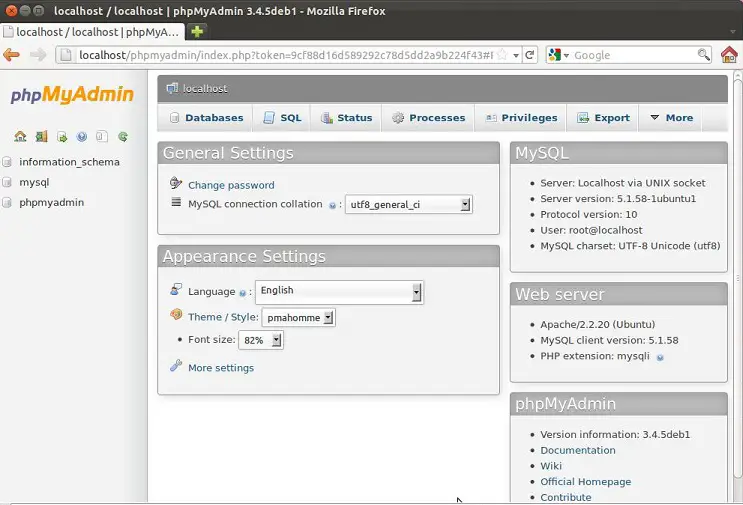
After the Log in you will get the Main Page of the phpMyAdmin. Here you can manage the database very easily.
That’s all!. Now the Ubuntu is ready with AMP.


