SSH is a client and server protocol, and it helps us to access the remote system over the network through the encrypted tunnel. Whenever the client machine accesses the server running SSH, the client downloads the secure key from the server, and at the same time, the server also downloads the key from the client. These two keys make the encrypted tunnel between the server and client, so that data transfer very securely over the network.
If the organization has a large number of servers, every time the admin has to enter the password to access the remote system. It is a pain to enter the password multiple times; SSH comes with a new feature called passwordless login, which helps to access the remote machine without entering the password.
Assumptions
Here we have two machines with two different usernames.
| Hostname | IP Address | User | OS | Purpose |
|---|---|---|---|---|
| server.itzgeek.local | 192.168.1.10 | raj | CentOS 7 / RHEL 7 | Source Machine |
| client.itzgeek.local | 192.168.1.20 | ram | CentOS 7 / RHEL 7 | Destination Machine |
Here, I will be using a hostname instead of an IP address.
Follow the steps to create the passwordless login.
Setup SSH Passwordless Login on CentOS 7
To enable the passwordless login, we have to put the public key entry of the client machine on the server’s ~/.ssh/authorized_keys (~ represents the user’s home directory) file.
We can set up an SSH passwordless login in two ways. Choose any one of the methods.
Method 1: (Automatic)
This method involves generating an SSH key pair on the source machine and place it on the destination machine with a single command.
Log in to the source machine and create an SSH key pair using the following ssh-keygen command.
[raj@server ~]$ ssh-keygen
Output:
Generating public/private rsa key pair.
Enter file in which to save the key (/home/raj/.ssh/id_rsa):  << Press Enter
Created directory '/home/raj/.ssh'.
Enter passphrase (empty for no passphrase):  << Press Enter
Enter same passphrase again:  << Press Enter
Your identification has been saved in /home/raj/.ssh/id_rsa.
Your public key has been saved in /home/raj/.ssh/id_rsa.pub.
The key fingerprint is:
SHA256:0oqVhWQzIV+hFFHkquVCTihmORqtt+vXHIXhhXoIosI [email protected]
The key's randomart image is:
+---[RSA 2048]----+
|    . XB=.       |
|. .  *oB.        |
|o. . +++o        |
|oE..o +=.        |
|+=o o.*.S        |
|++.+ *.o         |
|o . =oo.         |
| . ...o          |
| .+o             |
+----[SHA256]-----+
Once you have created, you will find two files id_rsa and id_rsa.pub inside the .ssh directory. We are going to use id_rsa.pub for the passwordless login.
[raj@server ~]$ ls -al ~/.ssh/
Output:
total 8
drwx------. 2 raj raj   38 Sep  6 00:37 .
drwx------. 3 raj raj   74 Sep  6 00:37 ..
-rw-------. 1 raj raj 1675 Sep  6 00:37 id_rsa
-rw-r–r–. 1 raj raj 406 Sep 6 00:37 id_rsa.pub
Use the ssh-copy-id command with an input file of id_rsa.pub.
[raj@server ~]$ ssh-copy-id -i ~/.ssh/id_rsa.pub [email protected]
Output:
The authenticity of host 'client.itzgeek.local (192.168.1.20)' can't be established.
ECDSA key fingerprint is SHA256:sueTz6FURcKDbeyGkpE7lUHOaosW/rkkvlG18v98T7Y.
ECDSA key fingerprint is MD5:f7:39:52:7e:2e:a4:20:84:ff:d7:72:21:20:36:91:76.
Are you sure you want to continue connecting (yes/no)? yes << Type Yes and Press Enter
/usr/bin/ssh-copy-id: INFO: attempting to log in with the new key(s), to filter out any that are already installed
/usr/bin/ssh-copy-id: INFO: 1 key(s) remain to be installed -- if you are prompted now it is to install the new keys
[email protected]'s password: << Enter password of destination machine user (ram)

Number of key(s) added: 1

Now try logging into the machine, with:   "ssh '[email protected]'"
and check to make sure that only the key(s) you wanted were added.
Method 2: (Manual)
This method involves generating an SSH key pair on the source machine and place it on the destination machine by login into it manually.
First, login into the source machine and create an SSH key pair using the following command.
[raj@server ~]$ ssh-keygen
Output:
Generating public/private rsa key pair.
Enter file in which to save the key (/home/raj/.ssh/id_rsa): << Press Enter
Created directory '/home/raj/.ssh'.
Enter passphrase (empty for no passphrase):  << Press Enter
Enter same passphrase again:  << Press Enter
Your identification has been saved in /home/raj/.ssh/id_rsa.
Your public key has been saved in /home/raj/.ssh/id_rsa.pub.
The key fingerprint is:
SHA256:0oqVhWQzIV+hFFHkquVCTihmORqtt+vXHIXhhXoIosI [email protected]
The key's randomart image is:
+---[RSA 2048]----+
|    . XB=.       |
|. .  *oB.        |
|o. . +++o        |
|oE..o +=.        |
|+=o o.*.S        |
|++.+ *.o         |
|o . =oo.         |
| . ...o          |
| .+o             |
+----[SHA256]-----+
Once you have created, you will find two files id_rsa and id_rsa.pub inside the .ssh directory, We are going to use id_rsa.pub for the passwordless login.
[raj@server ~]$ ls -al ~/.ssh/
Output:
total 8
drwx------. 2 raj raj   38 Sep  6 00:37 .
drwx------. 3 raj raj   74 Sep  6 00:37 ..
-rw-------. 1 raj raj 1675 Sep  6 00:37 id_rsa
-rw-r--r--. 1 raj raj 406 Sep 6 00:37 id_rsa.pub
Copy Method: 1
Log in to the destination machine and create the .ssh directory in the home directory of the user, if it doesn’t exist.
[ram@client ~]$ mkdir ~/.ssh

[ram@client ~]$ chmod 700 ~/.ssh
Use the scp command to copy the id_rsa.pub to the destination machine’s /tmp directory.
[raj@server ~]$ scp -pr ~/.ssh/id_rsa.pub [email protected]:/tmp
You would need to enter the password for the destination as we are yet to configure the passwordless login.
Put the source key to the authorized_keys file for passwordless login.
[ram@client ~]$ cat /tmp/id_rsa.pub >> ~/.ssh/authorized_keys
Update the permission of the file.
[ram@client ~]$ chmod 600 ~/.ssh/authorized_keys
Copy Method: 2
Log in to the destination machine and create the .ssh directory in the home directory of the user, if it doesn’t exist.
[ram@client ~]$ mkdir ~/.ssh

[ram@client ~]$ chmod 700 ~/.ssh
Edit the authorized_keys file.
[ram@client ~]$ vi ~/.ssh/authorized_keys
On the source machine, view the content of the id_rsa.pub file using the cat command. Copy the content by selecting it (Assuming that you are using PUTTY).
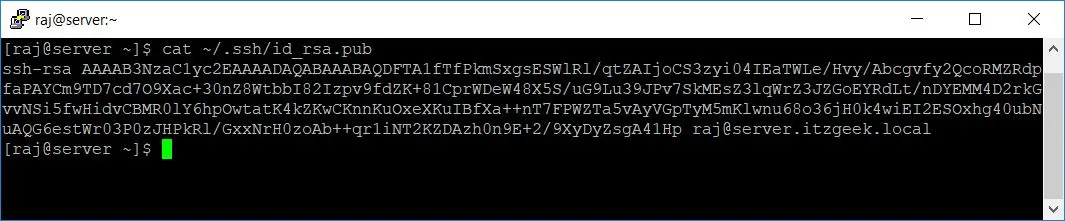
[raj@server ~]$ cat ~/.ssh/id_rsa.pub
Output: (Sample)
Place the above content into the authorized_keys file on the destination and save it. Then, update the permission of the file.
[ram@client ~]$ chmod 600 ~/.ssh/authorized_keys
Test Passwordless Login
Now access the remote machine using SSH. It will take you to the shell directly without asking the password.
[raj@server ~]$ ssh [email protected]

[ram@client ~]$ uname -a

Conclusion
That’s All. This passwordless login saves the time and energy of system admins. Please share your feedback in the comments section.