Install Linux Mint 12 on PC | Clean Installation of Linux Mint 12 on PC
 Linux Mint 12 “Lisa” has released at the end of 2011, it is one of most widely used Linux based distribution in the world for desktop operating system. The installation is very simple and does not require any Linux experience, it has inbuilt software repository so that the installation softwares are quiet simple. Linux Mint 12 has come with two flavours Desktop/Servers, It supports Intel x86 and AMD64 architecture.
Here i am doing the clean installation of Linux Mint, Before proceding further take backup of your data. Here is the tutorial about Installing Linux Mint 12 along with Windows operating system.
Requirements:
| Minimum | Recommended | |
|---|---|---|
| Processor (x86) | 600 MHz | 1 GHz |
| Memory | 256 MB | 512 MB |
| Hard Drive (free space) | 5 GB | 10 GB |
| Monitor Resolution | 800×600 | 1024×768 |
Download the ISO image Linux Mint (x86) or Linux Mint (x64).
Once download it burn it on DVD and Start PC with the first boot device of DVD ROM.
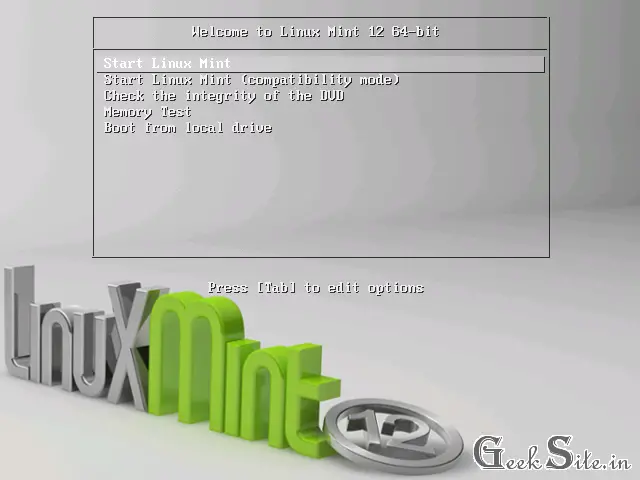
Step 1: Normally DVD should boot automatically, you can interrupt by pressing any key and select Start Linux Mint.
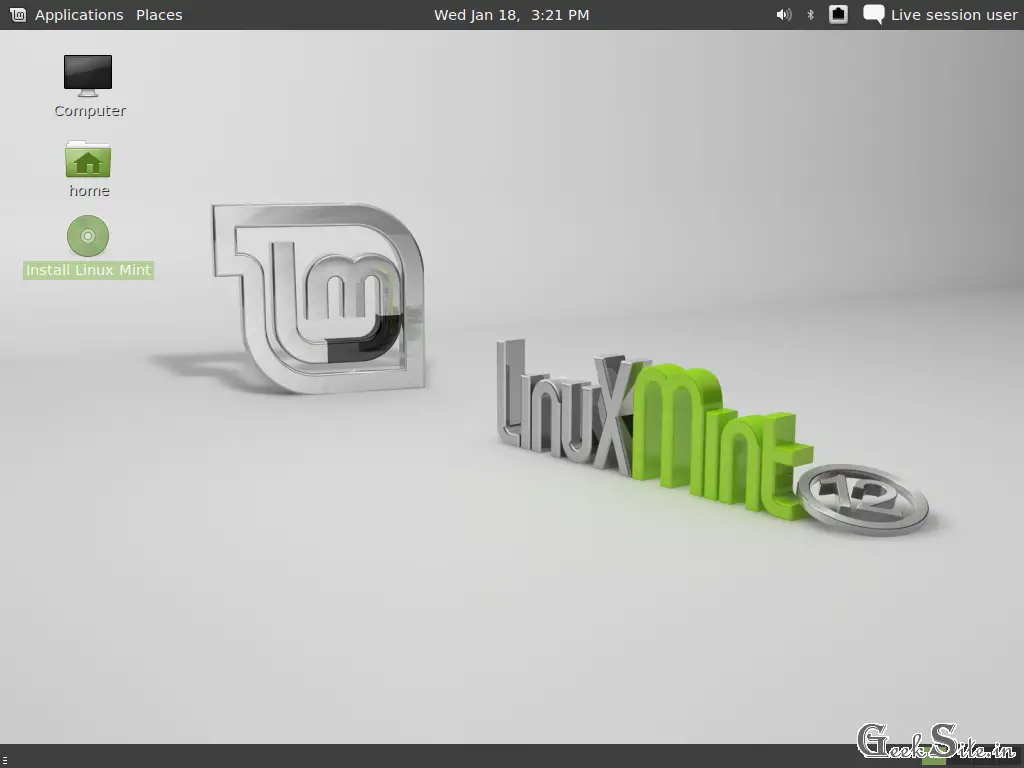
Step 2: Once DVD booted, you will reach to live desktop of Linux Mint.
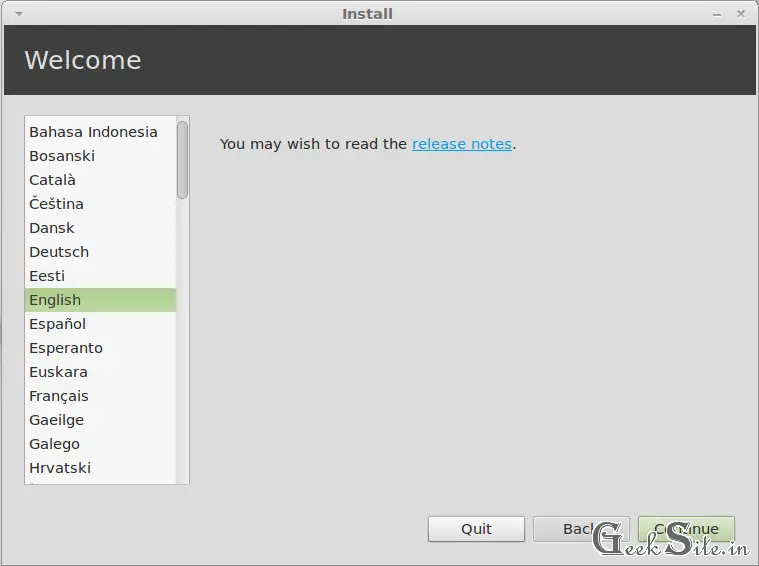
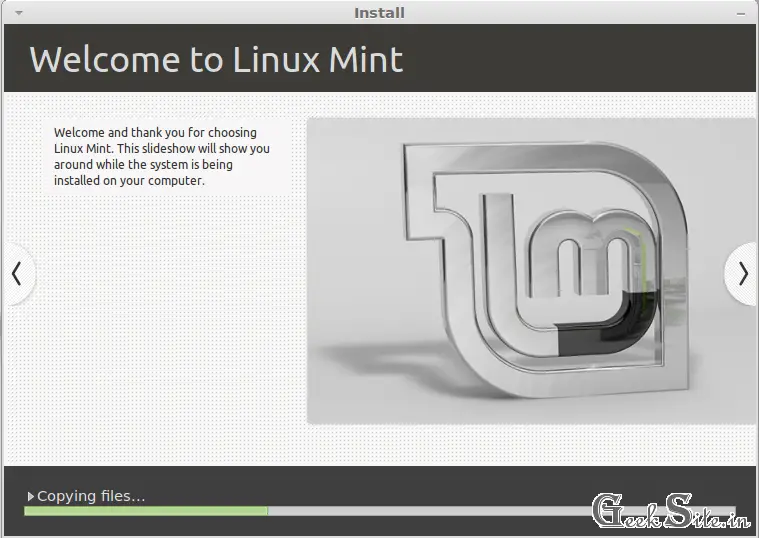
Step 3: Double click on Install Linux Mint shortcut on desktop, click Continue on Welcome page.
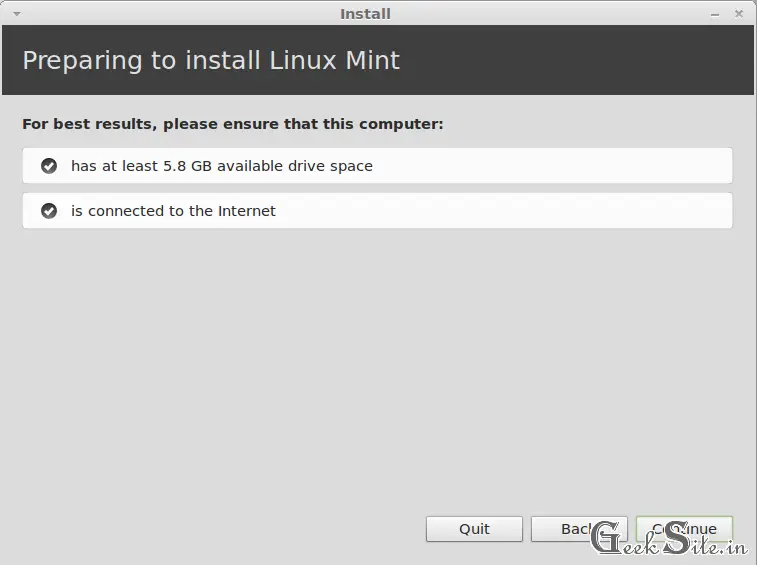
Step 4: Click on continue again.
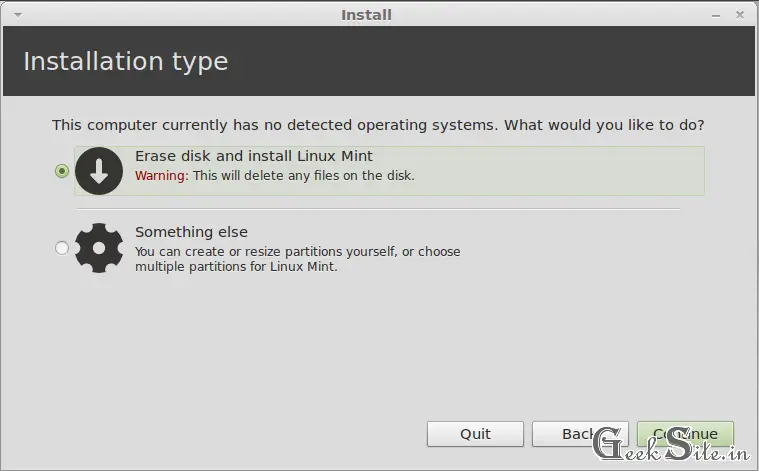
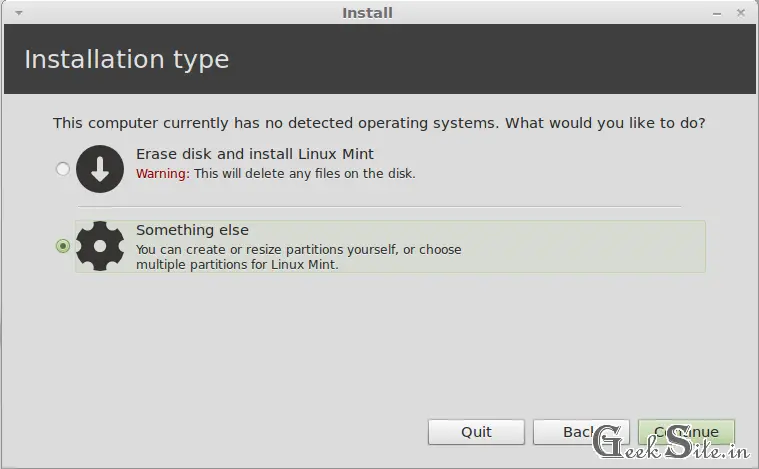
Step 5: Next is the installation type, here you have to be very careful on selecting the installation type. Choose any one.
Type 1:
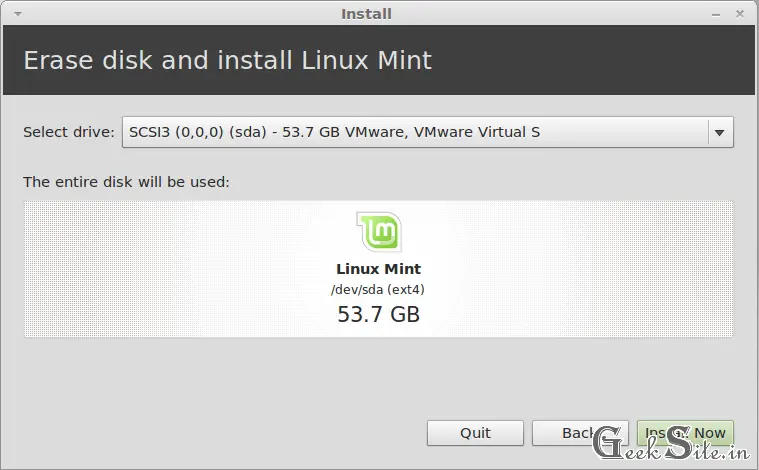
- If you want to install on full hard disk instead of making partition select the first one called Erase disk and Install Linux Mint
- Click on Install Now. it will format the hard drive automatically and allocate the size on its own.
Type 2:
- This method for advanced user, here you can create the partition & size of your choice. Select Something else to mannually partition your hard drive and click Next.
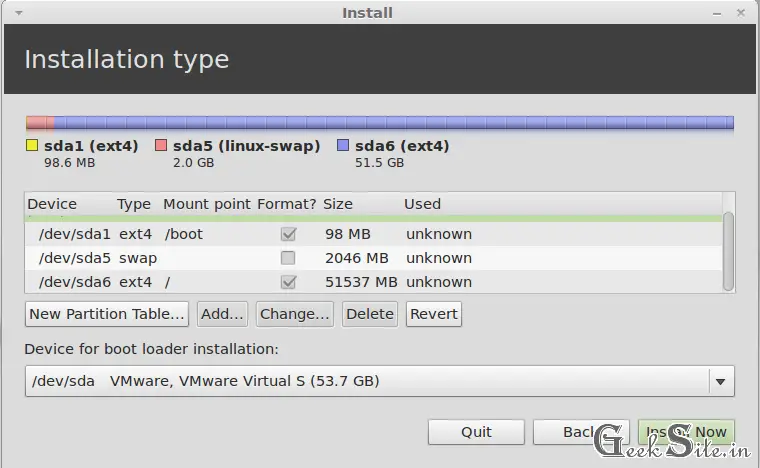
- Here i am going to manually create 3 partition of my choice. Total hard drive size 53GB
 Mount Point        Size
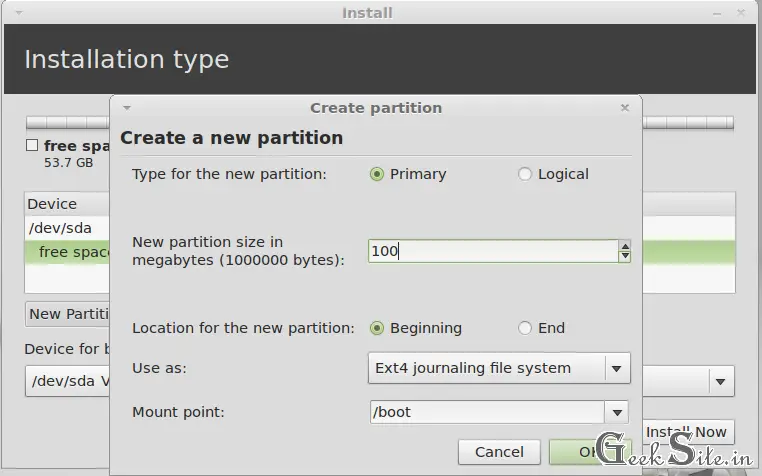
 /boot              100MB
 swap               2048MB
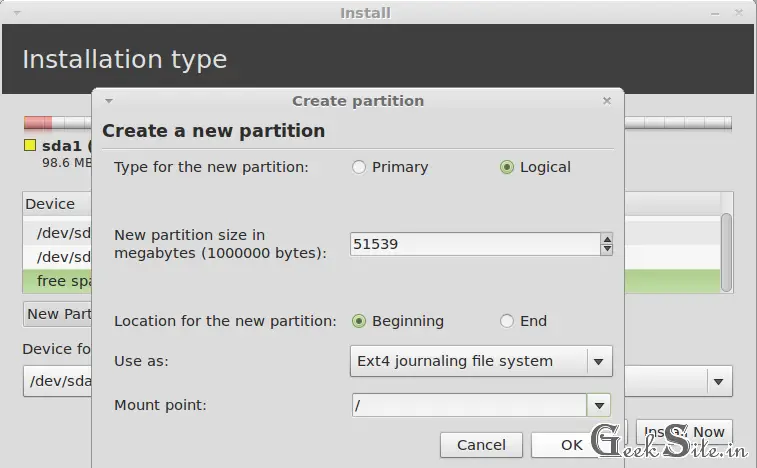
 /                  51537MB
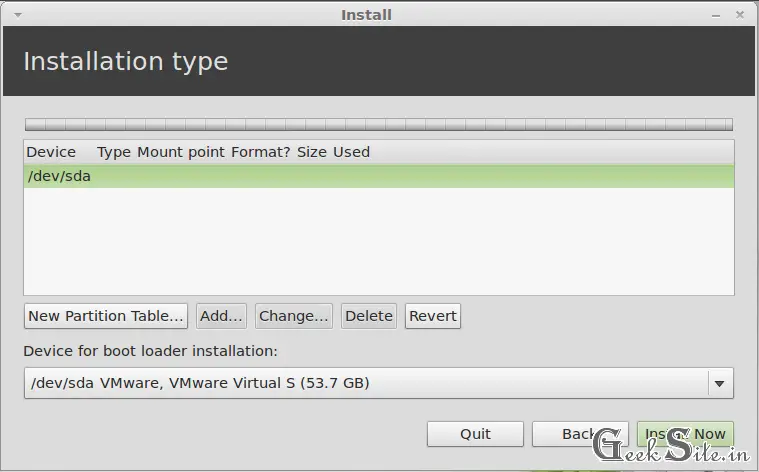
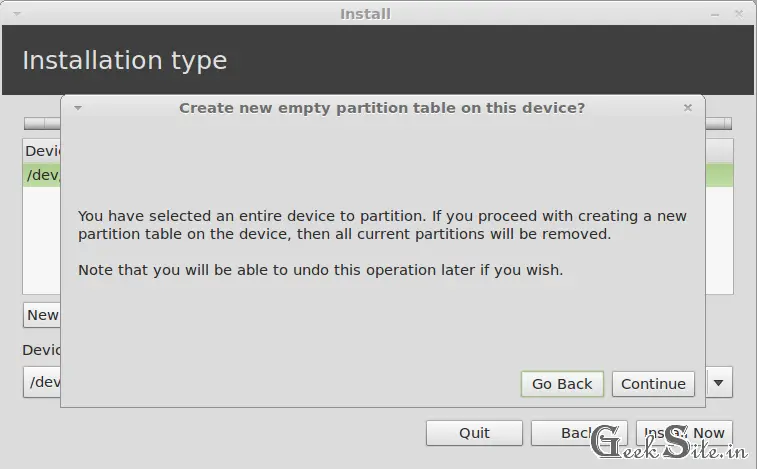
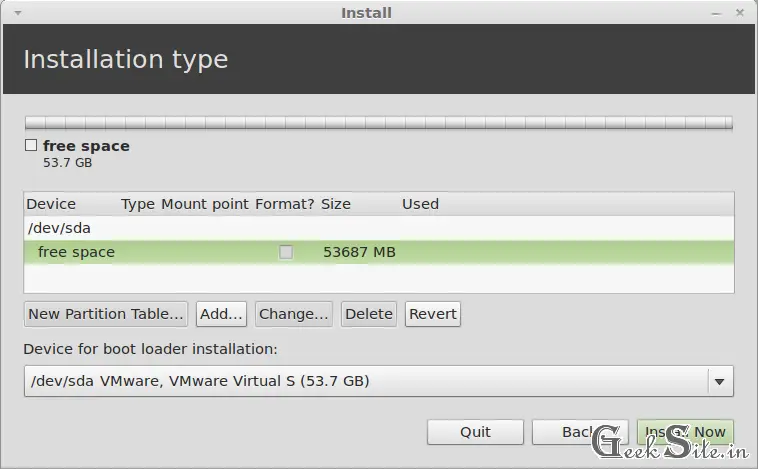
- On next window you will find list of hard drive attached on PC, in my case only one hard drive named /dev/sda. Click on New Partition Table.
- Click on Continue to create empty partition table.
- Now you can find the free space on the newly created partition table, click on Add to start adding (creating) partition.
- It will open new window,here you have to specify the information about new partition. Leave all default setting except size and mount point. Mention 100MB and Select the /boot from drop down menu in Mount point.
- Do it same as above for / partition. only you need to change size and select mount point name.
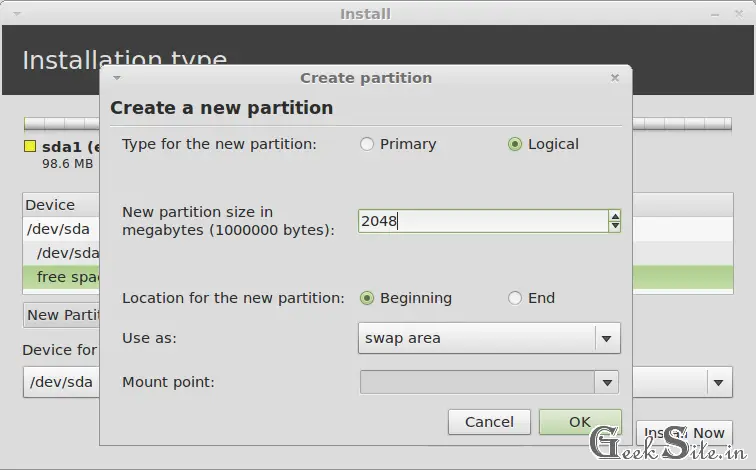
- To make swap partition, click on Add and Leave all default setting except Size and Use as, Here i going to use this partition as swap. Put the size of 2048MB (2*RAM Size) on that box and select swap area from drop down menu in Use as.
- Once done, you will get the list of partition with size. Click on Install Now to start installation.
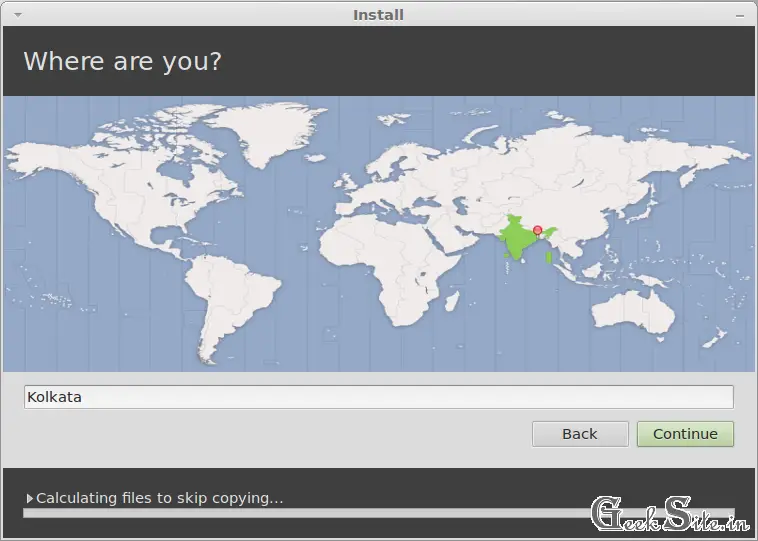
Step 6: Select your location from map.
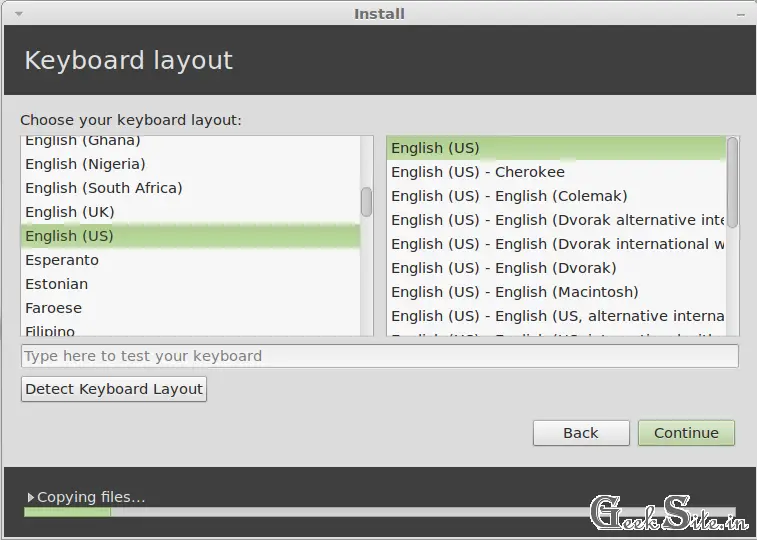
Step 7: Select your keyboard type.
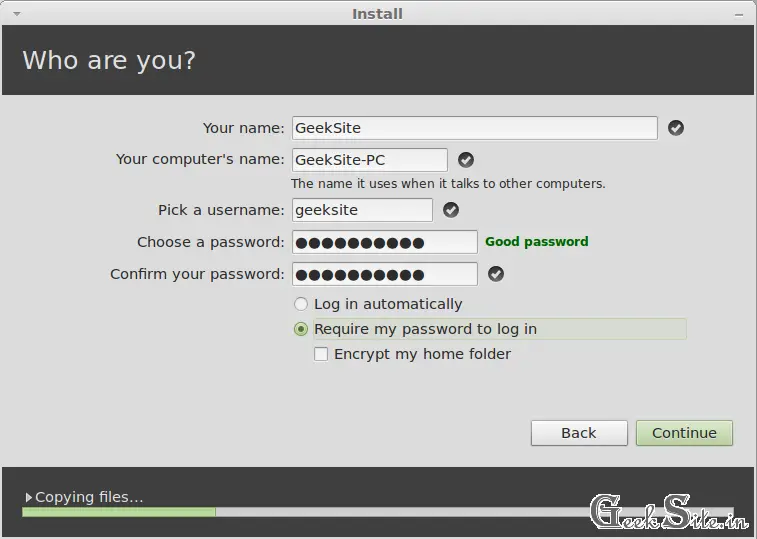
Step 8: Fill your information on who are you? screen.
Installation will start to copying the files from DVD to hard drive.
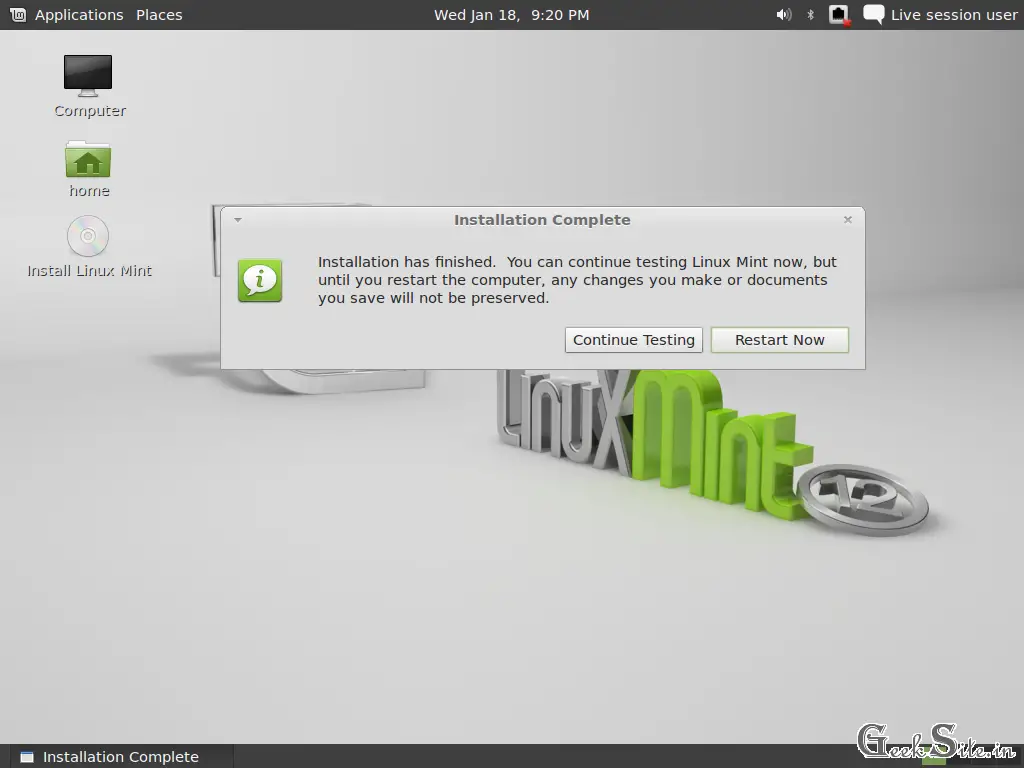
Step 9: Click on Restart Now to finish installation.
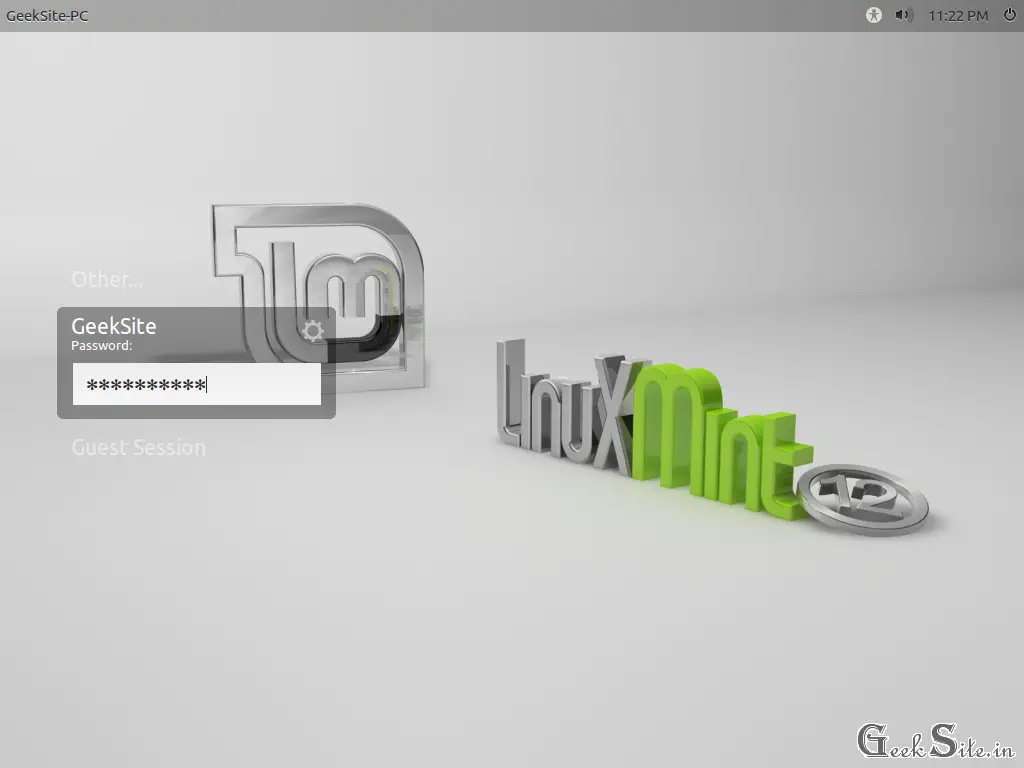
Once rebooted, You will get a login screen. Type password and get access to desktop.
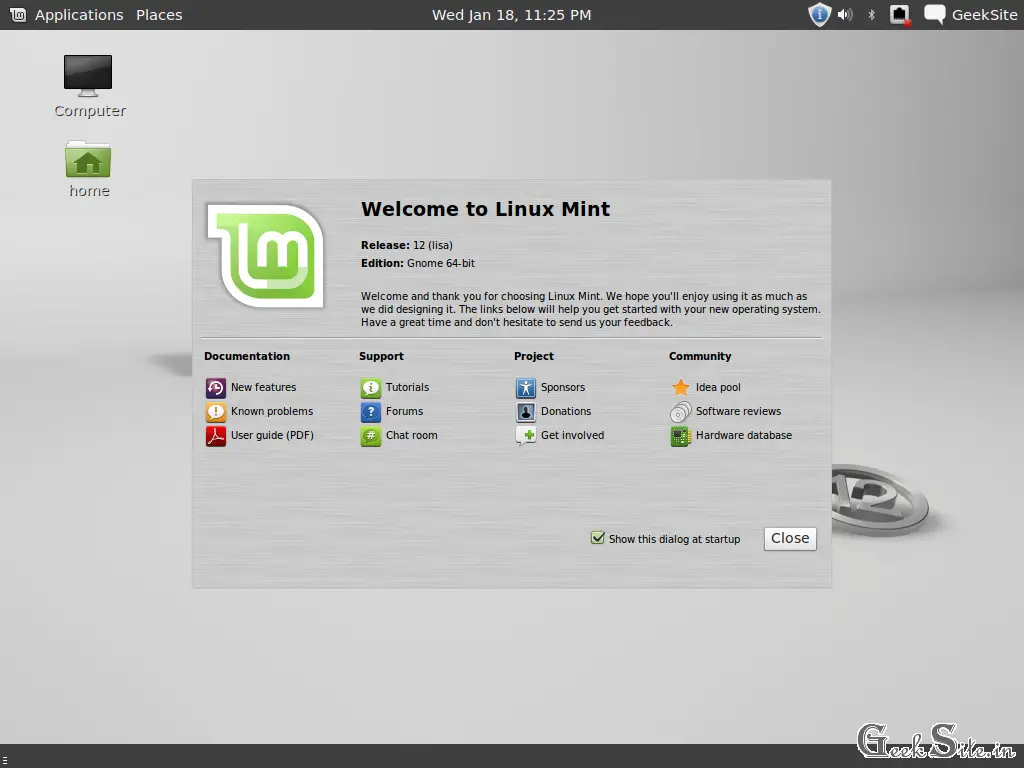
Desktop looks like below, it displays start up page after the first successful login.
Why are you waiting? Download and try it your own.

