How To Backup and Restore Ubuntu & Linux Mint With Timeshift
Timeshift is a backup and system restoration utility for Linux operating systems similar to the System Restore feature in Windows operating system. This tool protects the system by taking incremental snapshots of a filesystem at regular intervals.
It uses RSYNC and BTRFS mode for taking the snapshots. These snapshots can be restored at a later point of time to revert the changes made to the system or to recover the unbootable operating system.
Install Timeshift
Timeshift packages are available in Launchpad PPA for Ubuntu & Linux Mint.
Set up the PPA with the below command.
sudo add-apt-repository -y ppa:teejee2008/ppa
Update the repository index.
sudo apt update
Install Timeshift with the below command.
sudo apt install -y timeshift
Take System Backup with Timeshift
Open the Timeshift from the respective graphical interface.
Ubuntu: Activities » Search for Timeshift.
Linux Mint: Menu » Administration » Timeshift.
Enter your password if you get an authentication window.
Follow the backup wizard to configure Timeshift.
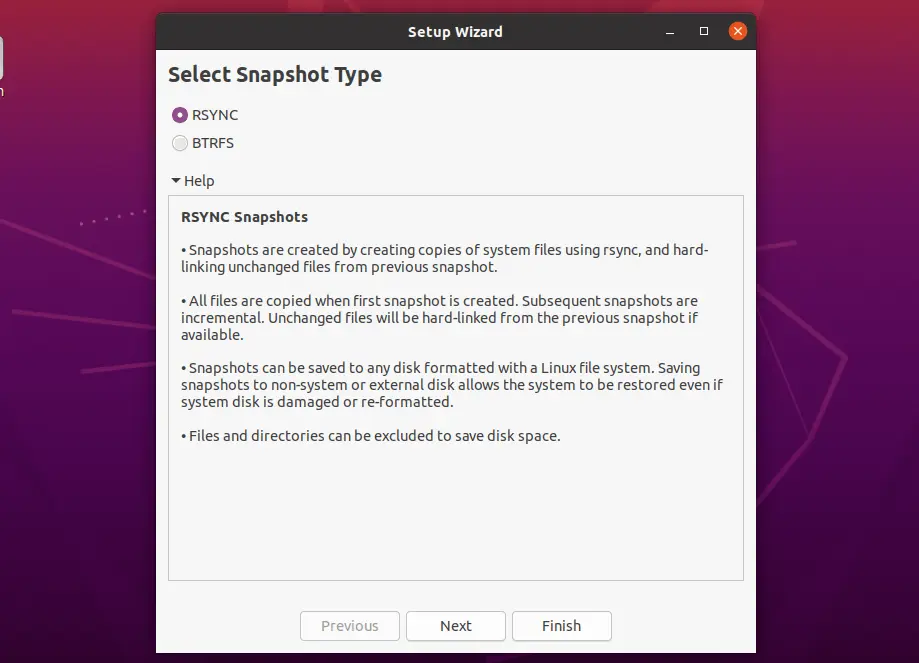
Snapshot Type
Select the Snapshot Type based on your system. RSYNC supports all the file system types and BTRFS supports only the backup of BTRFS filesystems.
In RCYNC mode, snapshots are taken by copying files using rsync and hard-linking unchanged files from the previous snapshots to save disk space. Each snapshot is a full system backup. Snapshots can be saved any disk formatted with a Linux file system. Saving snapshots on non-root disk or on the external disk which allows the system to be restored even if the operating system is not booting.
In BTRFS mode, snapshots are taken using the built-in features of the BTRFS file system. Snapshots are created and restored instantly without burdening the system. Snapshots are stored in on the same disk from which they are created (system disk). If the system disk fails then your snapshots will be lost.
Choose RSYNC and click Next.
Backup Location
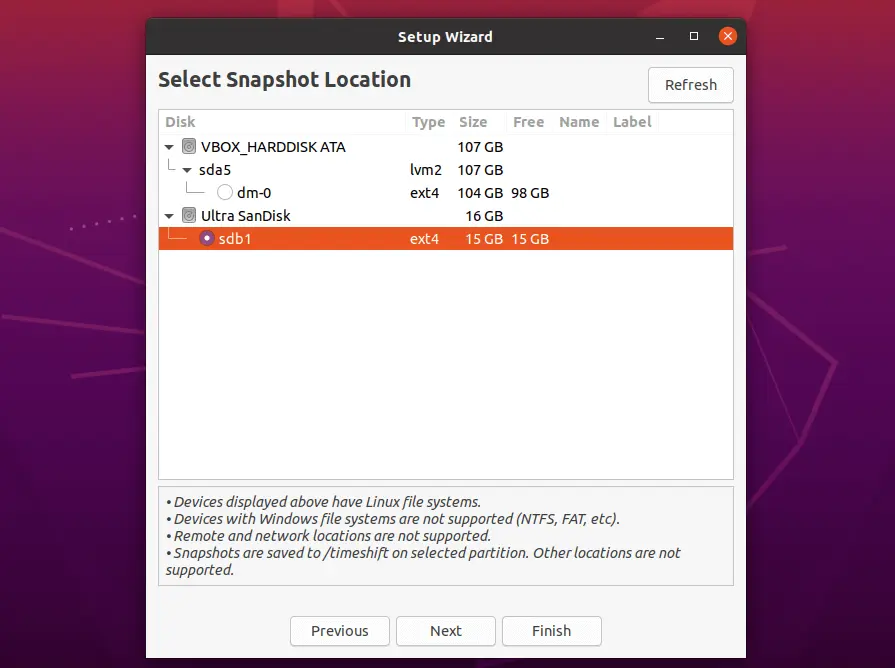
Timeshift supports storing snapshots only on Linux file systems. Windows file systems, remote and network storages are not supported.
Snapshots are stored in /timeshift of the selected partition. If /backup partition is selected for storing the snapshots then snapshots will be in /backup/timeshift.
During the initial setup, Timeshift will calculate the required space for storing snapshots and may show you a warning if the selected partition is short of the required space.
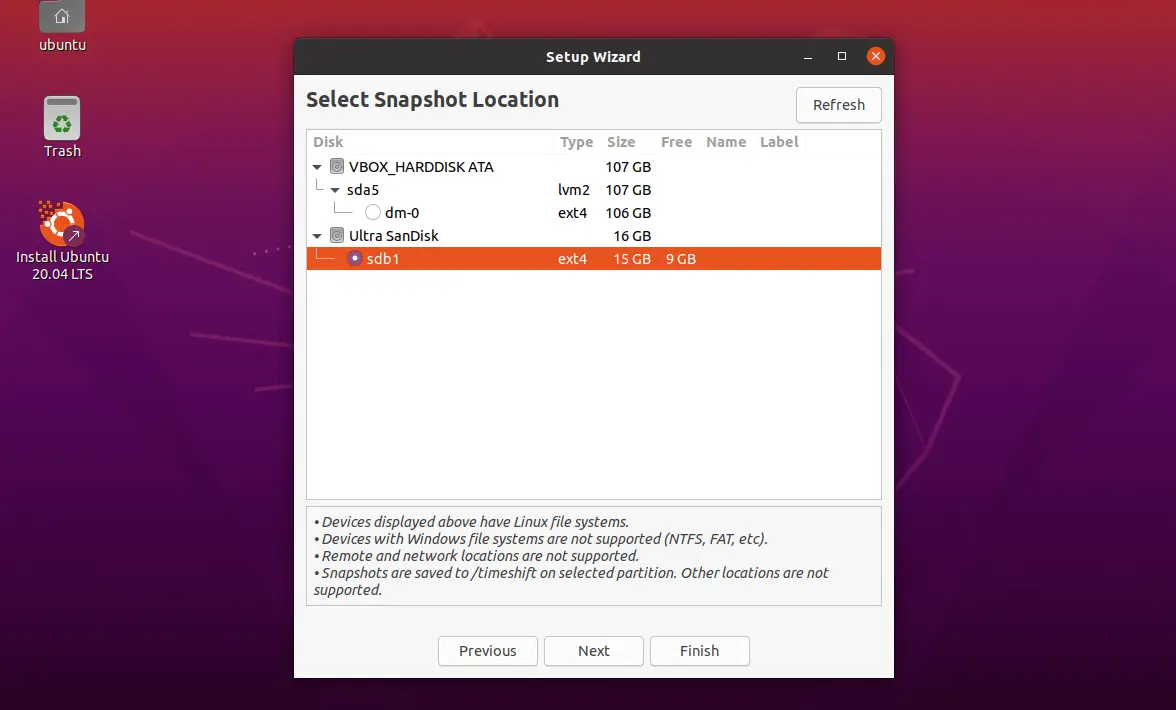
Here, I am using a USB stick for storing snapshots.

NOTE: You need to format the USB stick with ext4 or other Linux file system type.
sudo umount /dev/sdb1

sudo mkfs.ext4 -f /dev/sdb1
Choose the partition and click Next.
Scheduled Snapshots
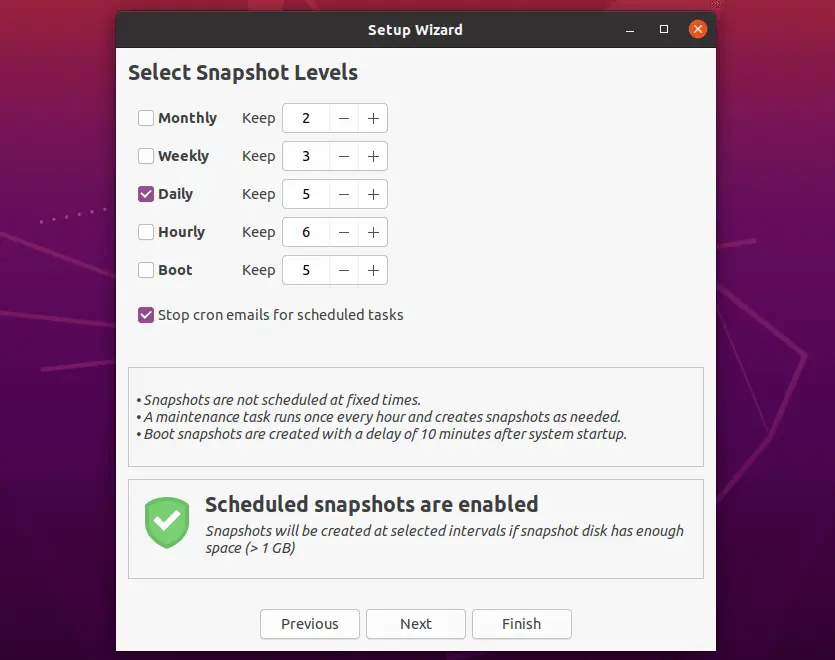
You can schedule automated snapshots at a standard interval – Hourly, Daily, Weekly, Monthly, or at the system boot with a delay of 10 mins.
You can choose to retain a number of snapshots for a selected schedule.
Include Home Directories
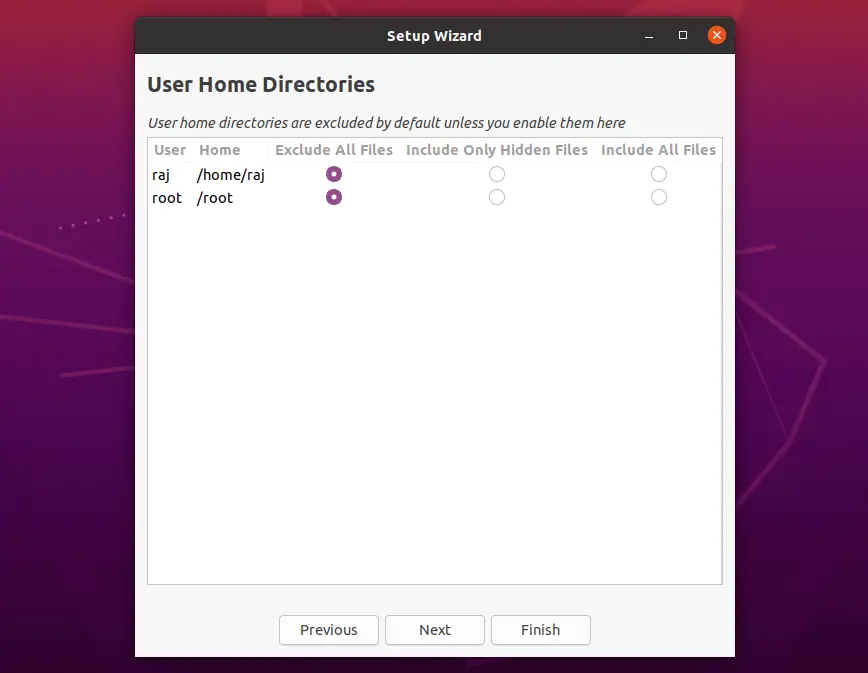
Timeshift is designed to protect only system files and settings, not user documents. However, you can enable the backup of /home directory (disabled by default) if needed.
Click Finish.
Take First Backup
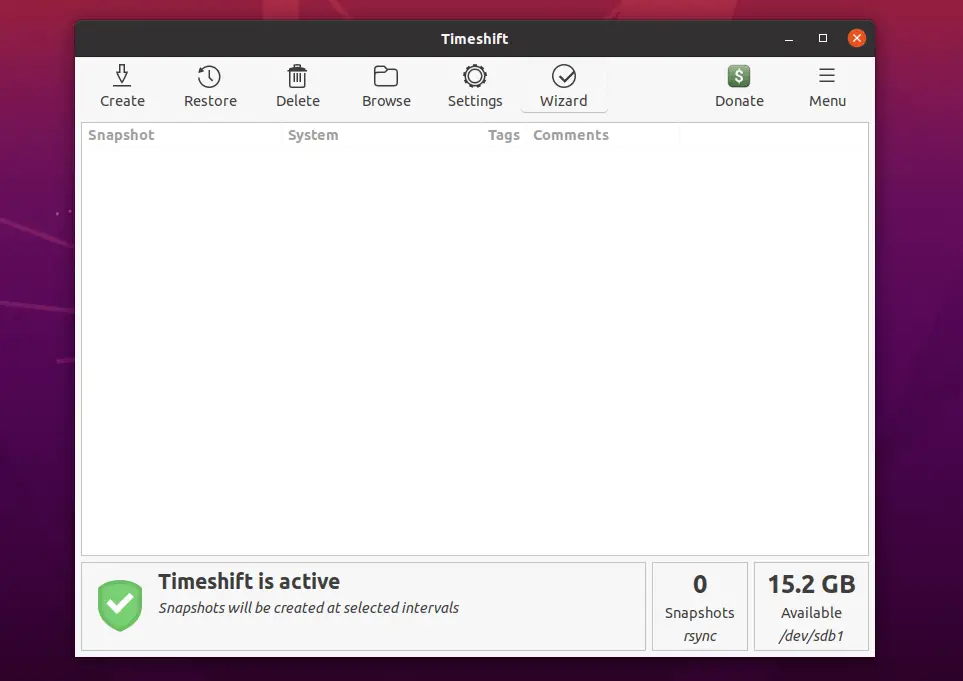
Click the Create button to start your first system snapshot.
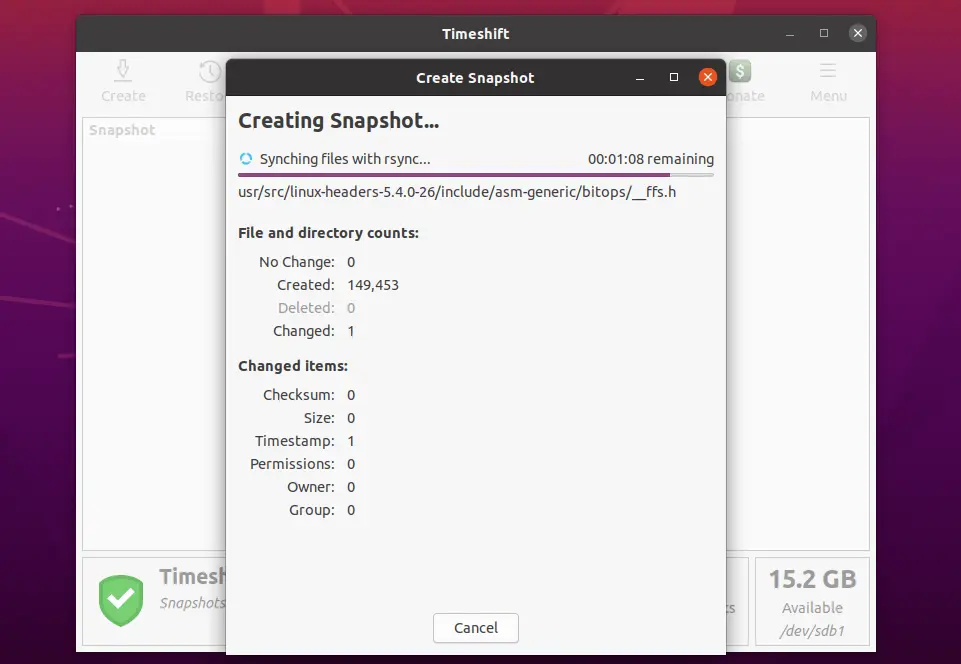
The snapshot creation would take time and it depends on the size of system data.
Once the snapshot is taken, you would see it in the snapshot list.
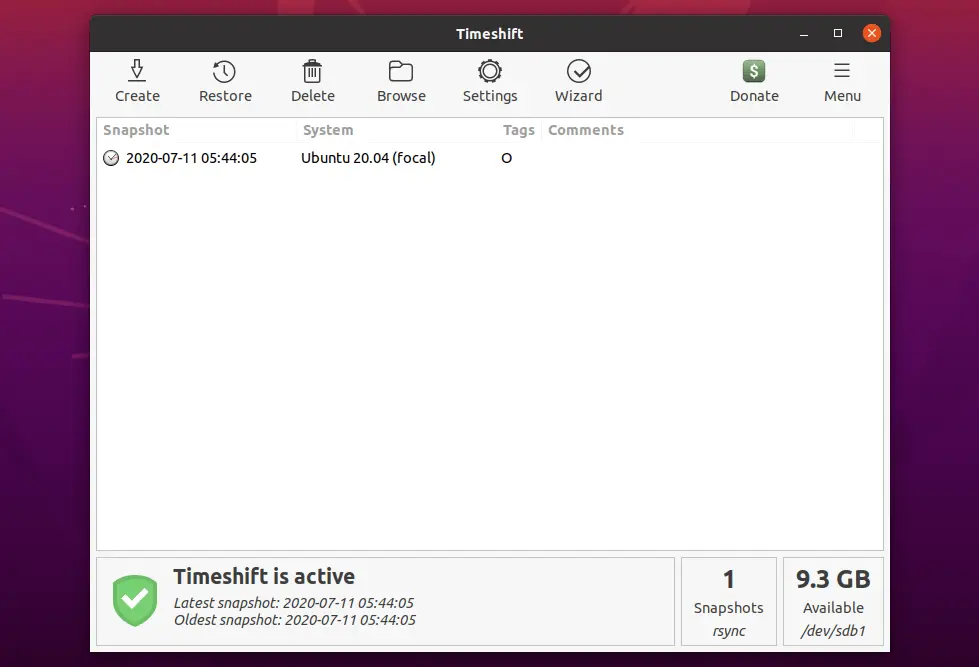
Restore System With Timeshift
Running System
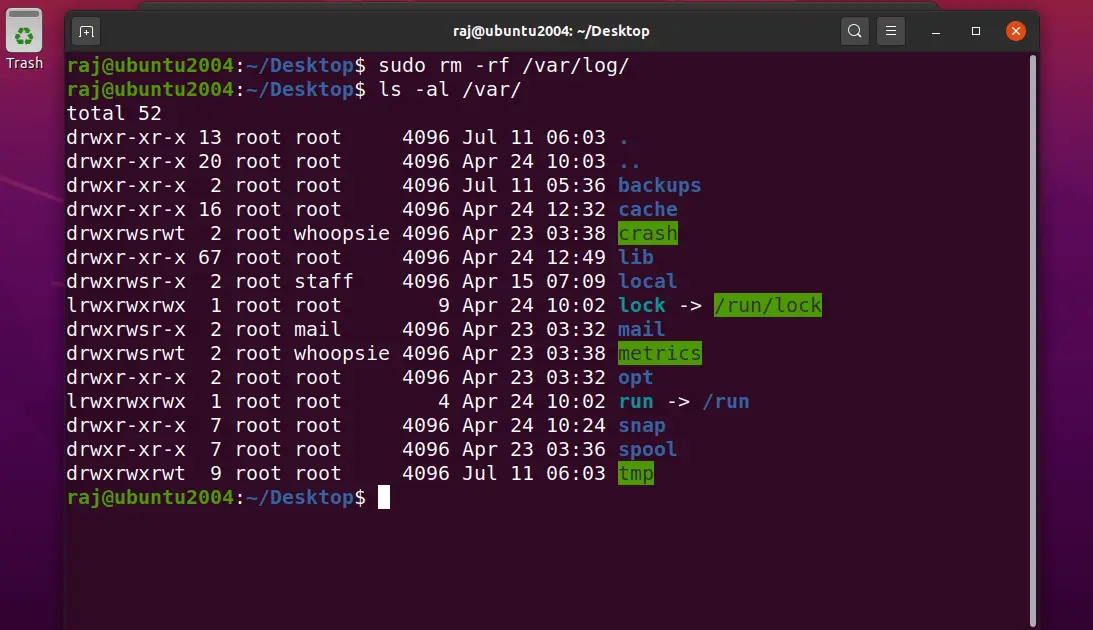
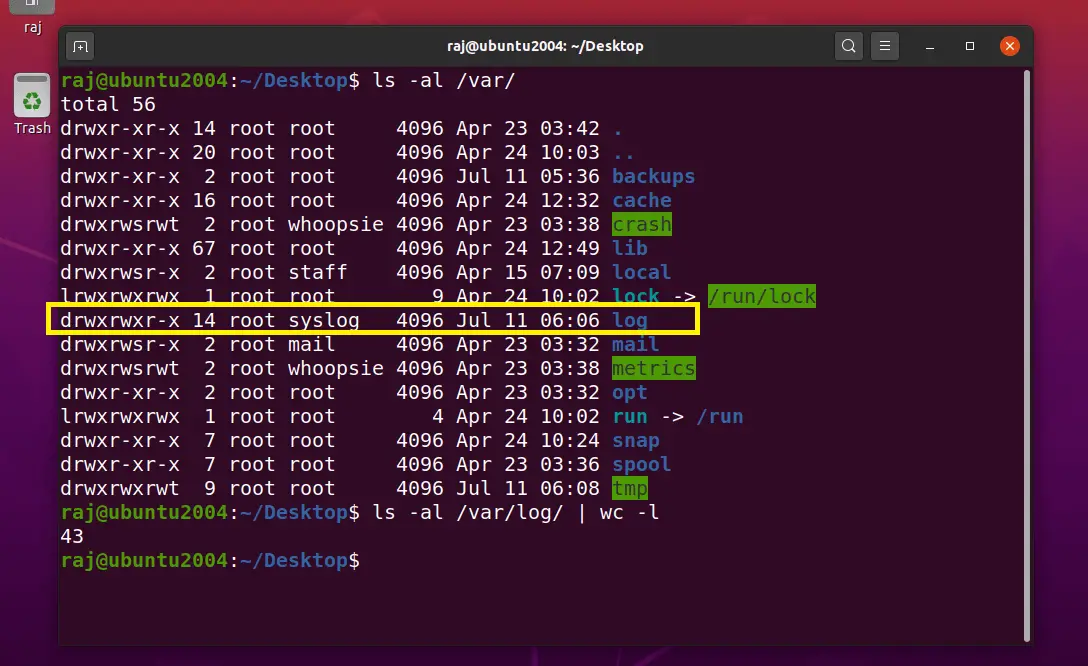
For testing the system restoration, I am deleting the /var/log directory and will restore the directory with the Timeshift.
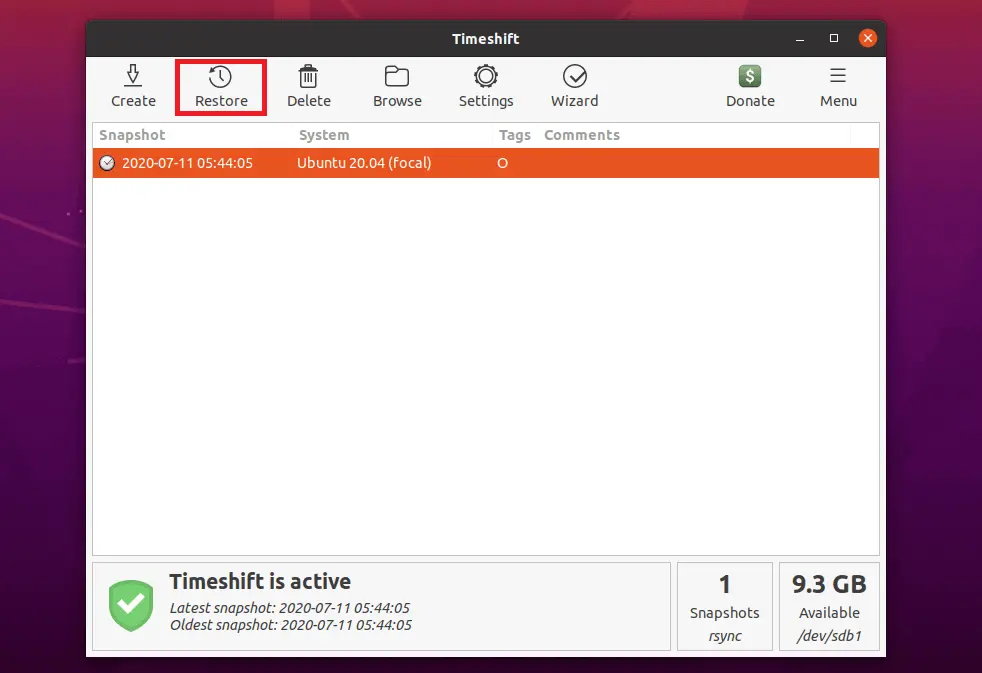
Snapshots can be restored by selecting a snapshot from the main window and clicking the Restore button on the toolbar.
Save your work and close any open applications before you begin restoring the system from snapshot as Timeshift will reboot the system during the restoration.
- Click Next on Select Target Device
- Review the Files that will be restored
- Click Next on the Warning page
System restore is in progress and the system will be rebooted automatically.
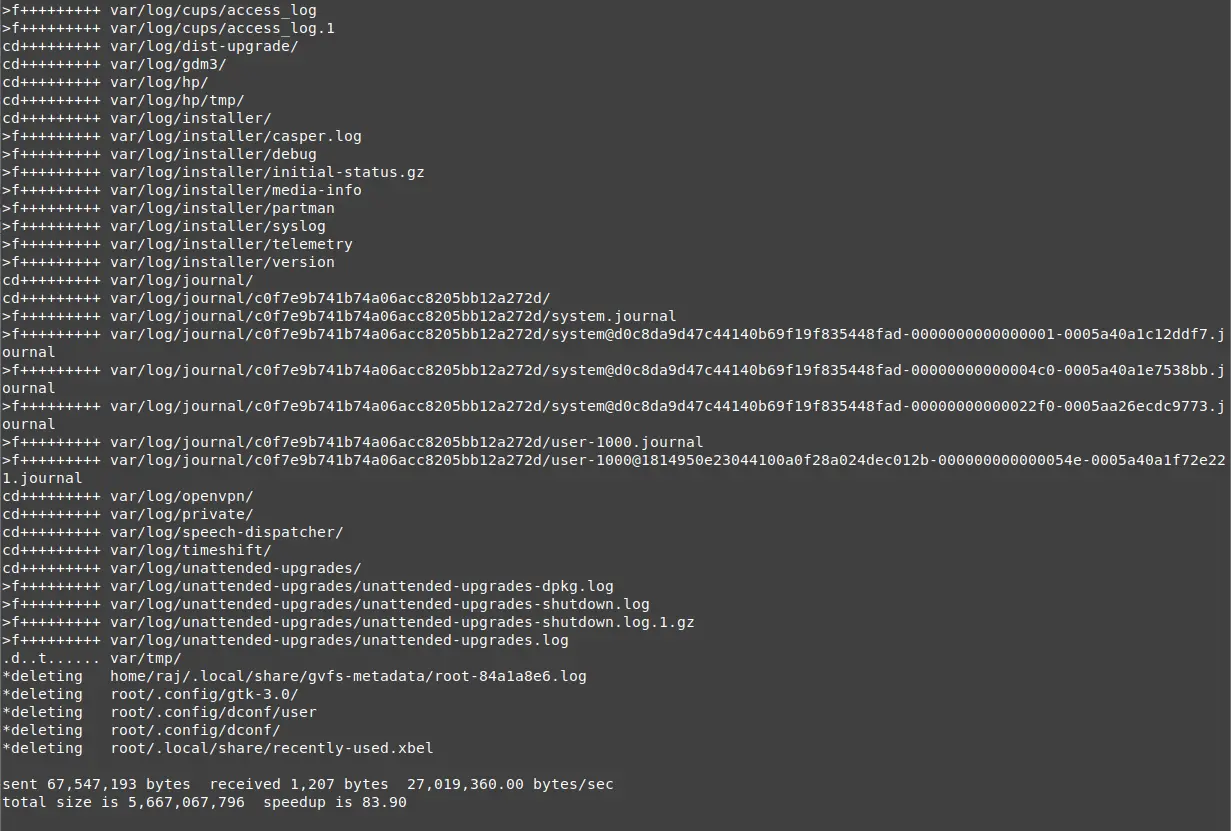
Upon system reboot, validate if the /var/log directory has been restored.
Non-Bootable System
For testing the system restoration, I am deleting the / to make the system non-bootable and will restore the directory with the Timeshift.
You would get a screen similar to below when you delete / directory.
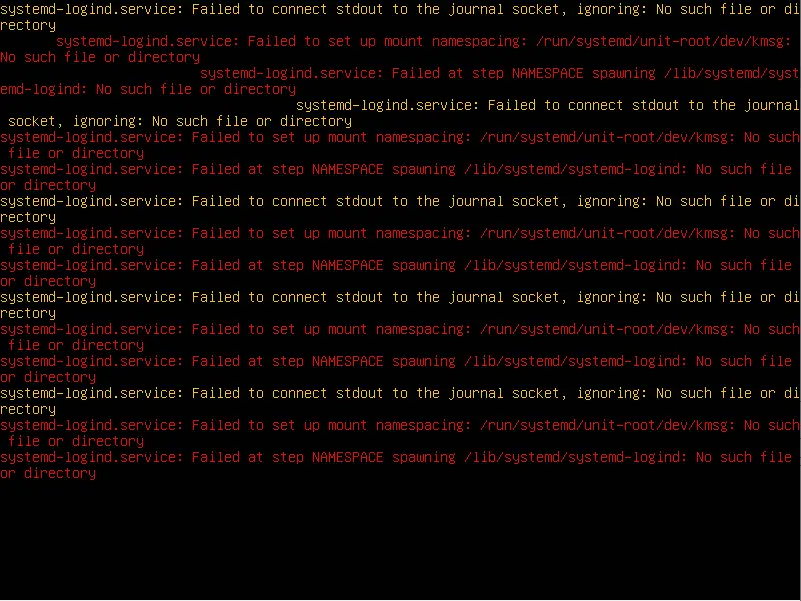
Boot your system with Ubuntu/Linux Mint live cd and install the Timeshift.
### Ubuntu 20.04 ###

sudo add-apt-repository "deb http://us.archive.ubuntu.com/ubuntu/ focal universe"

sudo apt install -y timeshift

### Other Ubuntu Versions & Ubuntu Derivatives ###

sudo add-apt-repository -y ppa:teejee2008/ppa

sudo apt update

sudo apt install -y timeshift
Open the Timeshift and choose RSYNC and then click Next.
Select the partition where the snapshots are stored and then click Next.
Now, Timeshift will list the available snapshots to restore.
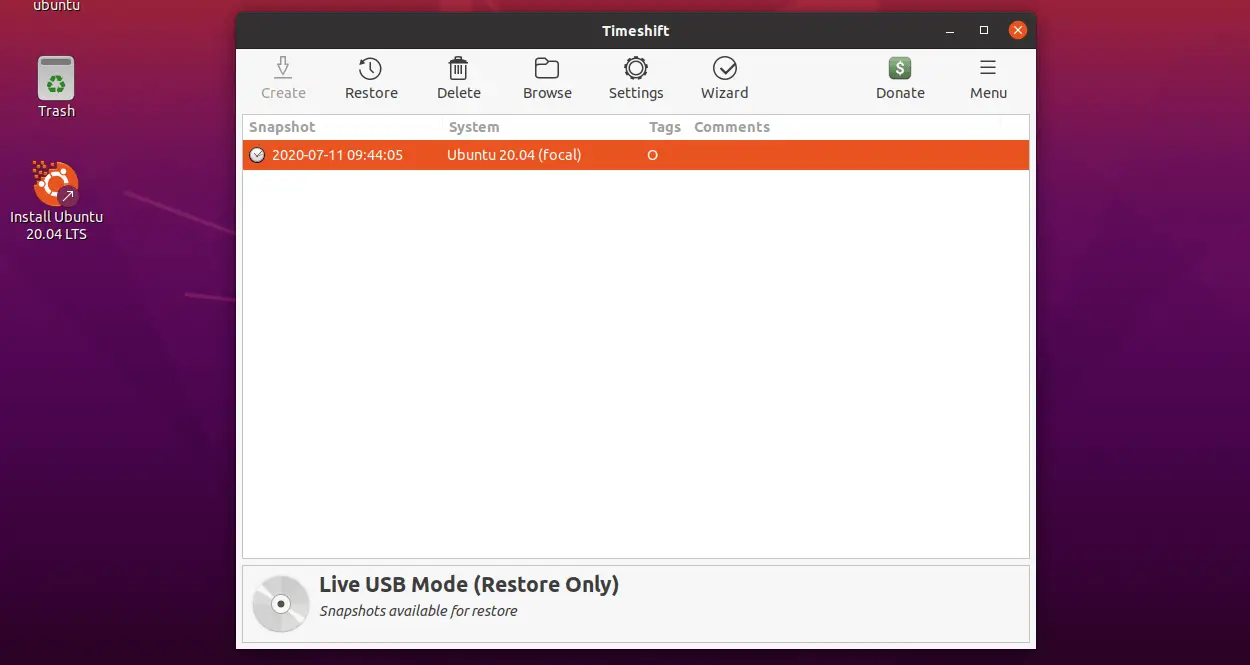
Select the snapshot you want to restore and then click Restore.
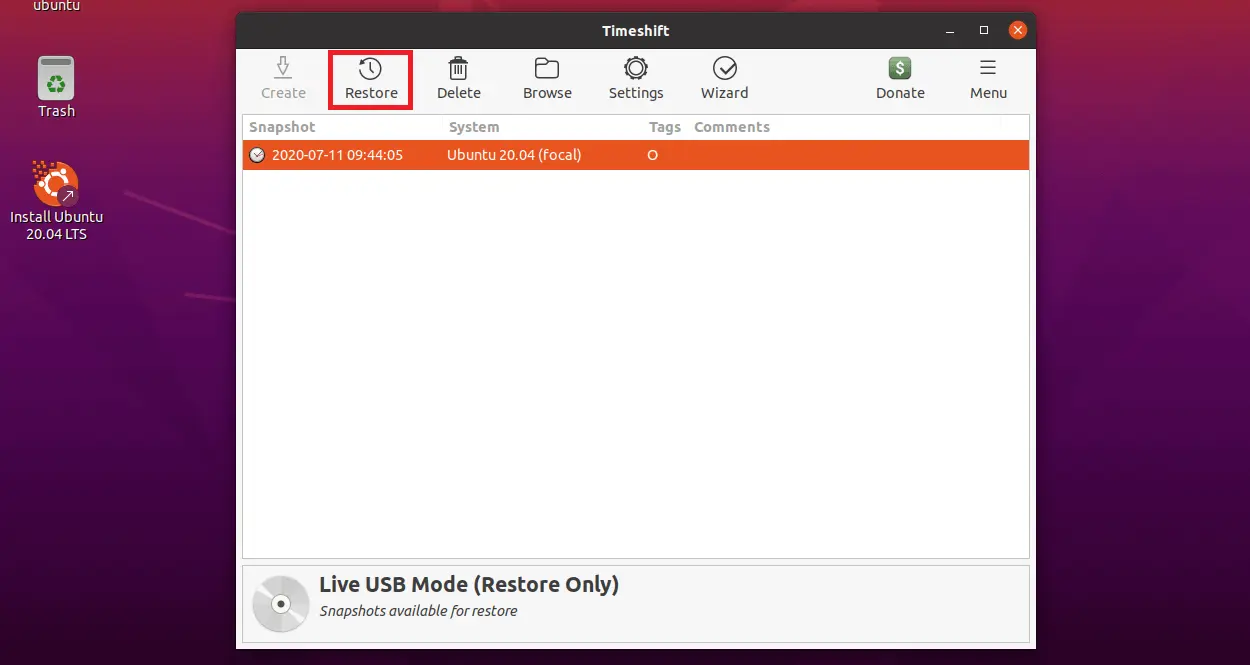
- Review the Files that will be restored
- Click Next on the Warning page
System restore is in progress.
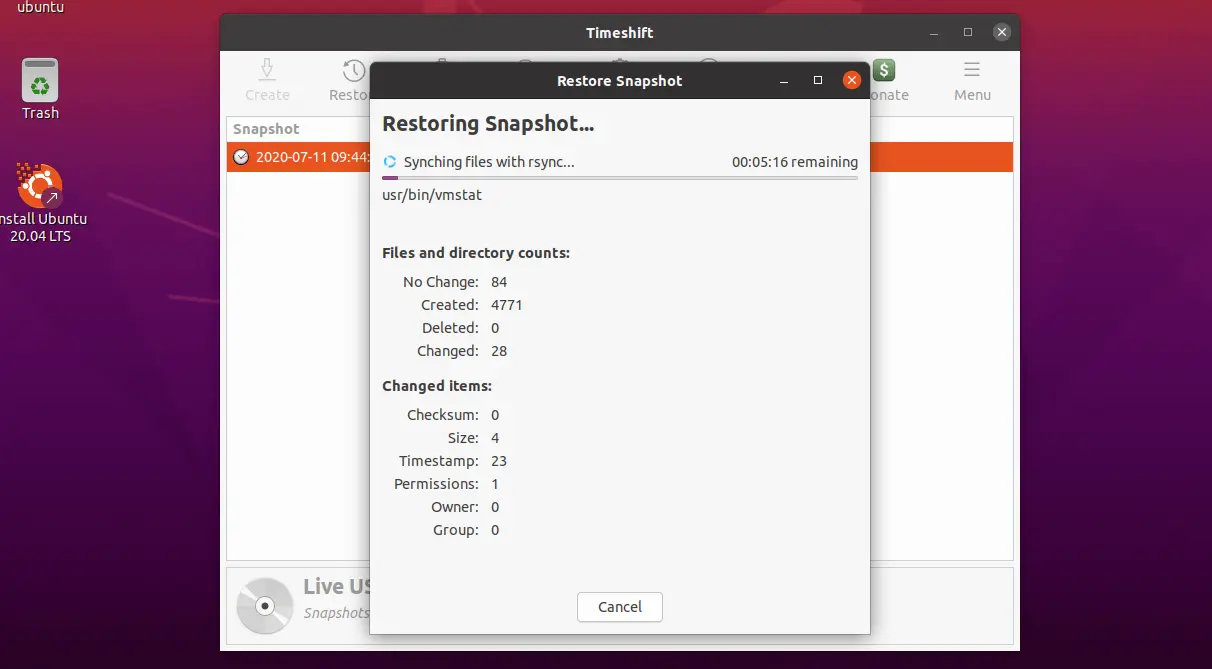
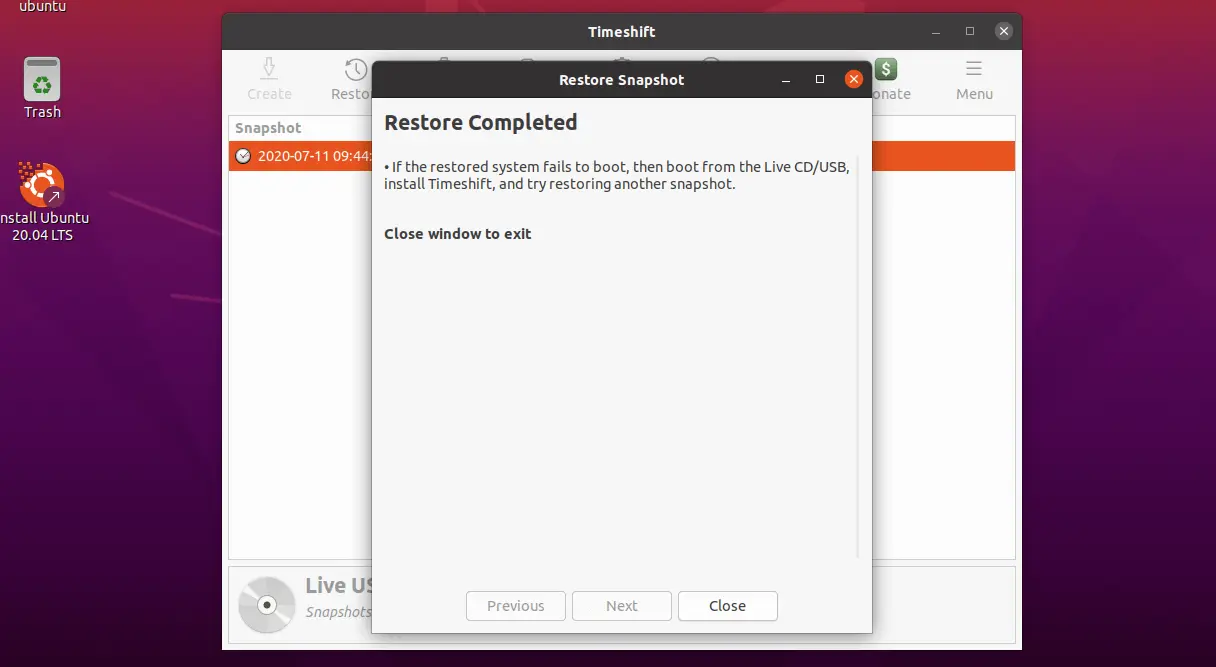
Upon completion of the system restore, reboot your system.
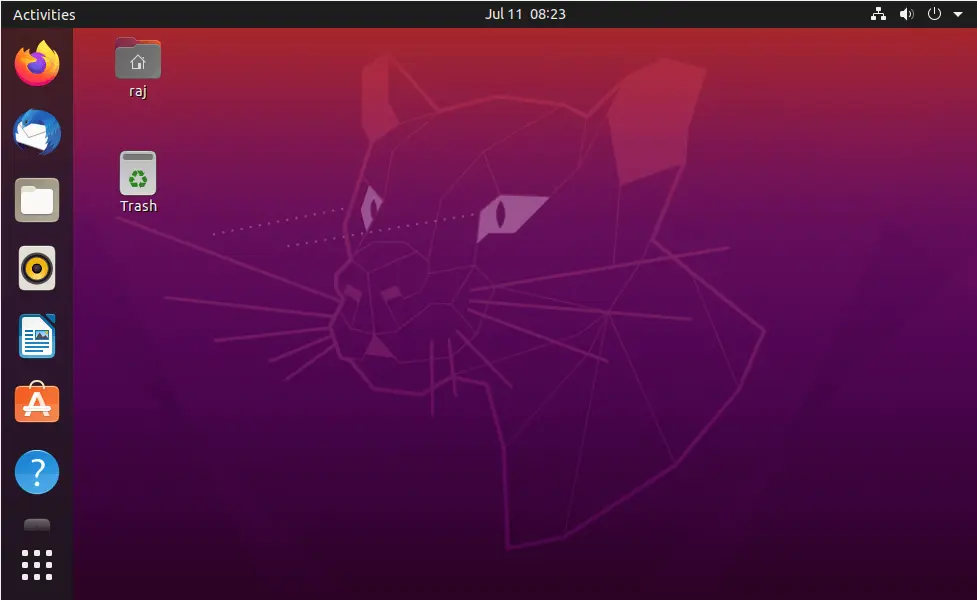
Your system should boot fine like earlier.
Conclusion
That’s All. I hope you have learned how to backup and restore the Ubuntu & Linux Mint systems with Timeshift. Please share your feedback in the comments section.
![How To Upgrade To Linux Mint 20 From Linux Mint 19 [Detailed Guide]](/post/how-to-upgrade-to-linux-mint-20/featured_hu3b6c6a25dd04b6406f79faf78c8c0be6_108894_550x0_resize_q90_lanczos.jpg)


![How To Upgrade To Ubuntu 20.04 From Ubuntu 18.04 / Ubuntu 19.10 [Detailed Guide]](/post/how-to-upgrade-to-ubuntu-20-04/featured_hu8b7fad8701aaa8998bccee63d00edef2_86059_550x0_resize_q90_lanczos.jpg)


