How To Install Ubuntu 20.04 LTS (Focal Fossa) On UEFI and Legacy BIOS System
Ubuntu 20.04 is the latest LTS and the current version of the most famous opensource desktop operating system from Canonical, released on April 23, 2020.
Ubuntu is the favorite OS for desktop users, mainly developers. Canonical releases new Ubuntu versions every six months with free support for nine months and every fourth release would receive long-term support, up to five years from the date of release.
Ubuntu 20.04 LTS will receive support until 2025.
New Features in Ubuntu 20.04
- Yaru Theme
- GNOME 3.3
- Bult-in support for WireGuard VPN
- Support for raspberry pi
- Comes with Linux kernel 5.4
READ: New Features of Ubuntu 20.04 LTS
System Requirements
Make sure your system is good enough to run Ubuntu 20.04.
- 2 GHz dual-core processor or better
- 4 GB RAM
- 25 GB of free hard drive space
- Either a DVD drive or a USB port for the installer media
- Internet Connection (Optional)
If you have a Ubuntu 18.04 system and want to upgrade it to Ubuntu 20.04, then come back here in a few days to get a link to the article.
READ: How To Upgrade Ubuntu 18.04 to Ubuntu 20.04 LTS
Try Ubuntu 20.04 LTS VM Images
If you do not have time to install Ubuntu 20.04, use the below link to download a ready to run Ubuntu20.04 VirtualBox and VMware images.
Install Ubuntu 20.04 LTS (Focal Fossa)
Ubuntu 20.04 supports UEFI firmware and can boot on PCs with secure boot enabled. So, you can install Ubuntu 20.04 on UEFI systems and Legacy BIOS systems without any problems.
Step 1: Download Ubuntu 20.04 LTS ISO
Download Ubuntu 20.04 LTS desktop iso image from the Ubuntu website.
Step 2: Create a Live USB / Write a Bootable CD
Create a Bootable CD/DVD
Windows:
Burn the downloaded Ubuntu OS image to a DVD using your favorite DVD burner in Windows.
Linux:
Replace /path/to/ubuntu-20.04-desktop-amd64.iso with the path to the downloaded ISO file.
growisofs -dvd-compat -Z /dev/sr0=/path/to/ubuntu-20.04-desktop-amd64.iso
Create a bootable USB disk
Windows:
Use Universal USB Installer (BIOS compatible) or Rufus (UEFI compatible) to create a bootable USB disk.
Linux:
Replace /path/to/ubuntu-20.04-desktop-amd64.iso with the path to the downloaded ISO file and /dev/sdx with your USB drive name.
dd bs=4M if=/path/to/ubuntu-20.04-desktop-amd64.iso of=/dev/sdx status=progress oflag=sync
Step 3: Boot from Live USB or CD
Power on your system and press F2, F10, F12 or DEL key to change/select the boot order.
To boot from Live USB and DVD, you need to select boot from USB or removable drive and boot from CD/DVD ROM drive, respectively.
Step 4: Preparing to Install Ubuntu 18.04 LTS
Do not interrupt the booting of the Ubuntu image.

Press Ctrl+C to cancel All filesystem checks if you do not want to wait for checks to complete.
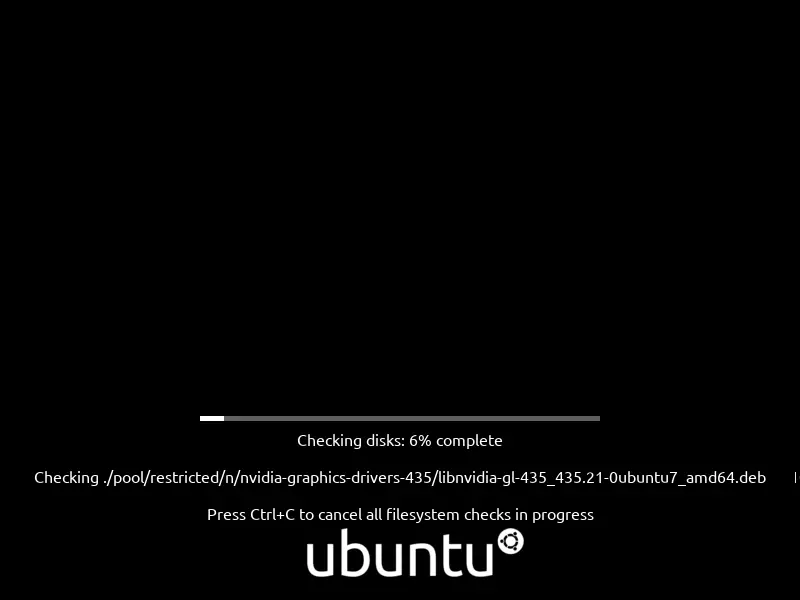
Ubuntu 20.04 live image will begin to load.
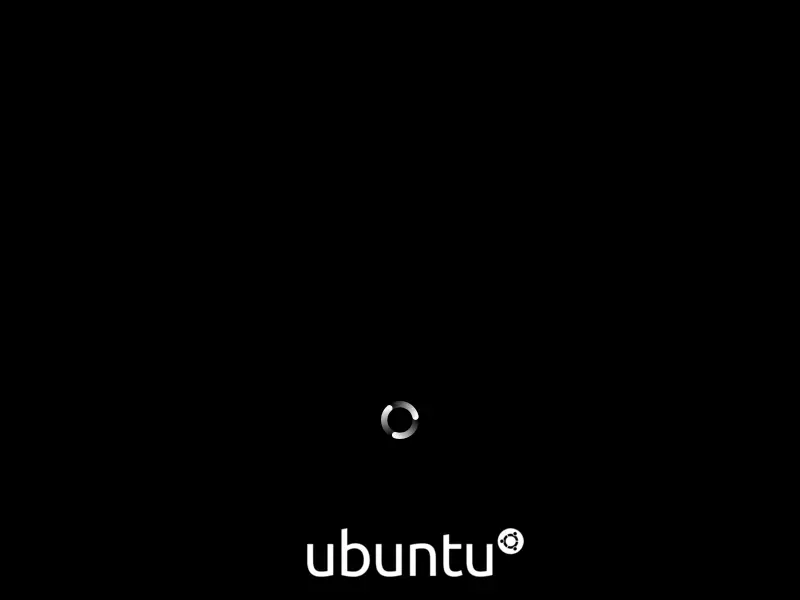
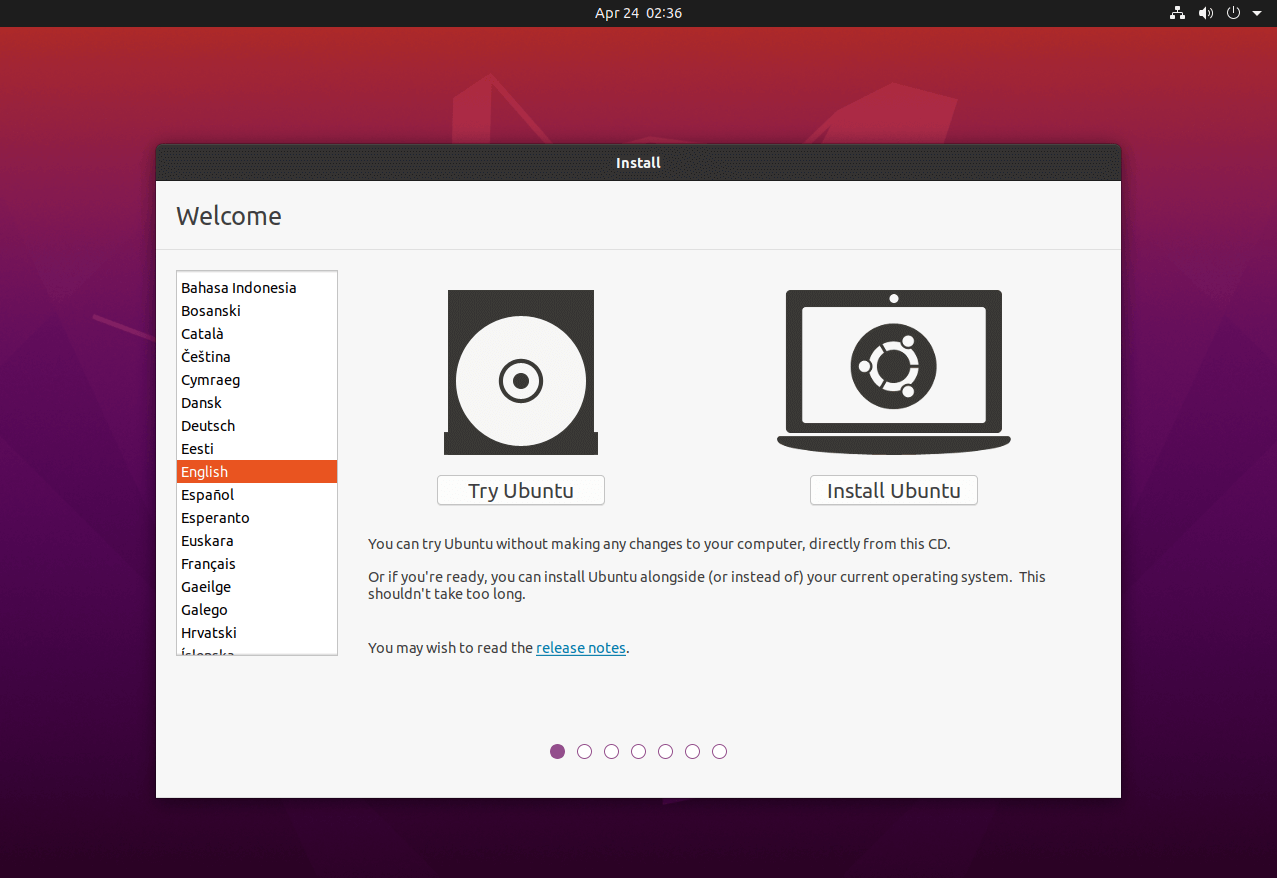
Once the system is fully booted from Live USB or DVD, you will get the OS installer window like below.
To install Ubuntu 20.04, click on Install Ubuntu.
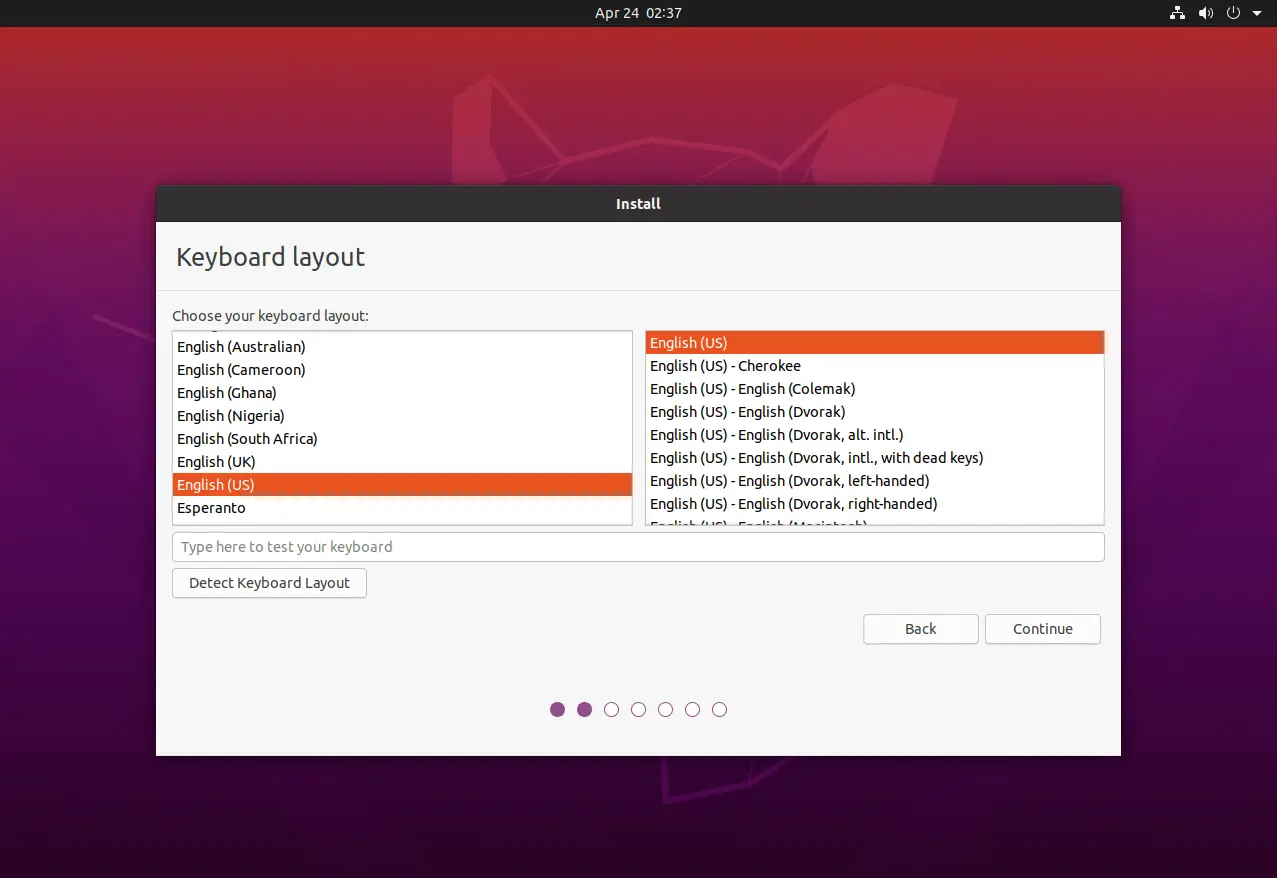
Select your keyboard layout. If you are not sure about your keyboard layout, use the Detect Keyboard Layout option.
You can also test your selected layout by typing in the test text box.
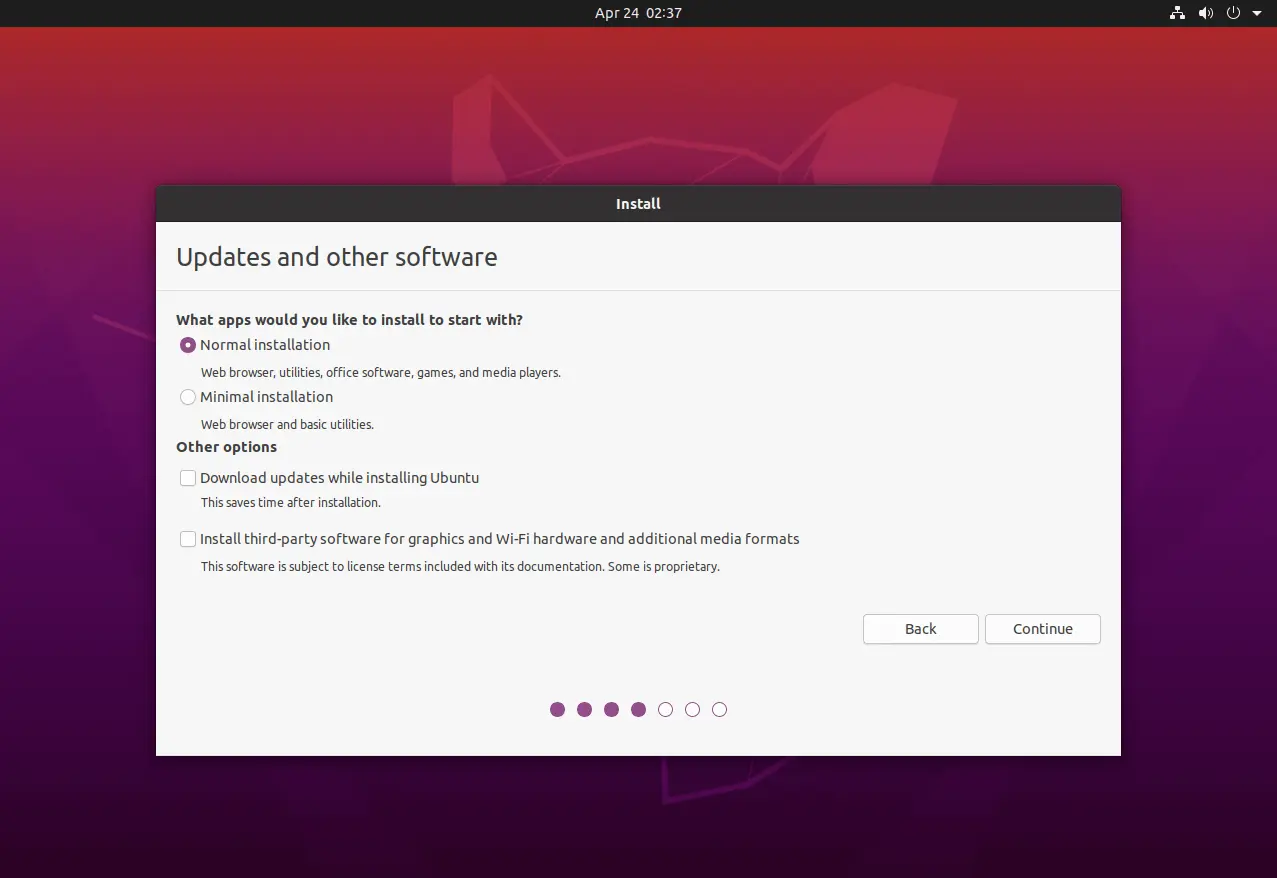
Step 5: Normal/Minimal Installation
On this screen, you need to choose the apps for installation.
Normal Installation – You will get a graphical desktop environment with all regular software. Minimal Installation – You will get a basic desktop environment with a web browser and core system administration utilities.
You can either choose to install updates and other third-party software while installing Ubuntu 20.04 or leave it (you can install them later if you wish).
The updates and third-party software installation requires an active internet connection to your system. The installation may take a bit more time depends on the downloadable contents.
For this demo, I chose to do Ubuntu Normal installation
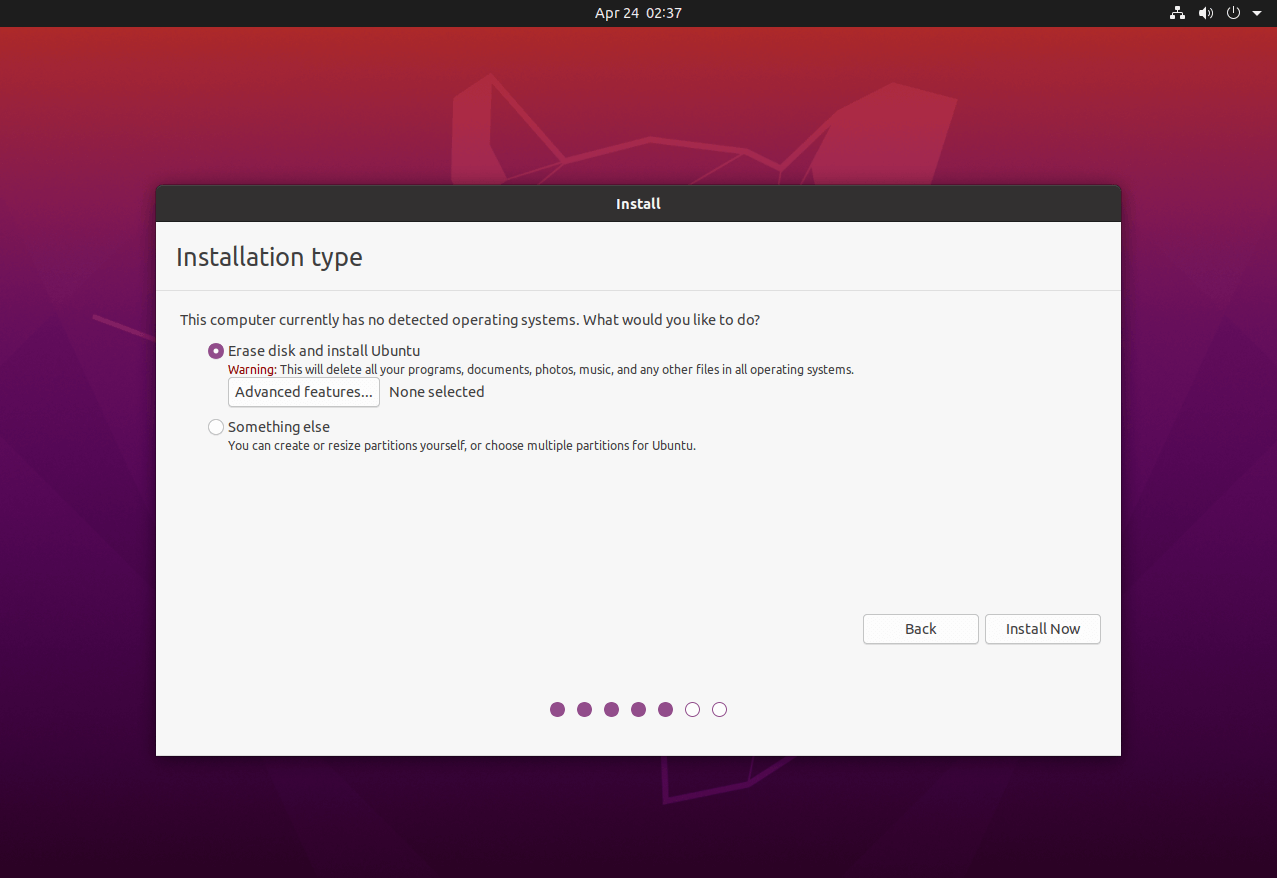
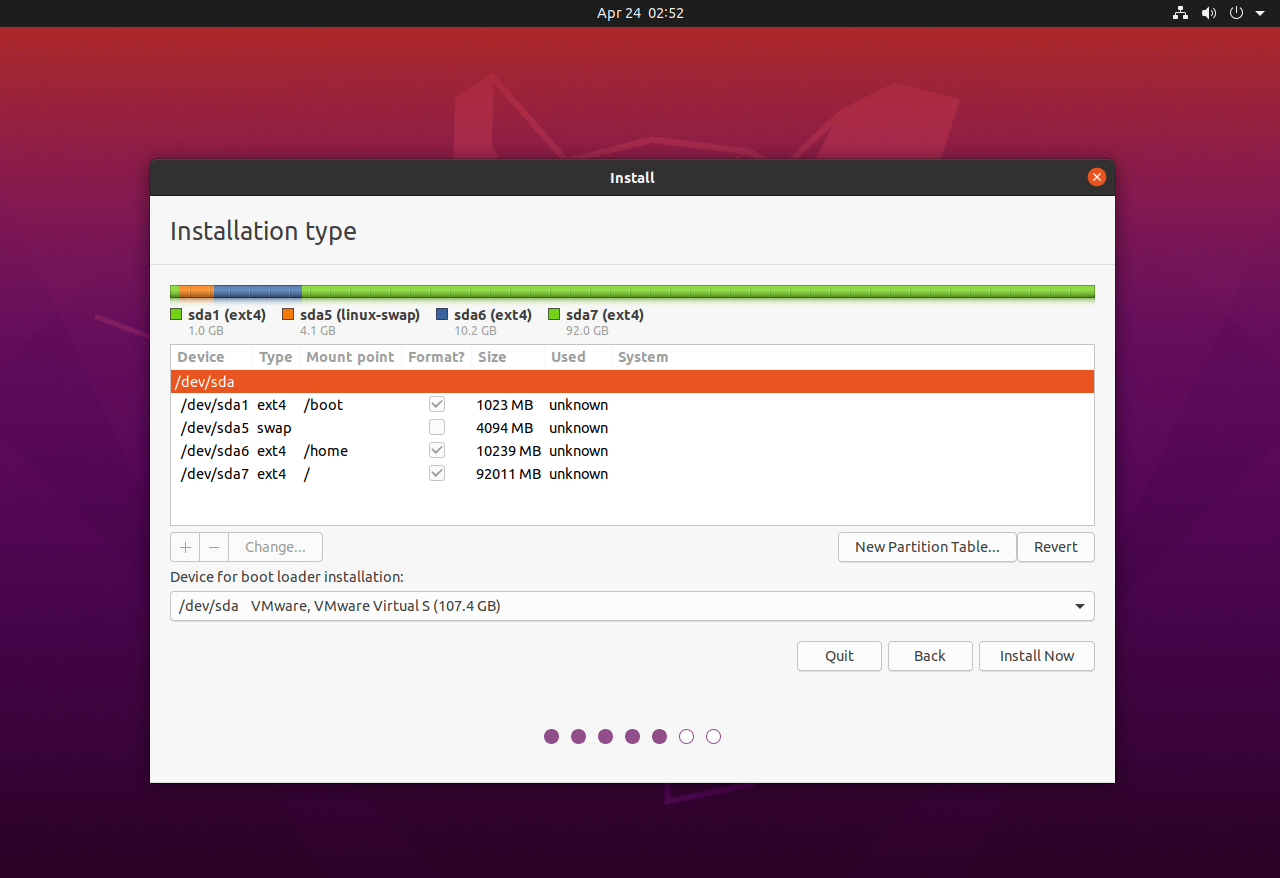
Step 6: Create Partitions
This Ubuntu 20.04 installation is on the empty hard drive. So, I have only two options in the installation type. Depends on the other OSes on your hard drive, you will get more options.
Please choose any one of the methods.
6a: Automatic Partitioning
Without LVM
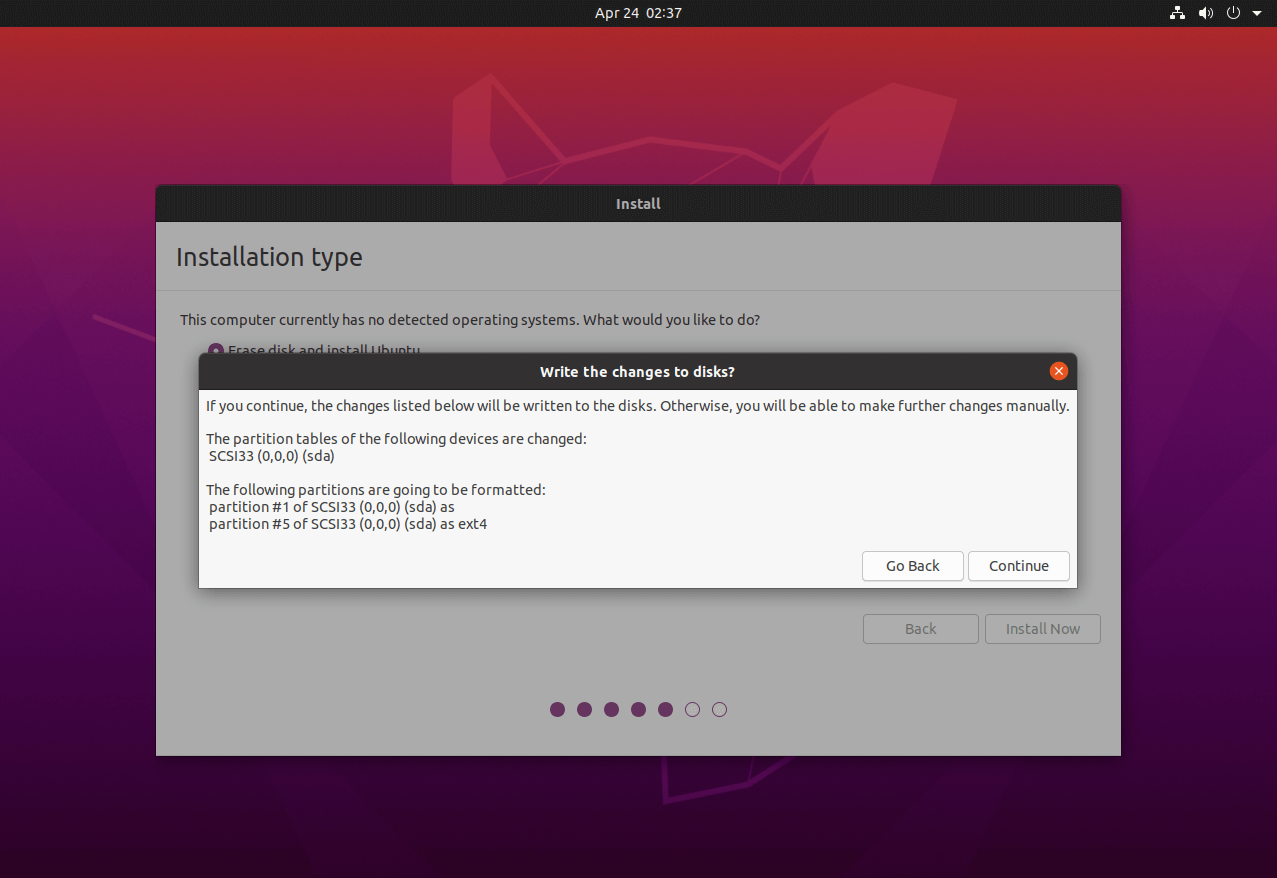
Erase disk and install Ubuntu – The installer will format the entire hard drive and install the OS. The Ubuntu installer will take care of creating the required partitions (without LVM) for OS installation. Use this option only if you don’t mind about the partition layout and its size.
Click Install Now.
Now, the installer will ask you to confirm the auto partitioning. Click on Continue.
With LVM
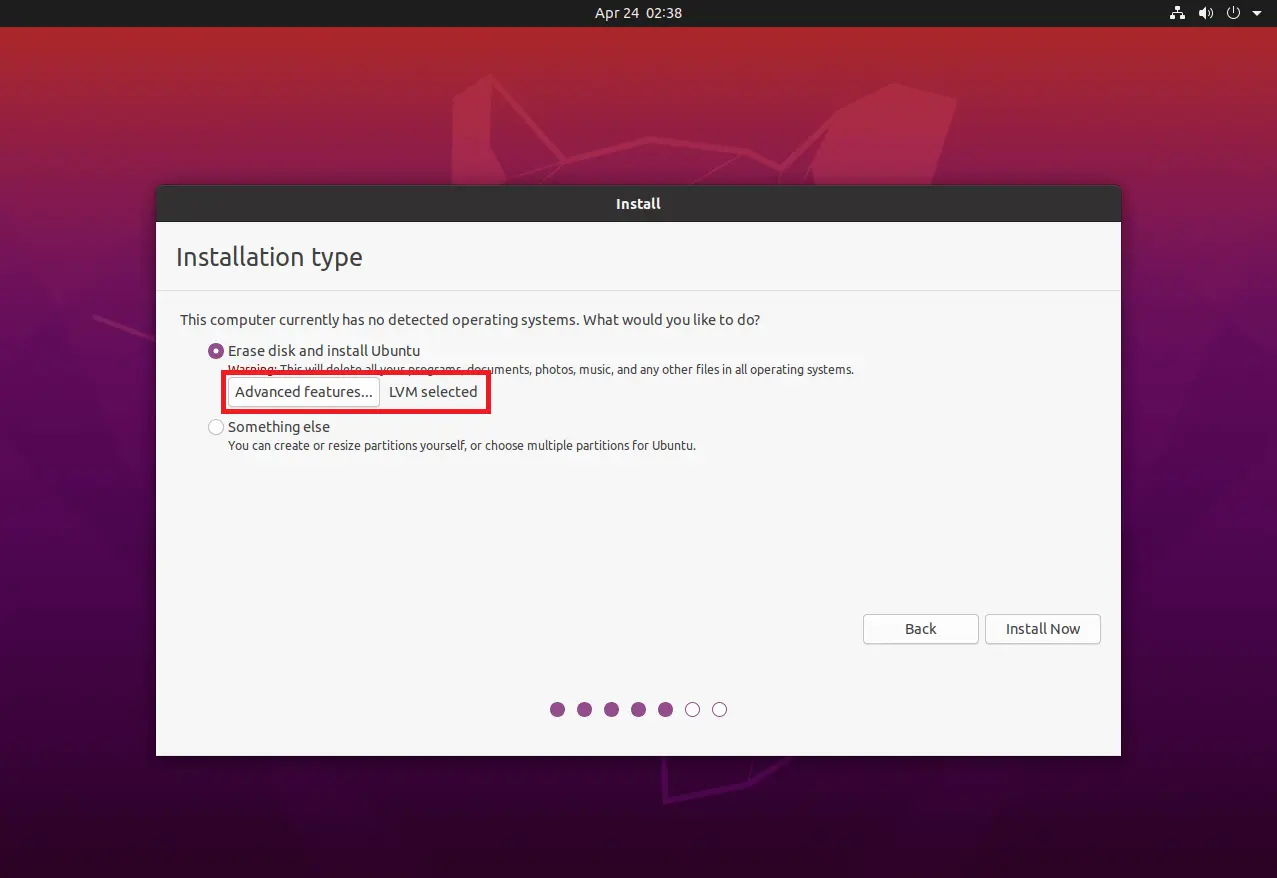
Click on Advanced features to select use LVM with the new Ubuntu Installation.
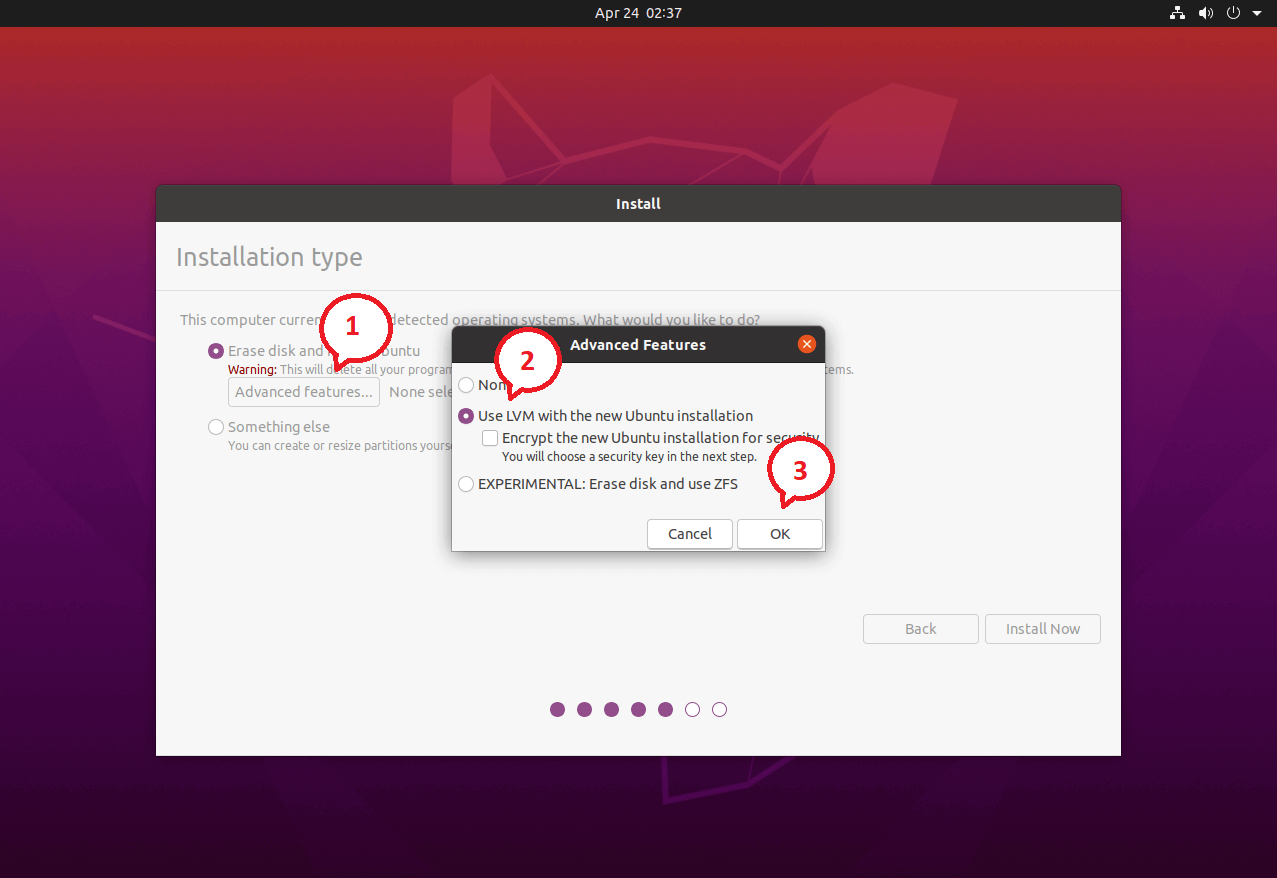
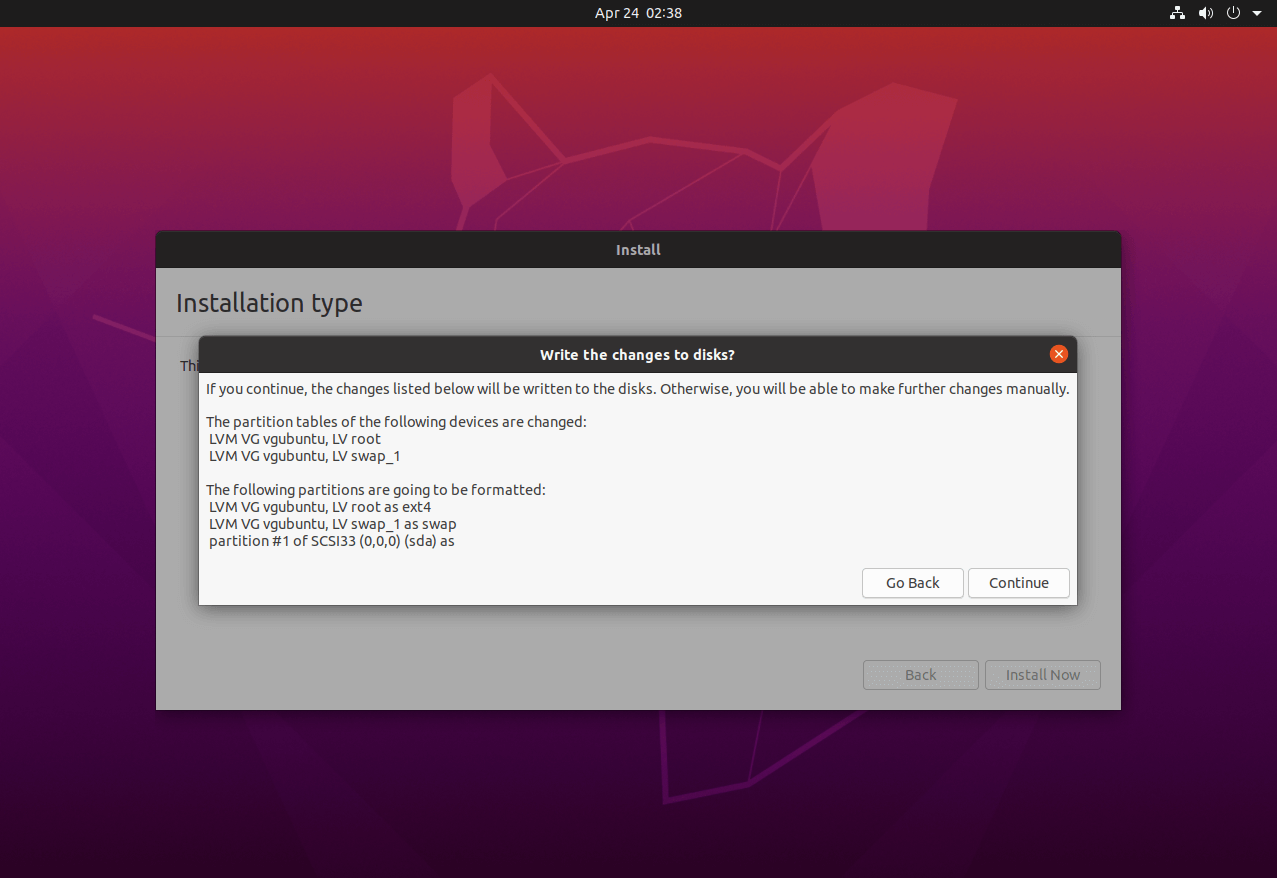
Ensure the LVM selected is shown and then click on Install Now.
Now, the installer will ask you to confirm the auto partitioning. Click on Continue.
6b: Manual Partitioning
Something else – Use this option in case you want to create partitions with the custom size. Click the Continue.

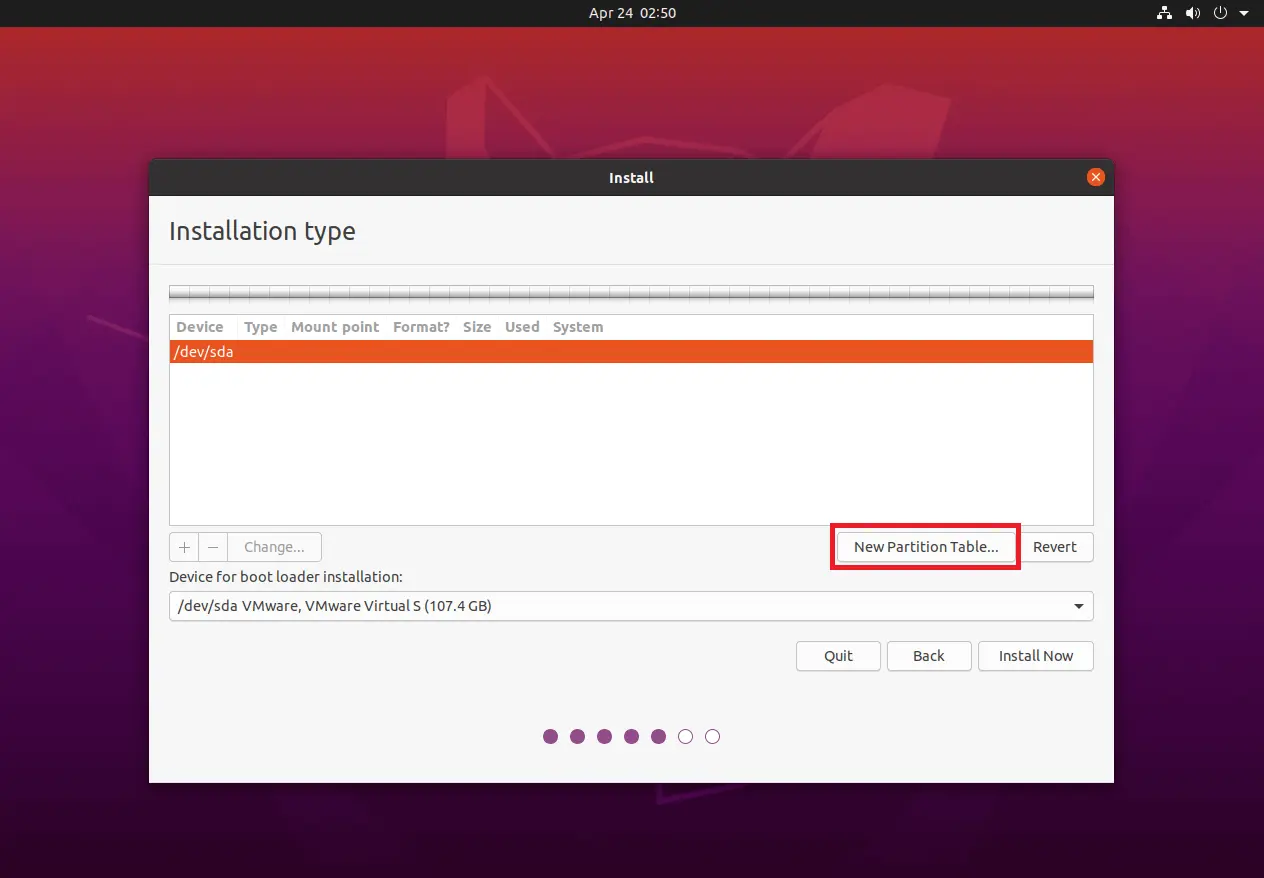
On this page, the installer will list all the available hard disks. In my case, I have only one hard disk with a size of 100GB.
Since this is a new disk, I had to click on New Partition Table to create an empty partition.
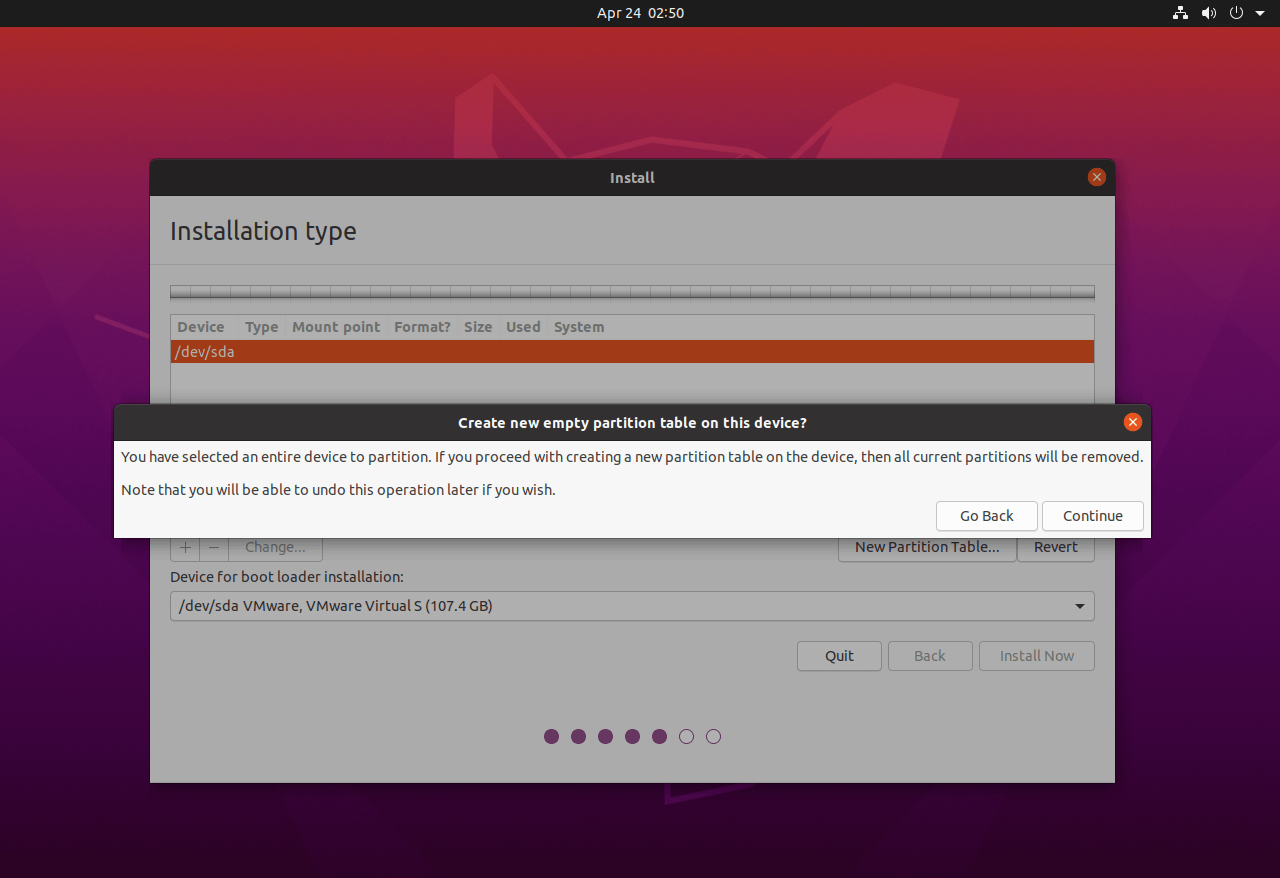
The Popup window will ask you to confirm the creation of an empty partition table. Click on Continue.
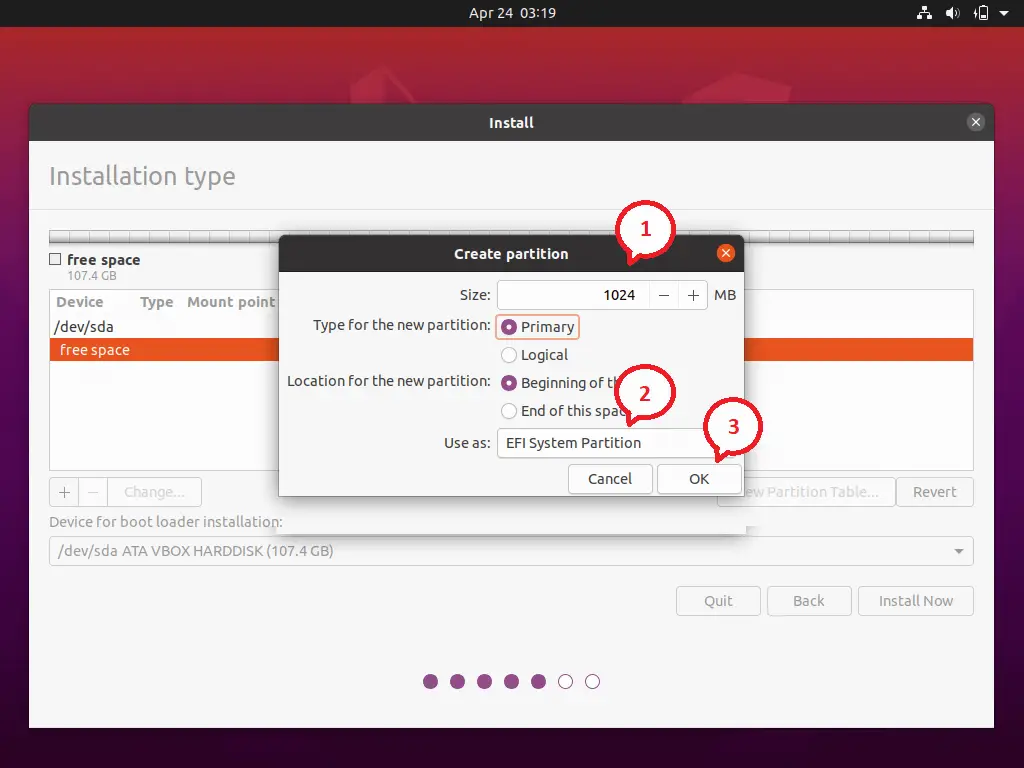
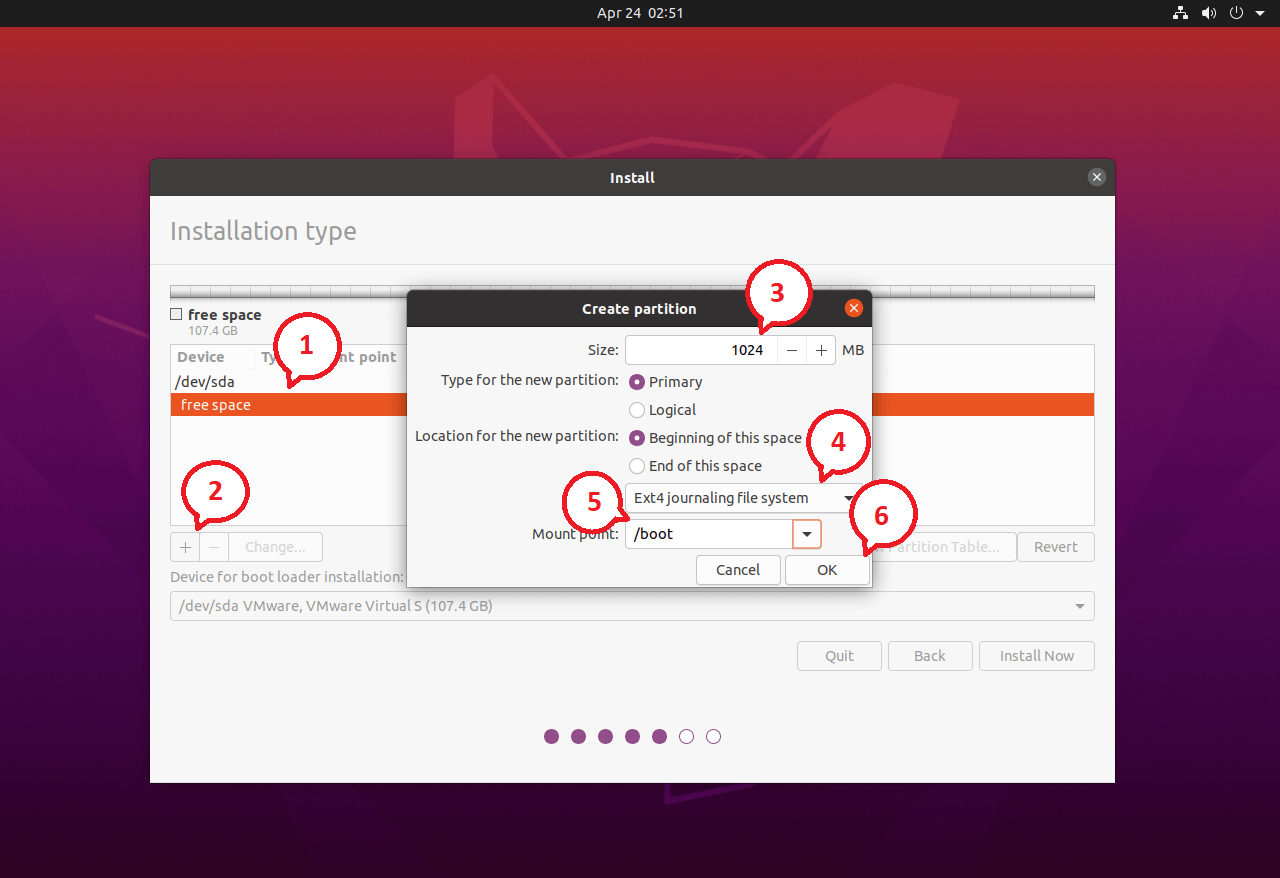
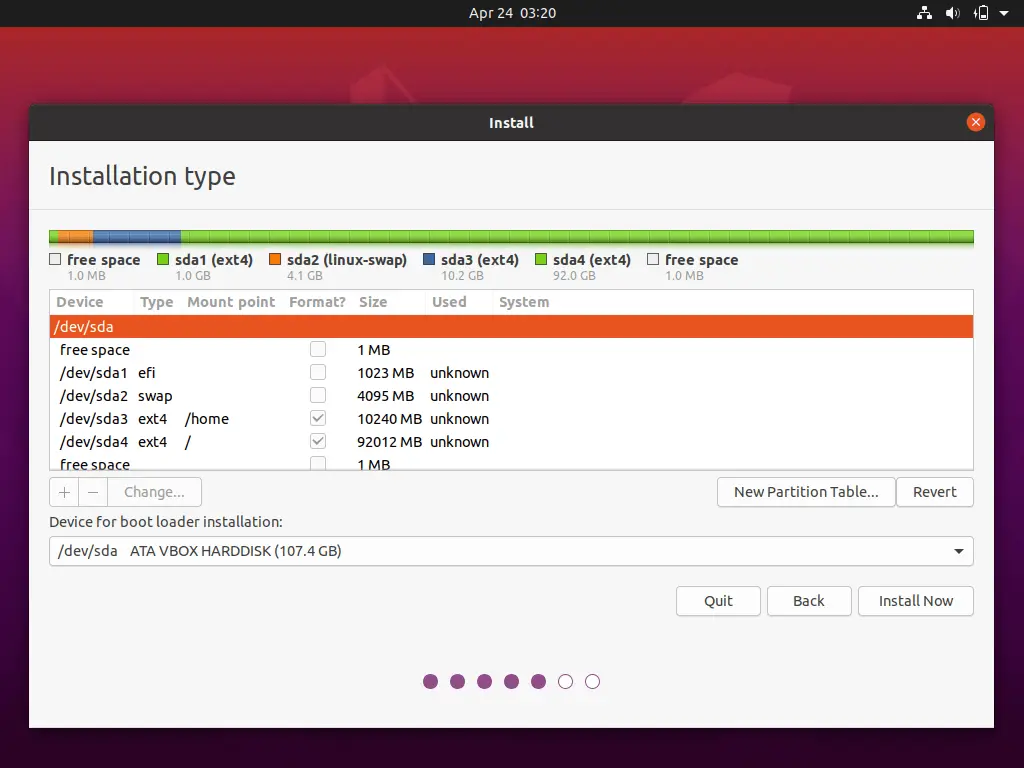
We will now create four partition for our Ubuntu 20.04 installation.
Partition details are shown below:
UEFI System:
- EFI : 1GB
- swap – 4GB
- /home – 10GB
- / – Remaining (85GB)
Legacy BIOS:
- /boot – 1GB
- swap – 4GB
- /home – 10GB
- / – Remaining (85GB)
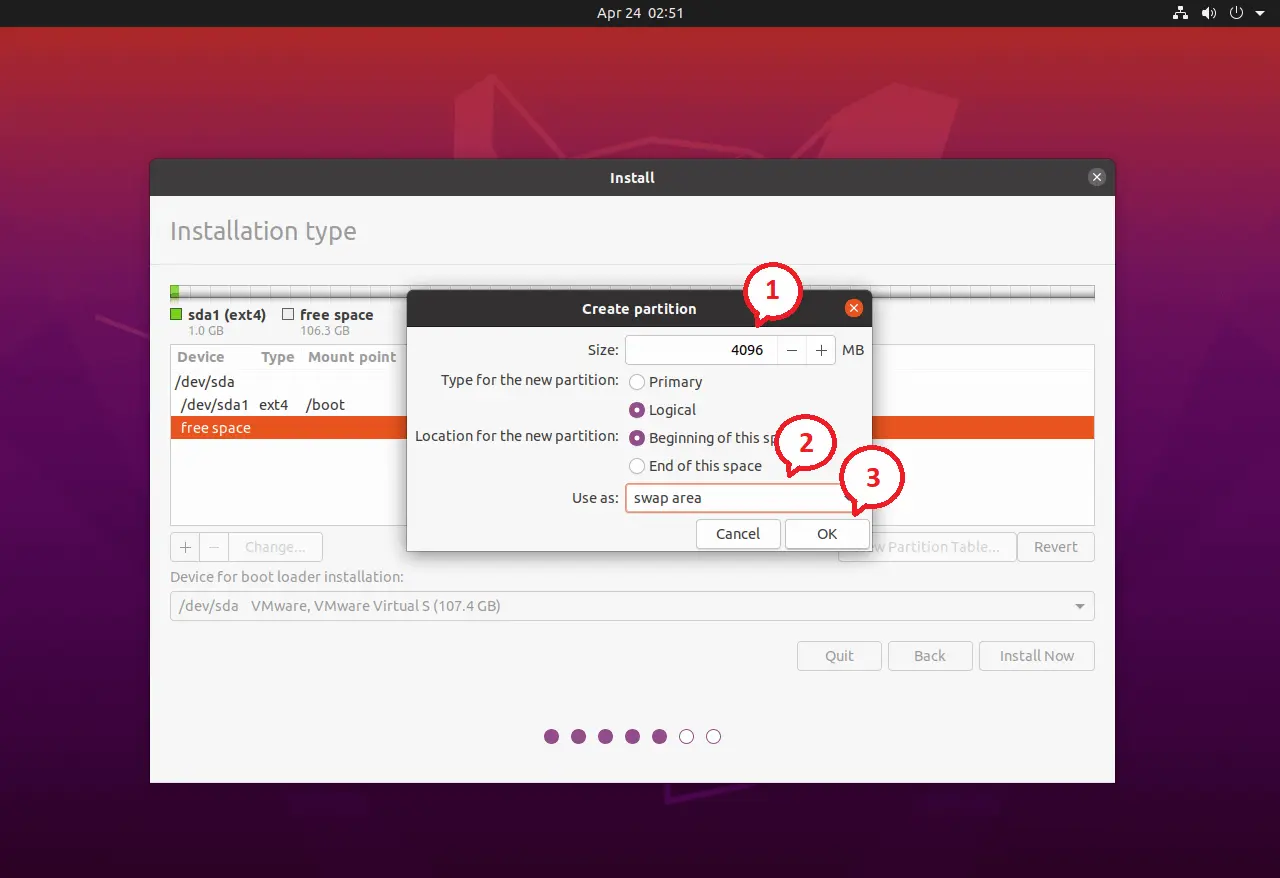
Select the free space and then click on the + sign at the bottom left to create a partition.
UEFI System: Following shows for efi partition.
Legacy BIOS: Following shows for /boot partition.
Following screen shows for the swap partition. It is recommended to have the swap partition twice the size of the memory. Here, I have created a 4GB swap partition.
If your system has enough memory, then you can choose not to have a swap partition.
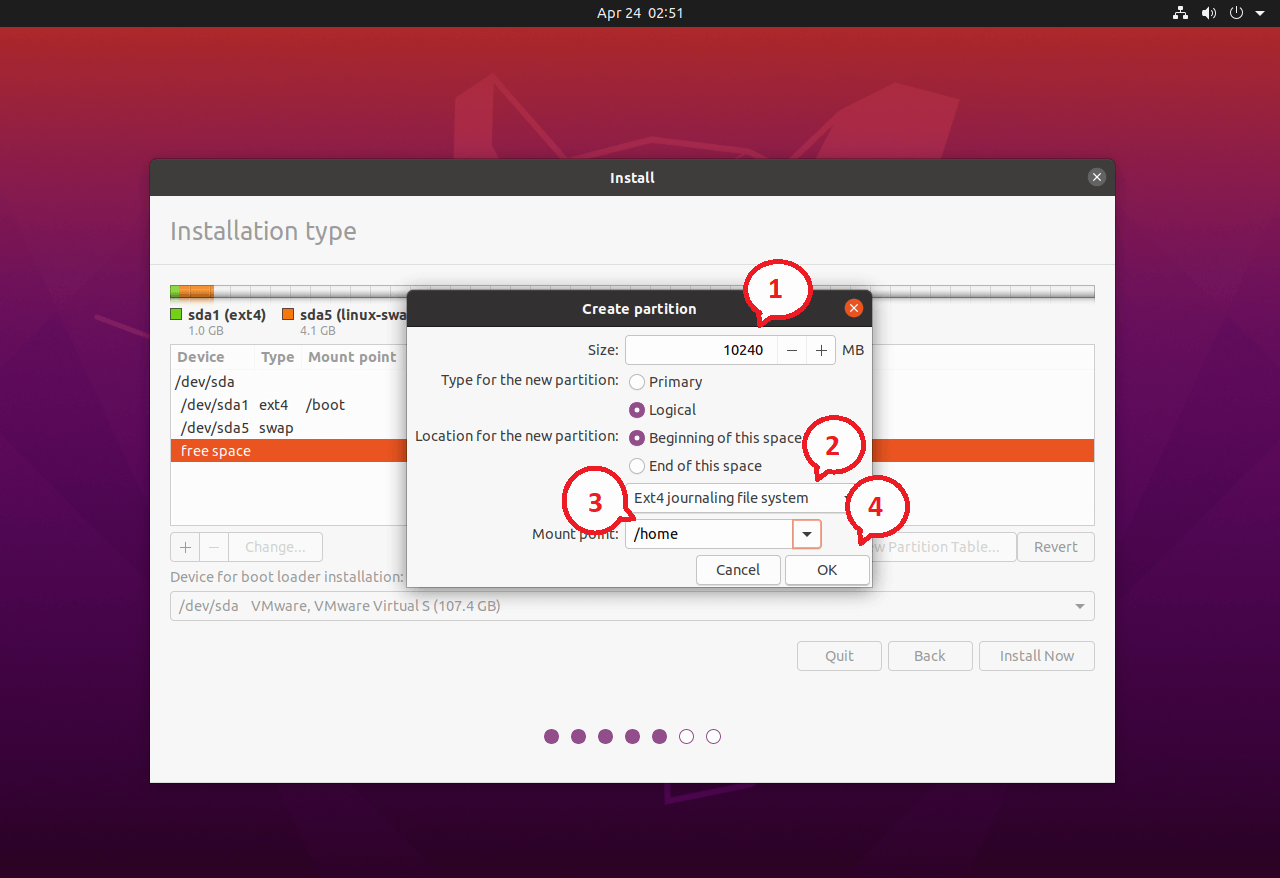
The following is for /home partition.
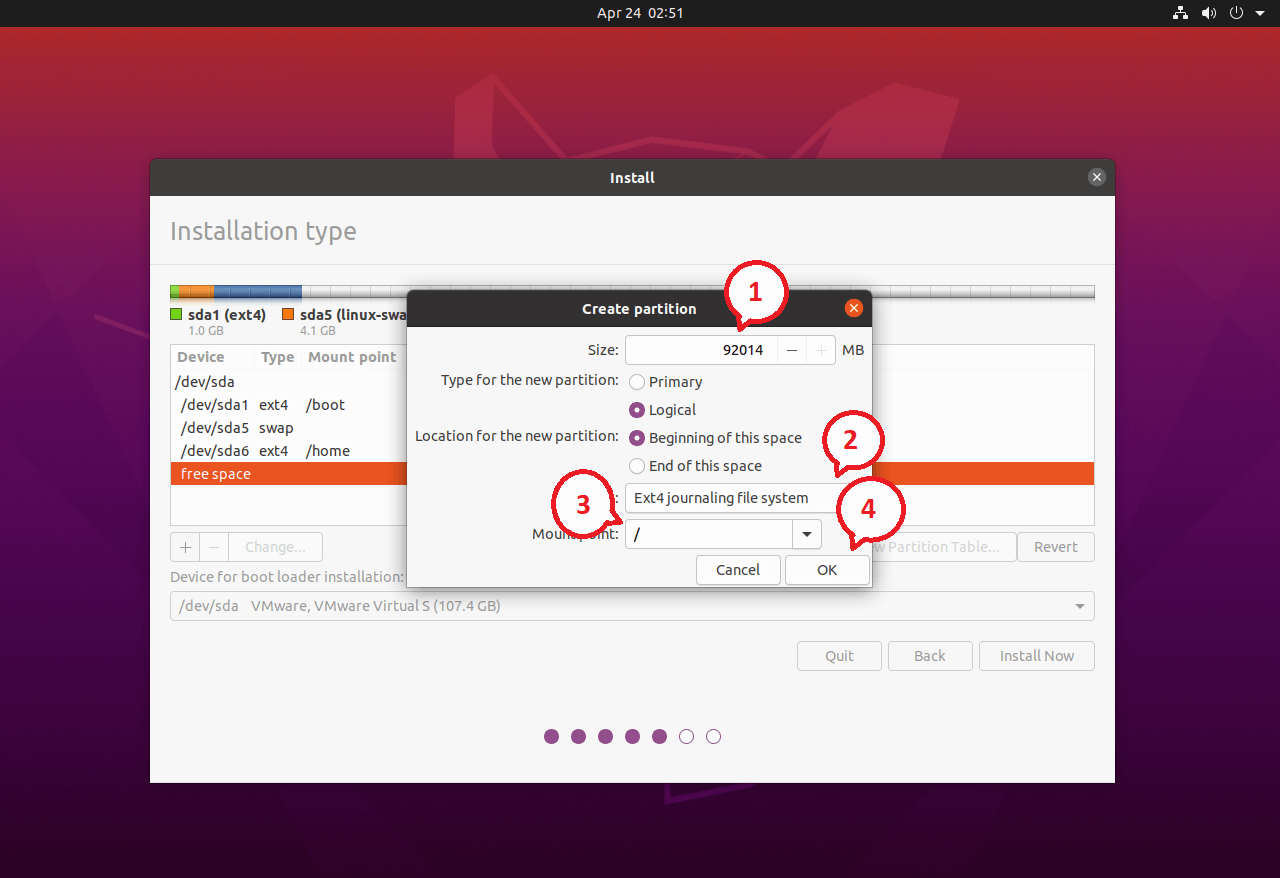
The Following is for / (root) partition. We will use the remaining space for / partition.
Review your partition layout and click on Install Now.
UEFI System:
Legacy BIOS:
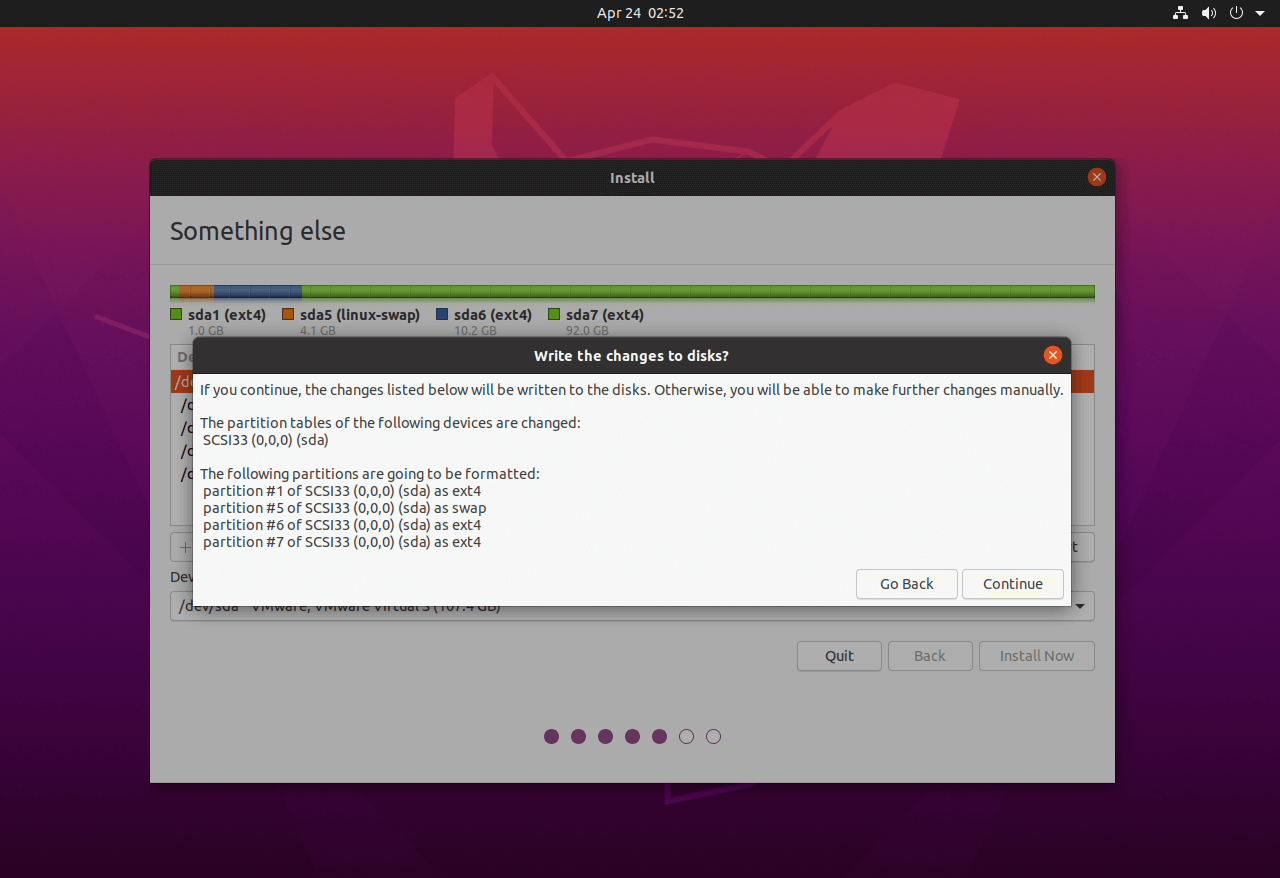
Click on Continue to create partitions as per the plan.
Step 7: Additional Configurations
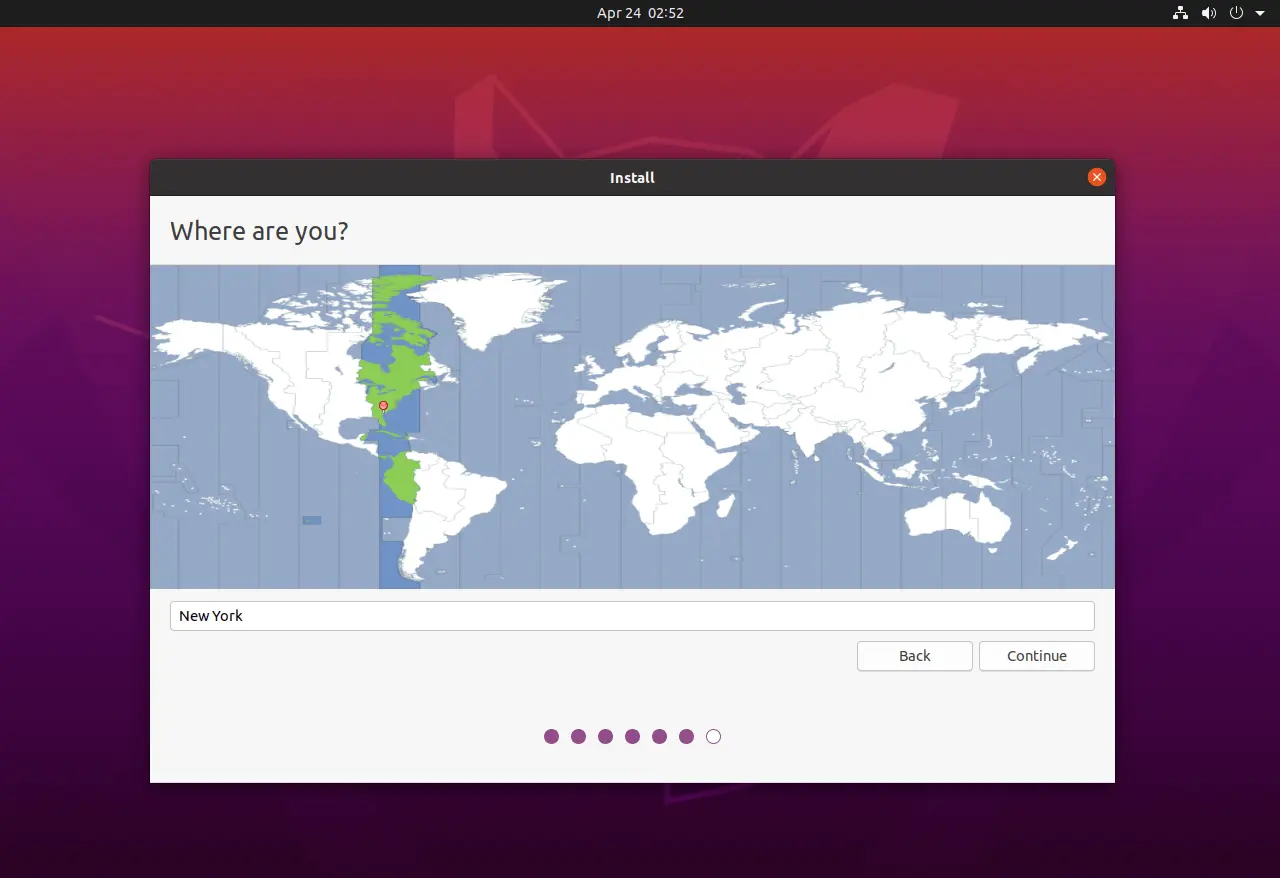
Select your location from the map to set the system timezone. Then, click on Continue.
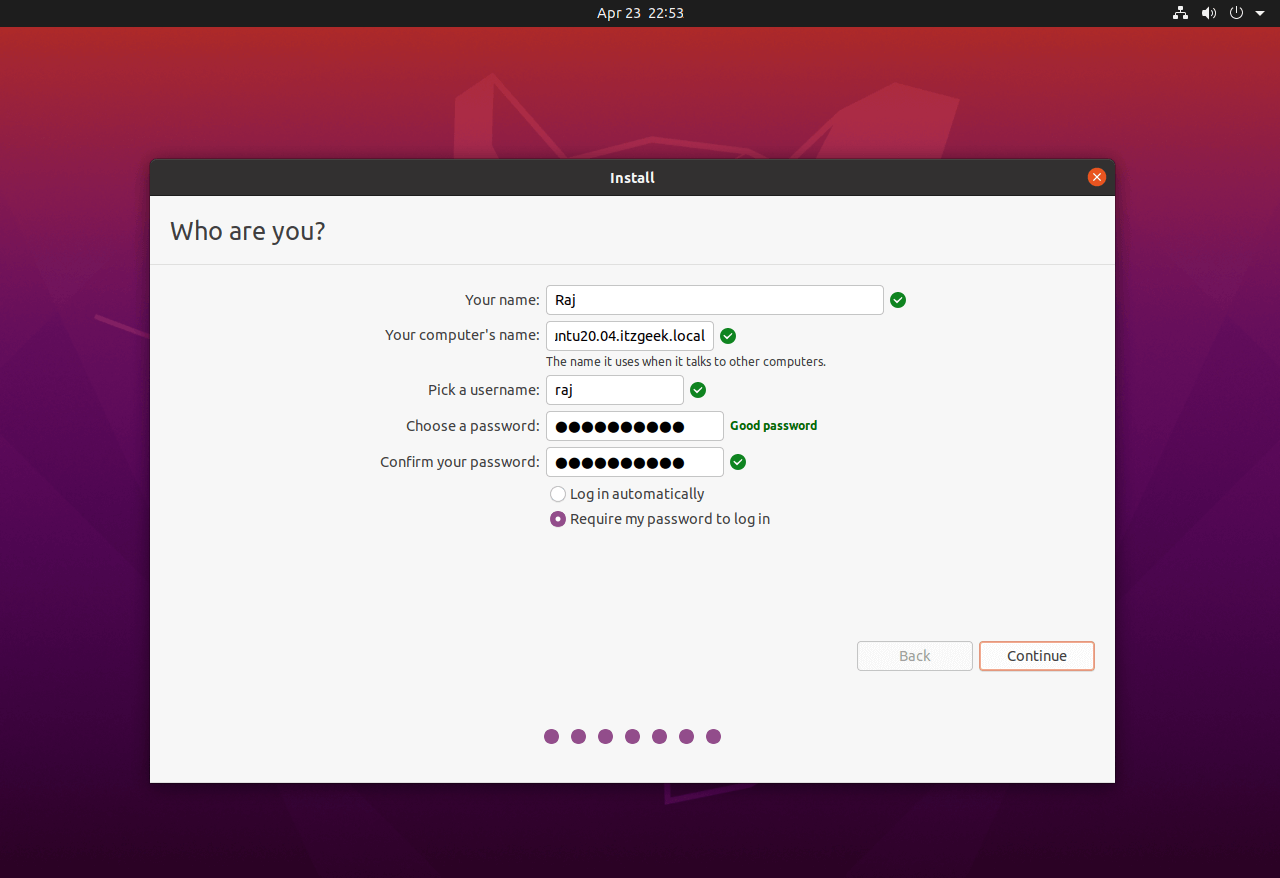
In this screen, you can create a username and password to access the system. It’s best if you set a very secure password for your user.
Also, set the hostname for your system.
Here is one thing you should remember – if you chose to log in automatically, then the system will directly take you to desktop without asking any credentials.
Click on Continue.
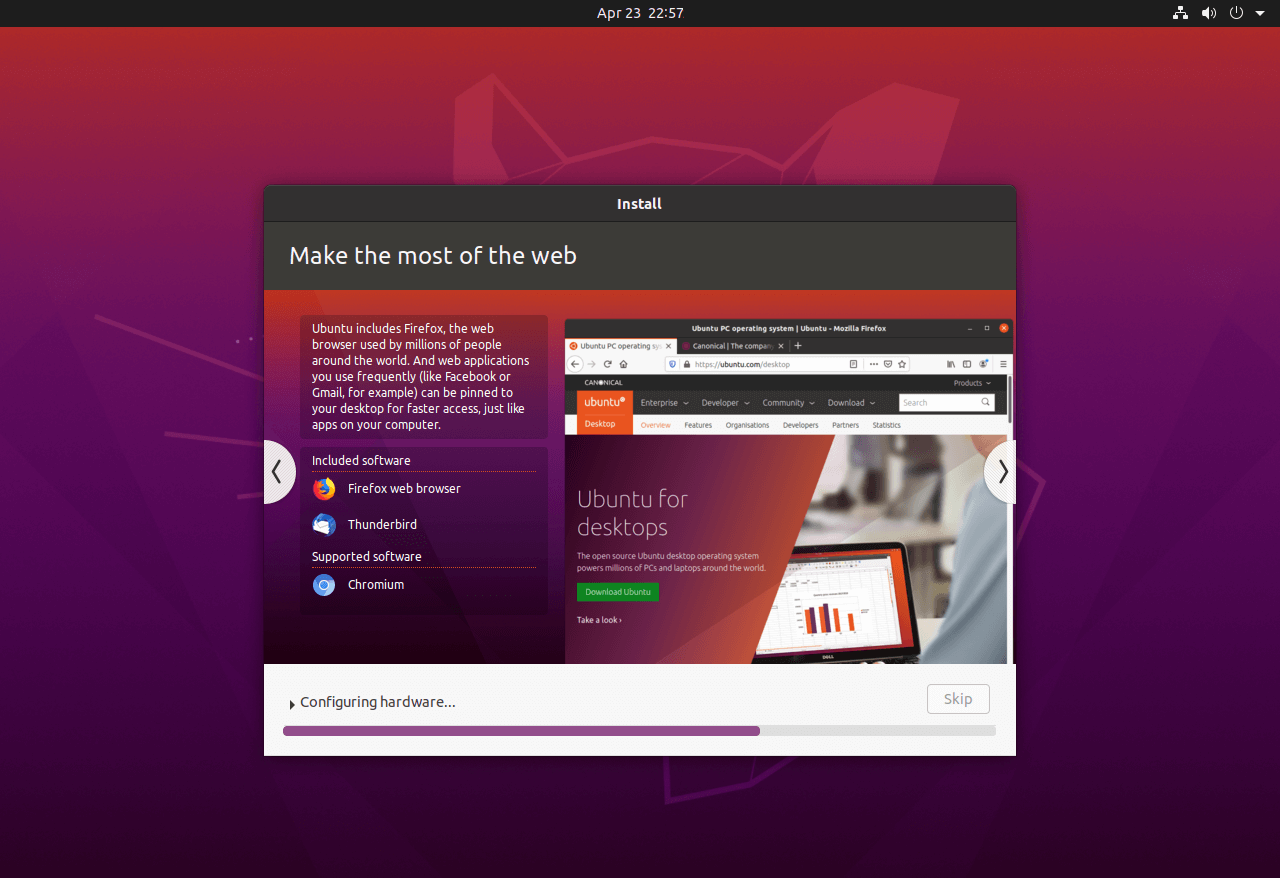
Step 8: Ubuntu 20.04 – Installation
The below screenshot shows the installation of Ubuntu 20.04.
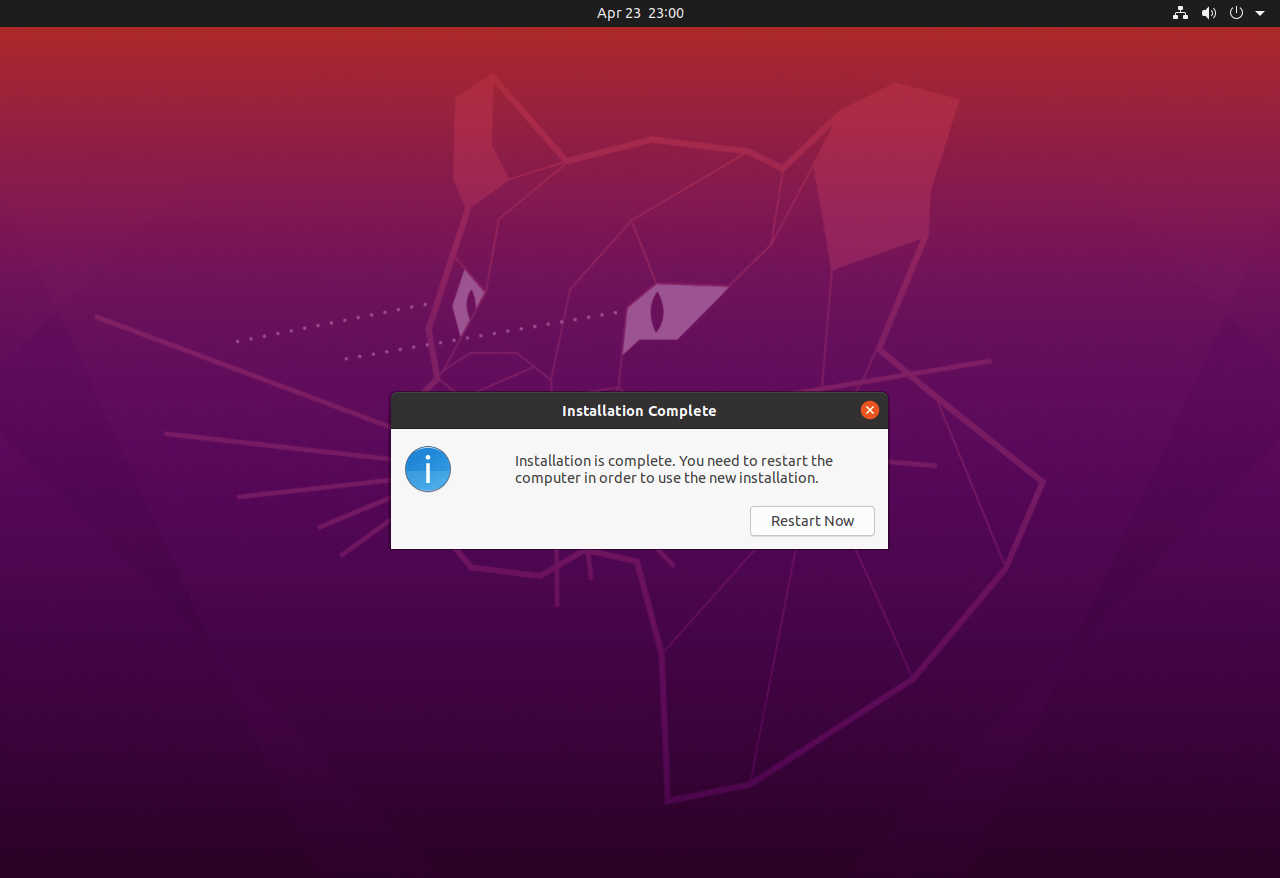
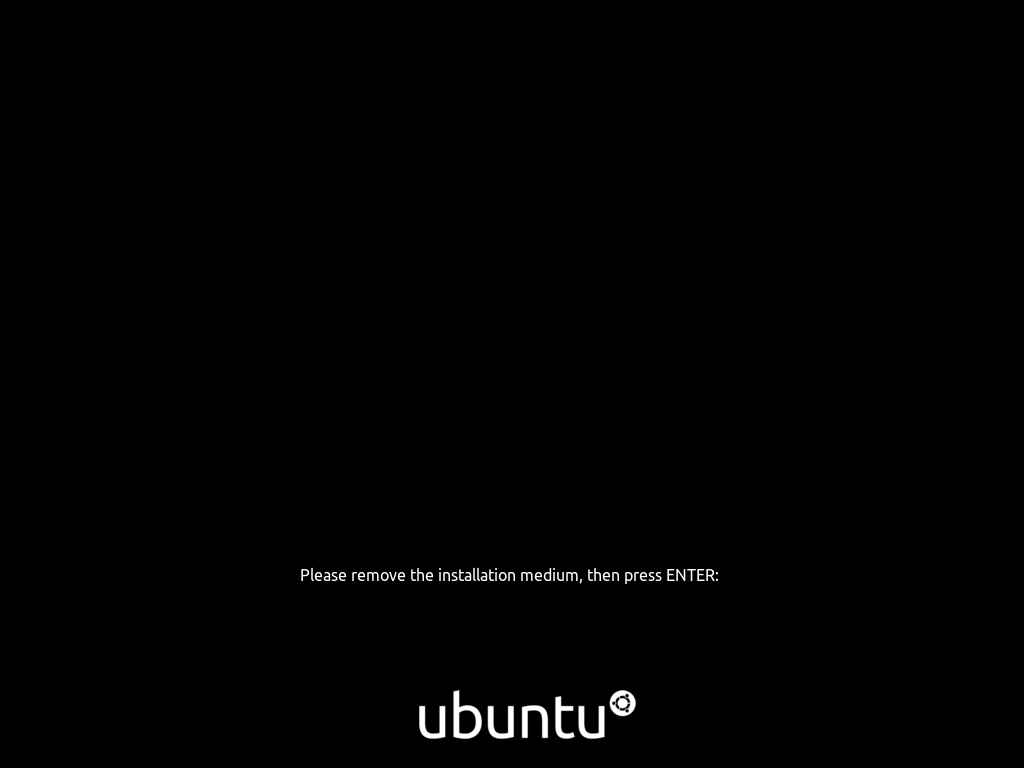
Remove the installation DVD ROM, if required, and then press Enter.
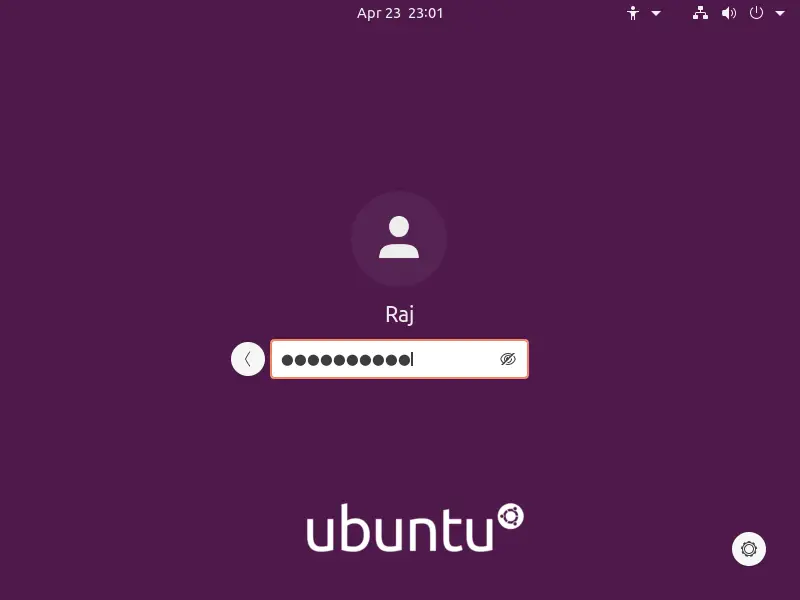
Once the system is restarted, you will get a login window. Log in to your system with the username and password that you created earlier.
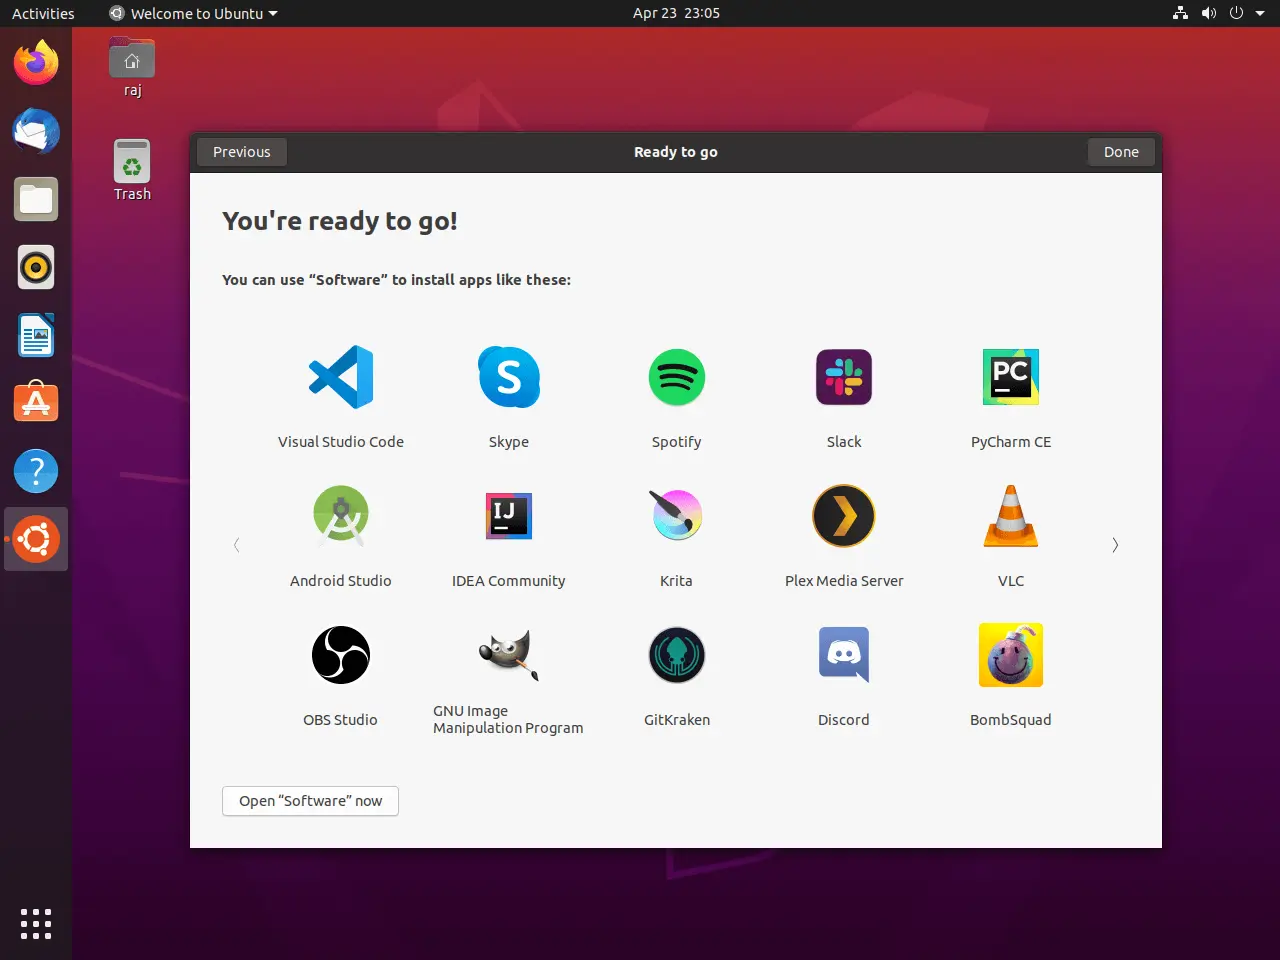
Step 9: Post Installation
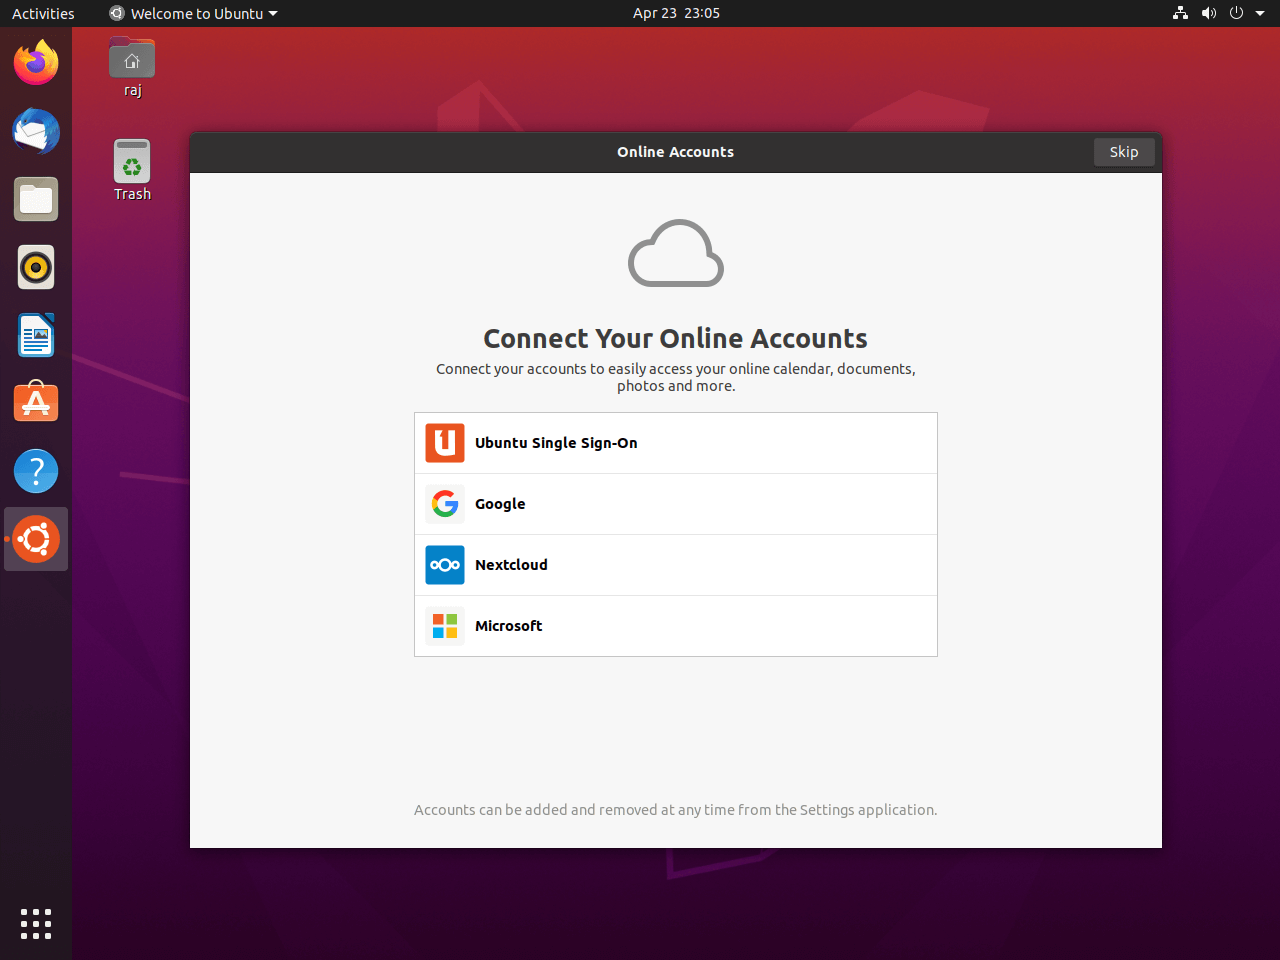
On successful login, you will get the below welcome screen that would ask you to do a post-installation setup.
Connect your online accounts to access them from the Ubuntu system directly if needed
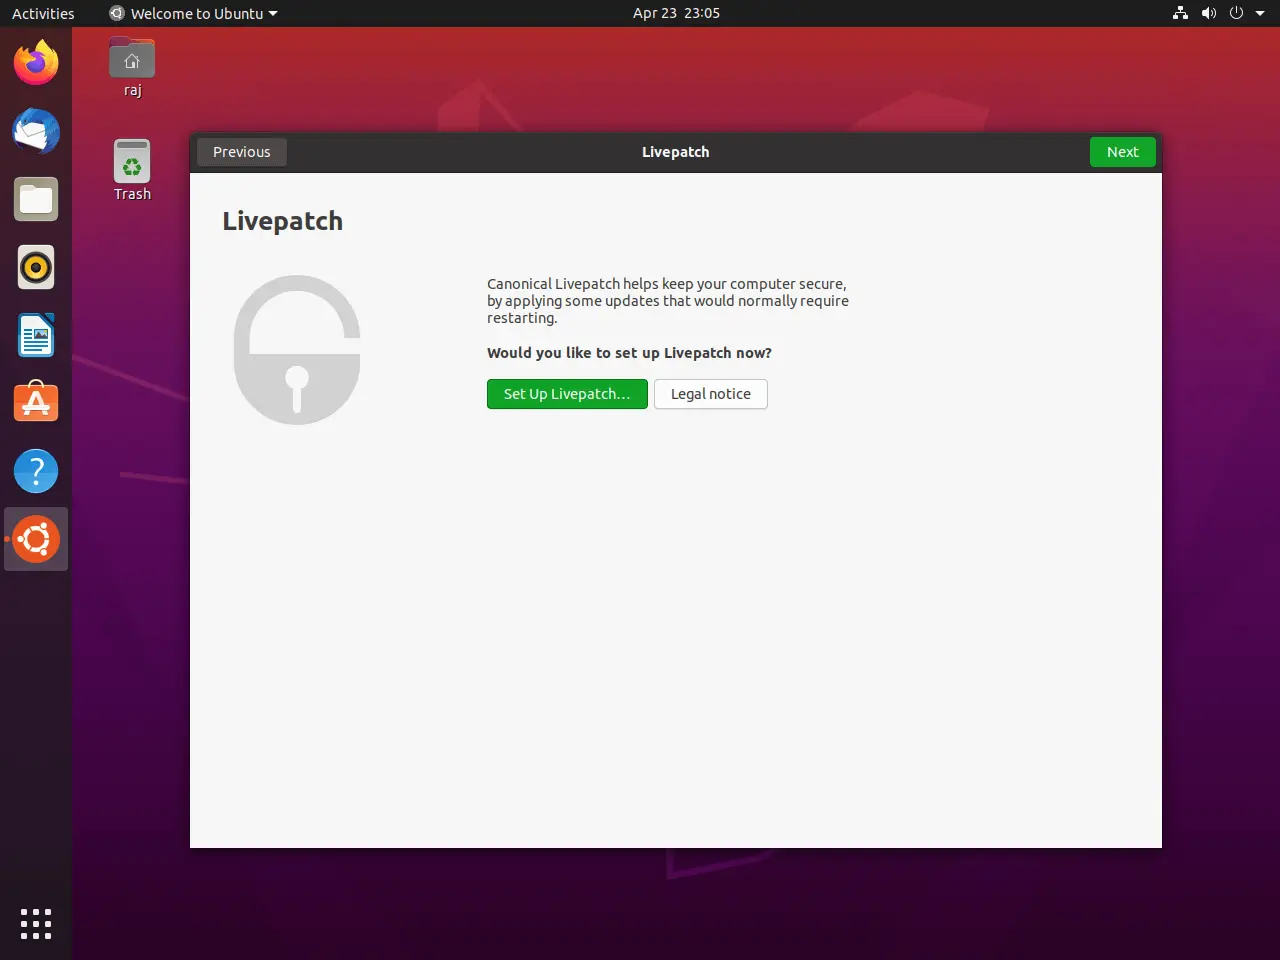
If you are a subscriber to Ubuntu Advantage, then configure Livepatch that helps you automatically apply fixes without rebooting your system.
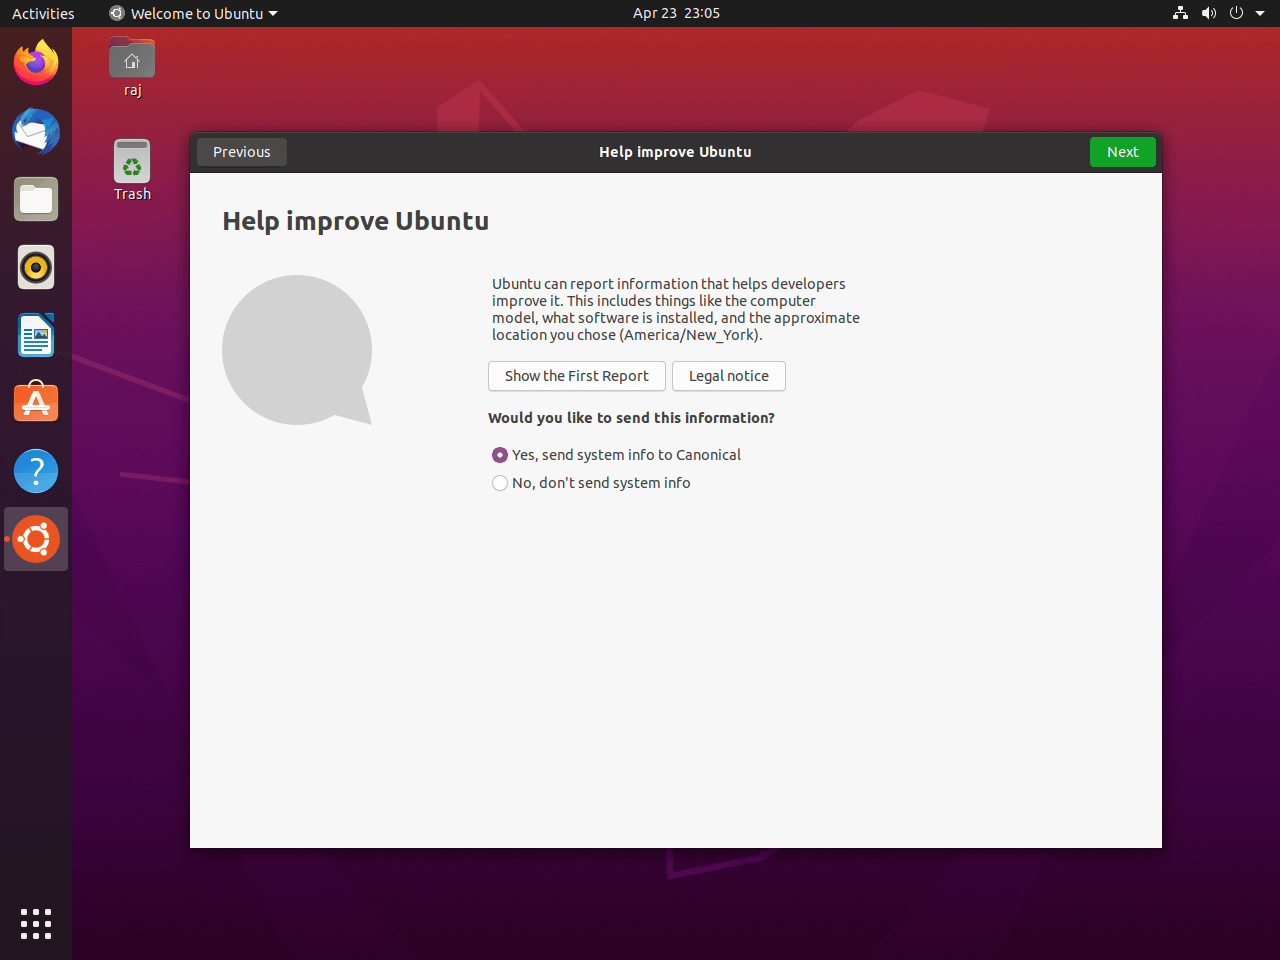
You can either choose to send or not to send your system information to Canonical.
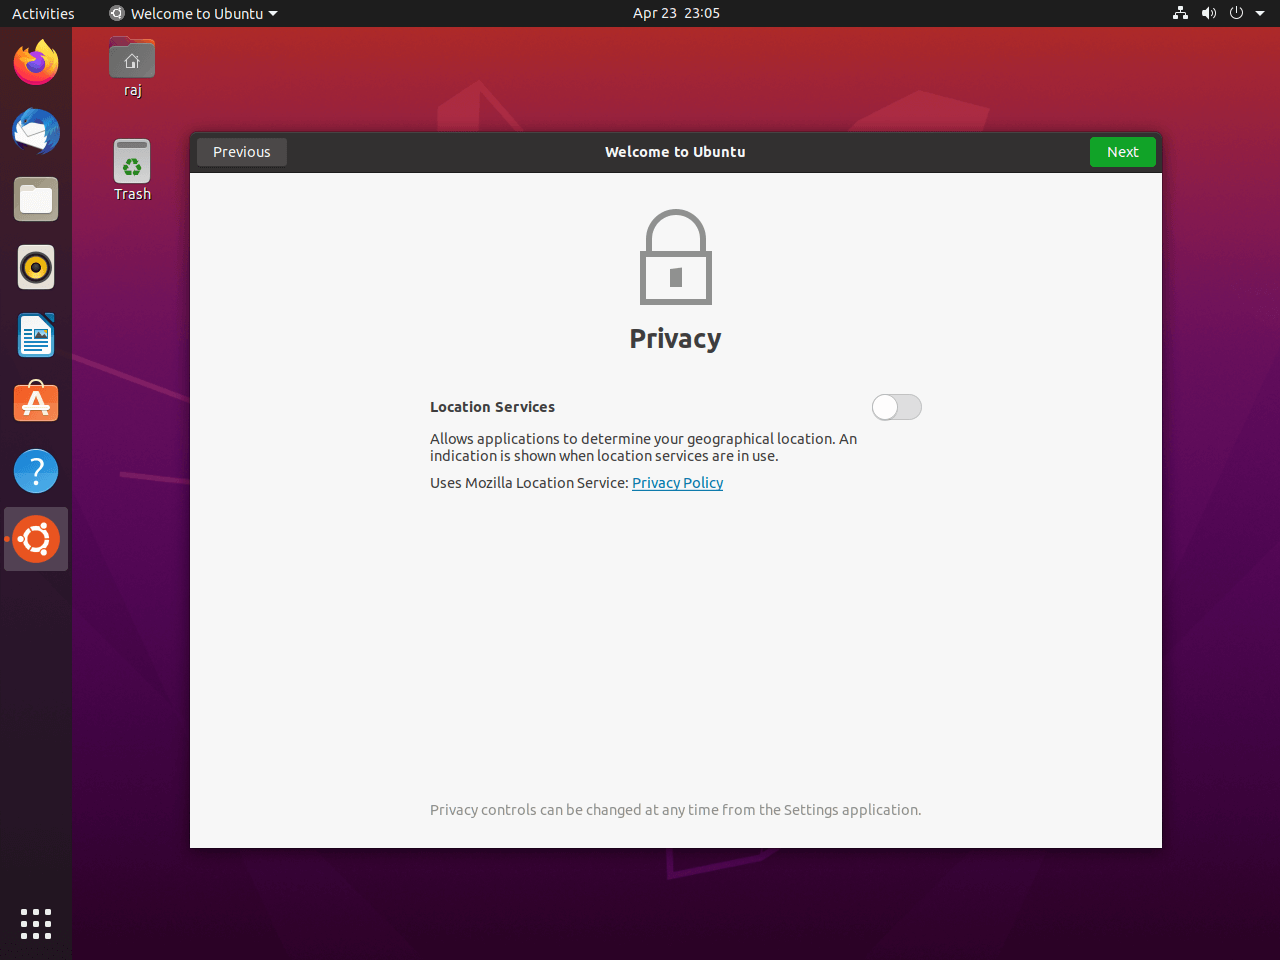
Choose whether you want your applications to determine your location or not.
Click Done. Ubuntu 20.04 is now ready for your use.
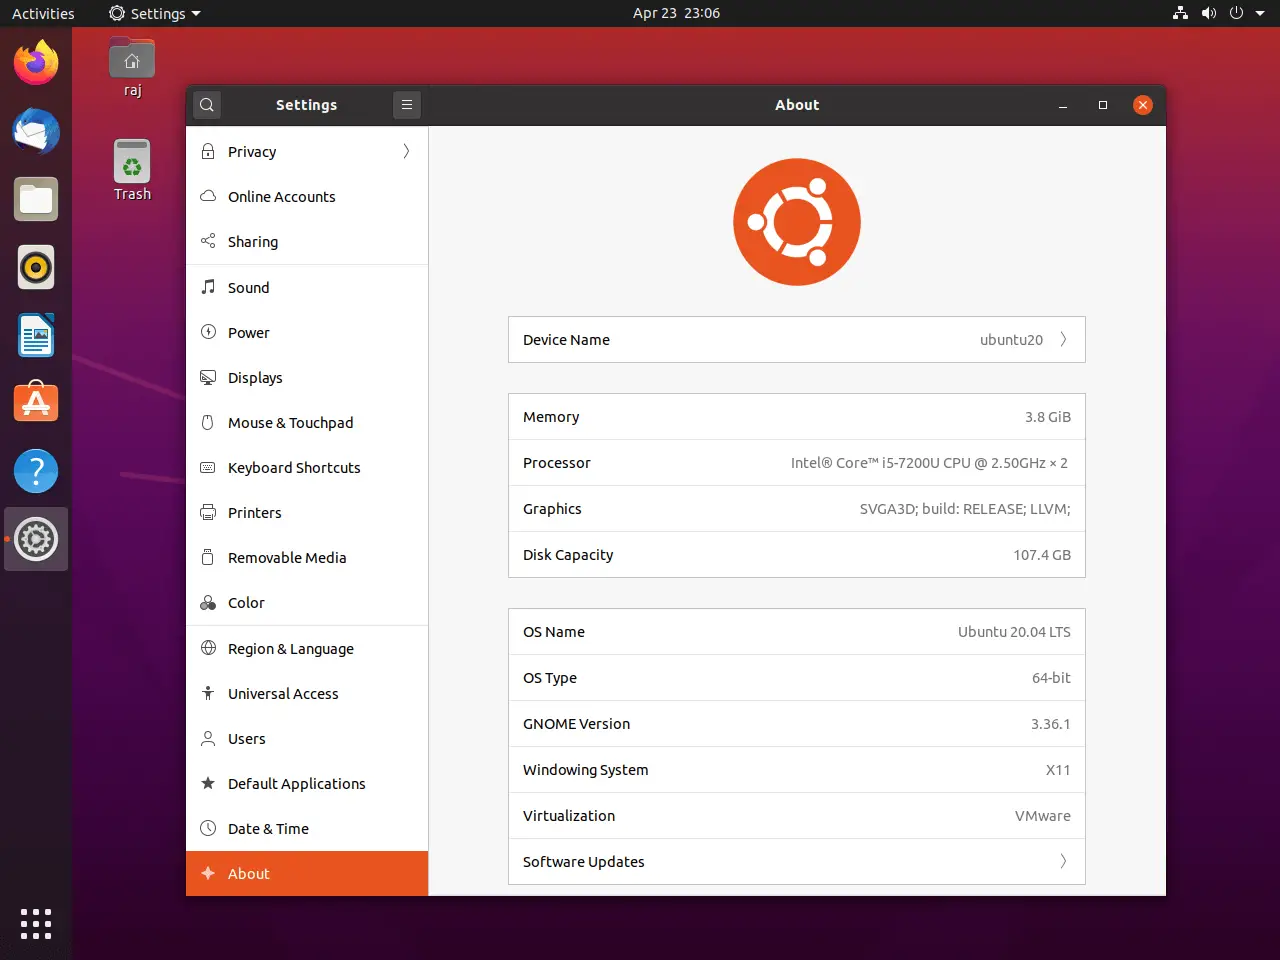
System Information:
Conclusion
That’s All. I hope you have learned how to install Ubuntu 20.04. Visit our Ubuntu 20.04 LTS page for all posts related to Ubuntu 20.04 release.
RECENT POSTS

![How To Upgrade To Linux Mint 20 From Linux Mint 19 [Detailed Guide]](/post/how-to-upgrade-to-linux-mint-20/featured_hu3b6c6a25dd04b6406f79faf78c8c0be6_108894_550x0_resize_q90_lanczos.jpg)