How to Install Android SDK 4.0.3 and Eclipse ADT on Linux Mint 12 / Ubuntu 11.10
 Ubuntu and Linux Mint are sharing desktop space with significant percentage, both are doing great job for the java developer with Eclipse IDE. Android is one of the famous operating system for mobile devices, which is open source, and is easy for developers to build powerful applications for Android-powered mobile devices. Eclipse most widely used IDE for developing the apps for Android with the help of extension. Here is is the how to guide for installing Android SDK and Eclipse ADT (Android development kit) on Linux Mint 12 / Ubuntu 11.10.
Before installing Android SDK, you must have the following packages installed on your machine.
- Java development kit (JDK).
- Eclipse IDE.
Install Java development kit:
Issue the following command to install JDK.
raj@geeksite~/$ sudo apt-get install openjdk-7-jdk
Install Eclipse IDE:
To know more about installing the Eclipse IDE.
Download Android SDK 4.0.3:
Android 4.0 delivers a refined, unified UI for phones and tablets and introduces innovative features for users and developers. If you are developing the apps for the Android download the latest version of SDK. Assume that downloaded file is in ~/Downloads directory.
Go to the downloads directory.
raj@geeksite~/$ cd ~/Downloads
Extract the downloaded file.
raj@geeksite~/$ tar -zxvf android-sdk_r16-linux.tgz
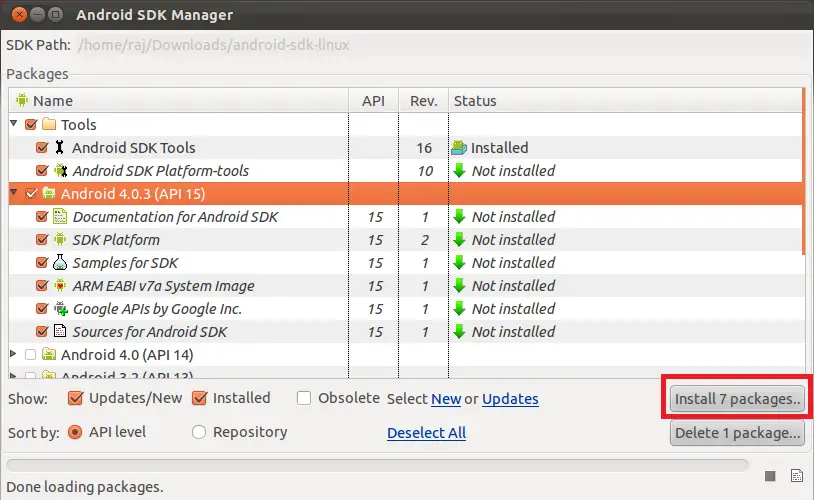
Run the Android SDK manager.
raj@geeksite~/$ sudo ./android-sdk-linux/tools/android
Select the version of your choice and then click on the install packages in the right side (for demonstration purpose i am installing the Android 4.0.3).
Install ADT Plugin:
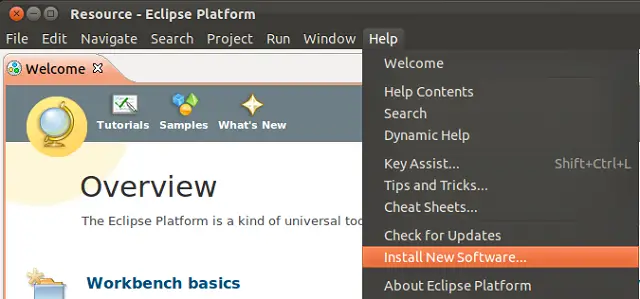
To install ADT plugin, go to Help —> Install New Software.
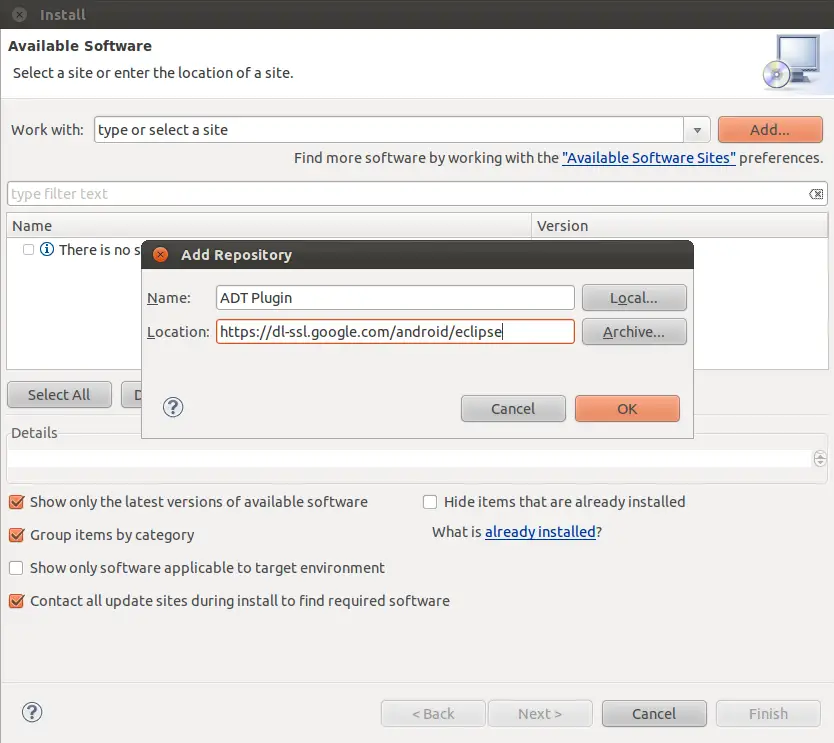
Click on Add,
Name: ADT Plugin and Location: https://dl-ssl.google.com/android/eclipse and click on OK.
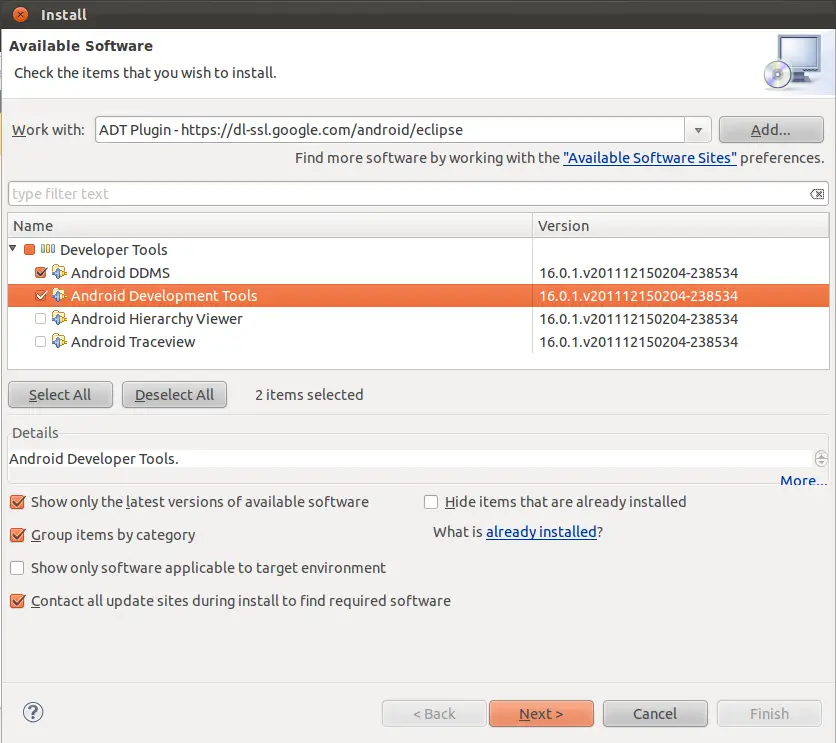
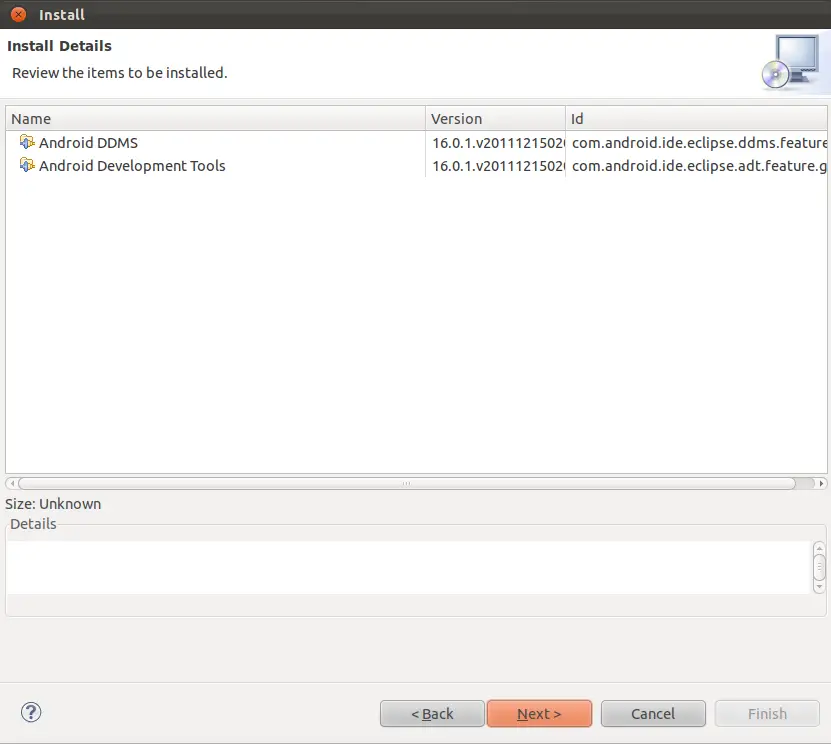
Select Android DDMS and Android Development Tools then click next.
If you got any type of error message like below,
Cannot complete the install because one or more required items could not be found. Software being installed: Android Development Tools 16.0.1.v201112150204-238534 (com.android.ide.eclipse.adt.feature.group 16.0.1.v201112150204-238534) Missing requirement: Android Development Tools 16.0.1.v201112150204-238534 (com.android.ide.eclipse.adt.feature.group 16.0.1.v201112150204-238534) requires ‘org.eclipse.wst.sse.core 0.0.0′ but it could not be found
Add Indigo repository:
Name: Indigo Location: https://download.eclipse.org/releases/indigo
Then try to install the above Android DDMS and Android Development Tools. Click on next in the review details.
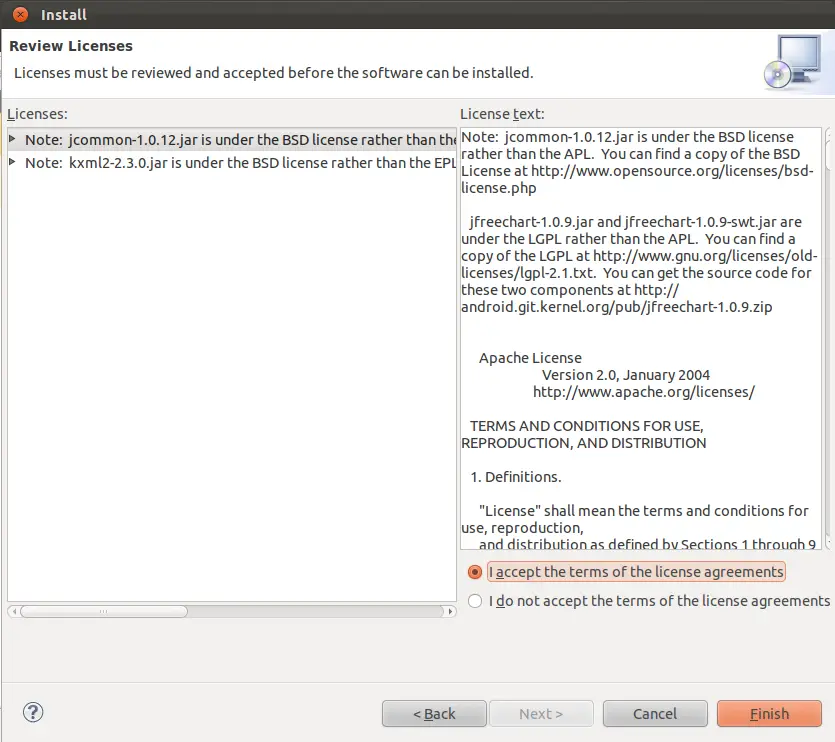
Accept the License agreement and click on Finish.
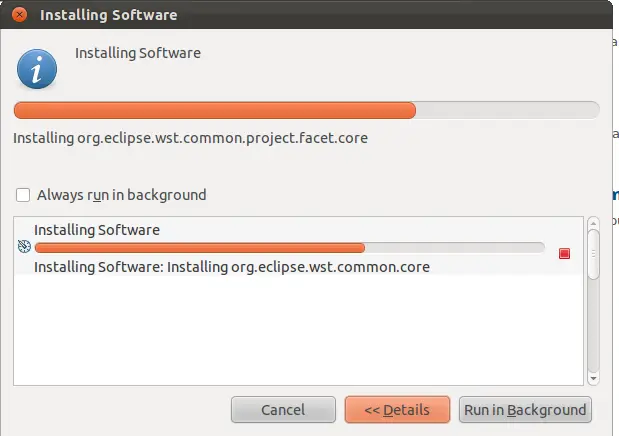
Once you have clicked, it will start to install the ADT plugin for Eclipse.
Restart the Eclipse.
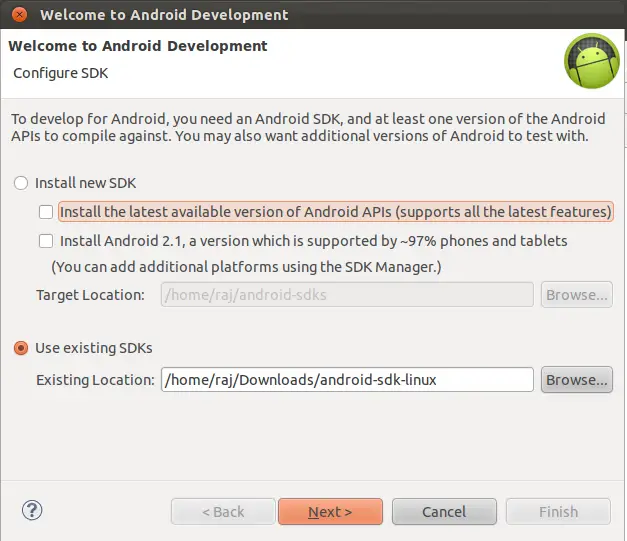
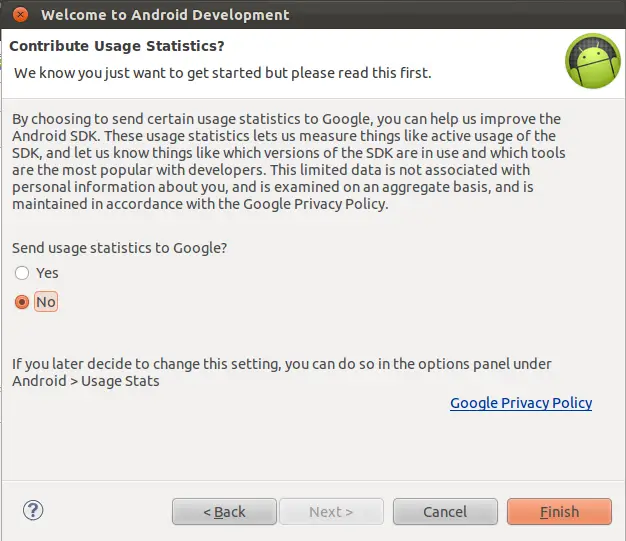
After the restart of Eclipse IDE, you should get the following Welcome to Android Development window which is asking you to configure the Android SDK for the development. Browse for the existing SDK manager that we have downloaded before.
Choose option to send statistics to Google.
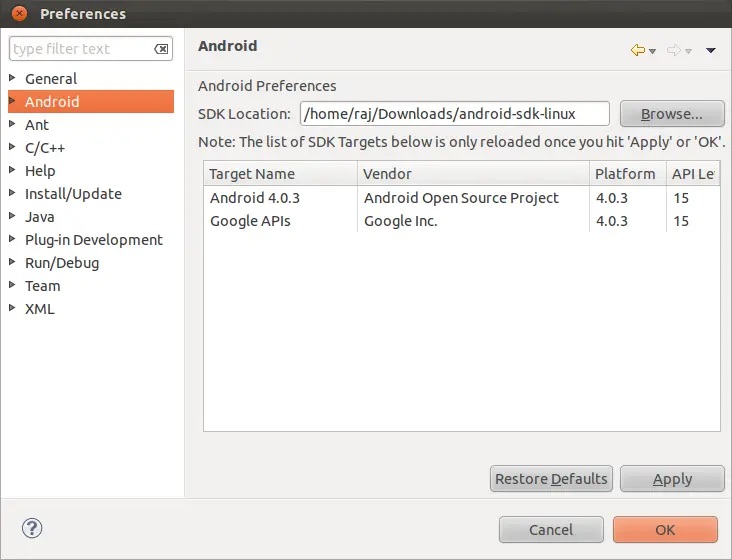
If you haven’t got the above Android development window; you can manually add SDK manager by going to Window —> Preference.
Android Virtual Device:
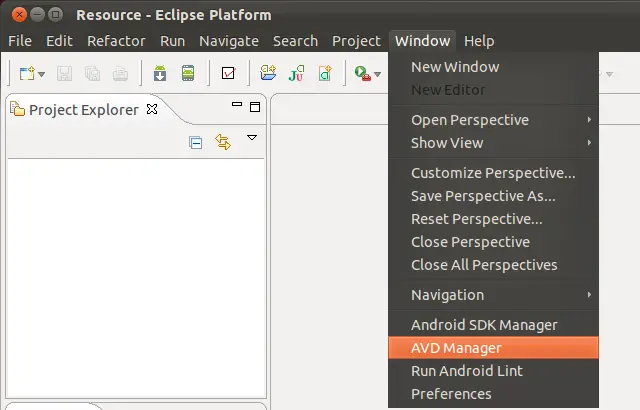
You can start to test the android apps by creating the virtual device by going to Window —> AVD Manager.
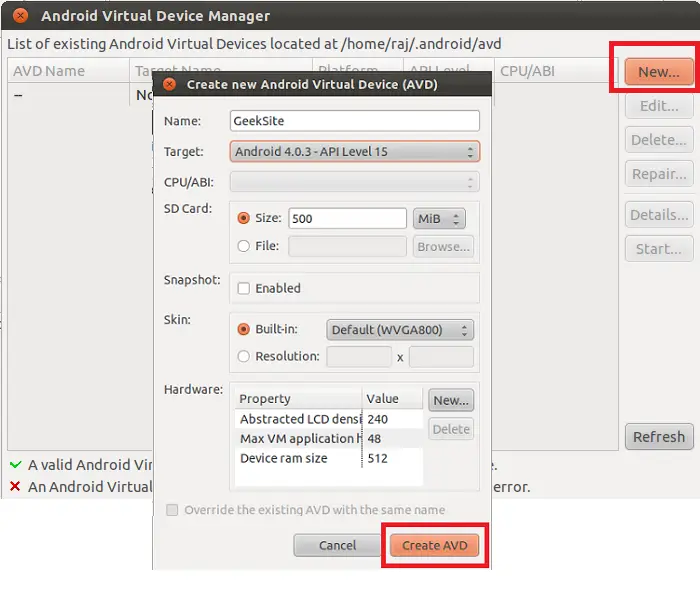
Click on New; fill up the details about the virtual device in the pop up window and then click on create AVD.
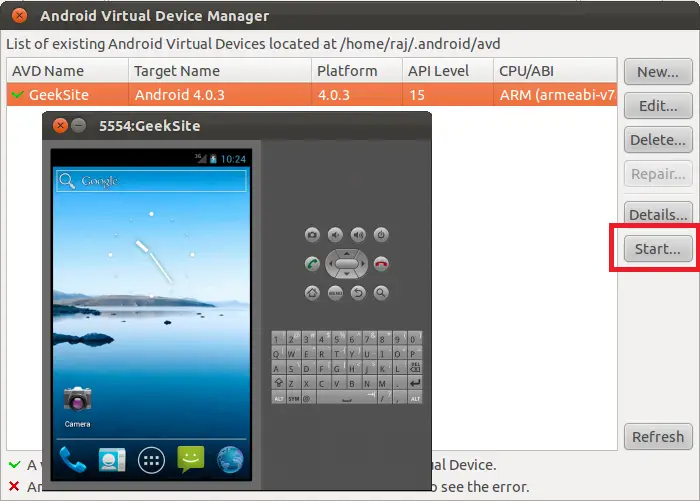
Once created; click on Start (This might take some minutes).
Screen Shot of Android 4.0.3:
Now you create the new project for Android from File —> New —> Project.
That’s All.

