Create Environments:
Environments (is aka Lifecycle environments) handles the lifecycle of content hosts, hold and promote content views. By default, during the installation, Katello creates special kind of Lifecycle environment called “Library“. The Library acts as the main container for products, puppet modules, and content views.
Evey organization has a library. If you create an environment, it will be derived from the library; meaning that Library will act as parent environment for all subsequent environments, we create.
To create an environment, go to Content –> Lifecycle Environments –> New Environment Path.
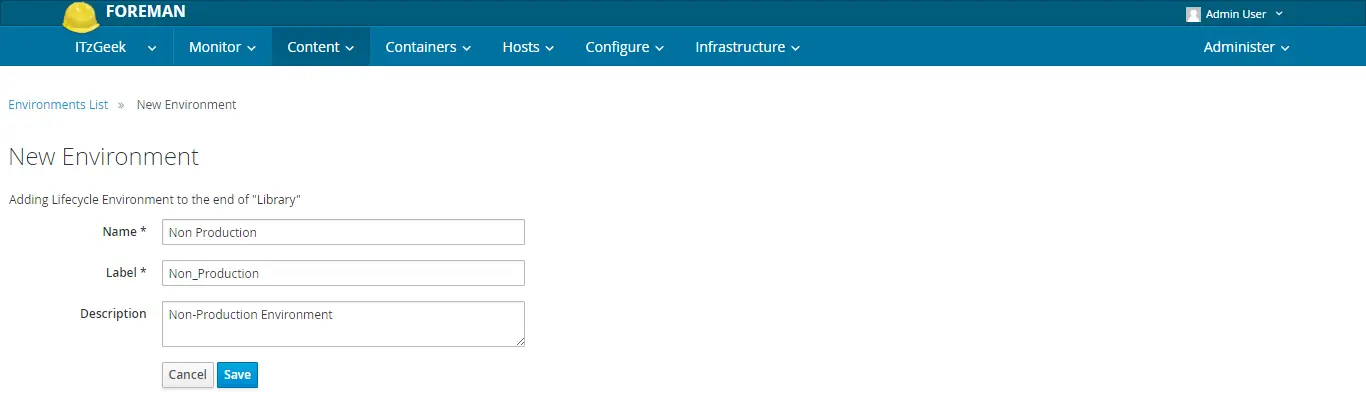
Let’s create two environments, namely.
- Production
- Non Production
Type the Name of the environment as “Non Production” and then Save.
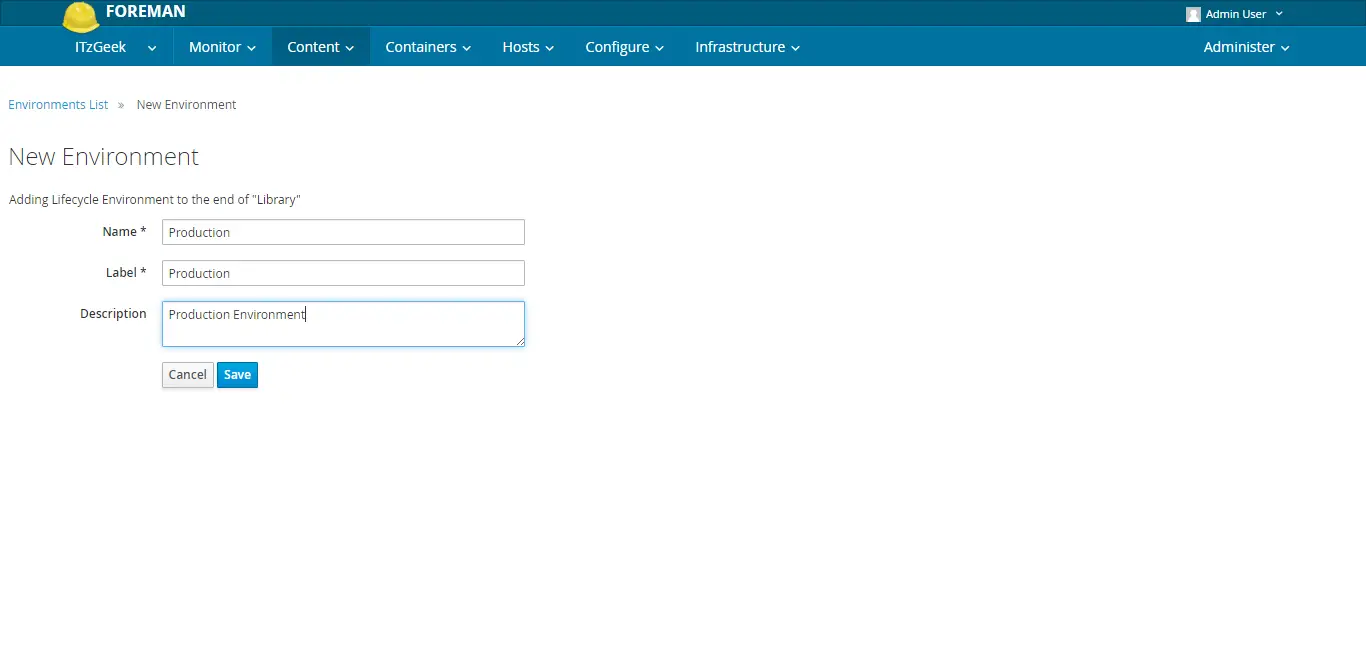
Similarly, create an another environment with the name “Production“.
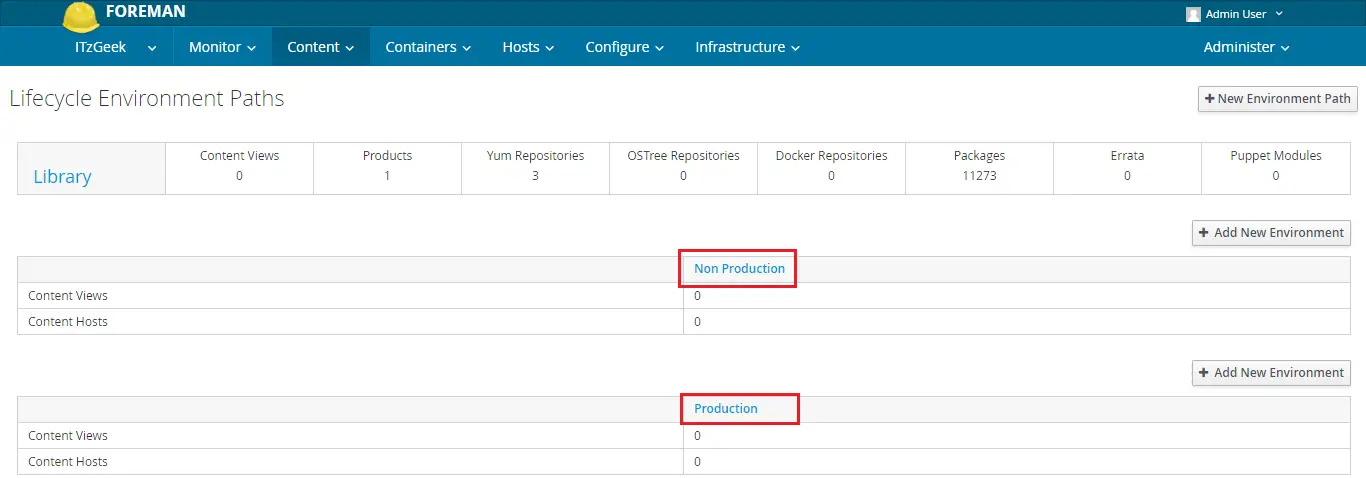
Once you have created, environments list will look like below.
Create Content views:
Content views are a collection of one or more repositories and/or puppet modules with optional filtering. The filter provides tight control over content in a content view; can be used to include or exclude packages, package groups, or errata.
To create a content view, go to Content –> Content views –> Create New View.
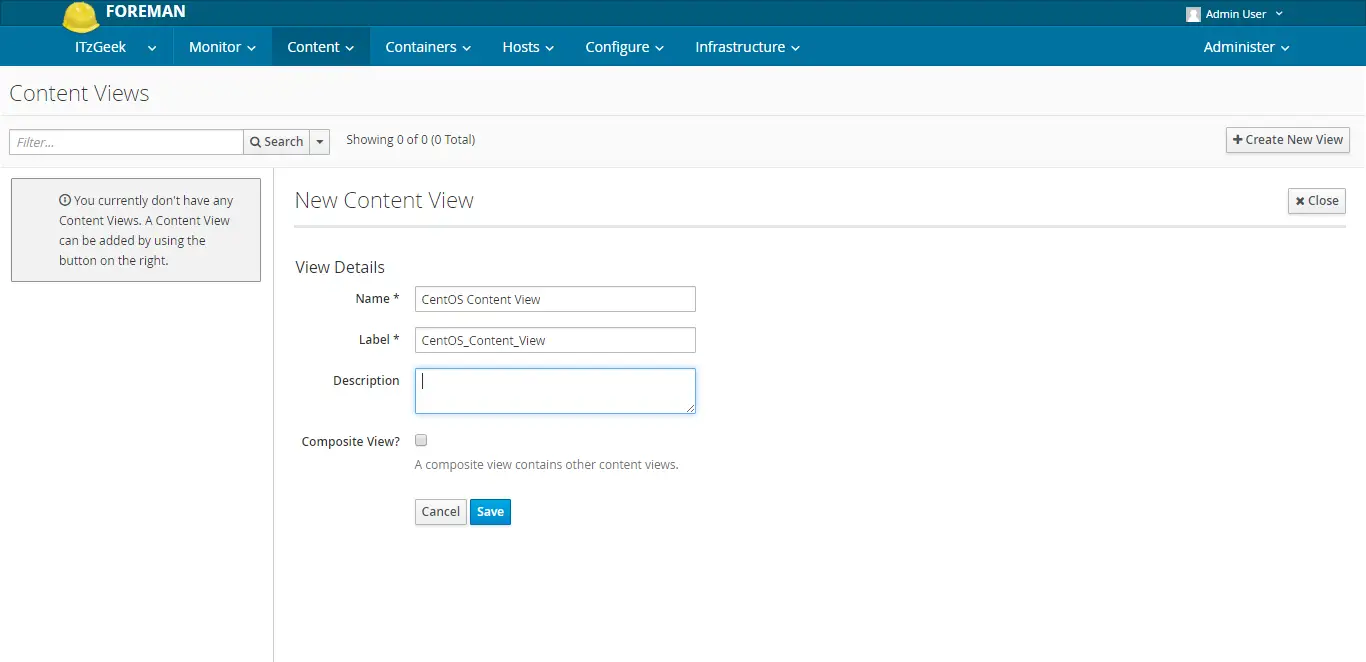
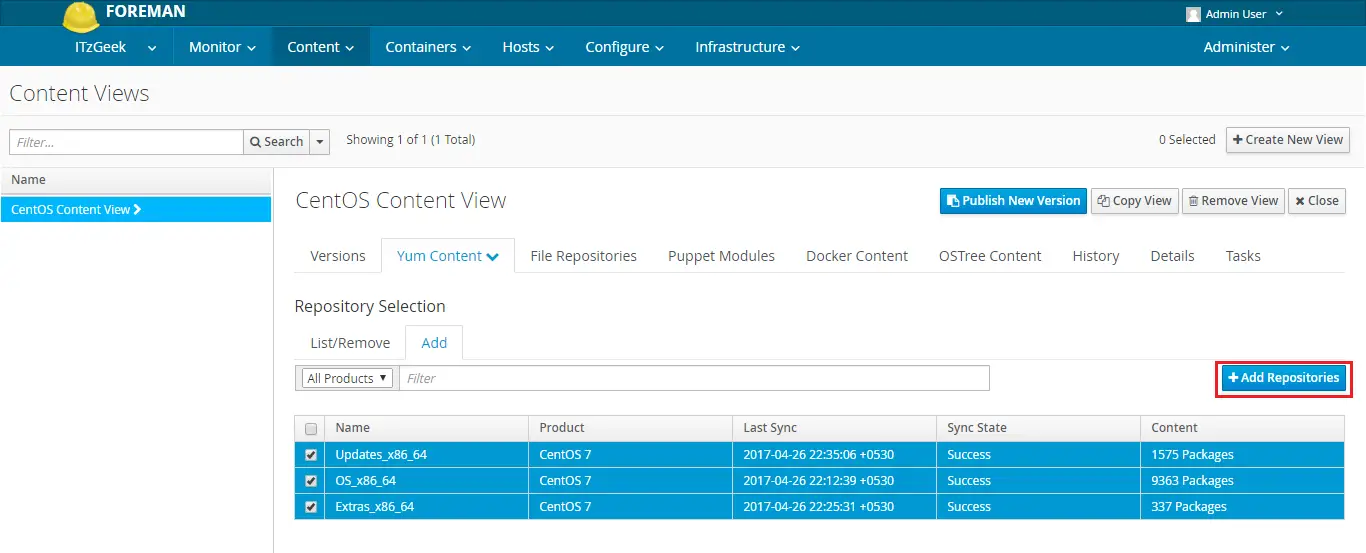
Now, select the repository you want to add it into content view. Here, I’m adding all the repositories in CentOS_Content_View.
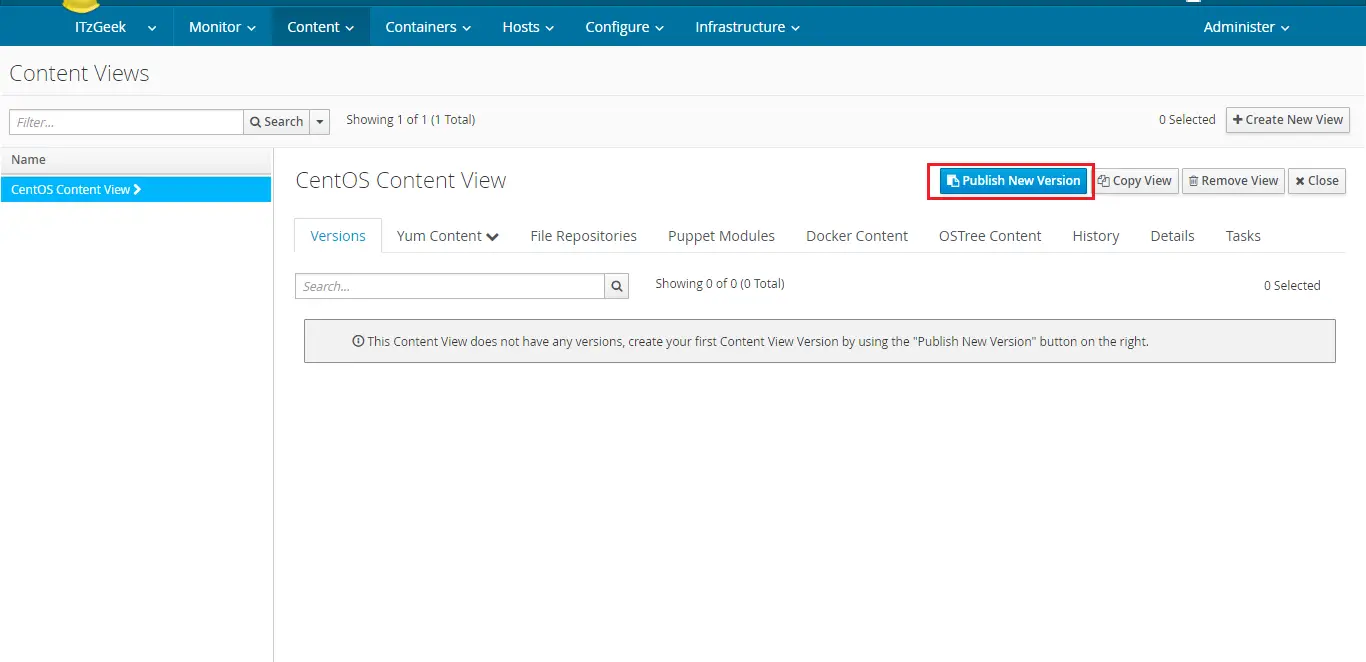
Once you have added the repositories, click on Publish New Version.
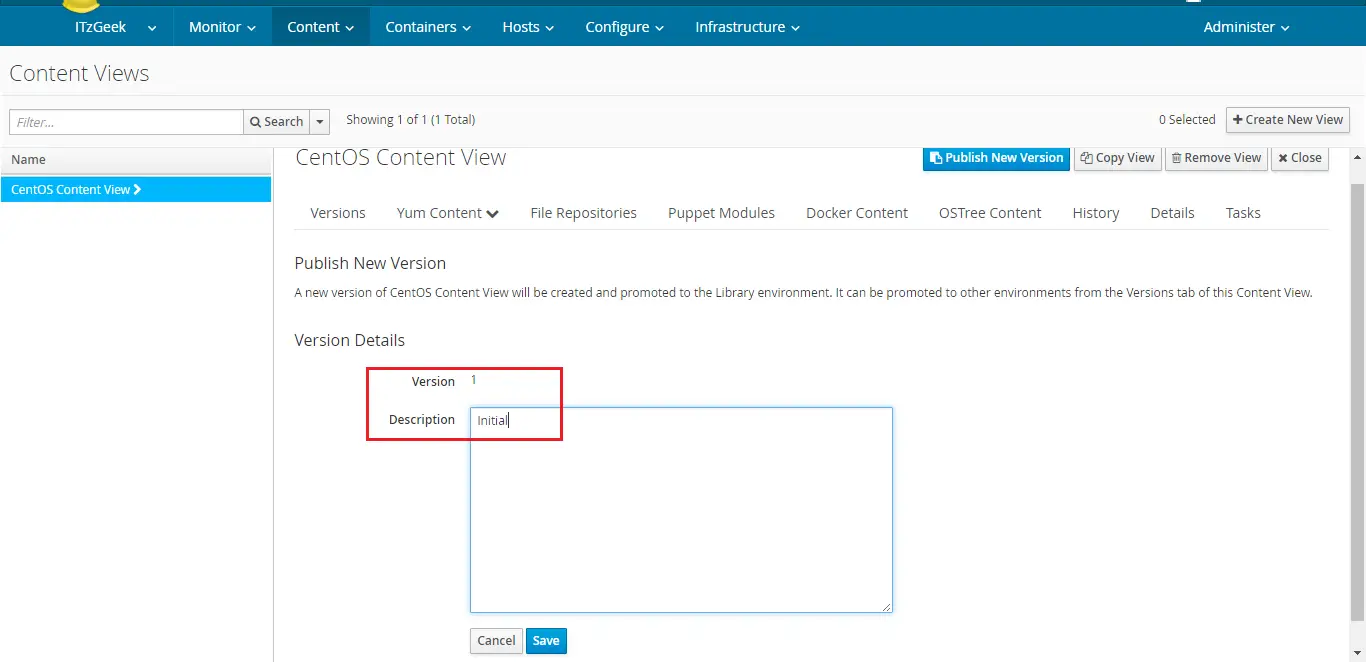
This is the version 1, just click save.
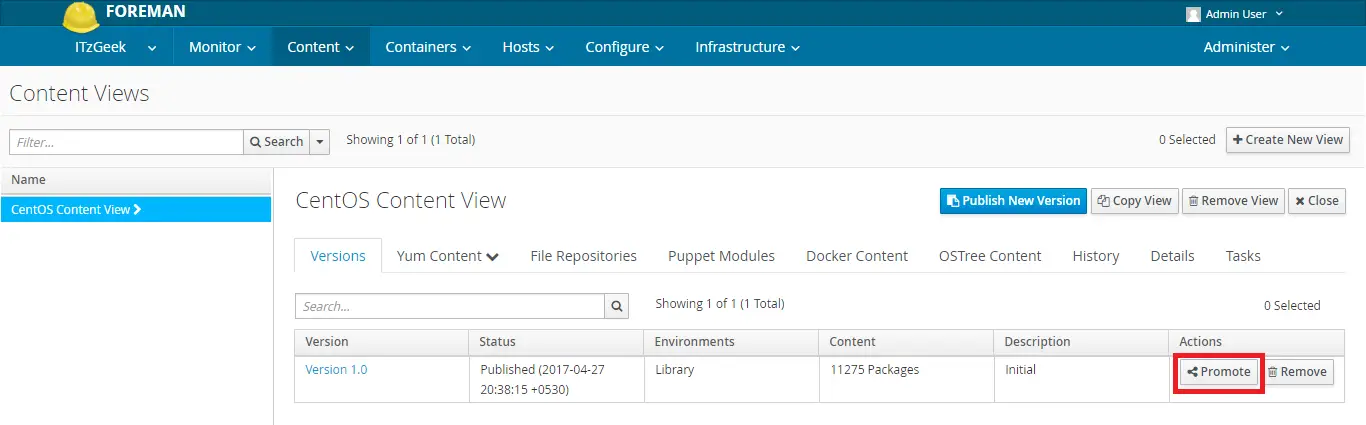
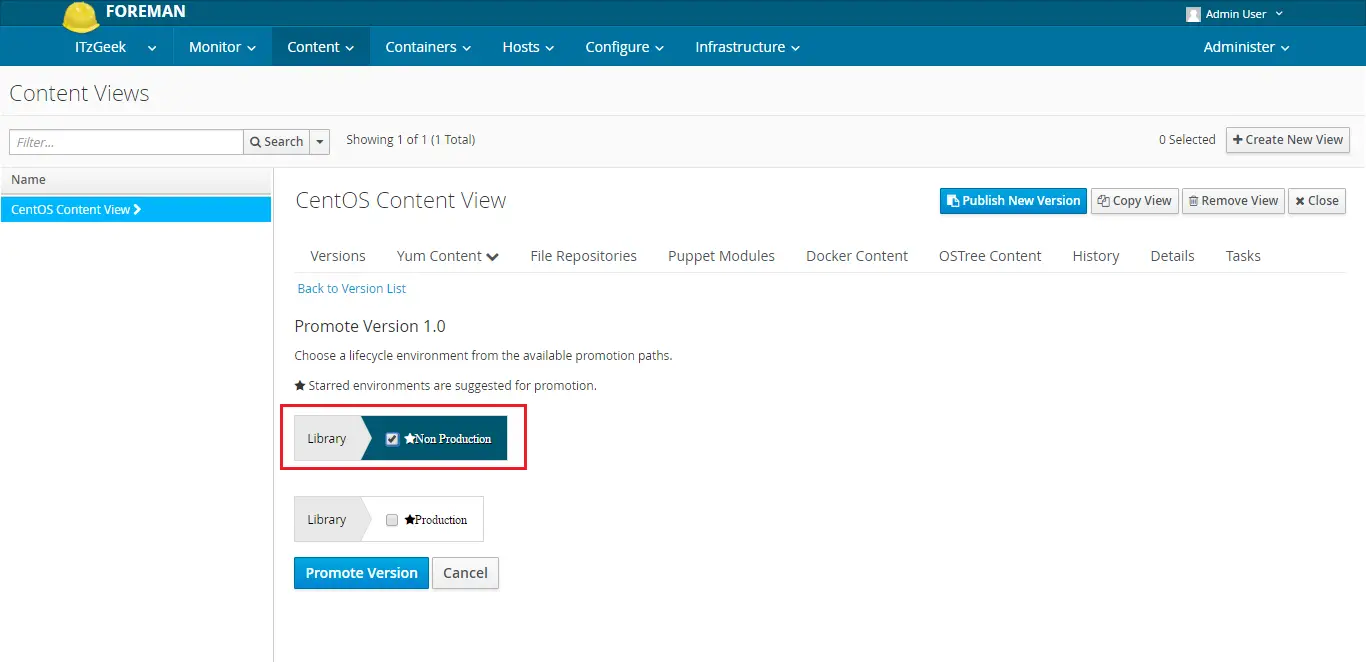
Click Promote.
Select the environment “Non Production” and then click “Promote Version”
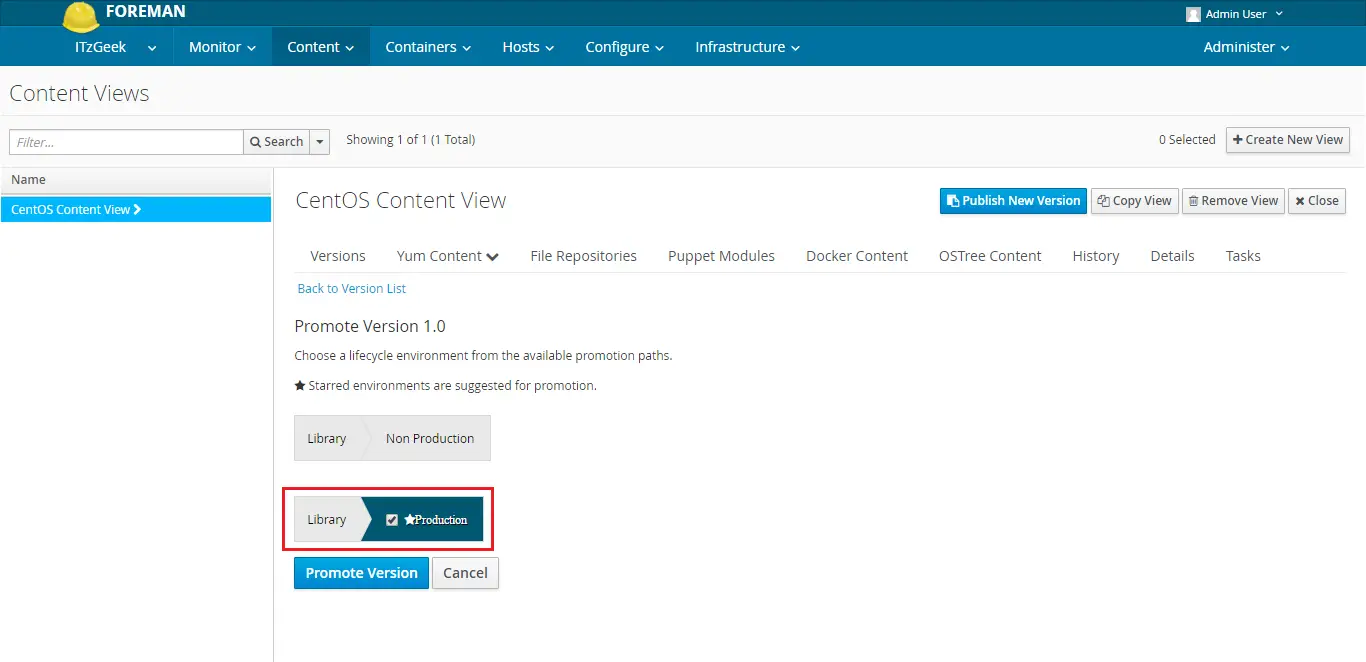
The same way, you promote “Production” environment.
Create Activation Keys:
Activation key is a preset key used when registering the content hosts, and this defines properties that may be applied to host such as,
- Which organization the host should be part of
- Which environment the host should be a part of
- What are the content views the host should see
- Subscription usage limit for the host
- Enabling the specific repository to the host
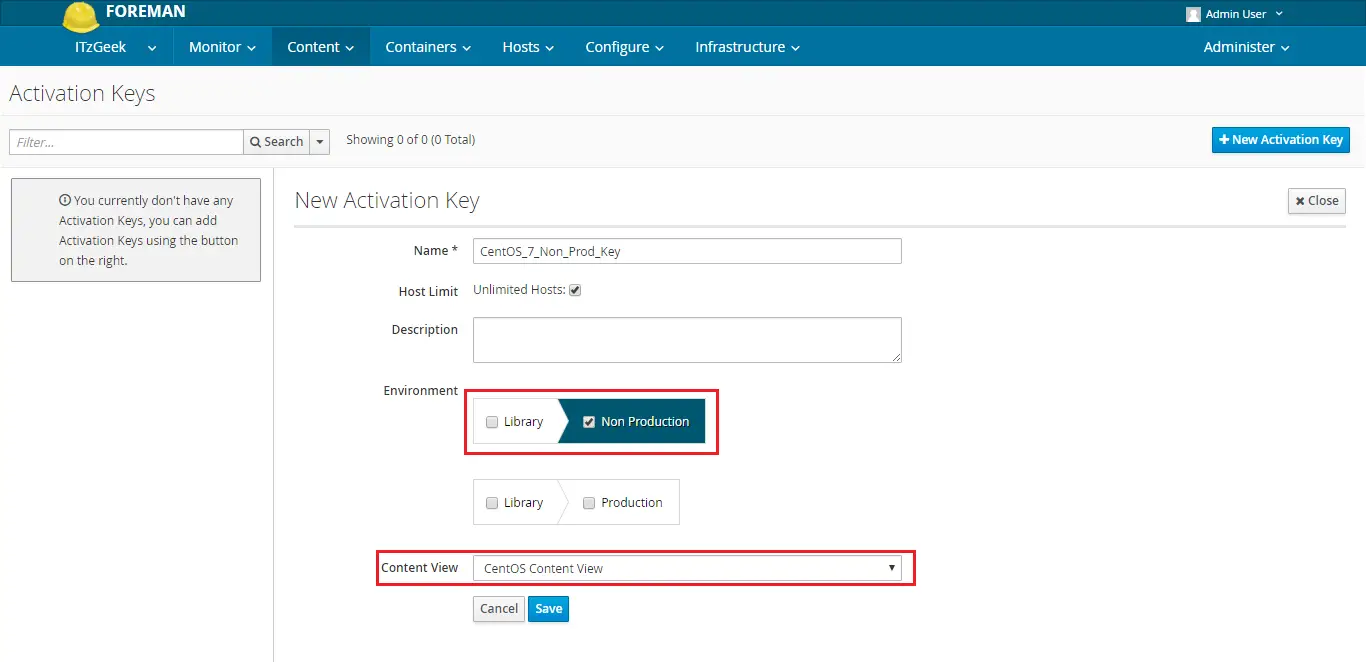
To create an Activation Key, go to Content –> Activation Keys –> New Activation Key. First, create an activation key for “Non Production”
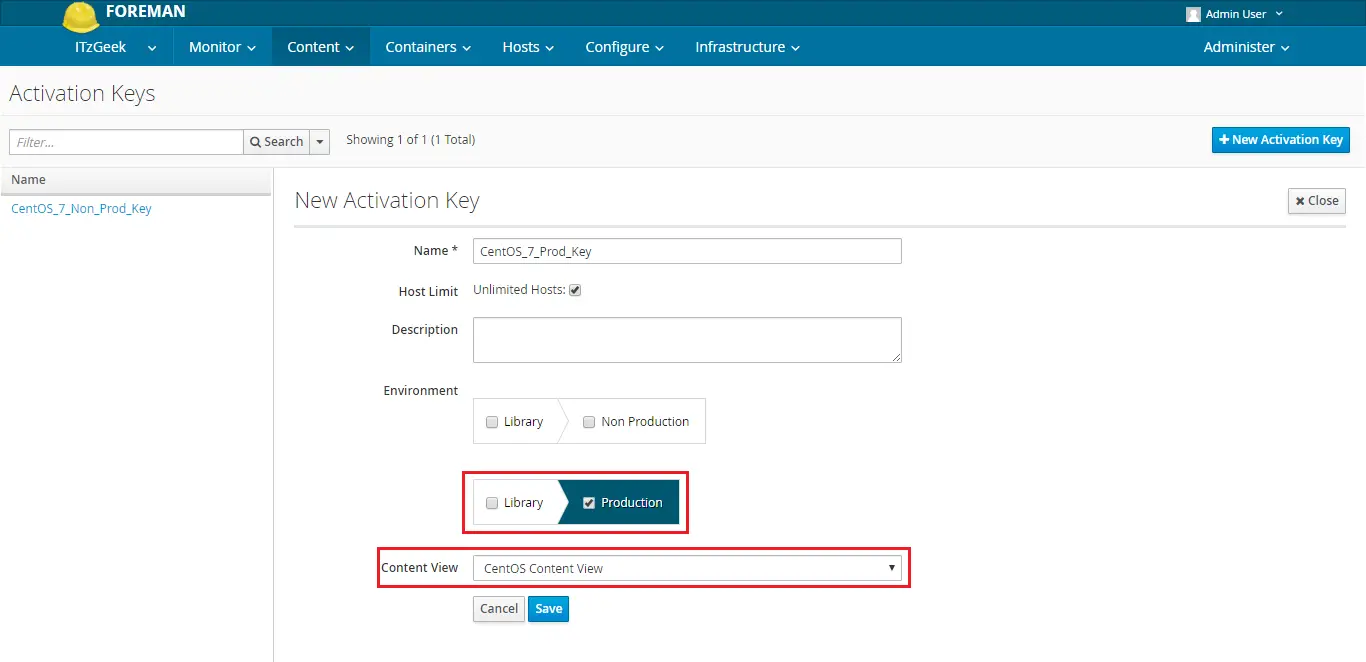
You can now create an activation key for the “Production” environment.
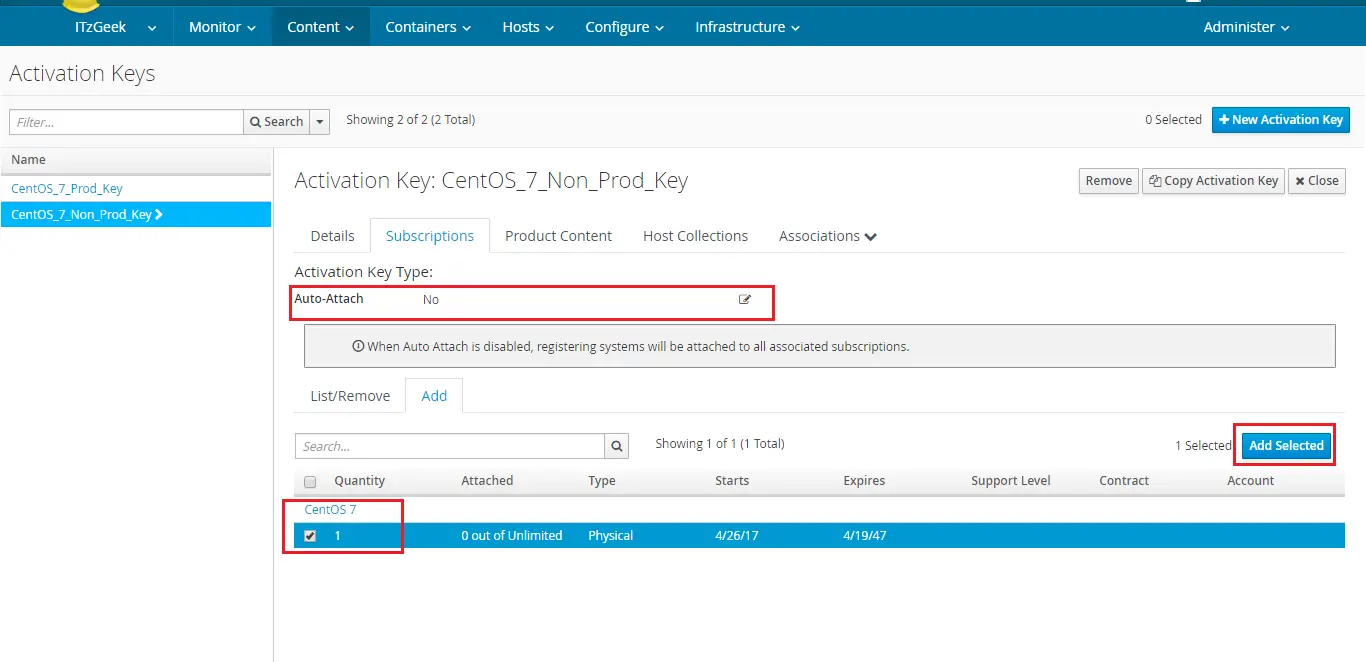
Auto-Attach:
When the “Auto-Attach” is enabled, the subscription will be automatically added to cover the installed products even though there are no subscriptions added to activation key.
Eg: Redhat Subscription will be added automatically to cover the installed Redhat Product on the host even though you haven’t added it (Redhat Subscription) to the activation key.
If you disable “Auto-Attach“, all the subscriptions available on the activation key will be attached to the registering host and does not cover the installed product with the auto addition of subscriptions.
Now, attach the subscription to the activation key and disable auto-attach.
Content –> Activation Keys –> Select Activation Key (CentOS_7_Non_Prod_Key) –> Subscribtions.
The same way, you can attach subscription to the activation key of production.
That’s All; the activation key is now ready for registering the Linux Servers with Katello.