This post is the third part of Katello series. In the previous article, we discussed the installation of Katello Server and Configuring Katello for Linux patching.
READ: How to Install Katello 3.2 on CentOS 7 / RHEL 7
READ: Configure Katello – Download Repositories, Create Environments and Activation Keys
If you have read articles mentioned above, you should probably now have a working Katello server setup and an activation key for host registration.
Log in into the Linux client-server and install subscription-manager package.
[root@client ~]# yum -y install subscription-manager
Download and install ca-consumer package to get a copy of the CA certificate for Katello Server.
Syntax:
yum -y install https://[hostname]/pub/katello-ca-consumer-[hostname]-1.0-1.noarch.rpm
Actual:
yum -y install https://104.154.180.134/pub/katello-ca-consumer-katello.itzgeek.local-1.0-1.noarch.rpm
Register the client with Katello Server with the following command.
[root@client ~]# subscription-manager register --org="ITzGeek" --activationkey="CentOS_7_Non_Prod_Key"
Output:
The system has been registered with ID: 2ffe4169-4afe-4acf-9fec-3ce5ab76a341
No products installed.
List out the available subscription using the following command.
[root@client ~]# subscription-manager repos --list
Output:
+----------------------------------------------------------+
    Available Repositories in /etc/yum.repos.d/redhat.repo
+----------------------------------------------------------+
Repo ID:   ITzGeek_CentOS_7_OS_x86_64
Repo Name: OS_x86_64
Repo URL:  https://katello.itzgeek.local/pulp/repos/ITzGeek/Non_Production/CentOS_Content_View/custom/CentOS_7/OS_x86_64
Enabled:   1

Repo ID:   ITzGeek_CentOS_7_Extras_x86_64
Repo Name: Extras_x86_64
Repo URL:  https://katello.itzgeek.local/pulp/repos/ITzGeek/Non_Production/CentOS_Content_View/custom/CentOS_7/Extras_x86_64
Enabled:   1

Repo ID:   ITzGeek_CentOS_7_Updates_x86_64
Repo Name: Updates_x86_64
Repo URL:  https://katello.itzgeek.local/pulp/repos/ITzGeek/Non_Production/CentOS_Content_View/custom/CentOS_7/Updates_x86_64
Enabled:   1
Now, you can find the client-server under Hosts –> Content Hosts.

As you can see, client server has been registered atomically under “Non Production” environment because we used the activation key of Non Production.
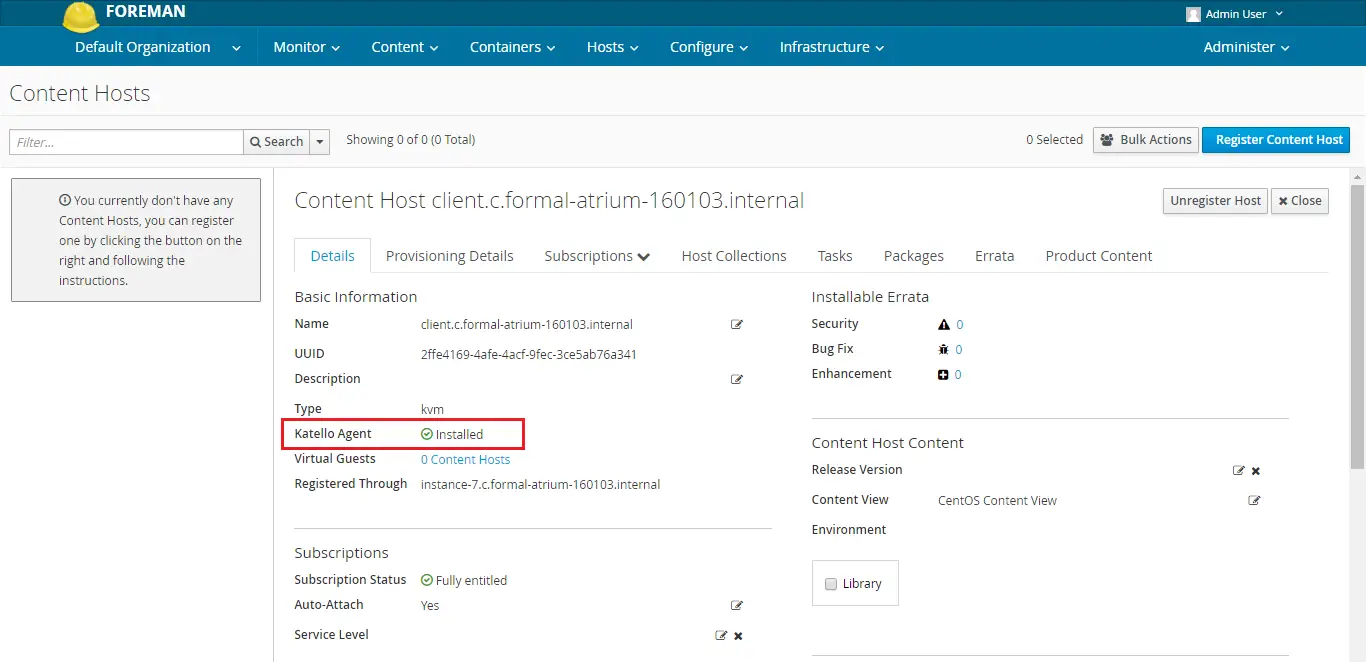
Katello Agent:
Katello agent is a client package, installed on all client machines that are connected to Katello Server. Katello Agent must be enabled on client servers to push the updates from the Katello Dashboard.
Also, It provides information about errata that are applicable to the system to the Katello Dashboard from there you can get to know all the details of what is required to keep the client-server up-to-date.
Install Katello client release packages.
[root@client ~]# yum -y install https://fedorapeople.org/groups/katello/releases/yum/3.2/client/el7/x86_64/katello-client-repos-latest.rpm
[root@client ~]# yum -y install https://dl.fedoraproject.org/pub/epel/epel-release-latest-7.noarch.rpm
Install Katello-Agent using following command.
[root@client ~]# yum install katello-agent -y
Start the Katello agent service and enable it to start at the system boot.
[root@client ~]# systemctl start goferd
[root@client ~]# systemctl enable goferd
Remove or move all of your repositories except redhat.repo present inside the /etc/yum.repos.d/.
[root@client ~]# cd /etc/yum.repos.d/
[root@client ~]# mv CentOS-* epel*  katello* /tmp/
Verify whether the Katello-agent is installed on the host using the Katello Dashboard.
Hosts –> Content Hosts –> Select Host (client.c.formal-atrium-160103.internal) –> Details.
Performing Package Actions:
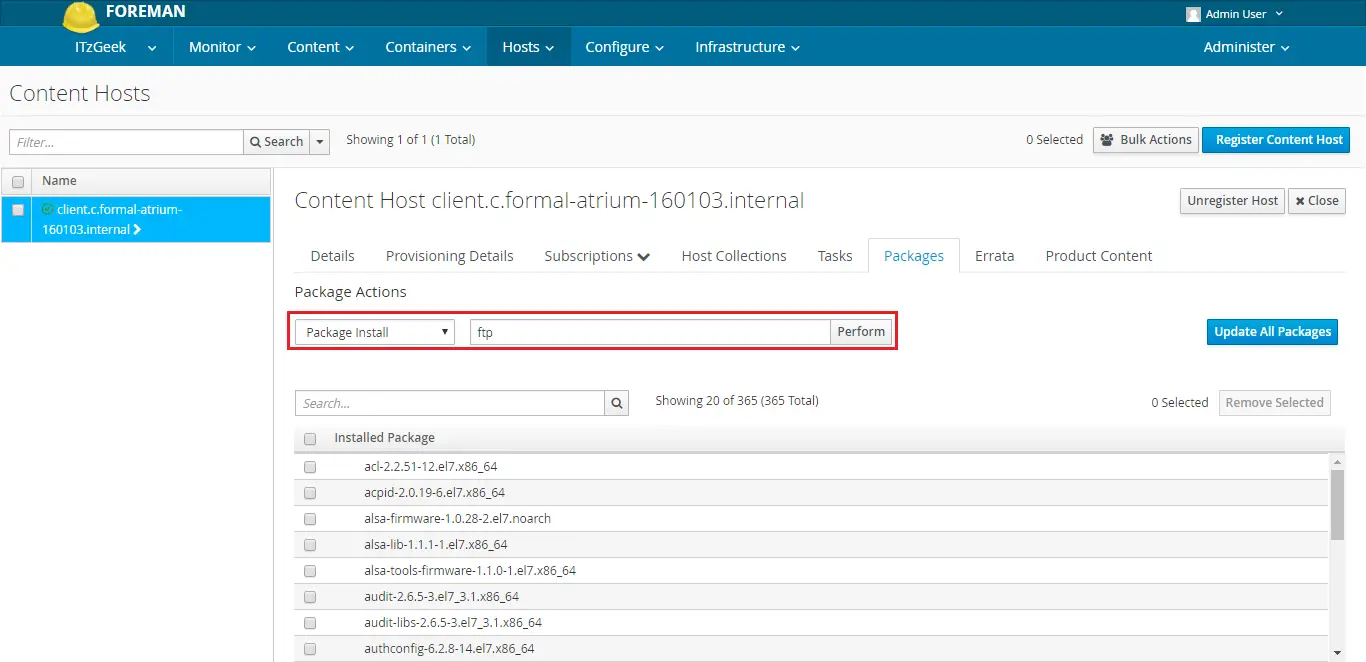
Install Packages:
To install a package, go to Hosts –> Content Hosts –> Select Host (client.c.formal-atrium-160103.internal) –> Packages.
Chose Package Action as “Package Install” and then type the name of a package; then click on perform.
Package installation is in progress.
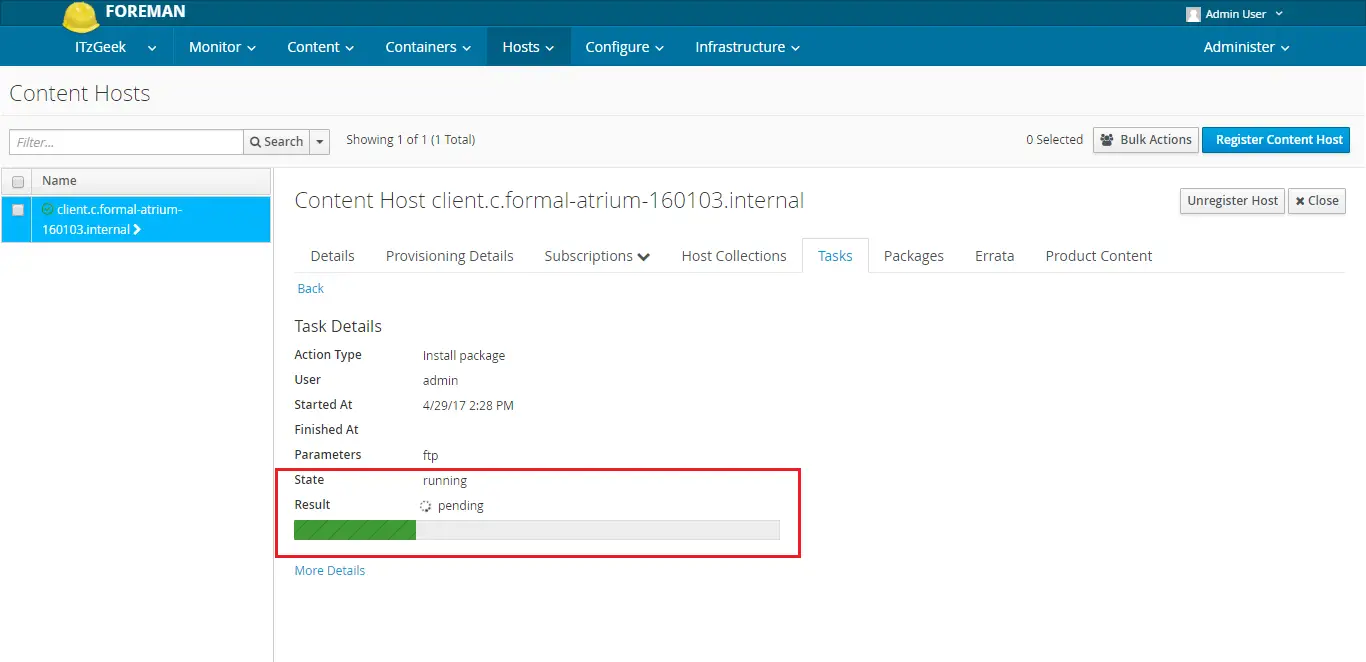
Below screen shot shows the package installation has been successfully completed.
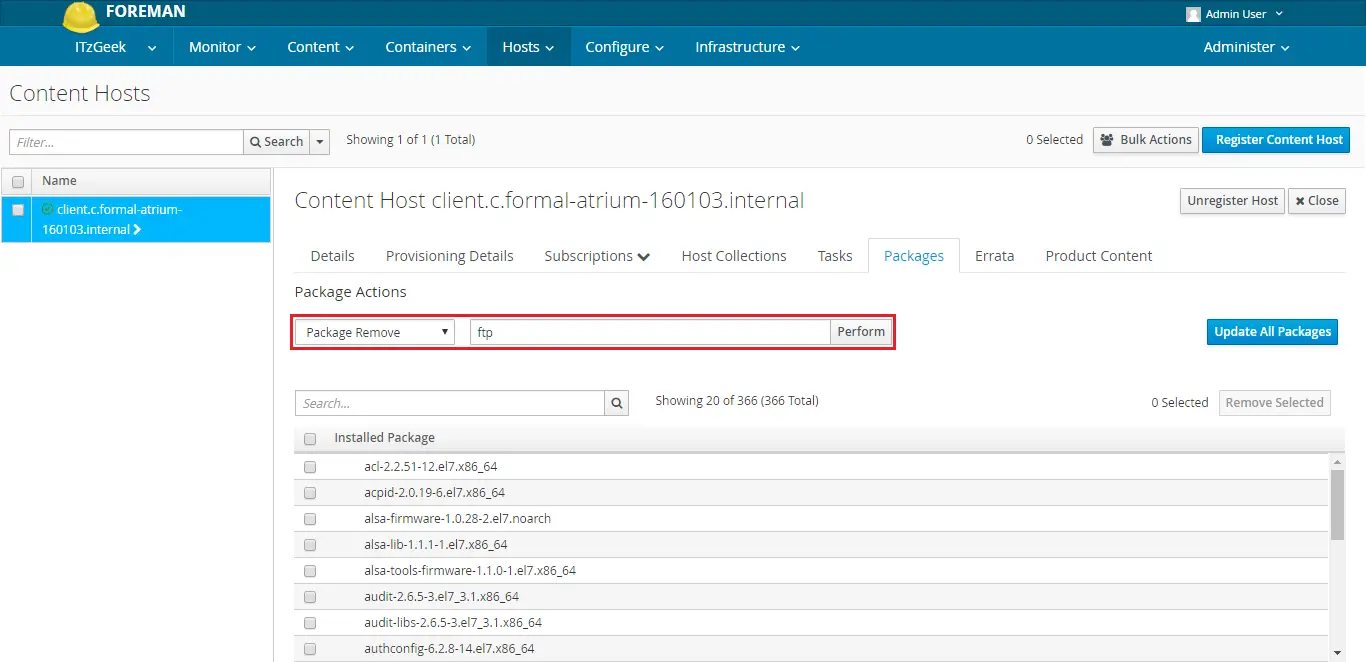
Remove Packages:
To install a package, go to Hosts –> Content Hosts –> Select Host (client.c.formal-atrium-160103.internal) –> Packages.
Chose Package Action as “Package Remove” and then type the name of a package; then click on perform.

Similar way, you can carry out the tasks such as Package update, Install or Remove package group.
That’s All. Thank you for reading.