How to Configure OpenStack Networking to Enable Access to VM Instances
This tutorial is the second part of our OpenStack series. In this tutorial, we will go through steps to configure OpenStack Networking to allow access to VM instances from external networks.
Prerequisites
Follow the below link to install OpenStack so that we can begin the network configuration.
READ: Install Single Node OpenStack on CentOS 7 / RHEL 7
Environment
Internal (VM) Network = 10.40.4.0/24
External Network = 192.168.1.0/24
Instances Floating IP Range = 192.168.1.200 – 192.168.1.240
Gateway of External Network = 192.168.1.1
Setup Network Bridge
Before we create OpenStack networks through the dashboard, we need to setup OVS network bridge (br-ex) using the physical interface available on our system.
Automatic
If you have come through the previous article, then you need not create OVS bridge as the OpenStack setup must have done it for you.
Manual
If you do not see br-ex (OVS Bridge) adapter on the system, then follow these steps.
First, create a configuration file for bridge interface “br-ex“.
vi /etc/sysconfig/network-scripts/ifcfg-br-ex
Add the below values:
DEVICE=br-ex
NAME=br-ex
DEVICETYPE=ovs
TYPE=OVSBridge
OVSBOOTPROTO="none"
OVSDHCPINTERFACES=ens33 # Physical Interface Name
BOOTPROTO=static
IPADDR=192.168.1.110 # Your Control Node IP (SingleNode)
NETMASK=255.255.255.0 # Your Netmask
GATEWAY=192.168.122.1 # Your Gateway
DNS1=192.168.122.1 # Your Name Server
ONBOOT=yes
The same way, edit the configuration file of physical interface (in my case: ens33). You can use ifconfig -a command to find the available physical interface.
vi /etc/sysconfig/network-scripts/ifcfg-ens33
Add the below values:
DEVICE=ens33
NAME=ens33
DEVICETYPE=ovs
TYPE=OVSPort
OVS_BRIDGE=br-ex
ONBOOT=yes
BOOTPROTO=none
Once you have modified both network interfaces, restart the network services to reflect changes.
service network restart
Verify Network Bridge
Use ifconfig command to check whether the OVS bridge is available on your system.
ifconfig -a
Output:
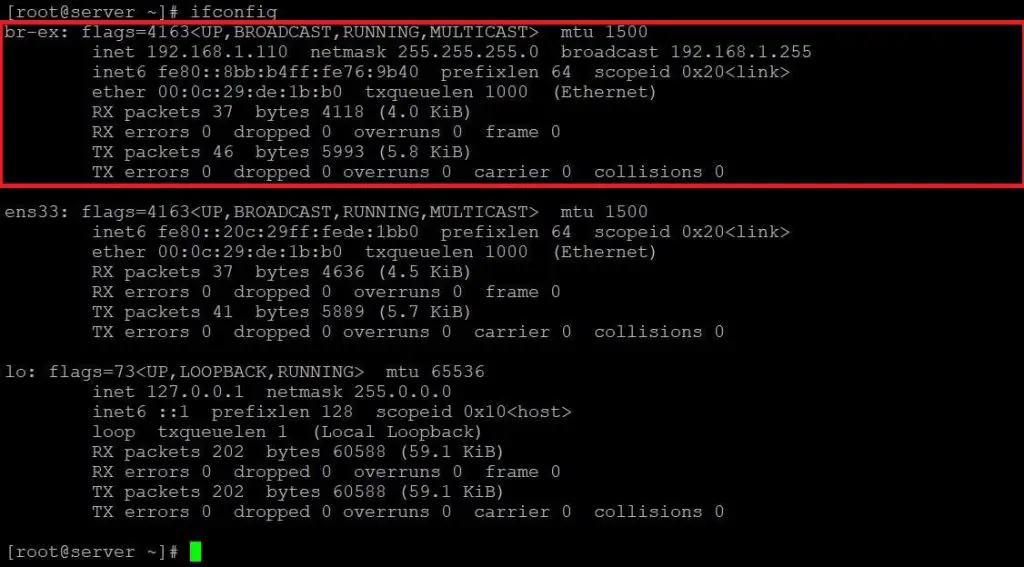
The above output confirms that OVS bridge has been set up and available.
Create a New OpenStack Project and User
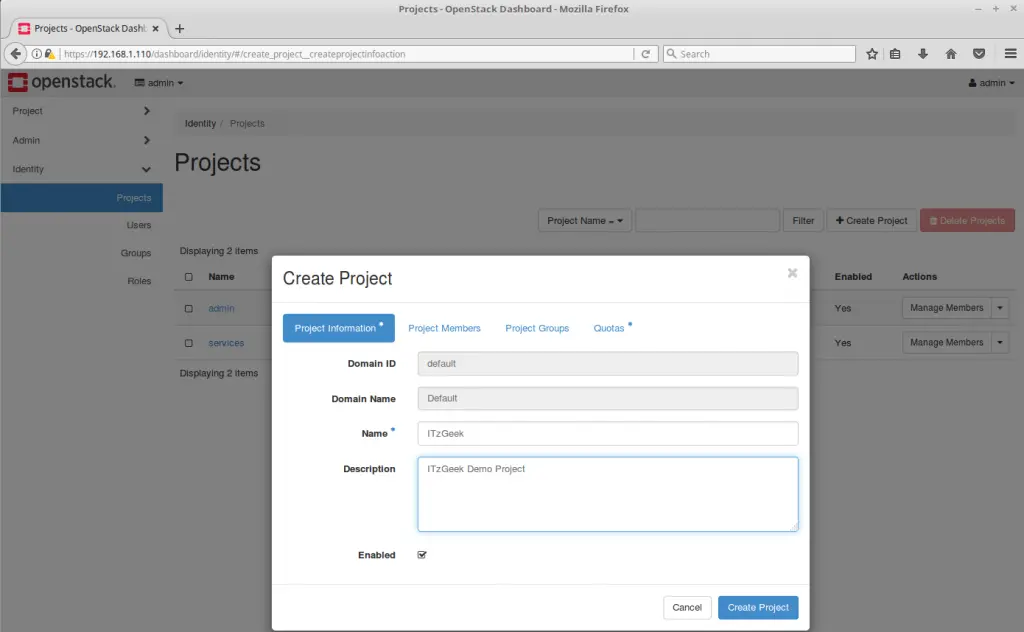
Login to OpenStack dashboard with admin credentials and create a project called “ITzGeek“. The end user uses this project for their cloud requirements.
Go to Identity >> Projects >> + Create Project.
Create a project as shown below.
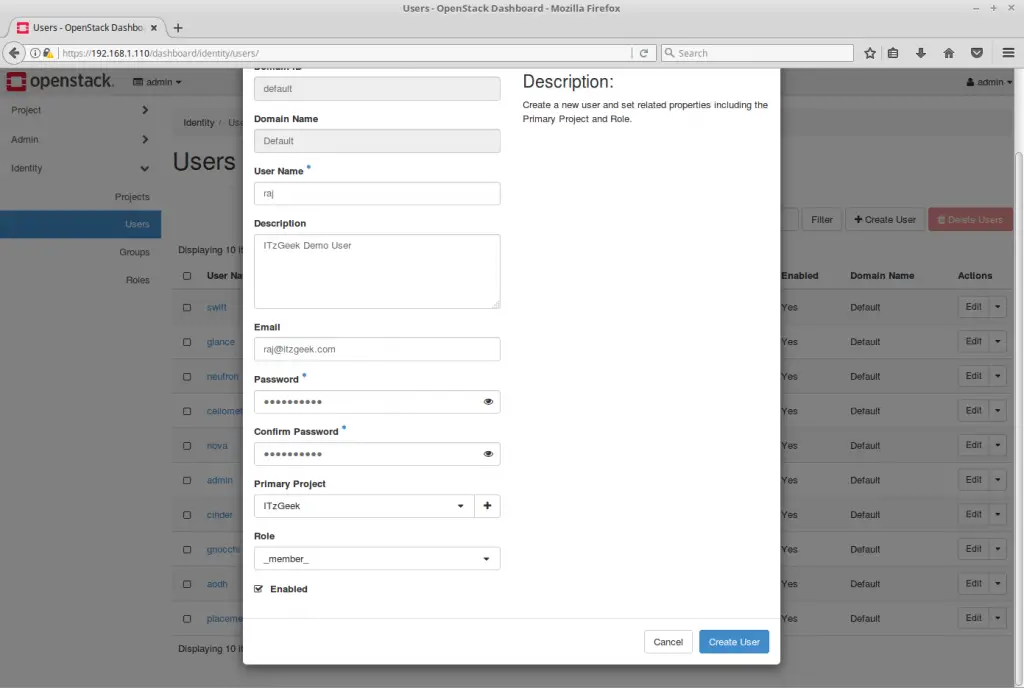
Next, create a user and assign it to the previously created project. Go to Identity >> Projects >> + Create User.
User Name: Raj
email: [email protected]
password: xxx xxx
Primary Project: ITzGeek
Role: _member_
Configure OpenStack Networking
External Network
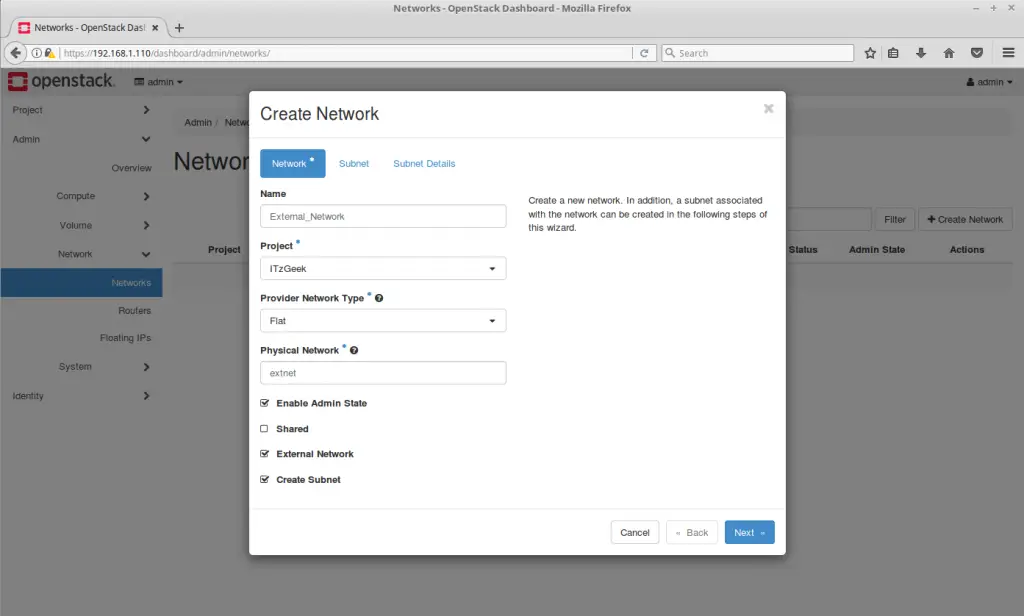
First, we will create the external network. Go to Admin >> Network >> Networks >> + Create Network. Make sure you logged in as Admin user
Set up the external network as follows:
Make sure the Physical Network (extnet) name matches the name you had in the answer.txt file which we used as an input for OpenStack installation.
Name: External_Network
Project: ITzGeek
Provider Network Type: Flat
Physical Network: extnet
Tick mark the External Network and Create Subnet, and then click Next.
When you choose network address (IP) for external network and instances, make sure it is in the same range of your home/personal network for easy communications. Otherwise, you would need to set up routes.
Gateway also should be your router IP in which your machine is connected.
On Subnet tab,
Subnet Name: External_Subnet
Network Address: 192.168.1.0/24
Gateway IP: 192.168.1.1
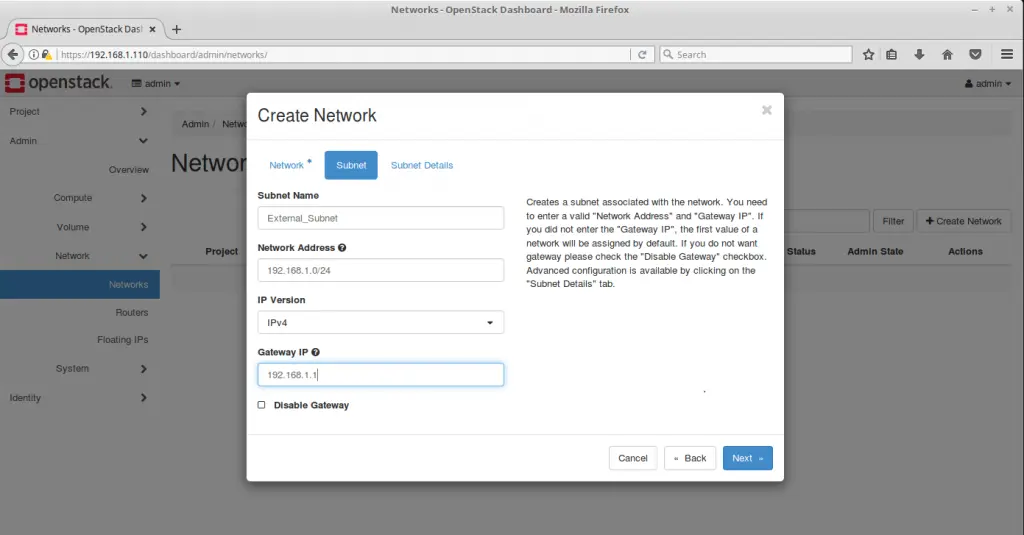
On Subnet Details Tab,
Enable DHCP: checked
Allocation Pools: 192.168.1.200,192.168.1.240 (Using these IP addresses, you will access VM instances from external machines)
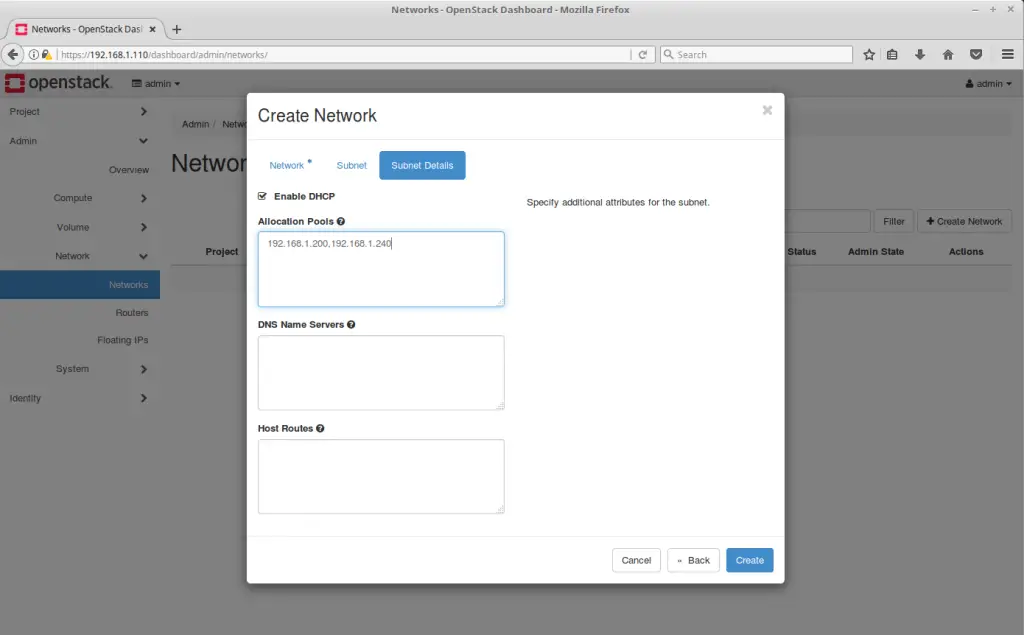
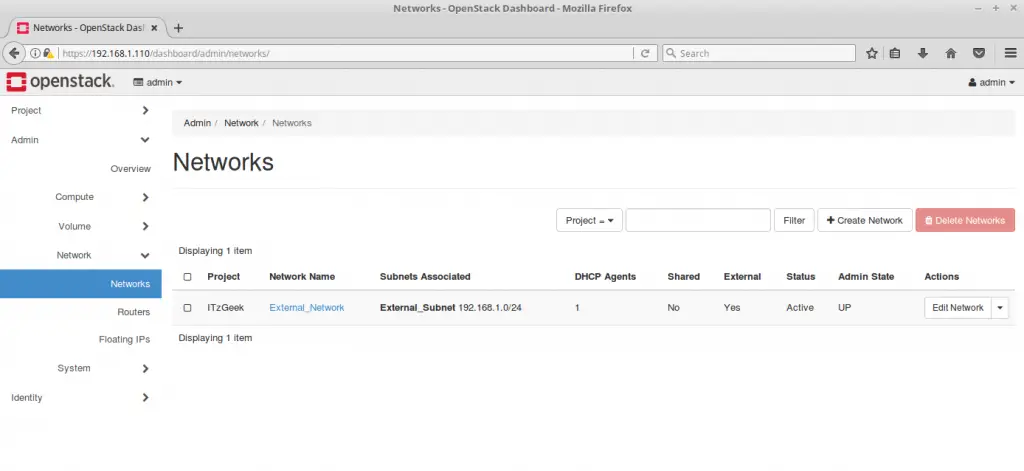
Finally, click Create to create the external network.
You have successfully created the External_Network.
Internal Network
This internal network is used by OpenStack to assign an IP address to VM instances. You can use any range of IP address for this network.
To create an internal network, you would need log out as admin and log in as a newly created user “raj“.
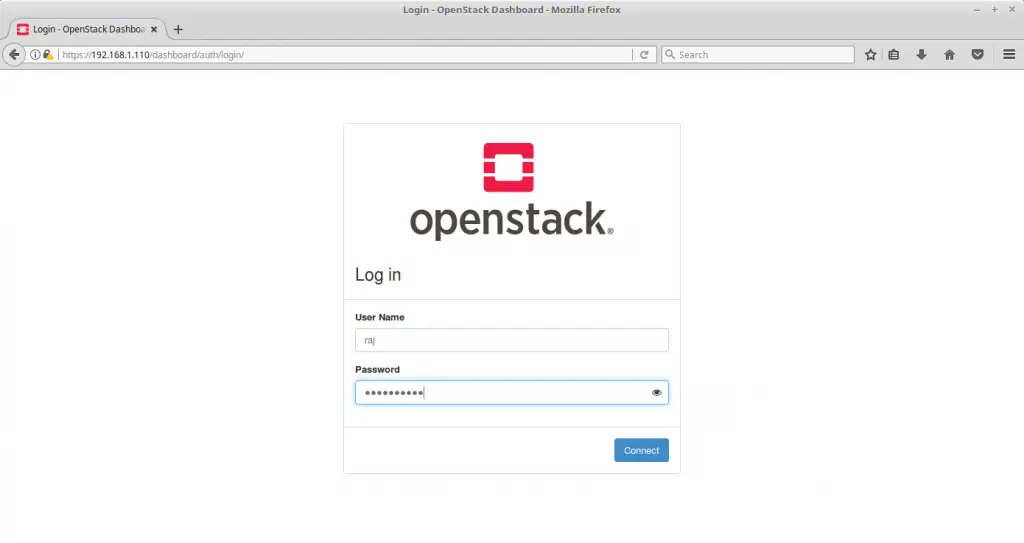
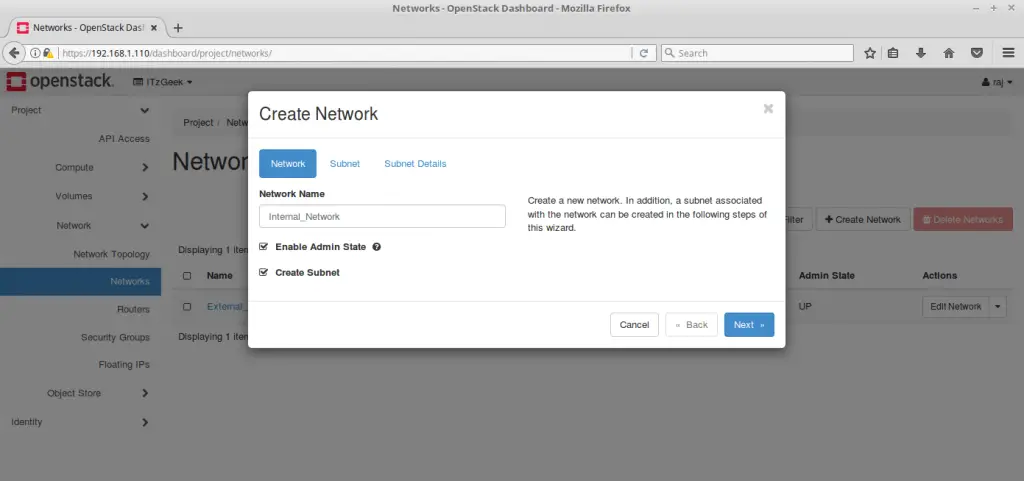
Go to Project >> Network >> Networks >> + Create Network.
Specify the Network Name as Internal_Network.
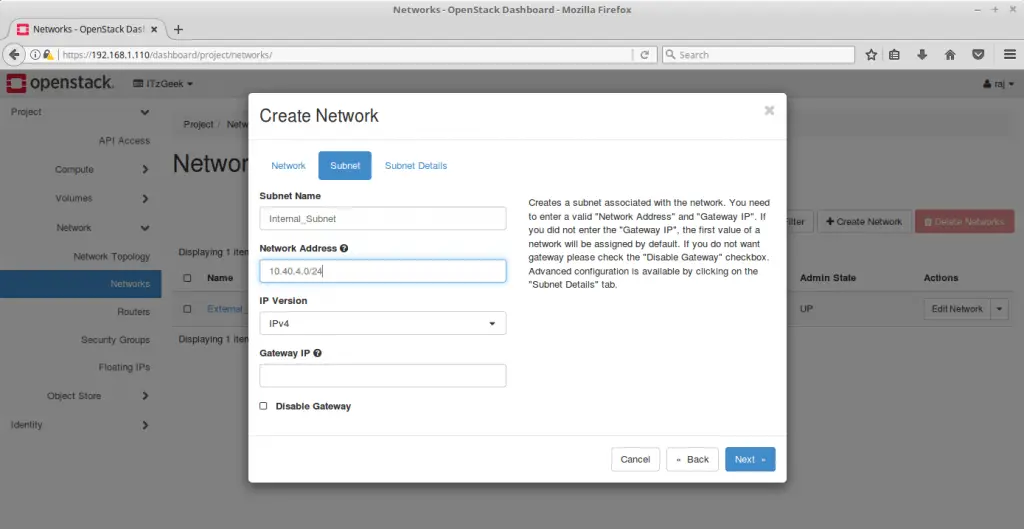
On Subnet Tab,
Subnet Name: Internal_Subnet
Network Address: 10.10.4.0/24
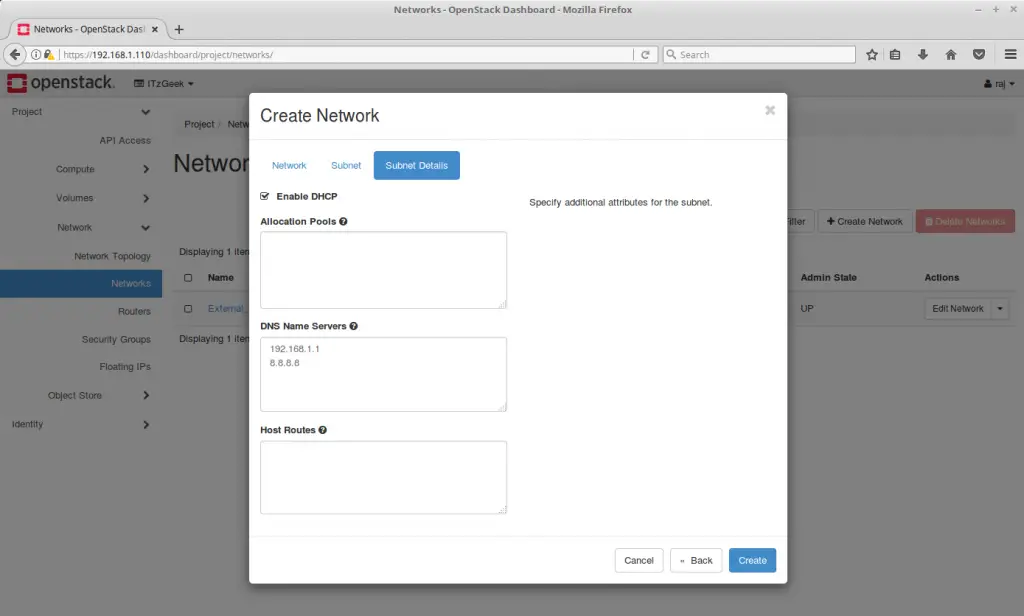
Leave the Subnet Details as it is and click on Create.
Here, I’m adding DNS servers IP address so that VM instances can access the internet.
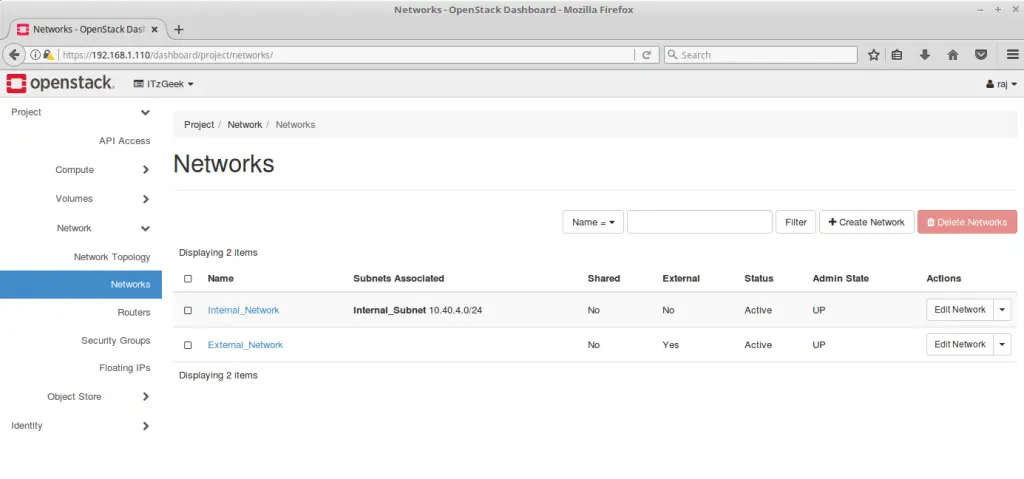
You should now have both networks.
Create Router
The router acts as the bridge between internal network and external network.
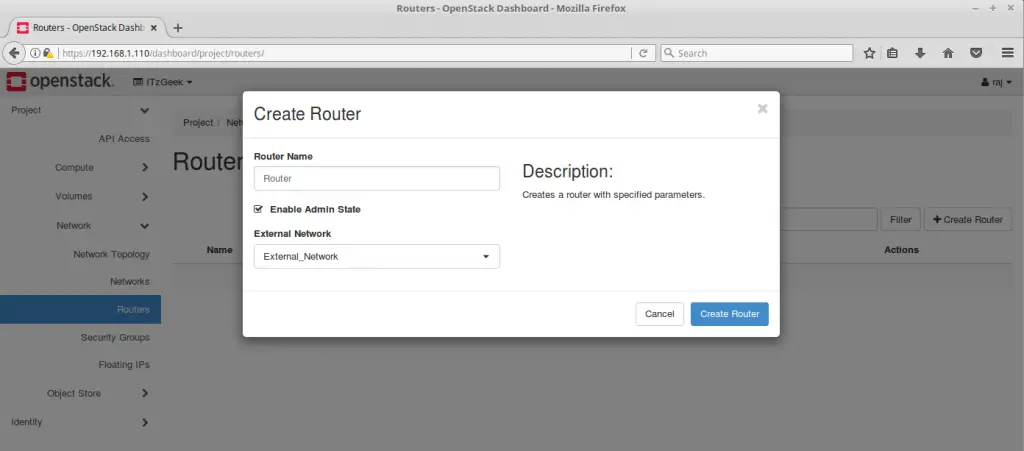
Go to Project >> Network >> Routers >> + Create Router.
Name the router and choose our External_Network as our external network and then click on Create Router.
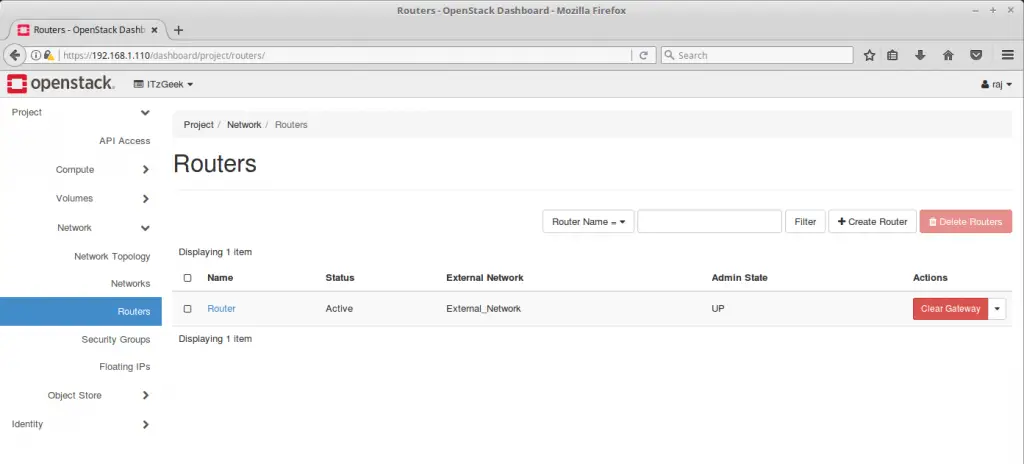
In the previous step, we have added the external network to the router. Now, we have to add the internal network as well.
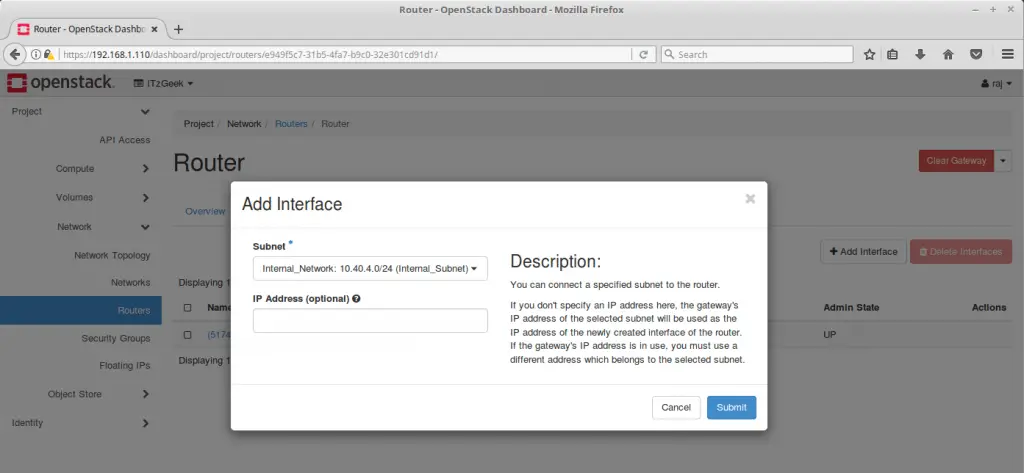
Click on the router and go to interfaces tab and then click on + Add interface. Now, select the subnet of Private_Network and then click submit.
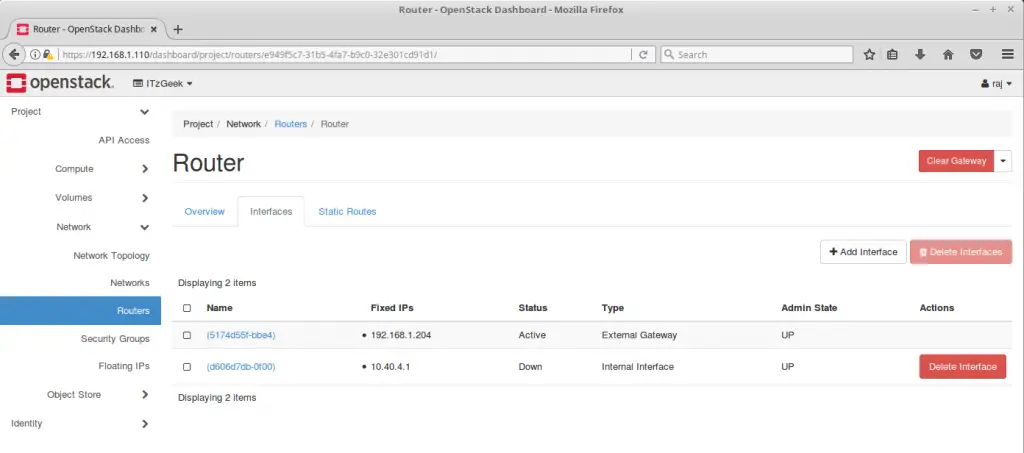
Now, the router should have interfaces from External_Network and Internal_Network.
Current Network Topology:
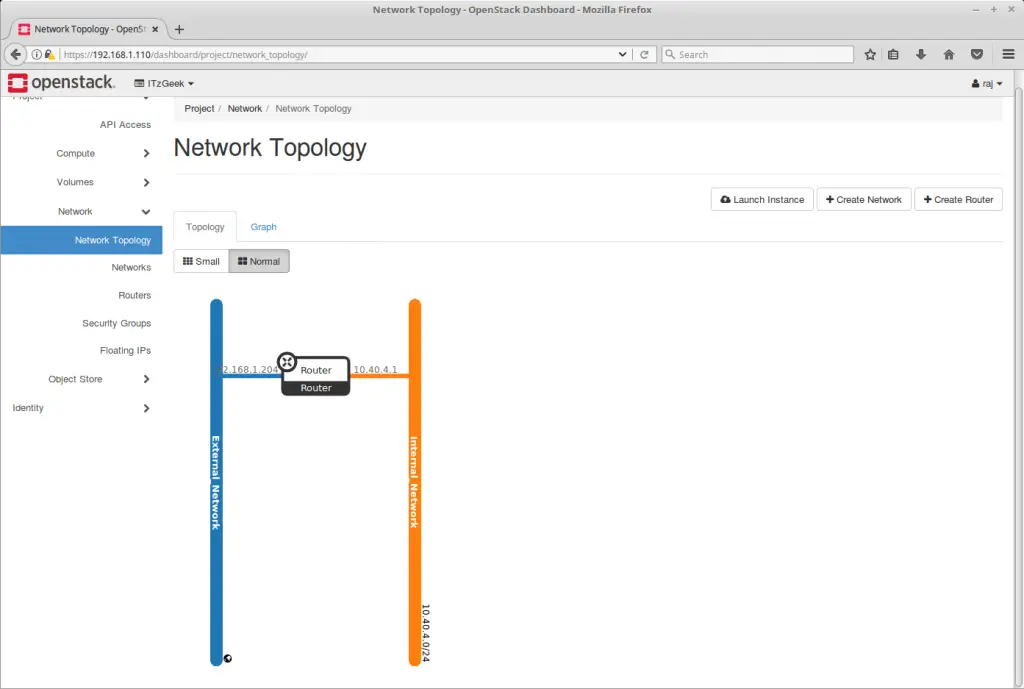
Now, we have completed the configuration of OpenStack networking. It is the time to Launch an OpenStack Instance using Horizon Dashboard.
