GitLab is an open-source web-based Git-repository manager, written in Ruby. It includes a wiki, issue management, code review, monitoring, and continuous integration and deployment.
GitLab enables developers to build, deploy and run their applications.
There are three editions of GitLab available for public, Community Edition (CE), Enterprise Edition (EE), and a GitLab-hosted version.
GitLab can import projects and issues from different sources including GitHub, which makes the migration process hassle-free. The GitLab web interface is clean, intuitive and close to GitHub’s interface.
There are different ways to install GitLab depending upon your preference.
This post covers the installing and configuring GitLab (CE) on a CentOS 7, Ubuntu 18.04 & Debian 9 machine using the Omnibus package.
System Requirements
The system requirements are based on the number of users who would be using the GitLab.
For 100 users:
2 cores
4GB RAM + 4GB SWAP
PostgreSQL (highly recommended)
10GB of free disk space
Prerequisites
Install the dependencies with the following commands.
### CentOS 7 / RHEL 7 ###

yum install -y curl policycoreutils-python openssh-server

### Ubuntu 18.04 / Debian 9 ###

sudo apt-get update
sudo apt-get install -y curl openssh-server ca-certificates
Firewall (CentOS / RHEL)
To be able to access the GitLab web interface you will need to open ports 80 and 443. Run the following commands.
firewall-cmd --permanent --add-service=http
firewall-cmd --permanent --add-service=https
firewall-cmd --reload
Install Postfix
For GitLab to send notification emails, you can either use Postfix or use external email services such as SendGrid, MailChimp, MailGun or SES.
You can skip the following steps in case you want to configure GitLab with external email services and can be done after GitLab has been installed.
Run the following command to install Postfix.
### CentOS 7 / RHEL 7 ###

yum install -y postfix

### Ubuntu 18.04 / Debian 9 ###

sudo apt-get install -y postfix
Ubuntu/Debian: During the Postfix installation, you will be asked to select the mail server configuration type. Select Internet Site and then press ENTER. Next, you will have to enter the mail name which should be your server hostname or external DNS name of your server (ex. example.com or gitlab.example.com).
Once the Postfix installation is complete, start and enable the postfix service by running the following commands.
### CentOS 7 / RHEL 7 ###

systemctl start postfix
systemctl enable postfix

### Ubuntu 18.04 / Debian 9 ###

sudo systemctl start postfix
sudo systemctl enable postfix
Install GitLab
Add the GitLab repository to your system using the following command.
### CentOS 7 / RHEL 7 ###

curl https://packages.gitlab.com/install/repositories/gitlab/gitlab-ce/script.rpm.sh | sudo bash

### Ubuntu 18.04 / Debian 9 ###

curl https://packages.gitlab.com/install/repositories/gitlab/gitlab-ce/script.deb.sh | sudo bash
The above script will enable the repository and install the necessary dependencies.
Once complete, install the GitLab by running the following command.
### CentOS 7 / RHEL 7 ###

yum install -y gitlab-ce

### Ubuntu 18.04 / Debian 9 ###

sudo apt-get install -y gitlab-ce
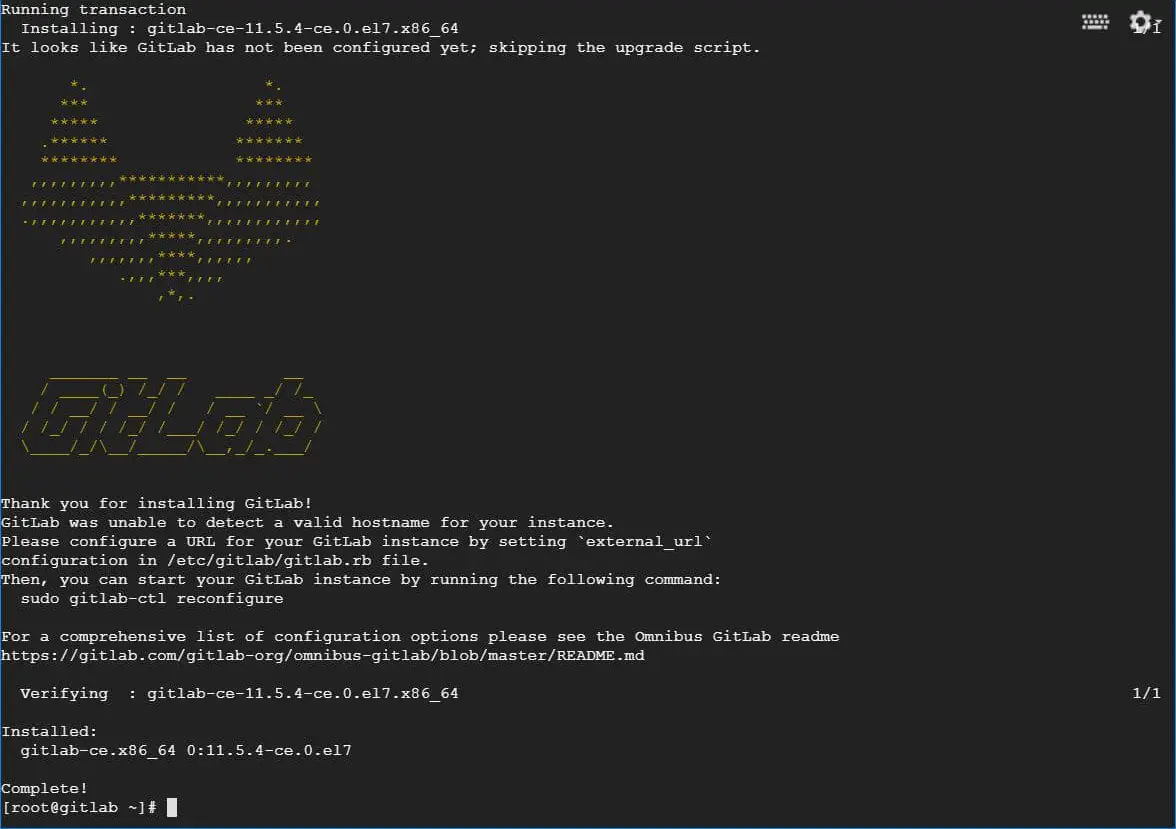
Wait for the installation to complete. After a successful installation, you will get the following output.
Before accessing the GitLab, we need to configure a URL for GitLab. To do that, edit the GitLab’s main configuration file /etc/gitlab/gitlab.rb.
### CentOS 7 / RHEL 7 ###

vi /etc/gitlab/gitlab.rb

### Ubuntu 18.04 / Debian 9 ###

sudo nano /etc/gitlab/gitlab.rb
Set external_url to your domain name or IP.
external_url "https://gitlab.itzgeek.local"
Once changed, reconfigure GitLab to apply the recent changes in the configuration file using the following command.
### CentOS 7 / RHEL 7 ###

gitlab-ctl reconfigure

### Ubuntu 18.04 / Debian 9 ###

sudo gitlab-ctl reconfigure
Configure GitLab with Let’s Encrypt SSL
Edit the GitLab main configuration file.
### CentOS 7 / RHEL 7 ###

vi /etc/gitlab/gitlab.rb

### Ubuntu 18.04 / Debian 9 ###

sudo nano /etc/gitlab/gitlab.rb
To enable Let’s Encrypt support for external URL, you would need to update external_url with the public domain name (ex. gitlab.itzgeek.com).
external_url "https://gitlab.itzgeek.com"
Next, find Let’s Encrypt integration section and uncomment the line starting with letsencrypt[‘enable’] and set it to true.
Optionally, if you want you can opt to receive emails from Let’s Encrypt with respect to your domain (ex. SSL certificate expiration reminders) by uncommenting the line starting with letsencrypt[‘contact_emails’] and add your email addresses.
Also, you can enable the automatic renewal of Let’s Encrypt SSL certificate.
# Enable Let's Encrypt integration

letsencrypt['enable'] = true
letsencrypt['contact_emails'] = ['[email protected]']

# Enable Let's Encrypt SSL reneal on every 4th day at 12:30

letsencrypt['auto_renew'] = true
letsencrypt['auto_renew_hour'] = "12"
letsencrypt['auto_renew_minute'] = "30"
letsencrypt['auto_renew_day_of_month'] = "*/4"
Save and close the file.
Visit the portal of your DNS registrar and create A record to point your external_url to your GitLab IPv4 address.
NAME                 TTL   TYPE      DATA

gitlab.itzgeek.com. 3600    A     35.231.140.52
Finally, run the following command to reconfigure Gitlab.
### CentOS 7 / RHEL 7 ###

gitlab-ctl reconfigure

### Ubuntu 18.04 / Debian 9 ###

sudo gitlab-ctl reconfigure
Access GitLab Web Interface
Launch your web browser and navigate to.
OR
The first time you access the GitLab web interface, you will be redirected to a page where you will be asked to set the password for the administrative (root) account.
Enter the desired password and click on the Change your password button.
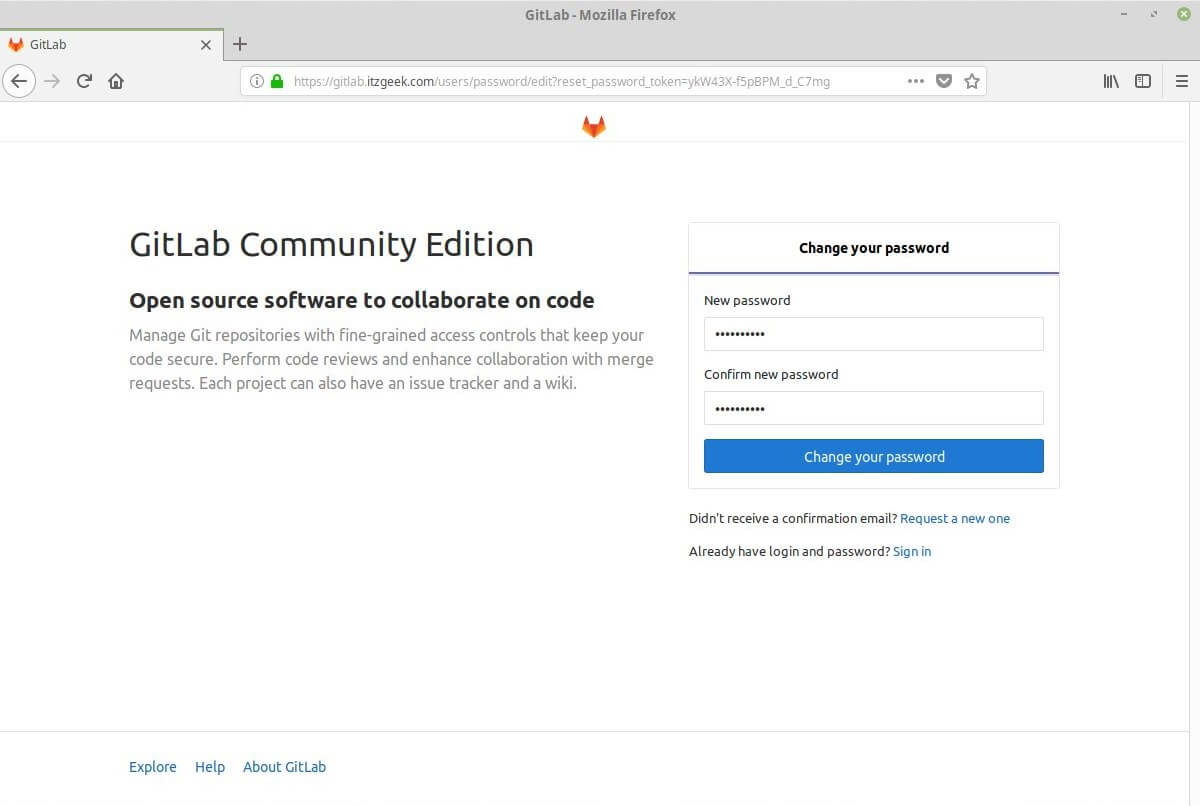
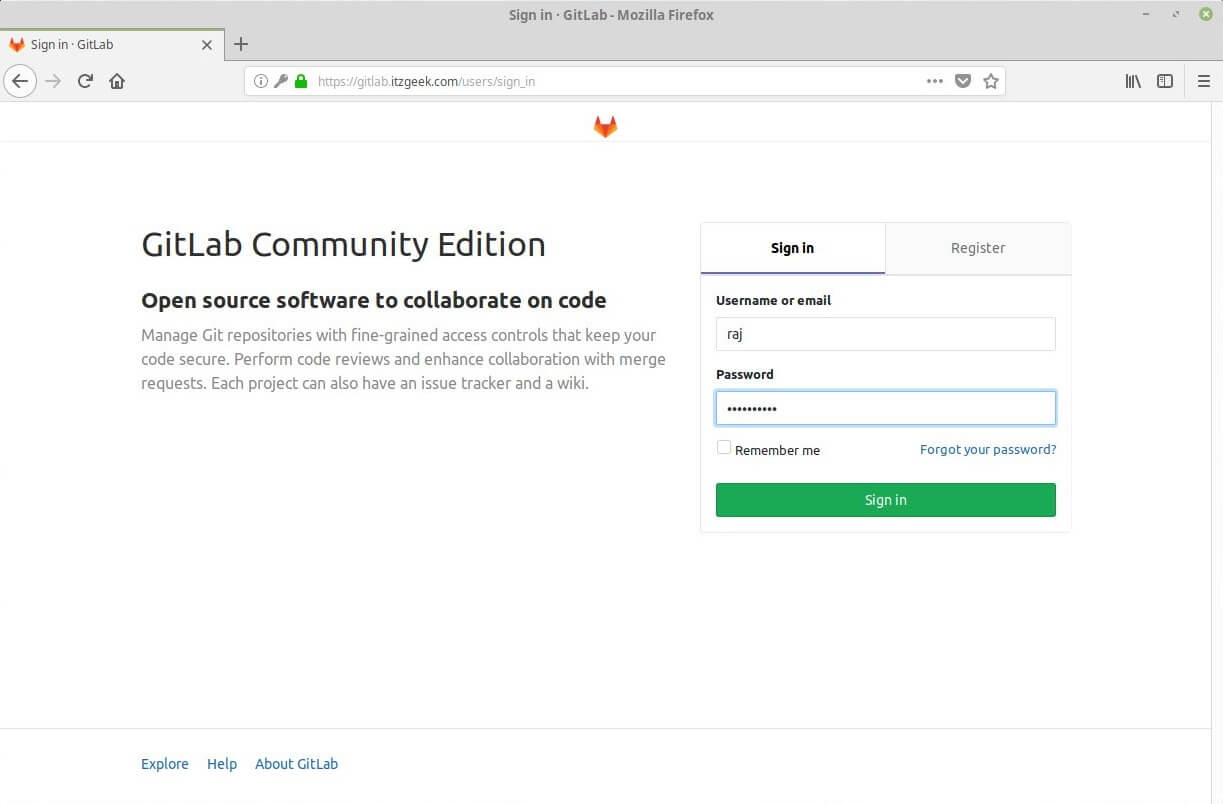
After you set the password, you will be redirected to the login page.
The default administrative account username is root.
Username: root
Password: [the password you have set]
Enter the login credentials and then click the Sign in button.

You will be taken to the GitLab Welcome page.

Change Default account Username
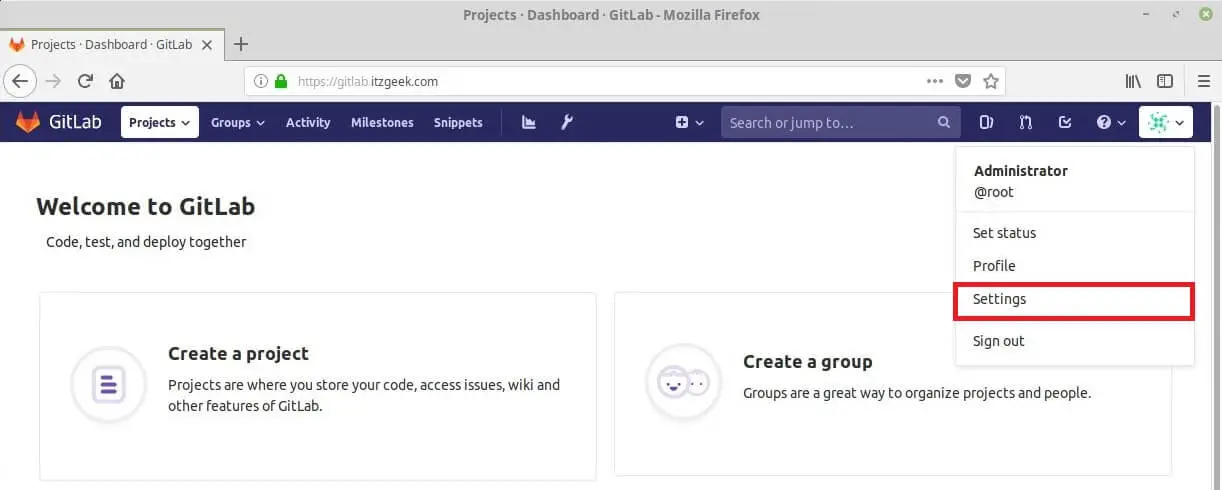
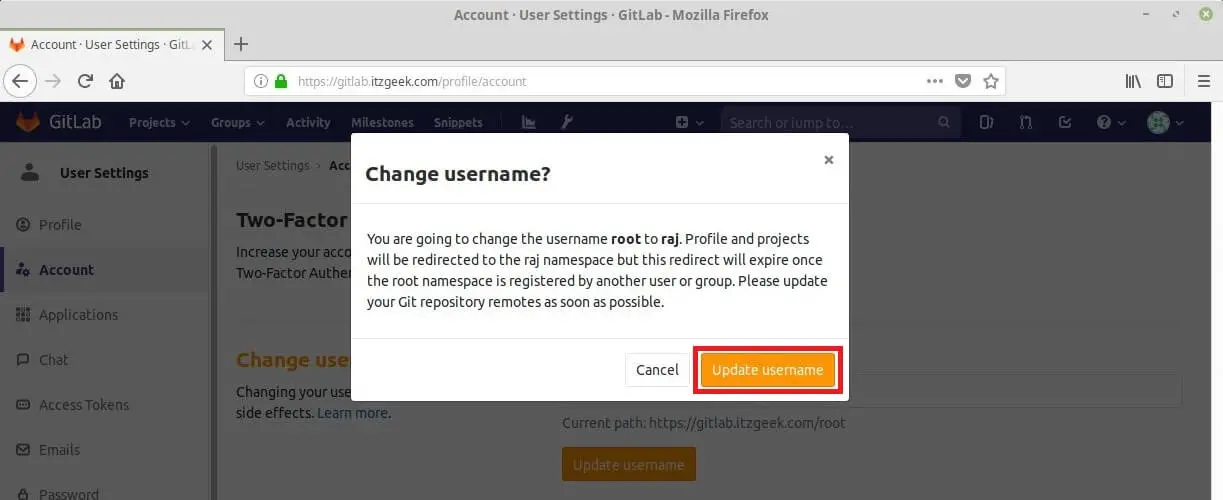
As a first task, we will change the username of the default account from root to something else.
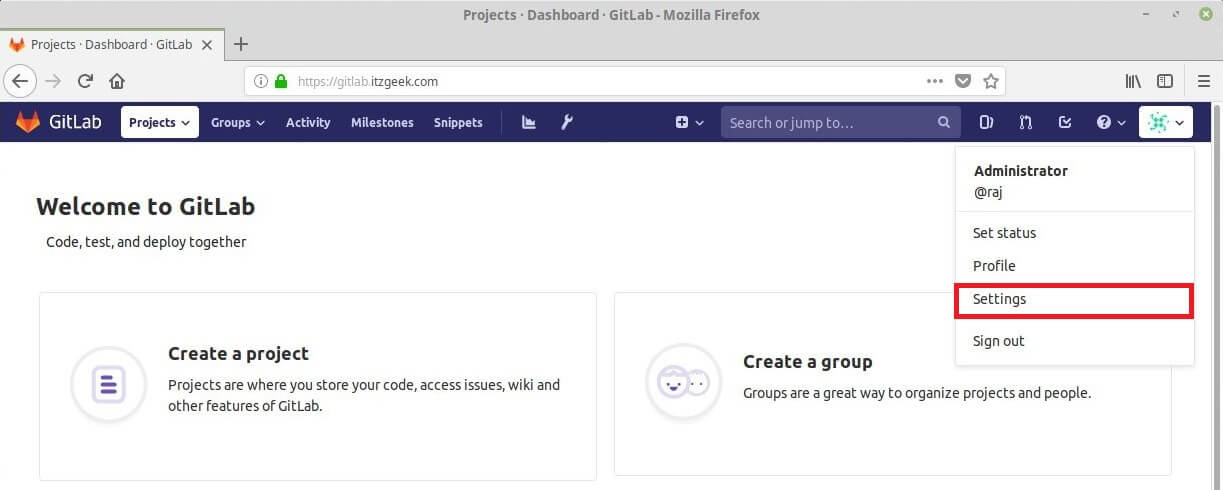
Click on Administrator Gravatar icon on the top right corner and choose Settings.
Go to Accounts and enter the new account name in the Change username field and then click Update username.
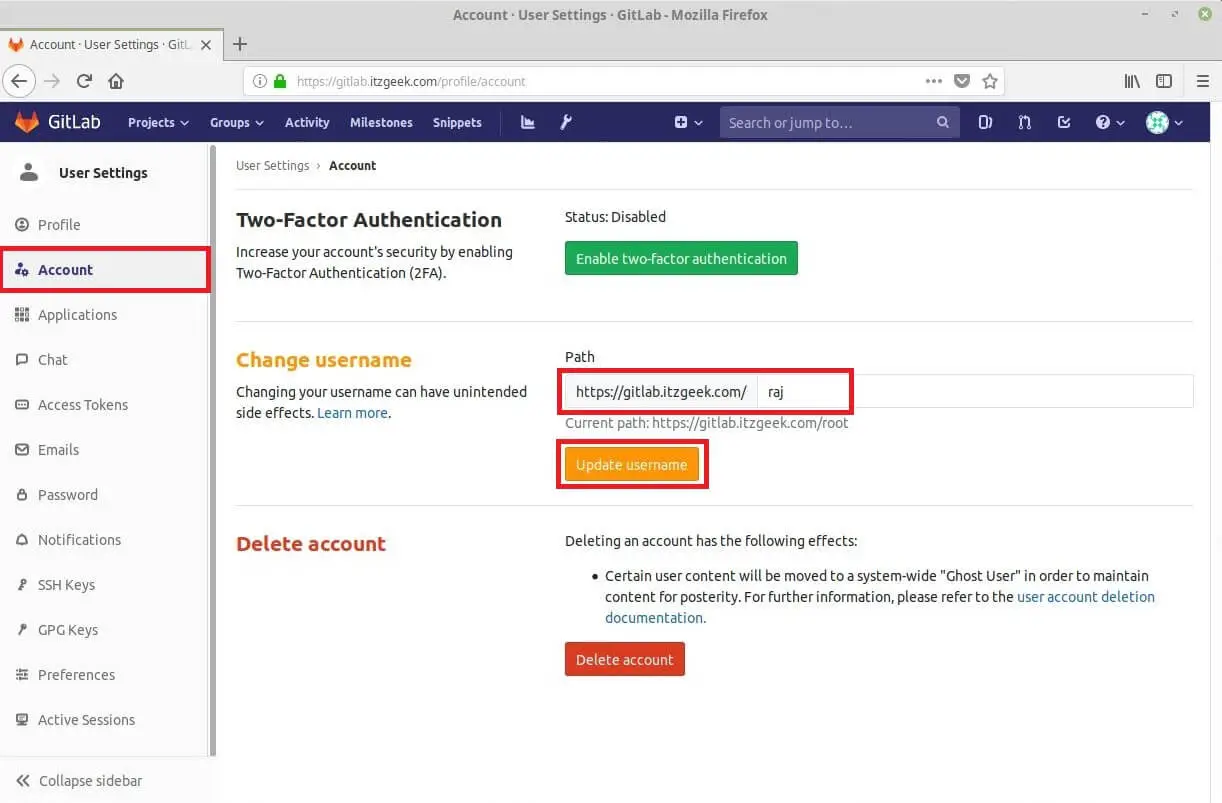
Click Update username to confirm the changes.
You will need to enter the new username on your next login.
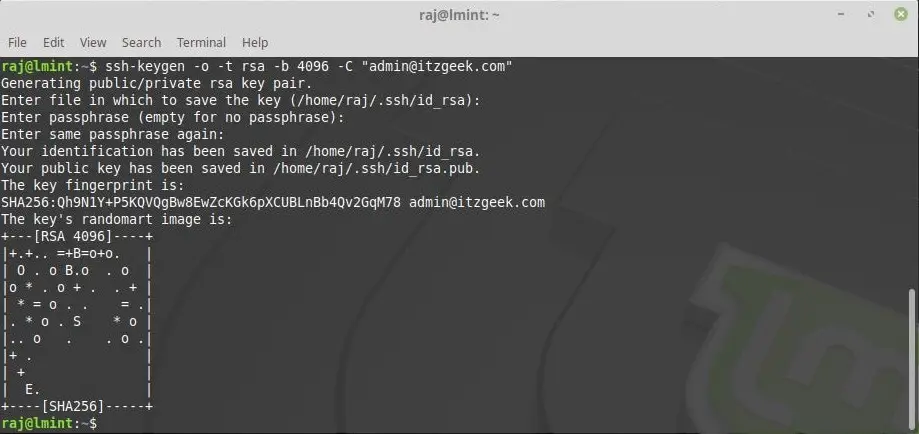
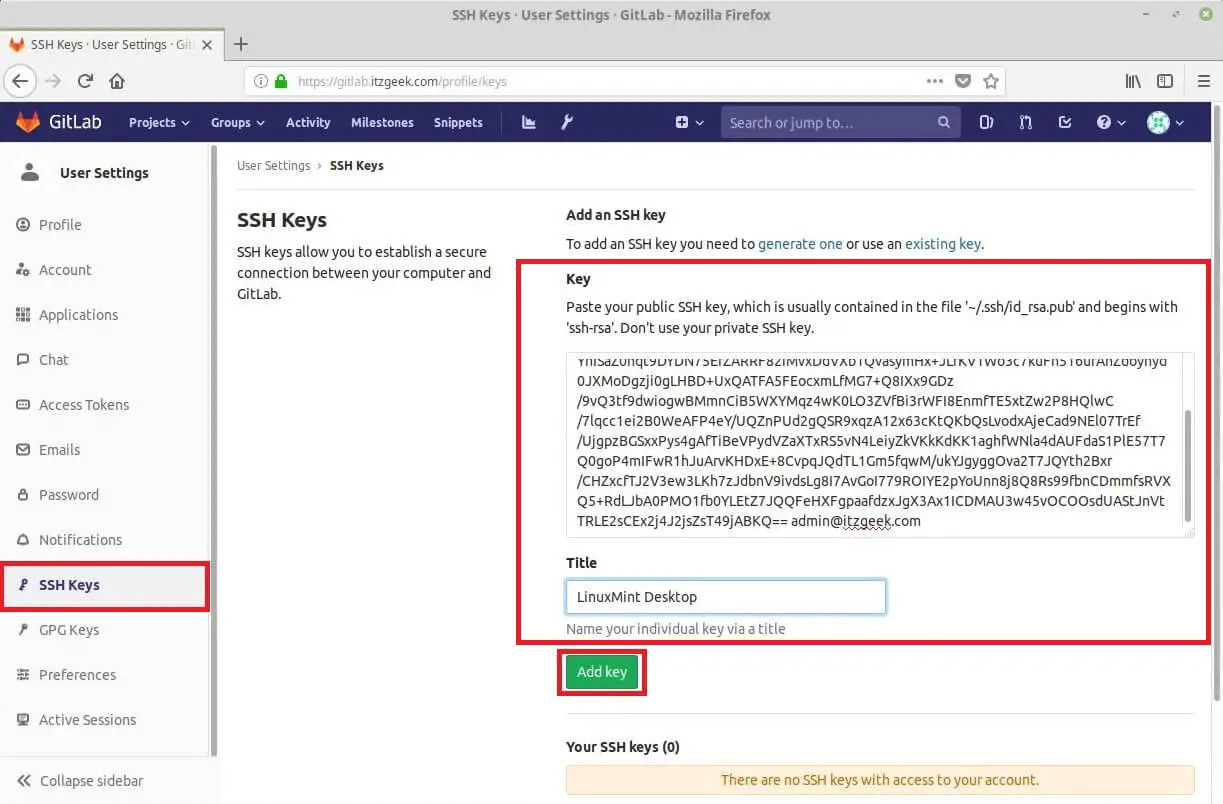
Add SSH Key
In order to push your local git changes to the GitLab server via SSH, you would need to add your SSH public (id_rsa.pub) key to your GitLab account.
If you already have an existing SSH key pair created, you can display copy the public key by display the key contents using the cat command.
cat ~/.ssh/id_rsa.pub

In case the command throws you an error like No such file or directory it means that your system does not have an SSH key pair generated.

To generate an SSH key pair use the below command.
ssh-keygen -o -t rsa -b 4096 -C "[email protected]"
Copy the output from the cat command.
cat ~/.ssh/id_rsa.pub
Go to the GitLab’s web interface and click on Gravatar icon on the top right corner and choose Settings.
Click SSH keys in the left pane.
Paste the public key you previously copied from your local machine and name your key and then click on the Add key button.
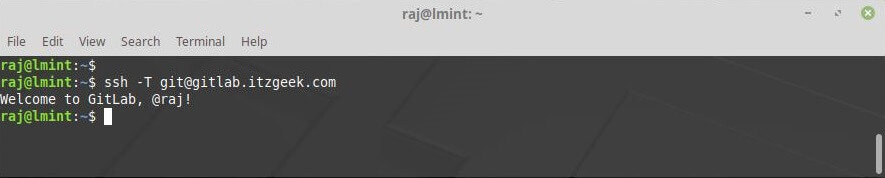
Verify the access using the below command.
ssh -T [email protected]
Output:
Welcome to GitLab, @raj!
That’s All.