Red Hat Enterprise Linux 8 has been released on May 7th, 2019. You now may be looking try the new version of world’s best enterprise operating system.
Red Hat Enterprise Linux 8 is based on Fedora 28 and uses Linux kernel 4.18. This release came after IBM acquired Red Hat for $34 billion.
There are many new features and changes in the recent release, compared to RHEL 7.
New Features
- The Cockpit – Web-based server manager is now available by default
- YUM v4 version is now based on DNF. This new version is compatible with YUM v3 (RHEL 7)
- RPM v4.14 is distributed in RHEL 8.
- RPM now validates the whole package contents before starting the installation
- RHEL 8 content is distributed through the two main repositories: BaseOS and Application Stream (AppStream)
- RHEL 8 support up to 4PB of physical memory
- XFS now supports shared copy-on-write data extents
- Wayland is the default display server for RHEL 8
- nftables replaces iptables as the default firewall
- PHP 7.2 comes with RHEL 8
- Nginx 1.14 is available in core OS repository in RHEL 8
- Python 3.6 is the default Python version in RHEL 8
Read more features of RHEL 8 here and here.
Supported Architectures
Red Hat Enterprise Linux 8 provides support for following architectures.
- AMD and Intel 64-bit architectures
- The 64-bit ARM architecture
- IBM Power Systems, Little Endian
- IBM Z
Download RHEL 8
You can click the below link to download the Red Hat Enterprise Linux 8.
Download Red Hat Enterprise Linux 8
Choose the Red Hat Enterprise Linux 8.0 Binary DVD ISO image for the installation.
Install RHEL 8
Installation of RHEL 8 is very similar to CentOS 7 / RHEL 7, and you would not find any difficulty in getting the RHEL 8 ready for testing.
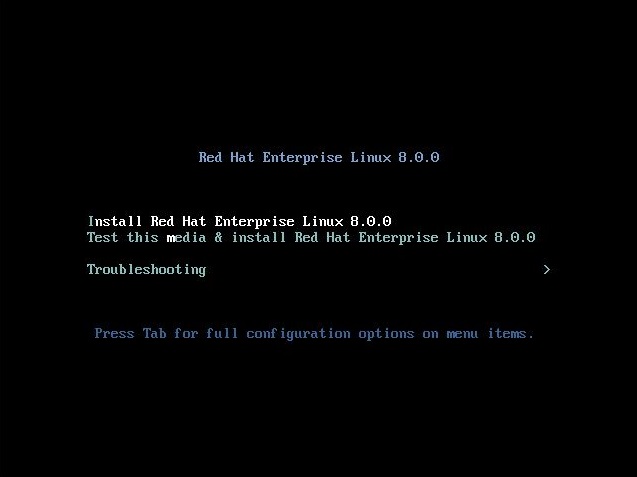
Boot the DVD and select Install Red Hat Enterprise Linux 8.0 from the boot menu.
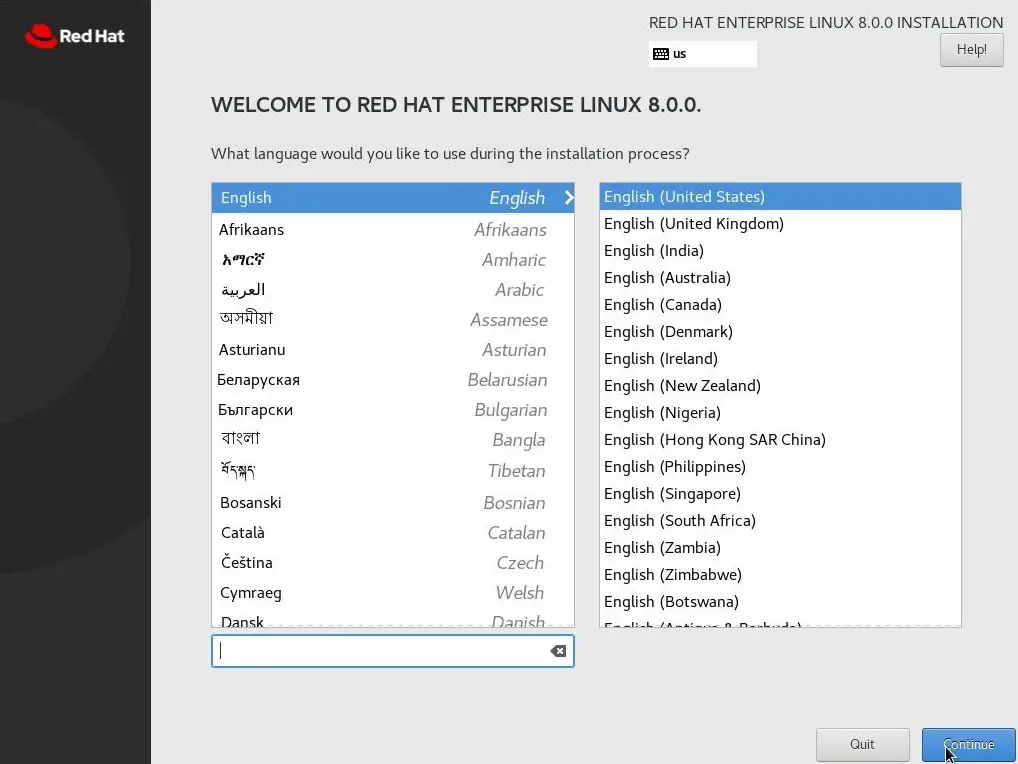
Select the language for RHEL 8 installation and continue.
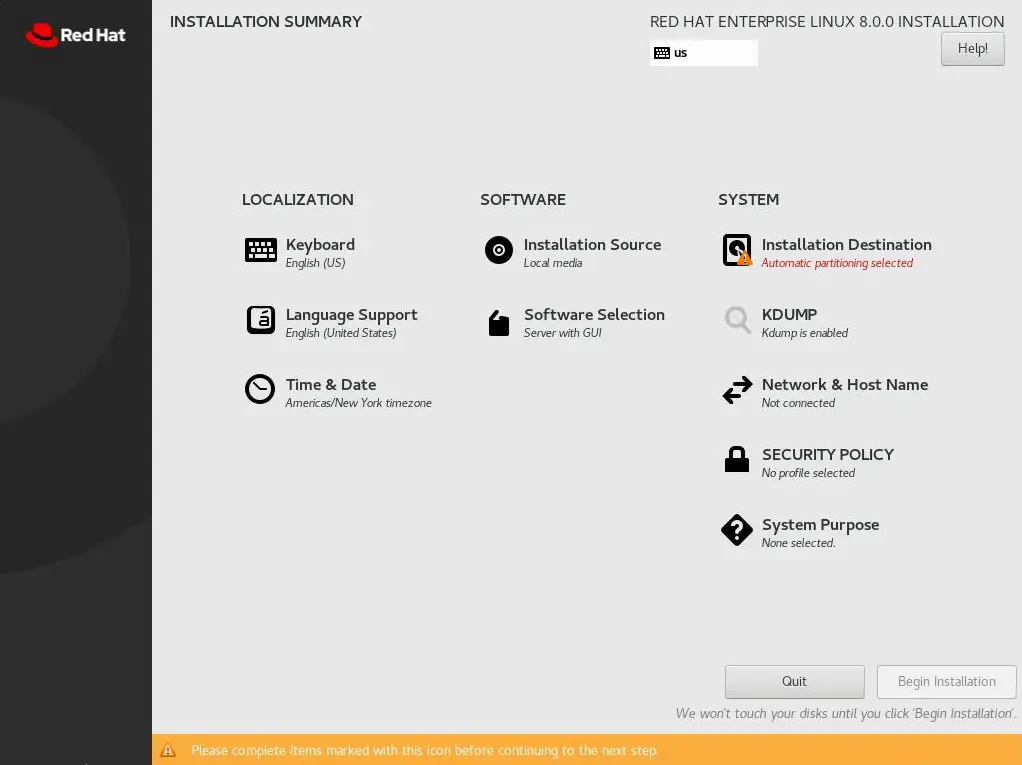
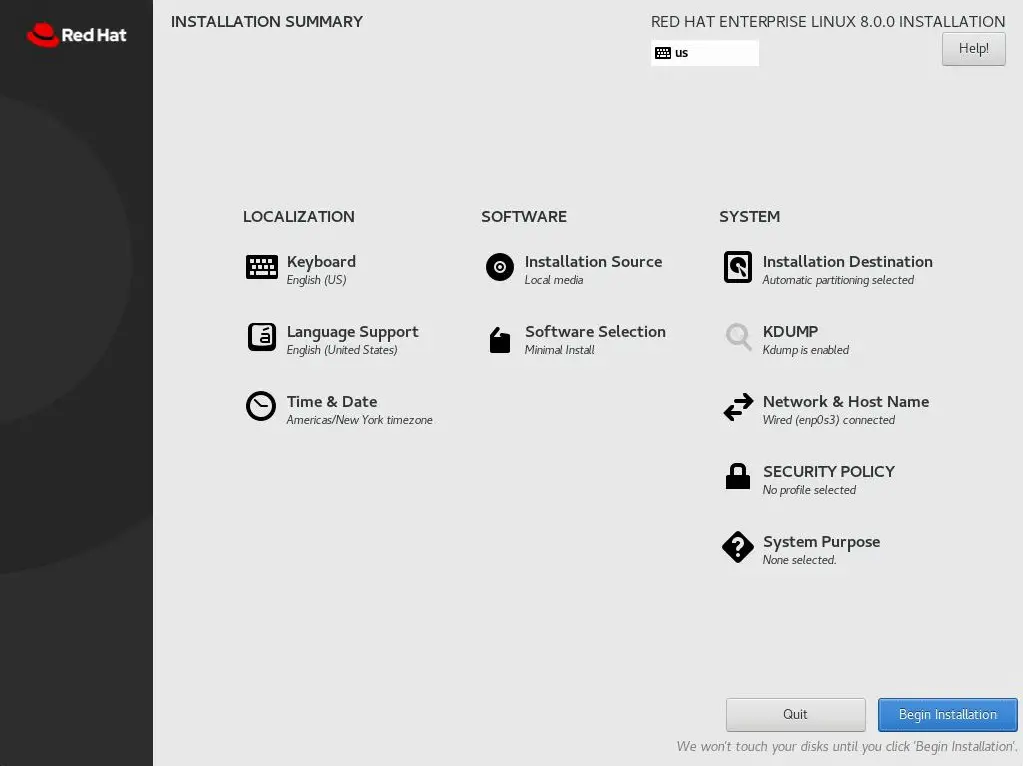
Next step is the installation summary, and you must clear the warning messages. If you want to change the setting, you can click on it and open the corresponding settings page.
- Localization
- Software
- System
Localization
- Keyboard
- Language Support
- Time & Date
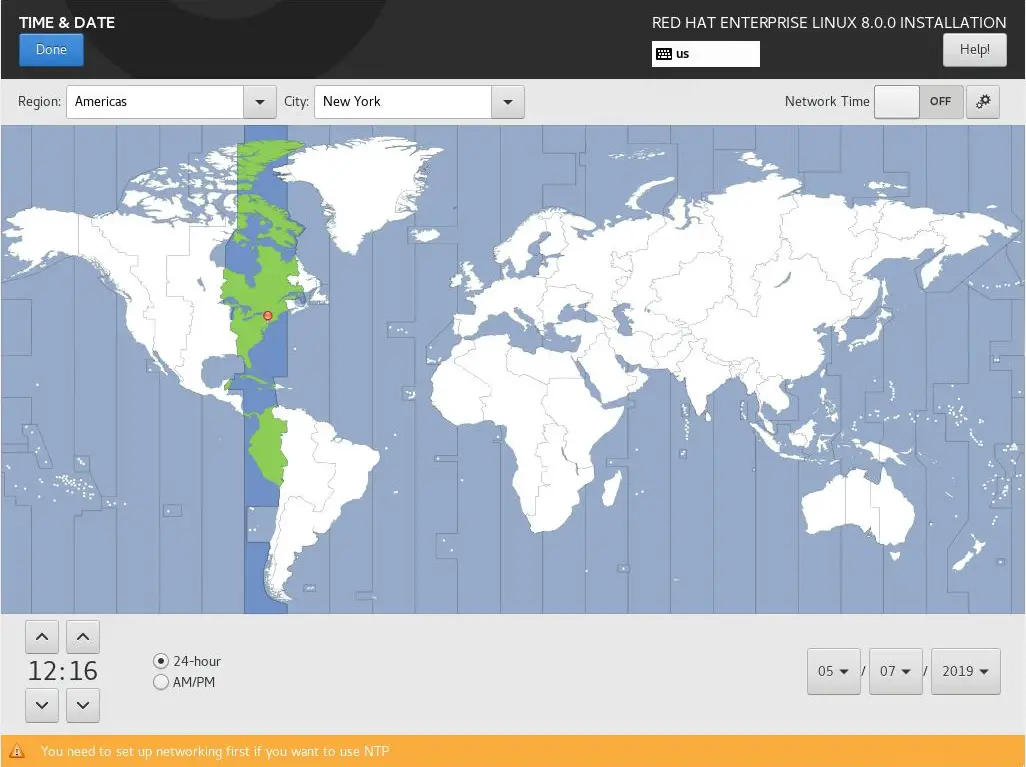
We have already set up the Keyboard and Language Support. Now, we will change the time zone. Click on Time and date. You will get the following page to change the Time and Date / Time zone. Click on Done.
Software
- Installation Source
- Software Selection
Leave the installation source be Local Media.
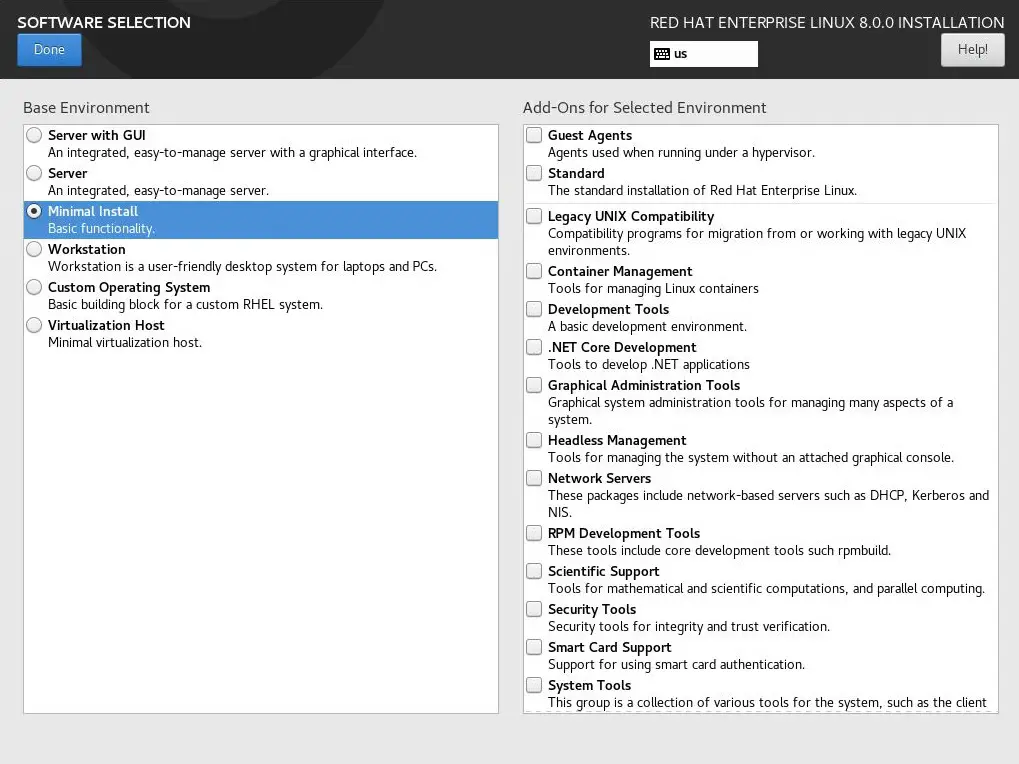
If you click on Software Installation, you will get the following page to change the type of installation.
There are four predefined installation types.
- Server with GUI
- Server
- Minimal Install
- Workstation
- Custom Operating System
- Virtualization Host
Choose the one that is suitable for your installation (I chose Minimal Install) and click on done.
System
- Installation Destination
- Kdump
- Network & Host Name
- Security Policy
- System Purpose
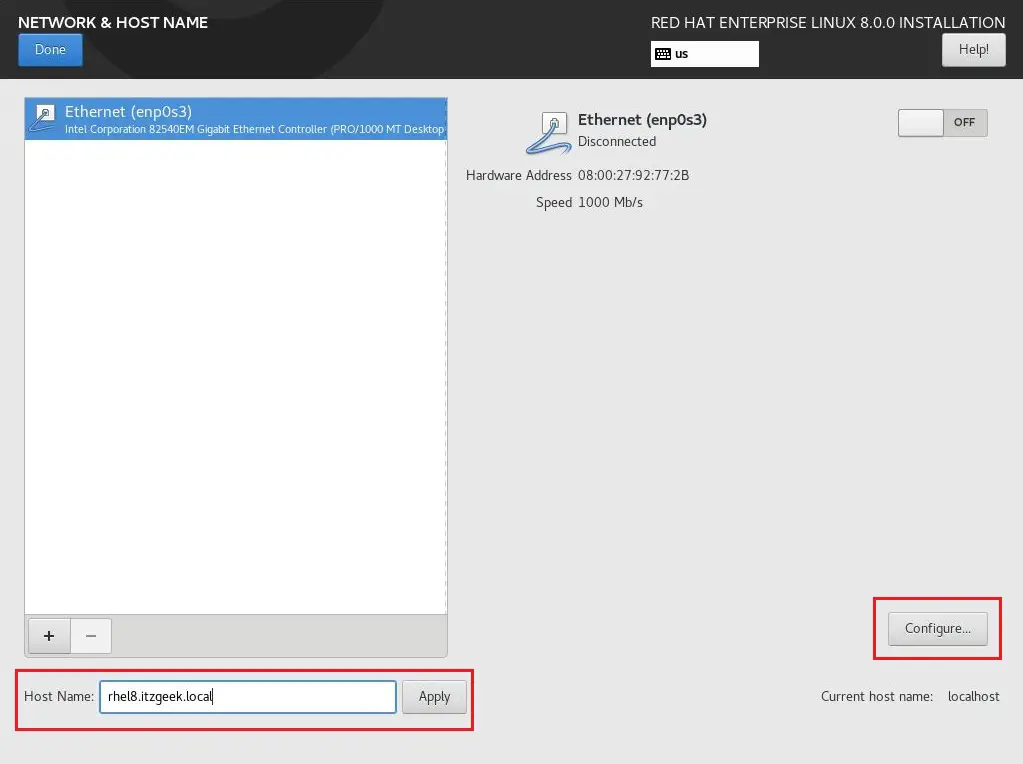
Click on the Network and Host Name to setup IP Address and hostname for your system. Type the hostname in the Host Name field and click Apply.
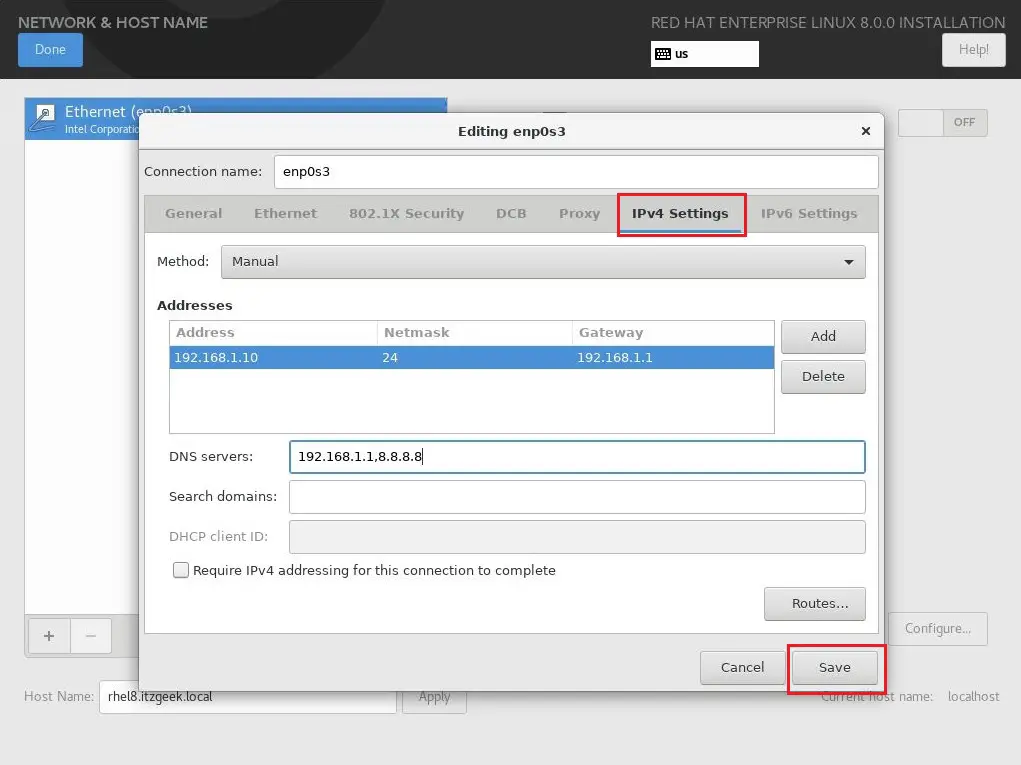
Click Configure in the above page to set up the IP Address.
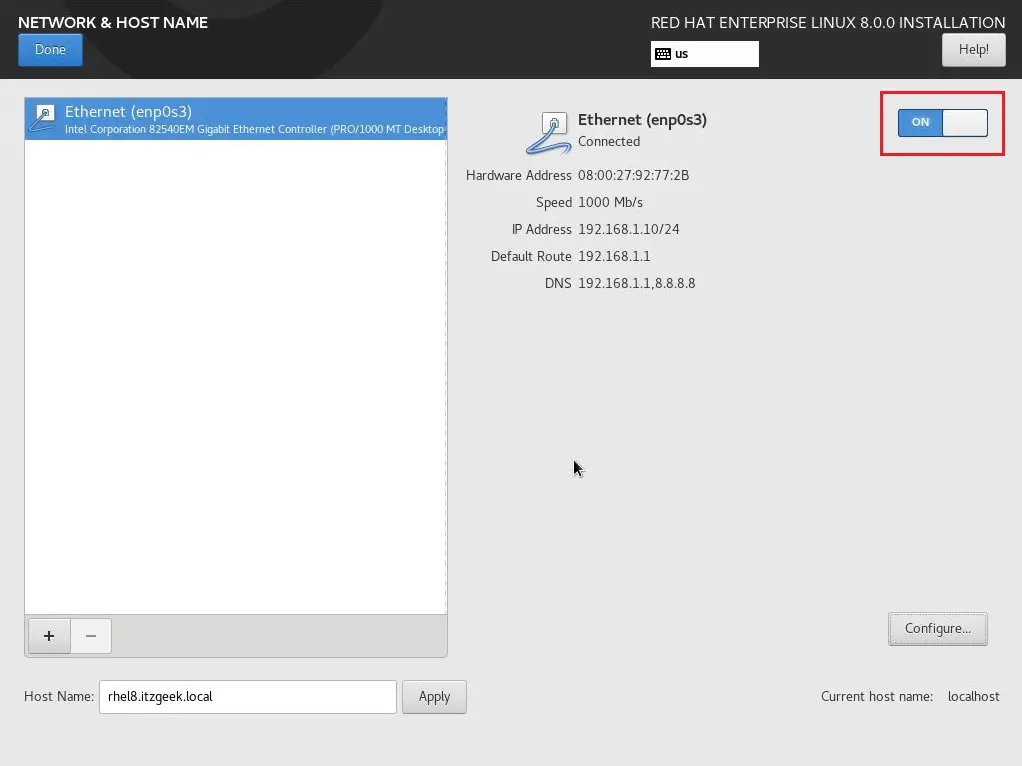
Turn on the Network and click Done.
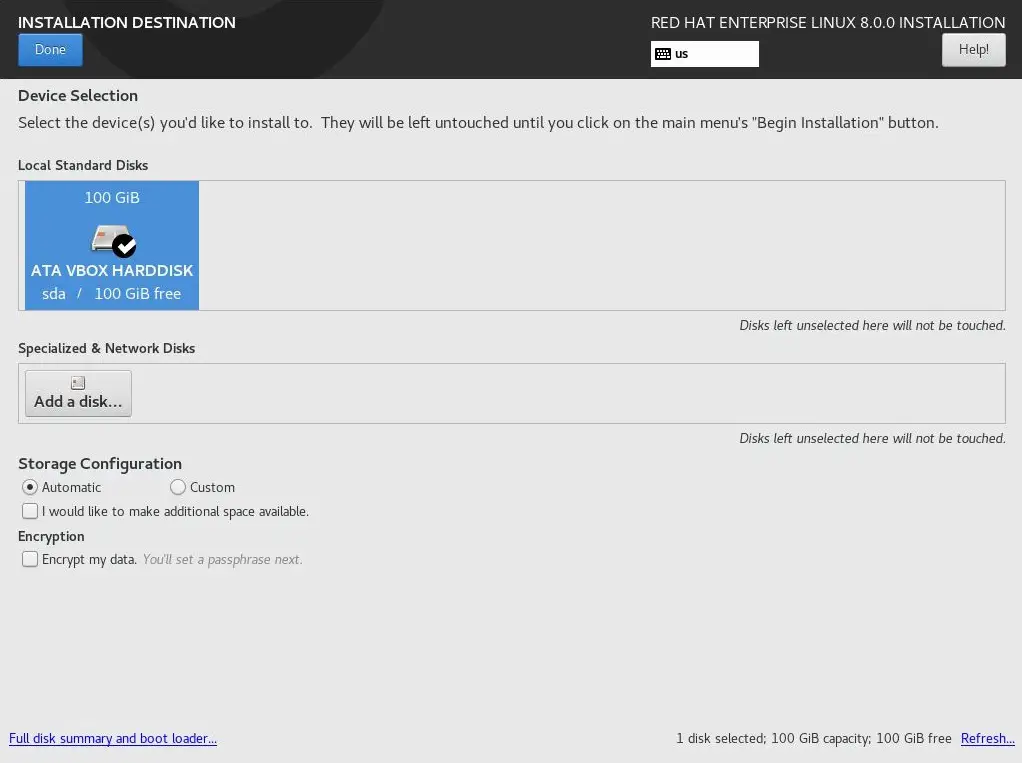
Click on Installation Destination to setup disk partitions for the installation. You can partition your system as per your need. Then, click Done.
Here, I will do the automatic partition.
Once you have completed the above setting, you would not see warnings in Installation summary. Click on Begin Installation to start the installation.
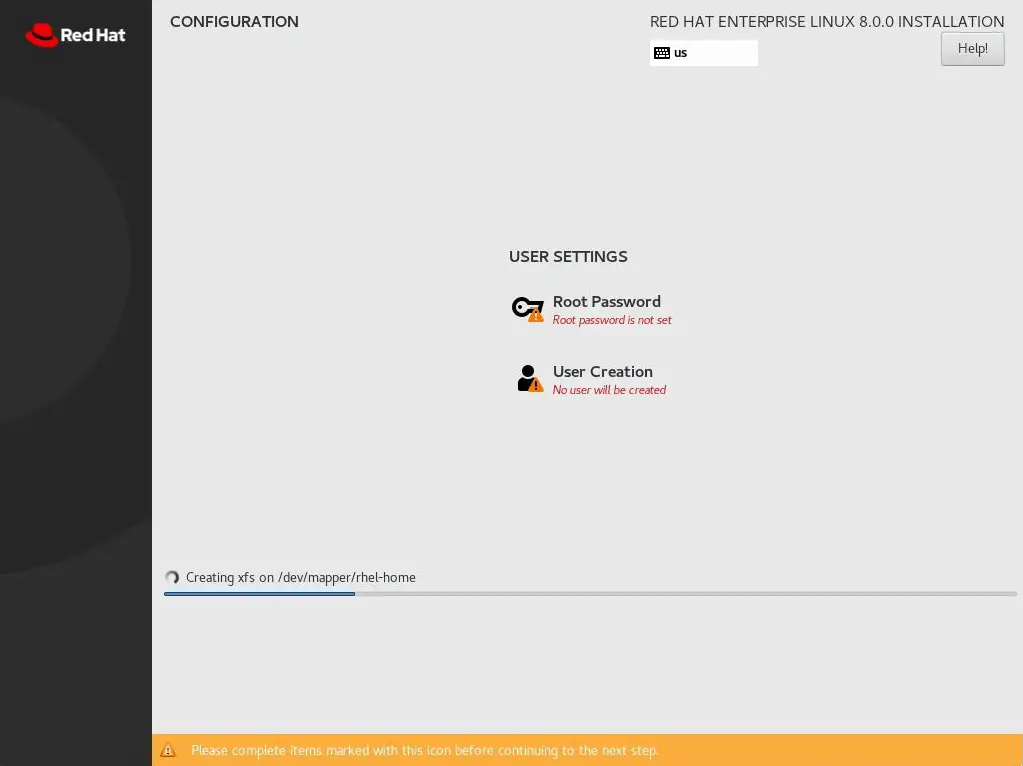
Configuration
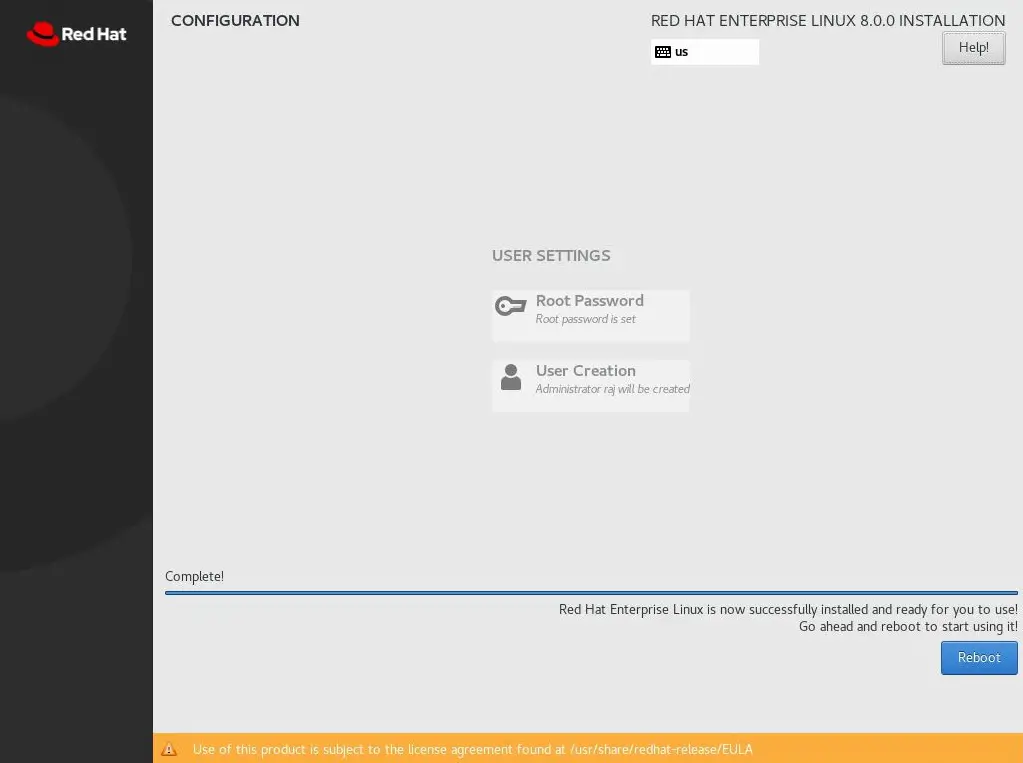
The installer will now start to install the packages. In the meantime, we will set up the following two things.
- Root Password
- User Creation
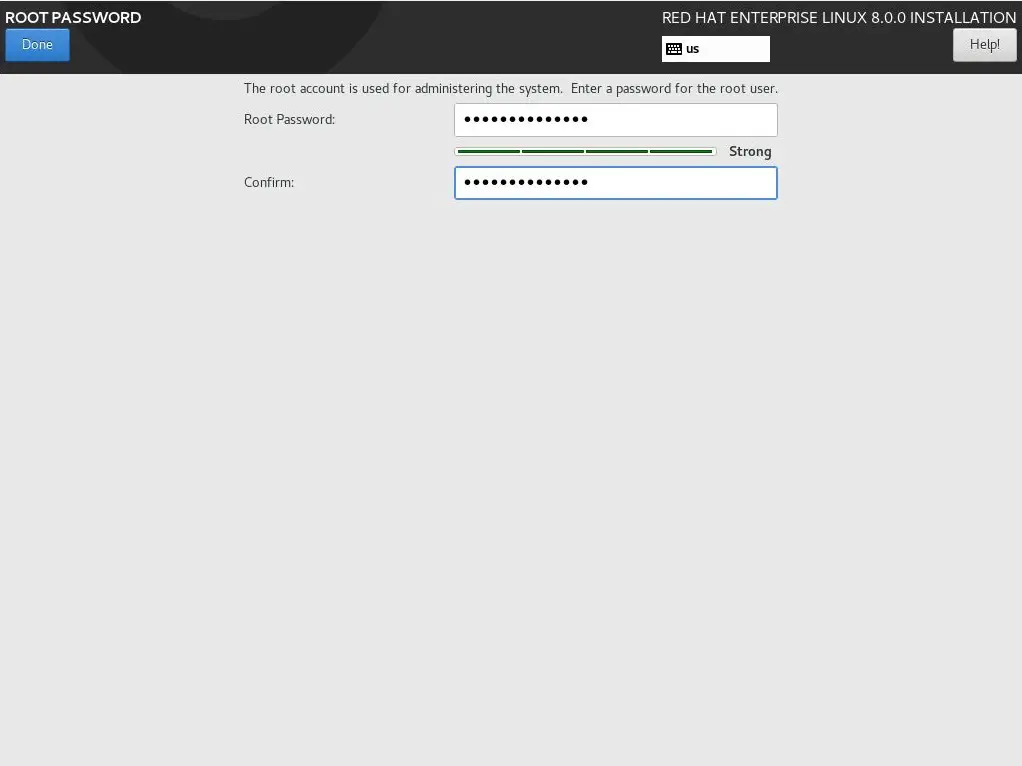
Set the root password.
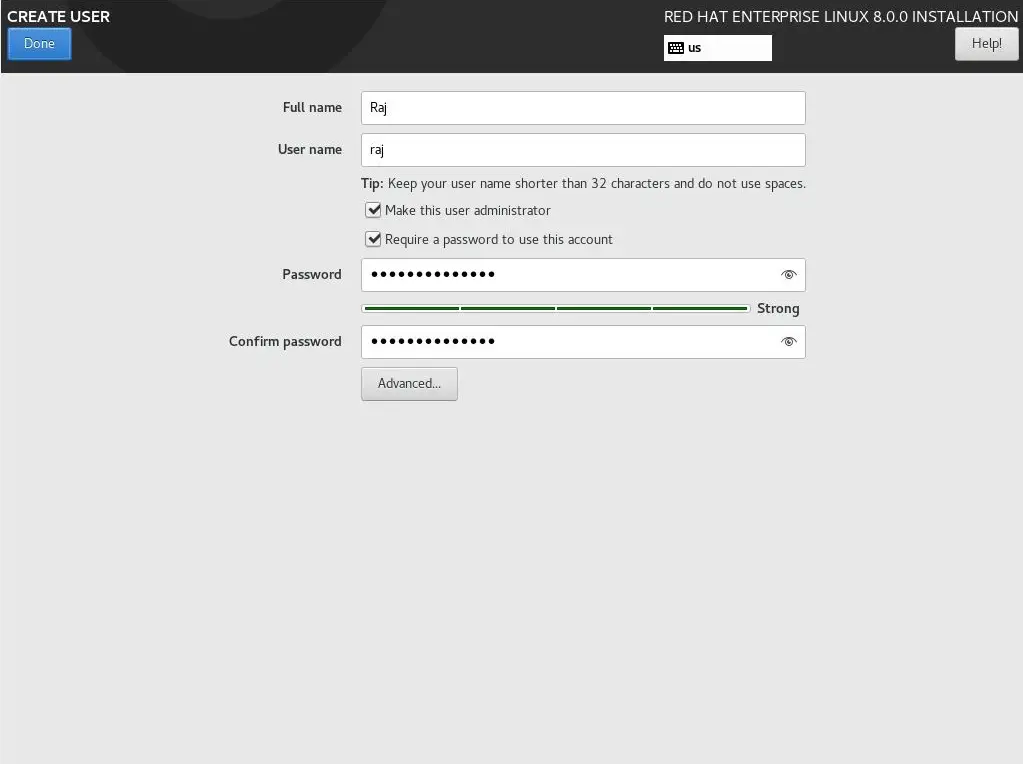
Create a new user (This is optional and can be created later).
Wait for the installation to complete. Once RHEL 8 installation is completed, you will be asked to reboot the system.
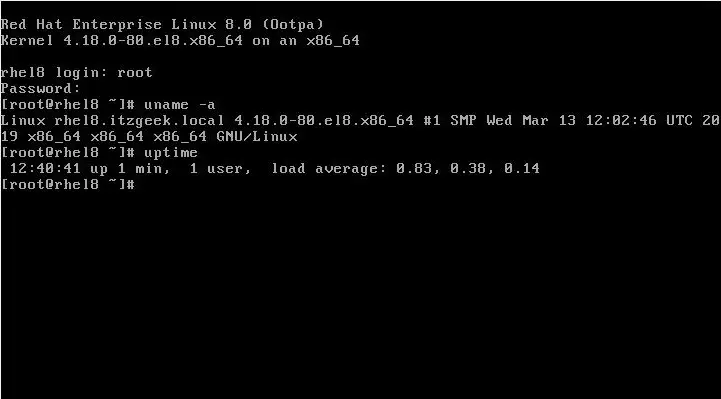
On a successful reboot, you will get a login screen (due to minimal installation).
Conclusion
That’s All. I hope this post helped you to install RHEL 8 on your system. If you chose the RHEL 8 minimal install, you can install GNOME desktop packages to have graphical desktop environment.