This article is the third part of our OpenStack series. In this tutorial, we will go through steps to launch an OpenStack instance from Horizon Dashboard.
Prerequisites
1: Install Single Node OpenStack in CentOS 7 / RHEL 7
2: Configure OpenStack Networking to Enable Access to VM Instances
Launch OpenStack Instance
Before launching an instance, we would need to perform the below tasks.
- Create OpenStack Image
- Create Machine Flavor
- Create Security Group
- Generate Key Pair
Create OpenStack Image
Without virtual machine images, you can not deploy OpenStack instances. OpenStack Image is a single file (QCOW2 or Raw) which contains a disk that has an operating system installed on it.
For this demo, we will use CentOS 6 image and upload it to OpenStack.
In case you want to use some other image, get it from here.
Login as admin user and perform the below tasks.
To Create Image, Go to Admin >> Compute >> Images >> + Create Image.
Enter the details.
Image Name: CentOS 6 x86_64
Image Description: CentOS 6 Image
Image Source: Browse the downloaded image (My image is in ~/raj – Home directory).
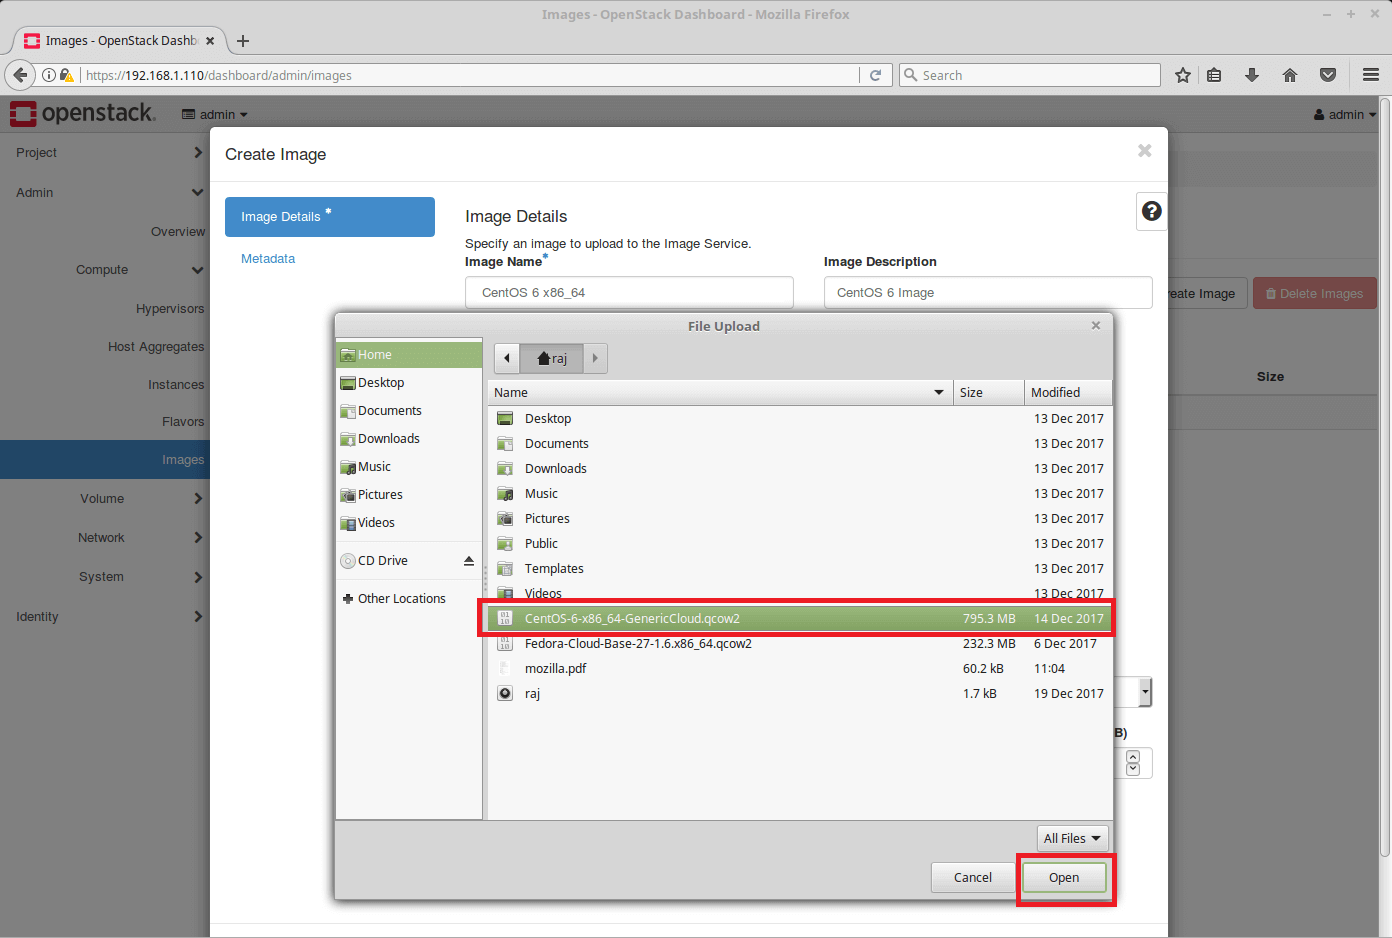
Format: QCOW2 – QEMU Emulator
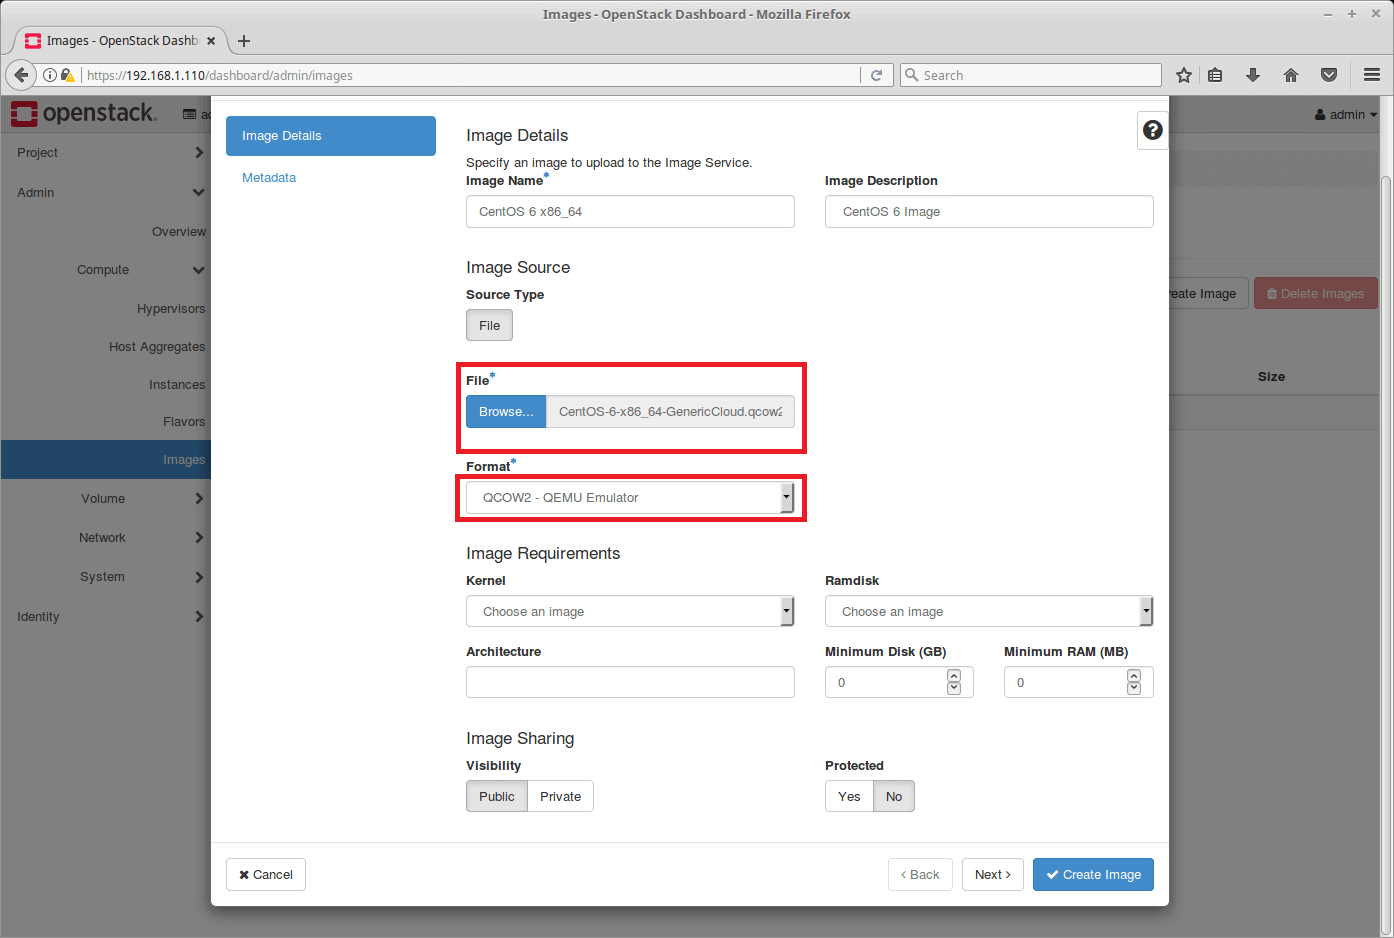
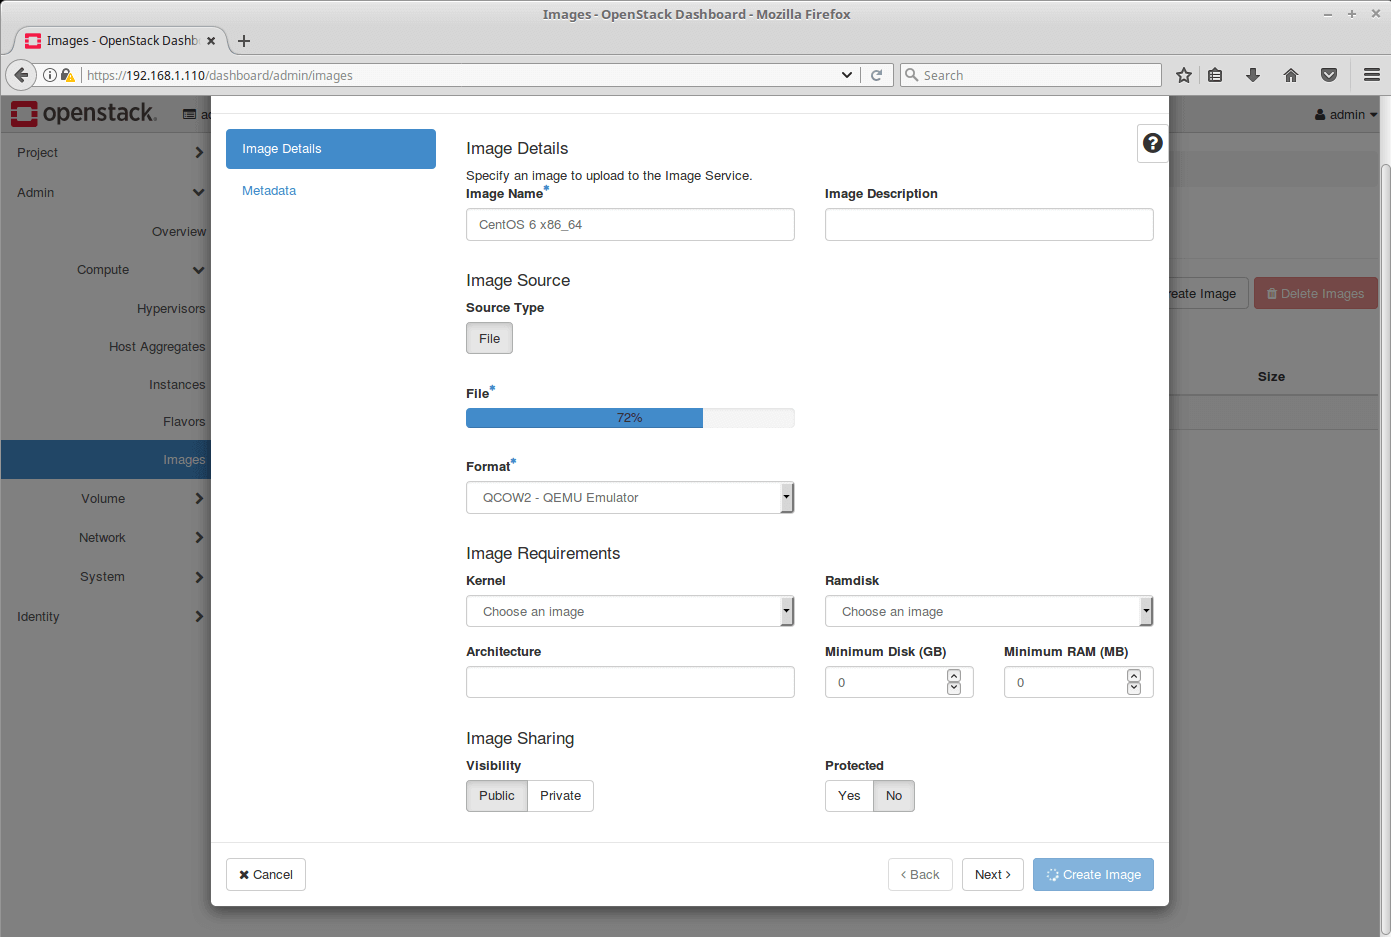
Click Create Image to begin. Wait for few minutes to complete.
Note: Image will be accessible to all OpenStack users, by default.
Create Machine Flavor
Machine Flavors are varying combinations of CPU, memory, storage and swap capacity and let you choose the correct mix of resources for your requirement.
Though OpenStack has predefined flavors creating a new machine flavor could match the exact resource requirement for your application.
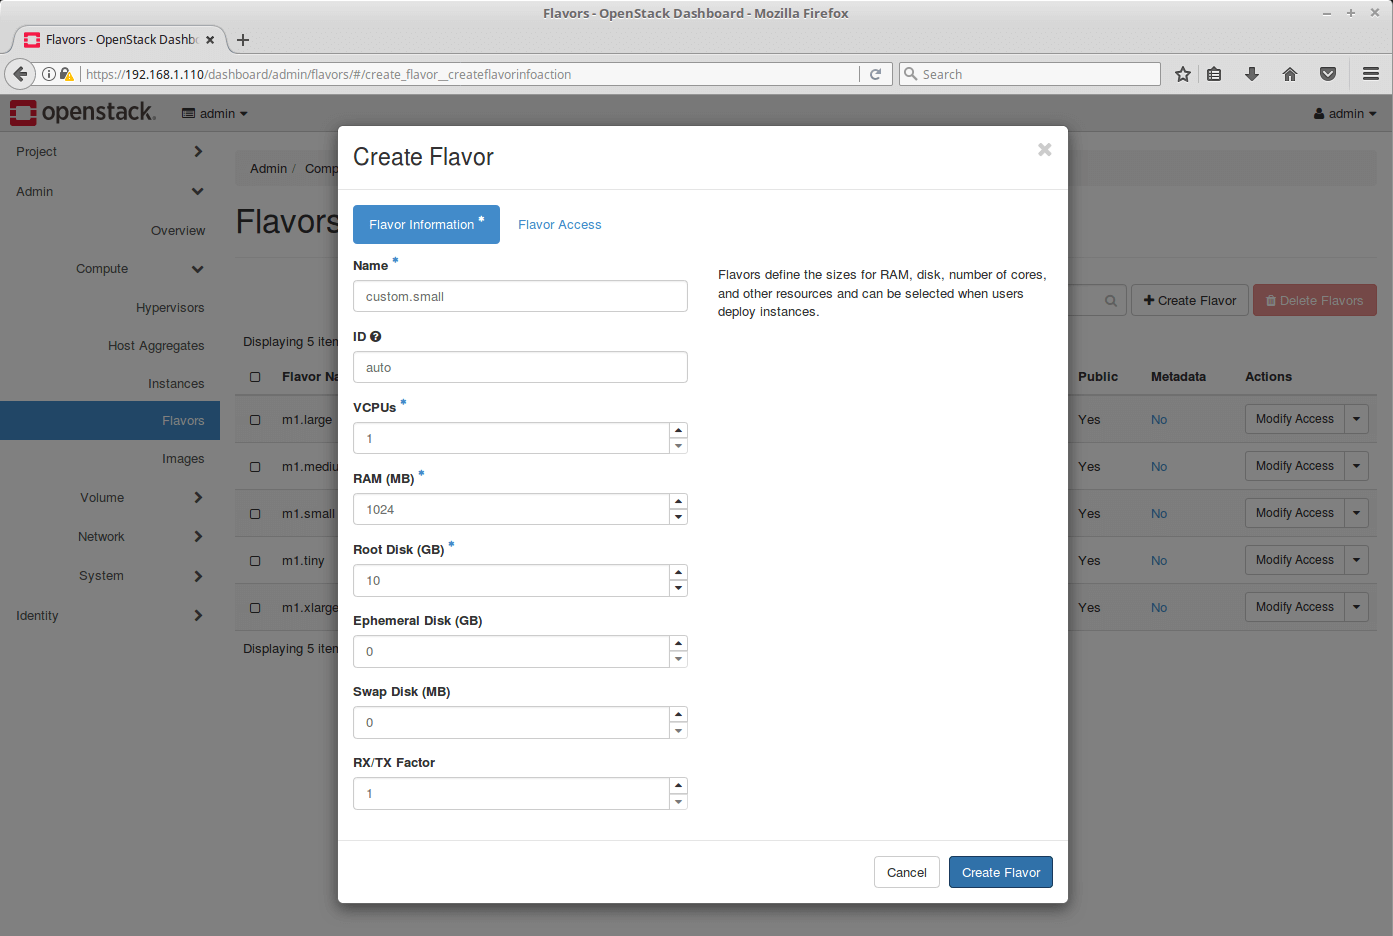
Let us create a flavor for 1VCPU, 1GB RAM, and 10GB Disk.
Go to Admin >> Compute >> Flavors >> + Create Flavor. You should be in OpenStack admin login.
Flavor details,
Name: custom.small
VCPUs: 1
RAM: 1024
Root Disk: 10 GB
Note: Any OpenStack user can use this flavor to create instances, by default.
Create Security Group
OpenStack security group acts as a virtual firewall that controls the connection to/from instances. Security groups should be created to allow connections like SSH, HTTP, HTTPS, etc.
Here, we will create a security group to allow ICMP and SSH connections.
Login as a normal user “raj”.

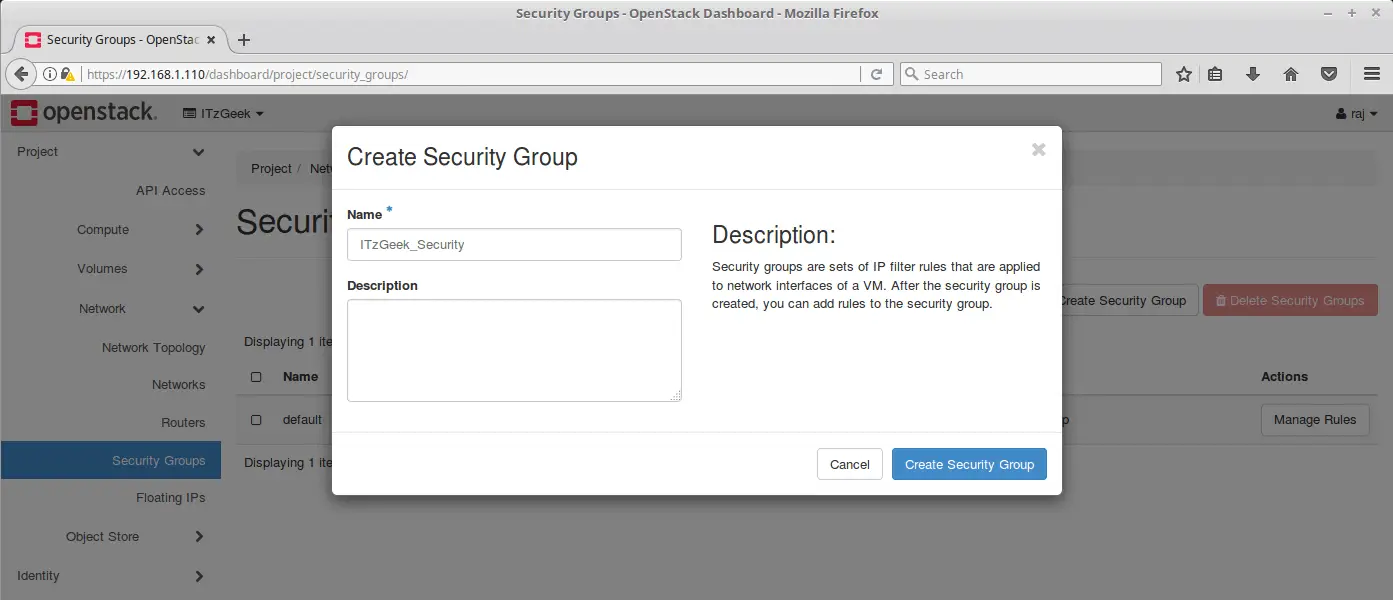
Go to Project >> Network >> Security Groups >> + Create Security Group.
In this page, name your security group and click Create Security Group.
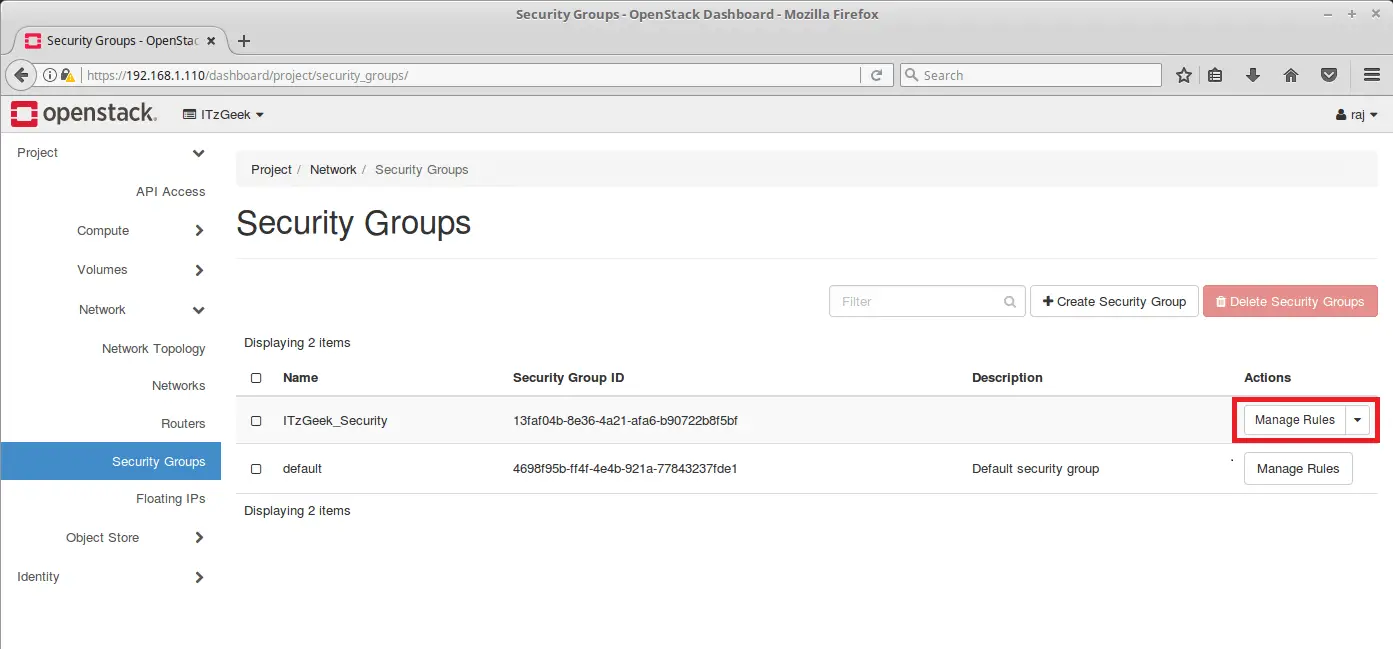
Now, click Manage Rules of the newly created group.
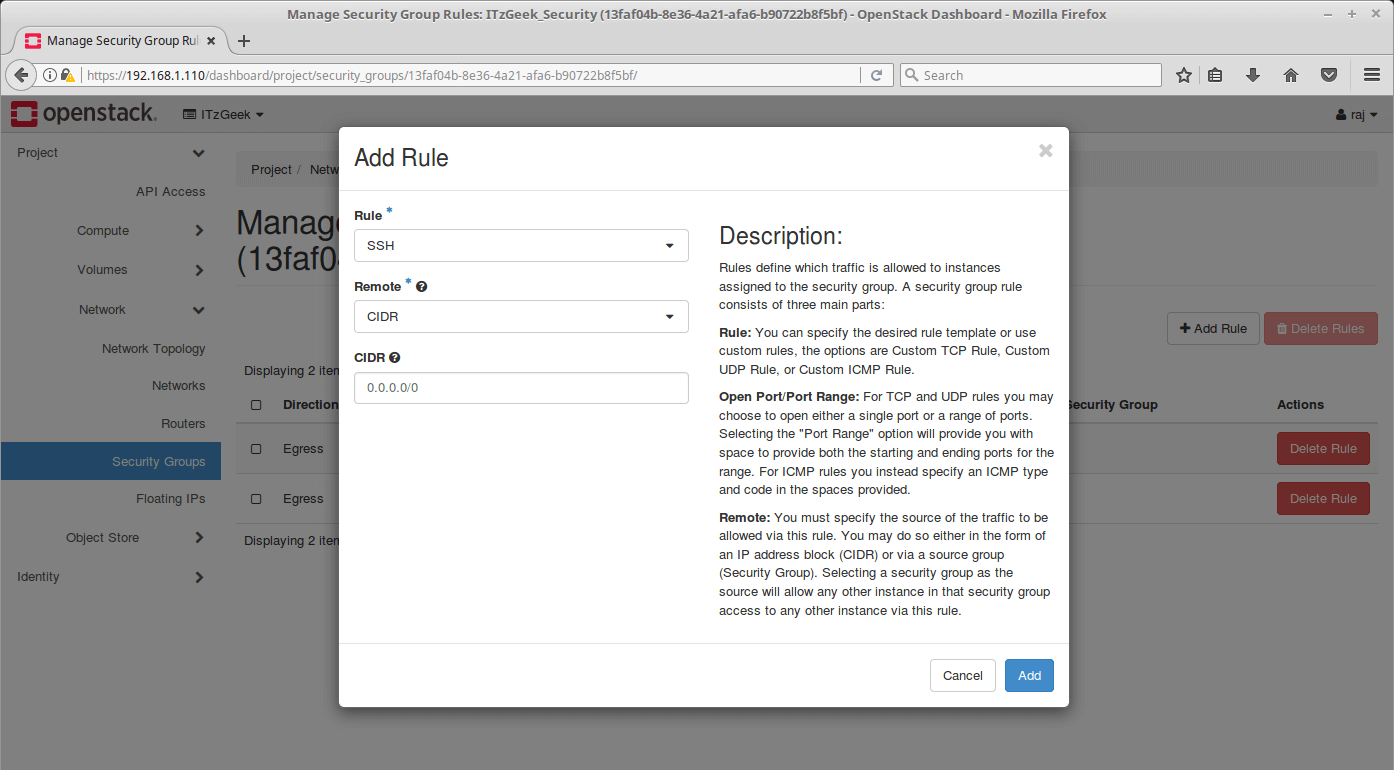
Add a rule something like below.
Project >> Network >> Security Groups >> Security Group (ITzGeek_Security) >> Manage >> + Add Rule.
SSH:
Rule: SSH / ICMP
Remote: CIDR
CIDR: 0.0.0.0/0
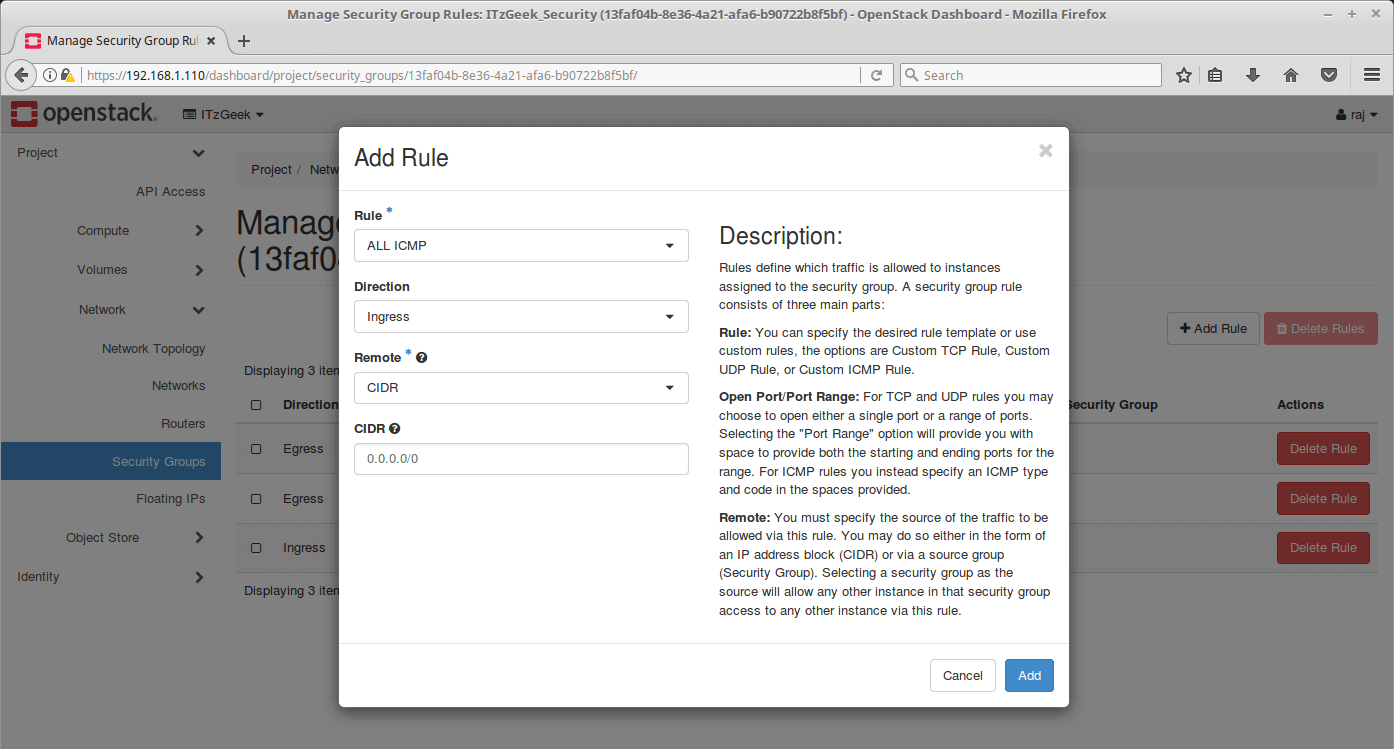
ICMP:
Rule: All ICMP
Direction: Ingress
Remote: CIDR
CIDR: 0.0.0.0/0
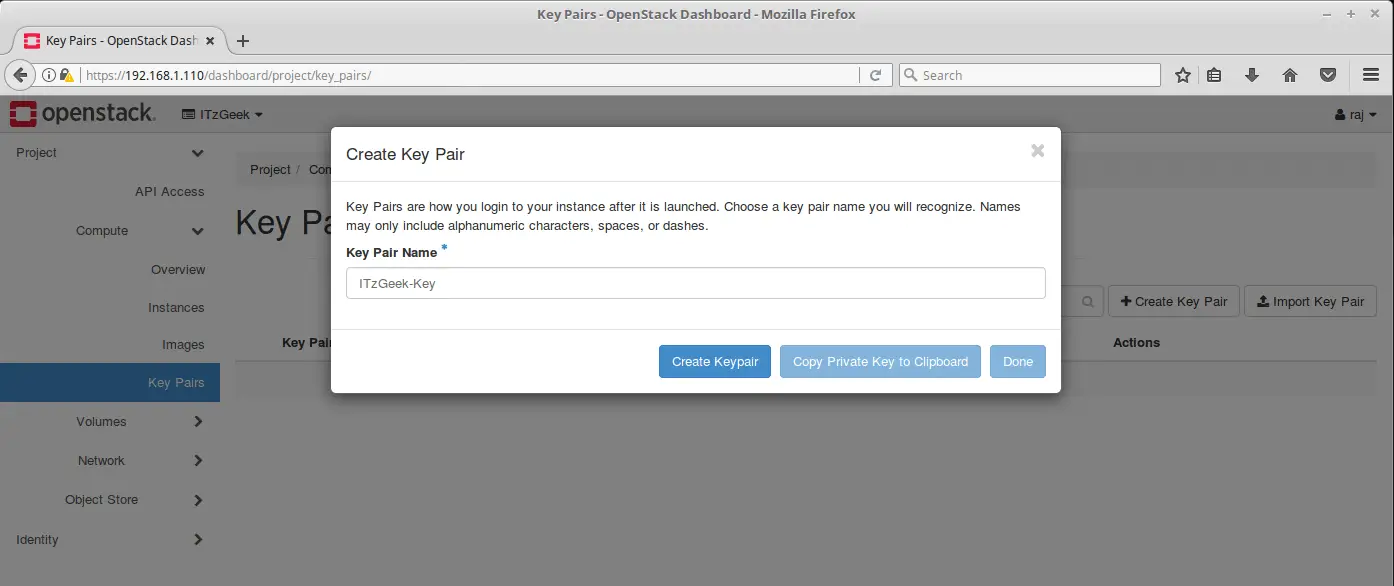
Create Key Pair
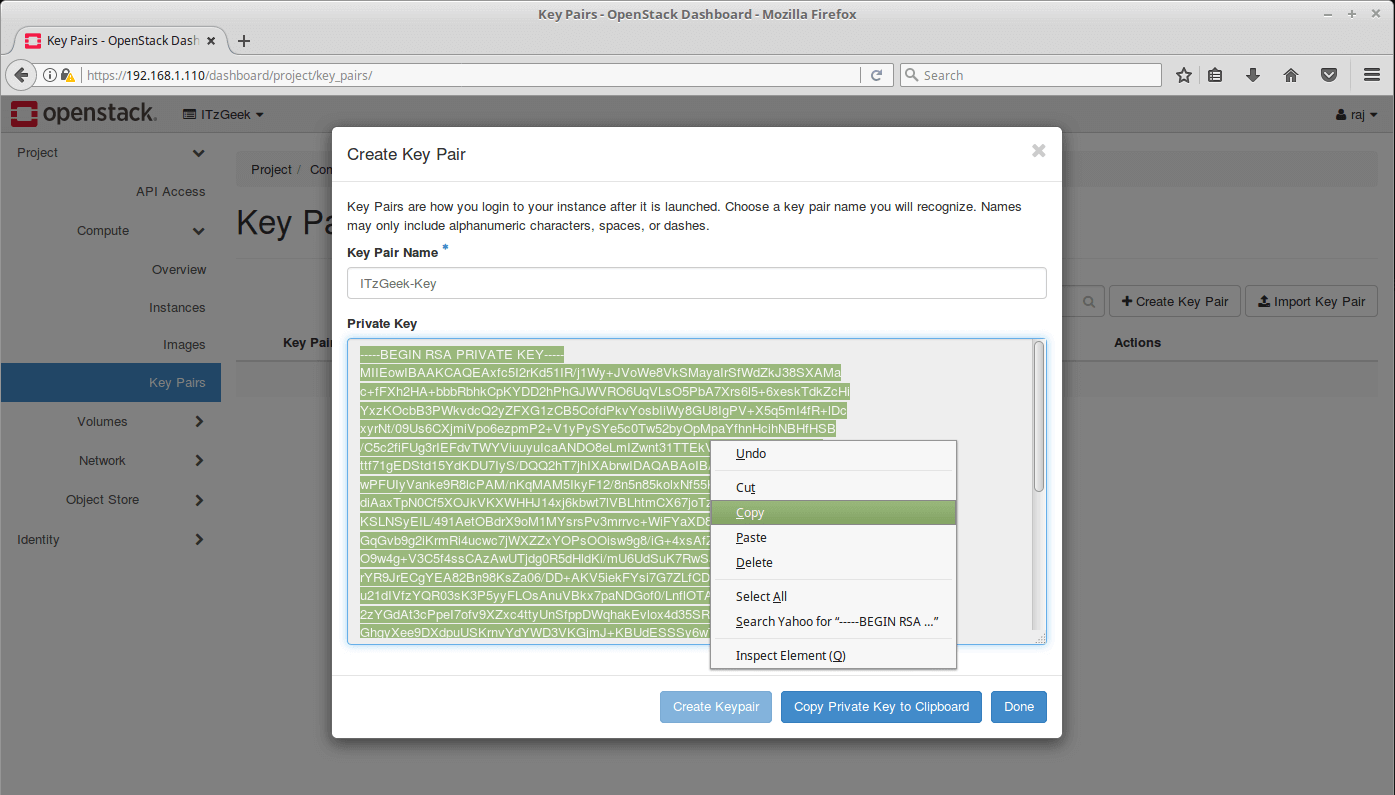
The key pair is the public key which is used for accessing the created instances. Without the key pair, we can not access the instance.
Go to Project >> Compute >> Key Pairs >> + Create Key Pair.
Use Right click and Copy or Click Copy Private Key to Clipboard and save the key pair to the file (in my case, it is ITzGeek-Key) for future use.
Now, we are ready to launch an instance.
Launch an instance
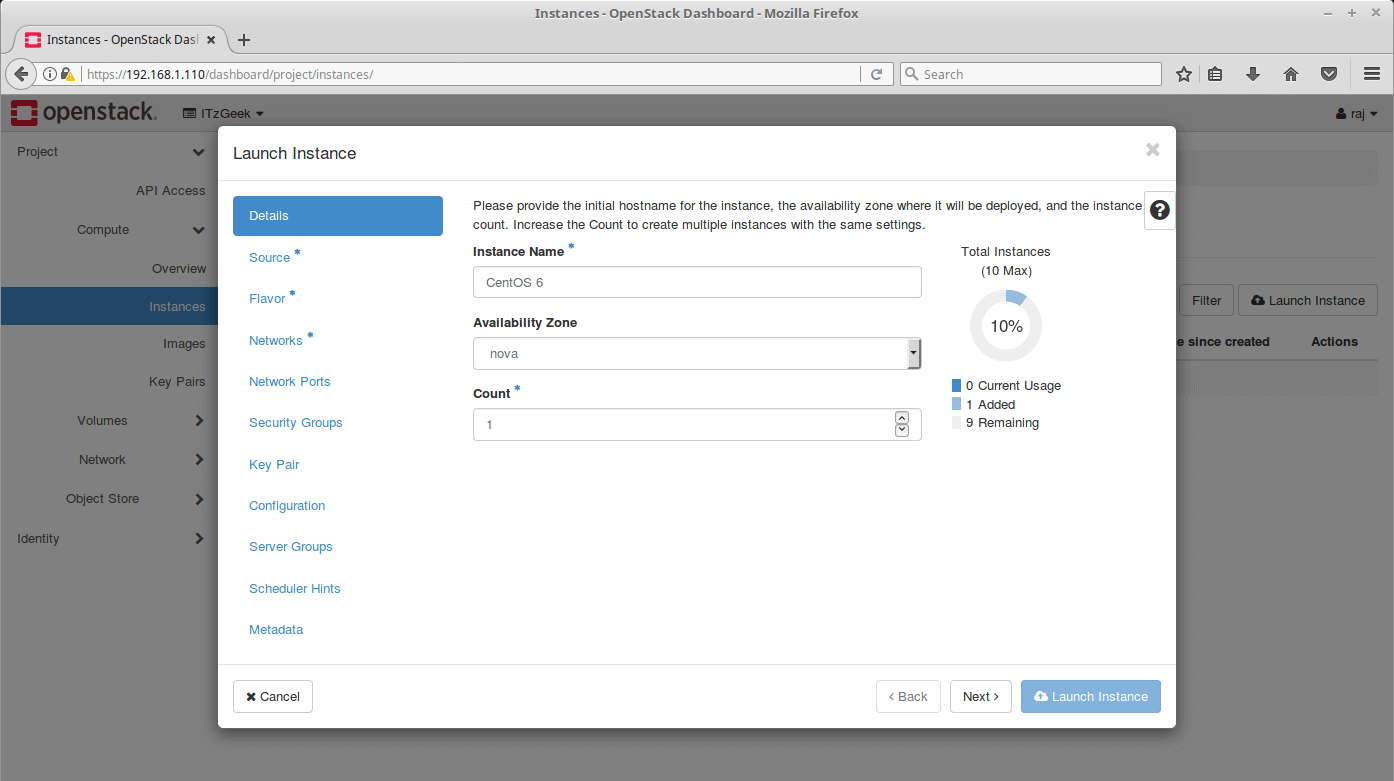
Go to Project >> Compute >> Instances >> Launch Instance.
Name your instance and click next.
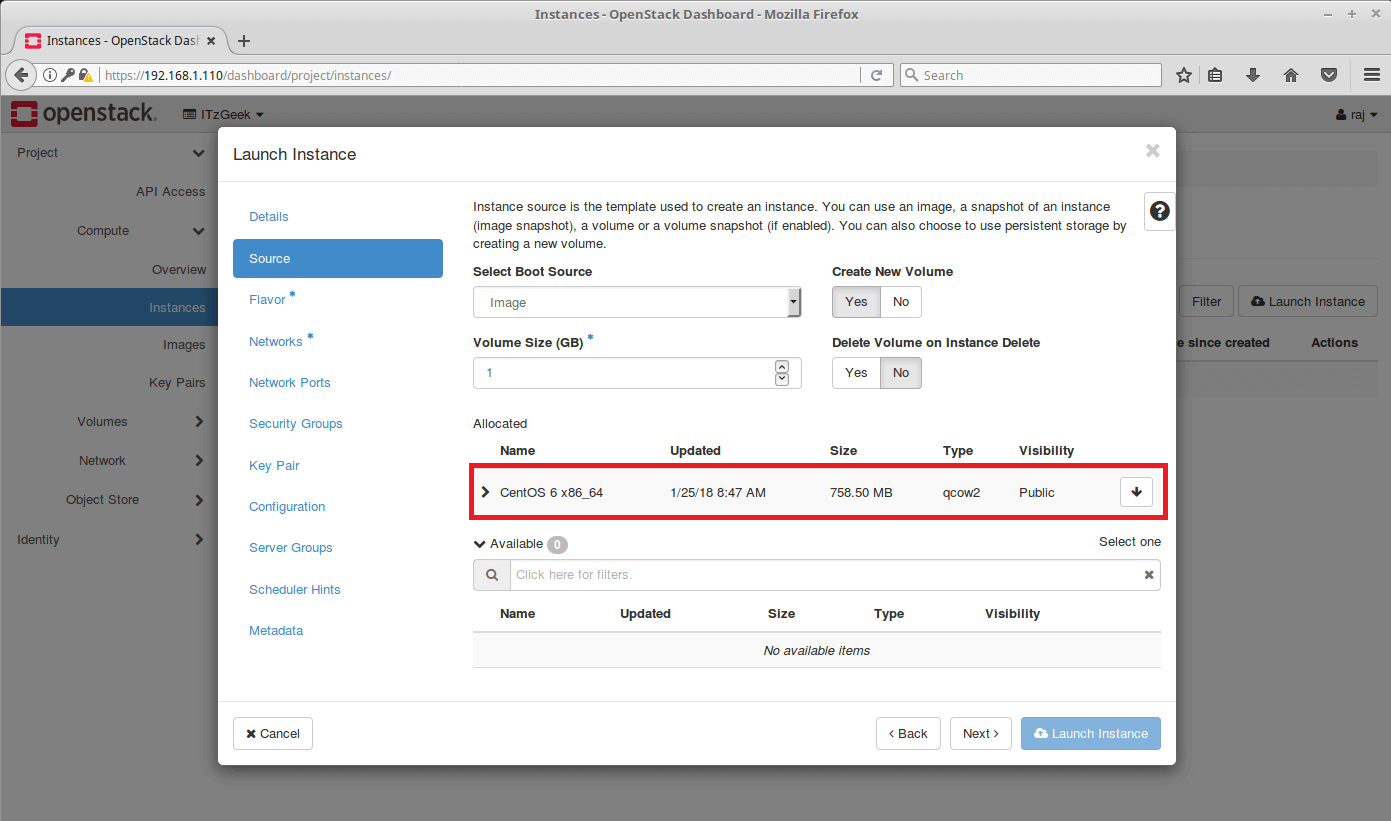
Select the uploaded (CentOS 6 x86_64) image as the source for this instance.
We will use our custom.small flavor so that OpenStack can allocate resources easily for us.

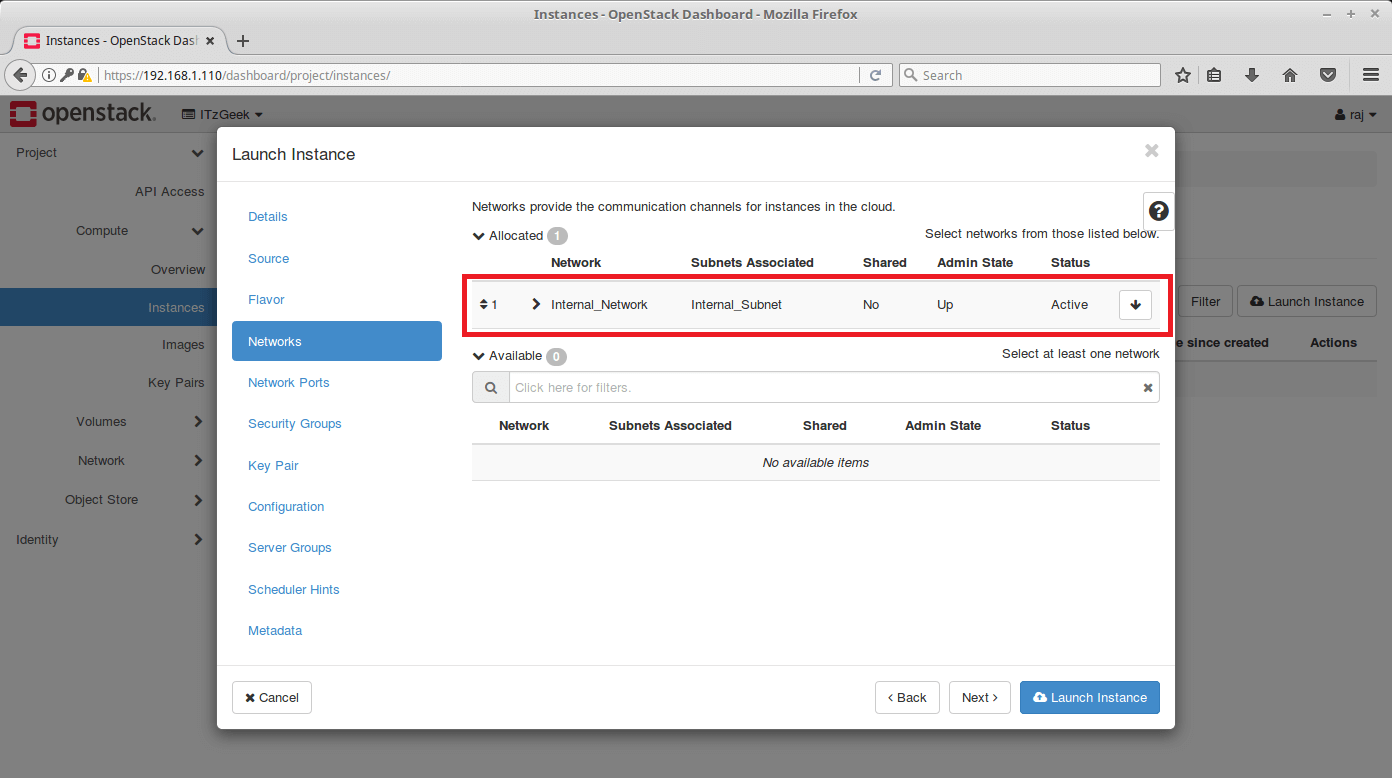
Choose the Internal_Network.
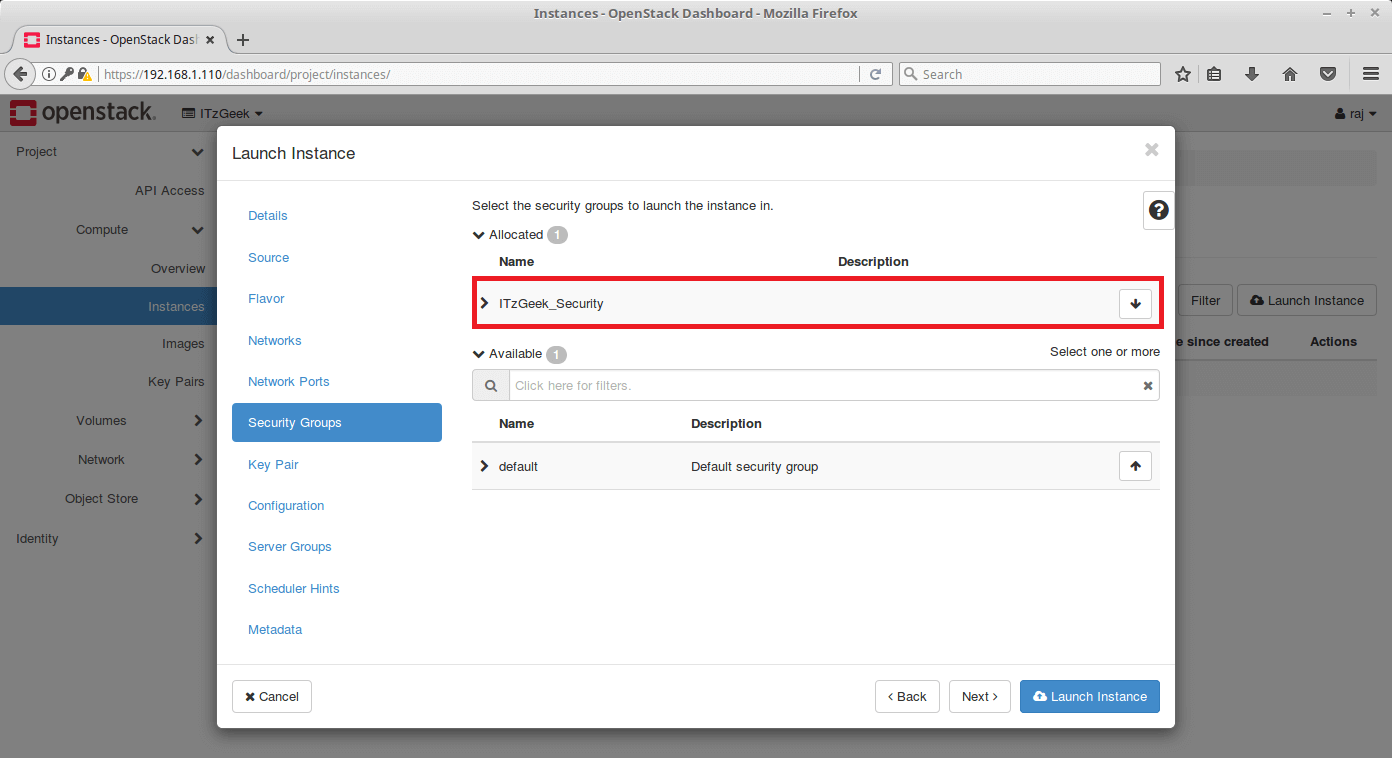
Select the security group we created earlier.
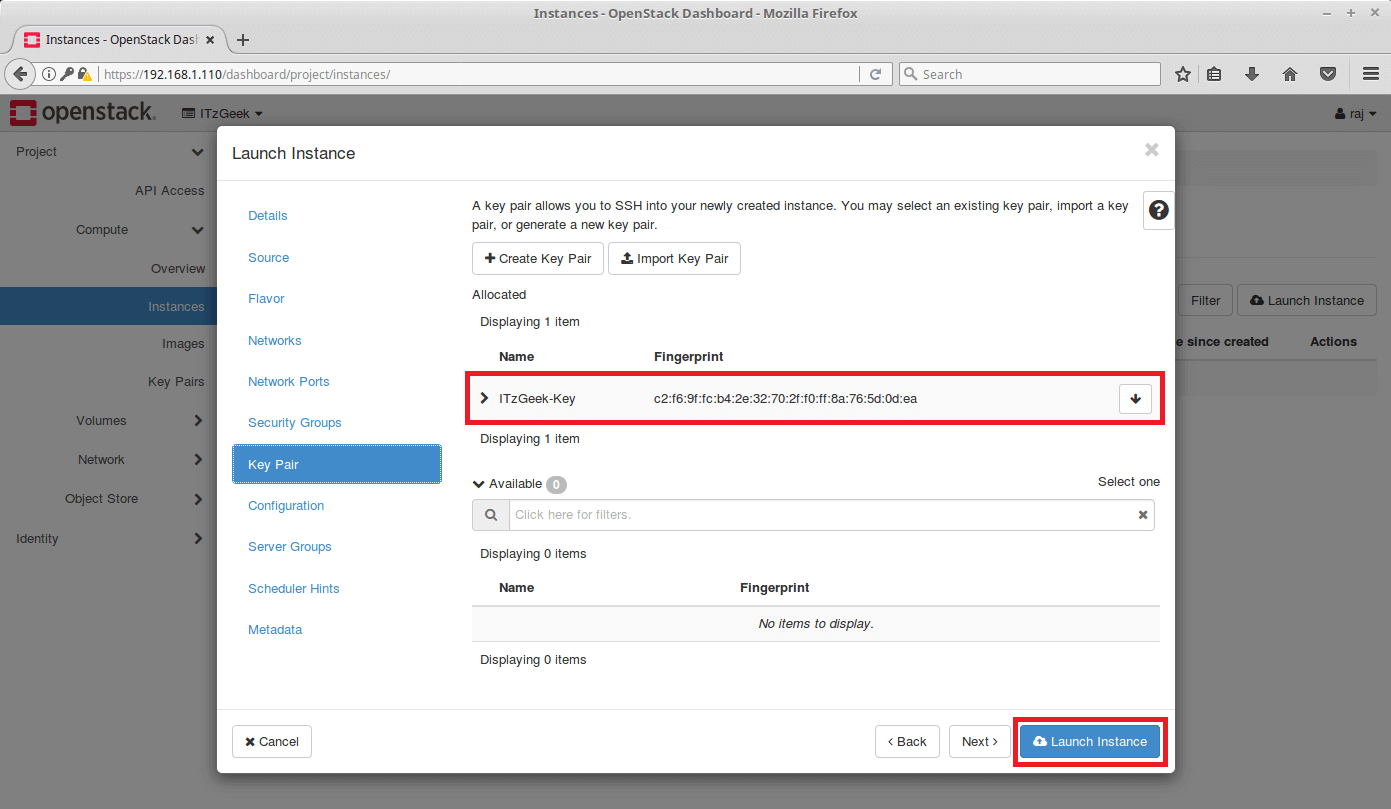
Make sure you select the correct key pair. Finally, click Launch Instance to begin the instance creation.
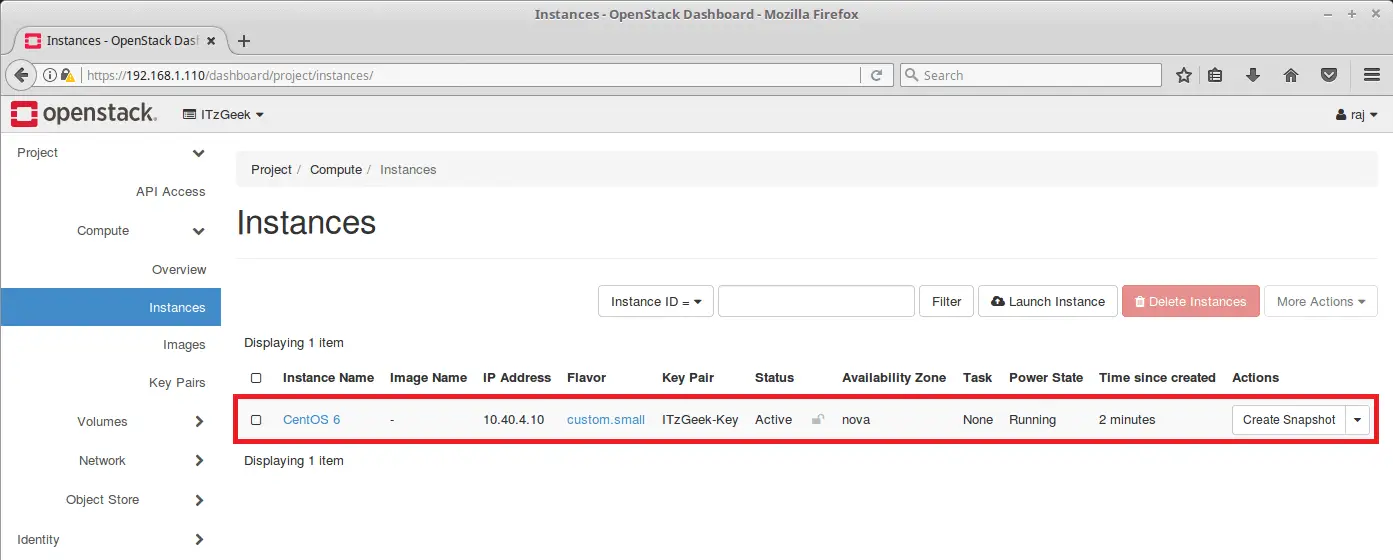
Wait for few minutes. The instance should be up and run in few minutes.
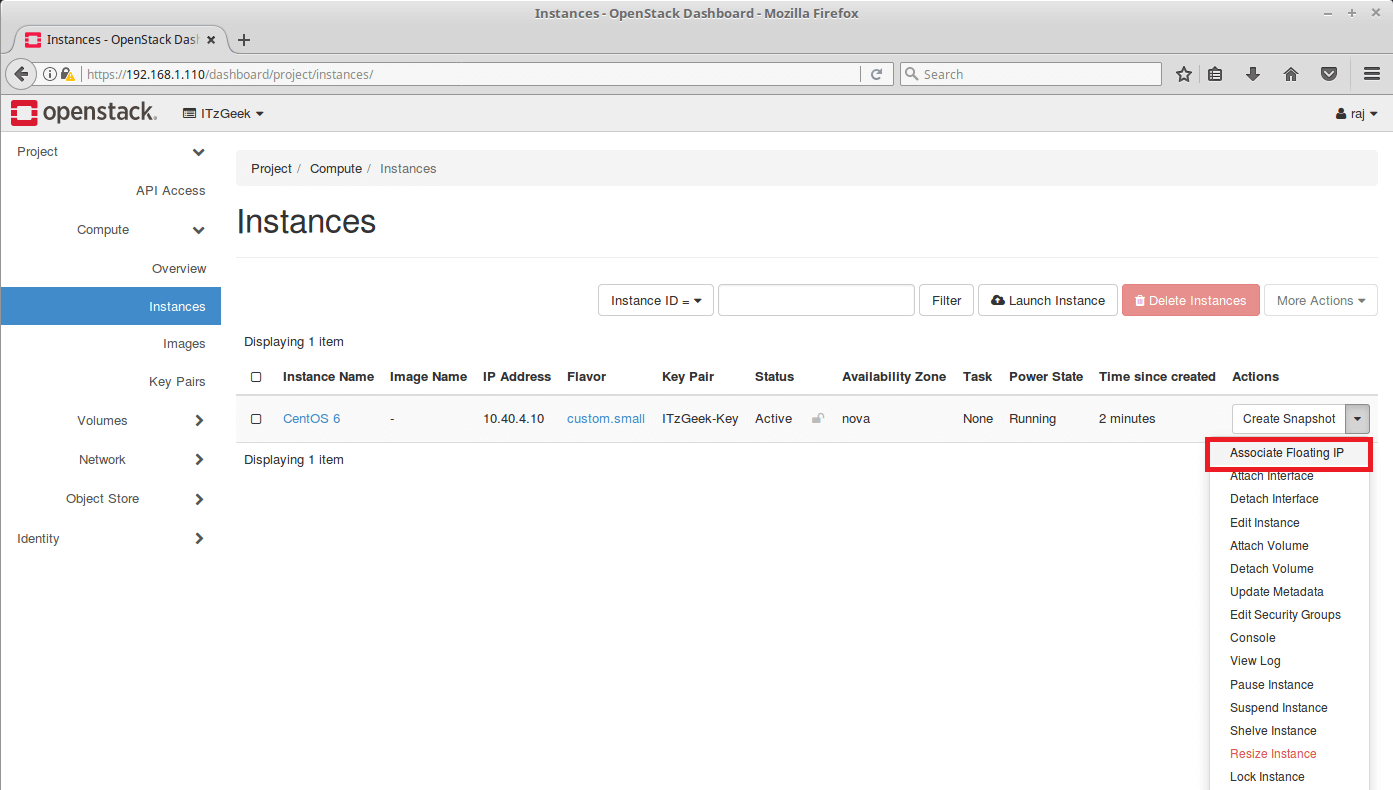
Once the instance is up, assign a floating IP to the instance so that we can access the instance. Click Associate Floating IP.
Click + sign.
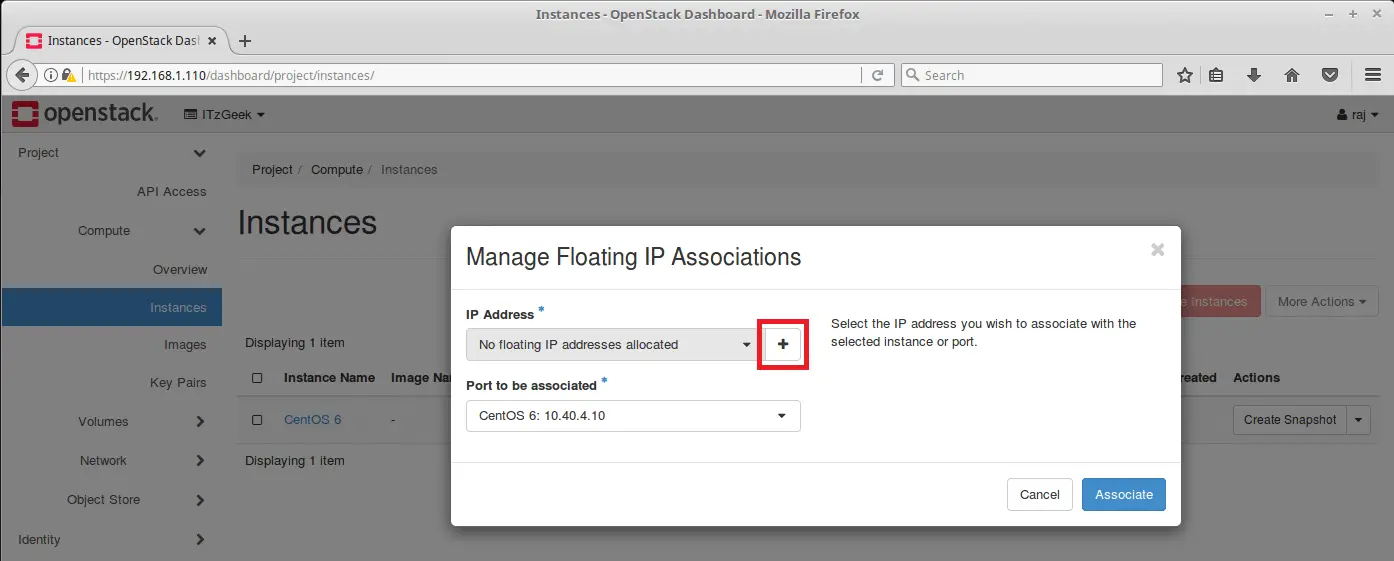
Use External_Network and then click Associate IP.

Finally, click Associate.
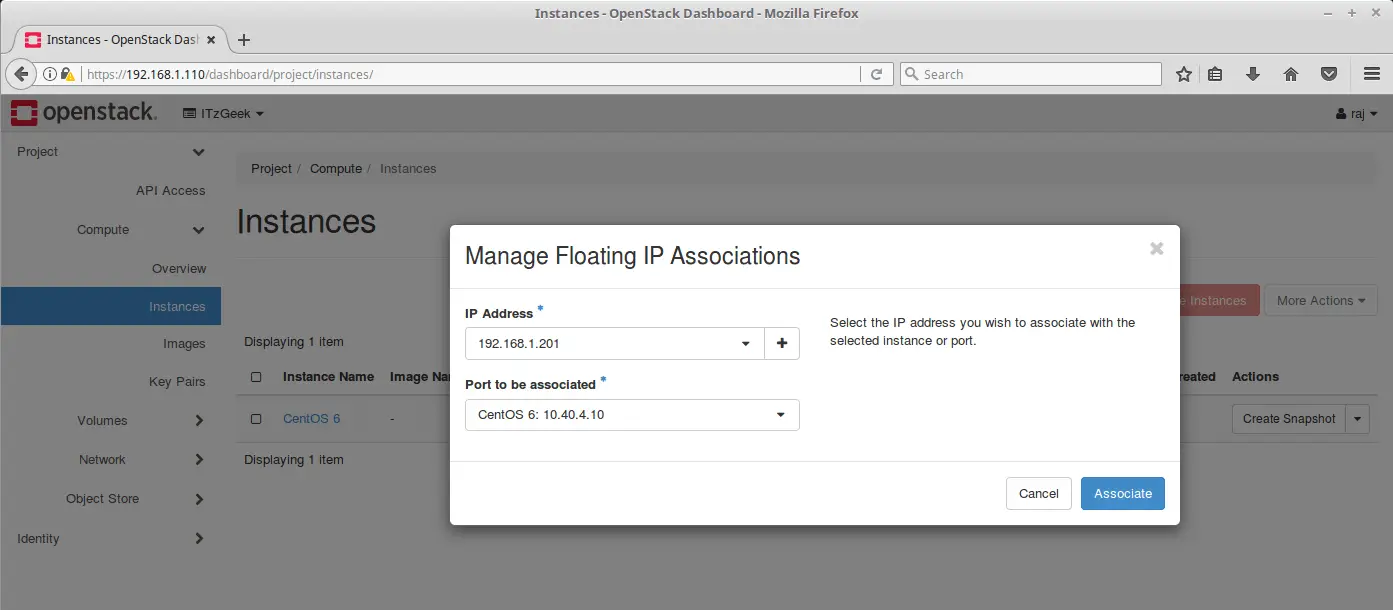
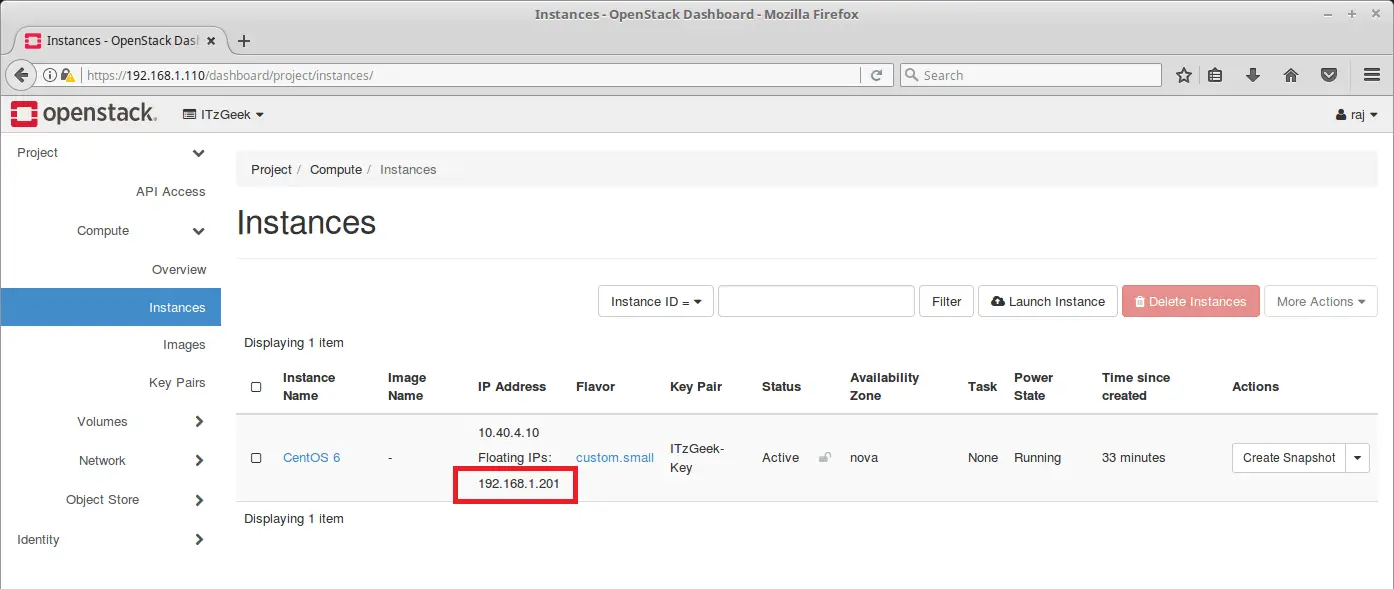
Your instance should have a floating IP address assigned to it.
Access OpenStack Instance
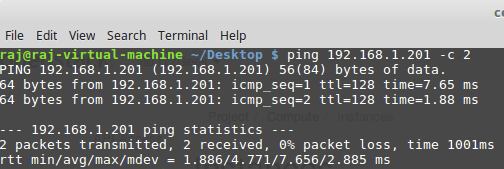
Wait for few seconds and try ping to the floating IP address. You should get a ping response.
ping 192.168.201 -c 2
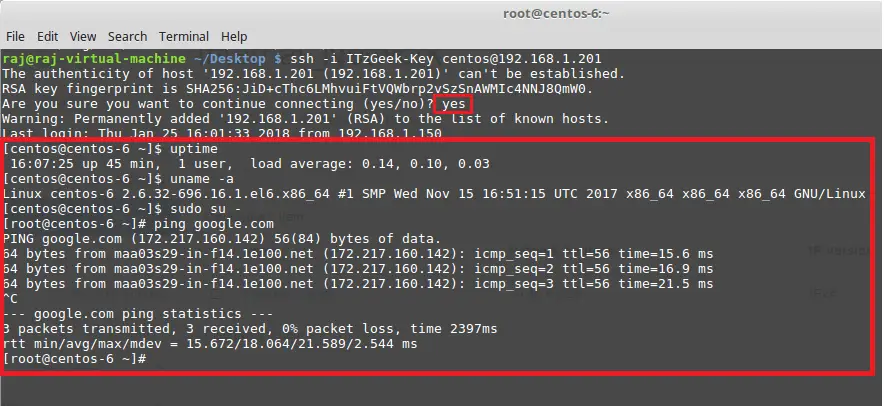
As I said already, I have saved Key pair in the file called “ITzGeek-Key“. When I save a file, it saved in 644 permission. The file permission should be changed to 600 for using with SSH for connecting to OpenStack instance.
chmod 600 ITzGeek-Key

Now try accessing the instance using the floating IP with the created key pair.
The default username for CentOS cloud image is centos.
ssh -i ITzGeek-Key [email protected]
Type yes to connect to the instance as you are connecting for the first time.
You should now be in the terminal of the newly created instance.
That’s All.