NextCloud is an open source web suite that provides cloud storage over the network, fork of ownCloud. It is like a Dropbox that permits you to store and share your documents and pictures in a centralized location.
In this post, we will see how to install Nextcloud on CentOS 7 / RHEL 7.
Features
- Access your files anytime, anywhere.
- Share your files with the other users. Create and send password protected public links.
- Two-factor authentication with TOTP and QR code.
- Monitor the activity on your NextCloud server.
- NextCloud can access files stored in external cloud storage service providers such as Amazon, Google, and Dropbox.
More here.
Prerequisites
Repository
Nextcloud works only with PHP v7.x. So, we need to enable software collection repository.
### CentOS 7 ###

yum install -y centos-release-scl

yum install -y epel-release

### RHEL 7 ###

subscription-manager repos --enable rhel-server-rhscl-7-eus-rpms

yum install https://dl.fedoraproject.org/pub/epel/epel-release-latest-7.noarch.rpm
Install Apache
Install the Apache server and other utilities.
yum install -y httpd wget bzip2
Install PHP 7.x
Install PHP 7 and other required extensions for Nextcloud.
### CentOS 7 ###

yum install -y rh-php72 rh-php72-php rh-php72-php-gd rh-php72-php-mbstring rh-php72-php-intl rh-php72-php-pecl-apcu rh-php72-php-mysqlnd rh-php72-php-pecl-redis rh-php72-php-opcache rh-php72-php-imagick rh-php72-php-ldap

### RHEL 7 ###

yum install rh-php72 rh-php72-php rh-php72-php-gd rh-php72-php-mbstring rh-php72-php-intl rh-php72-php-pecl-apcu rh-php72-php-mysqlnd rh-php72-php-ldap
Create symlinks so that Apache can support PHP 7.x.
ln -s /opt/rh/httpd24/root/etc/httpd/conf.d/rh-php72-php.conf /etc/httpd/conf.d/

ln -s /opt/rh/httpd24/root/etc/httpd/conf.modules.d/15-rh-php72-php.conf /etc/httpd/conf.modules.d/

ln -s /opt/rh/httpd24/root/etc/httpd/modules/librh-php72-php7.so /etc/httpd/modules/
Also, create a symlink for executing the php command.
ln -s /opt/rh/rh-php72/root/bin/php /usr/bin/php
Install MariaDB
The database can be any of from SQLite, MySQL/MariaDB, Oracle or PostgreSQL database.
For this demo, we will use MariaDB as a database for Nextcloud, and we will talk about the reason behind it later.
yum -y install mariadb-server mariadb
Services
Start the Apache and MariaDB service using the following command.
systemctl start httpd

systemctl start mariadb
Enable both Apache and MariaDB service to start automatically at system start-up.
systemctl enable httpd

systemctl enable mariadb
Install Nextcloud
Download Nextcloud
NextCloud provides installable archives for server admins to download and manually set it up on top of the LAMP stack. Download the latest version of Nextcloud using the terminal.
cd /tmp/

wget https://download.nextcloud.com/server/releases/latest.tar.bz2
Extract the Nextcloud archive using the tar command.
tar -jxvf latest.tar.bz2
Move the extracted files to Apache’s document root and then create a data directory to hold the user data.
mv nextcloud /var/www/html/

mkdir /var/www/html/nextcloud/data
Set the ownership of the files inside the NextCloud directory so that apache user can write the data into it.
chown -R apache:apache /var/www/html/nextcloud/
Create Database
If you are setting up a MariaDB for the first time, then
READ: Secure MariaDB with mysql_secure_installation
Now, login to the MariaDB server.
mysql -u root -p
Create a database called “nextclouddb“.
create database nextclouddb;
Allow “nextclouduser” to access the “nextclouddb” database on localhost with a predefined password.
grant all on nextclouddb.* to 'nextclouduser'@'localhost' identified by 'password';
Exit from the MariaDB prompt.
quit
SELinux
Set SELinux context to allow NextCloud to write the data inside its important directories.
semanage fcontext -a -t httpd_sys_rw_content_t '/var/www/html/nextcloud/data'
semanage fcontext -a -t httpd_sys_rw_content_t '/var/www/html/nextcloud/config(/.*)?'
semanage fcontext -a -t httpd_sys_rw_content_t '/var/www/html/nextcloud/apps(/.*)?'
semanage fcontext -a -t httpd_sys_rw_content_t '/var/www/html/nextcloud/3rdparty(/.*)?'
semanage fcontext -a -t httpd_sys_rw_content_t '/var/www/html/nextcloud/.htaccess'
semanage fcontext -a -t httpd_sys_rw_content_t '/var/www/html/nextcloud/.user.ini'

restorecon -Rv '/var/www/html/nextcloud/'
If you get an error for semanage command not found, then
READ: semanage command not found on CentOS 7/6 & RHEL 7/6 – Quick Fix
Firewall
Configure the firewall to allow access to the Nextcloud storage from external machines.
firewall-cmd --permanent --add-service=http

firewall-cmd --reload
Setup NextCloud
Open up your web browser, point a URL to
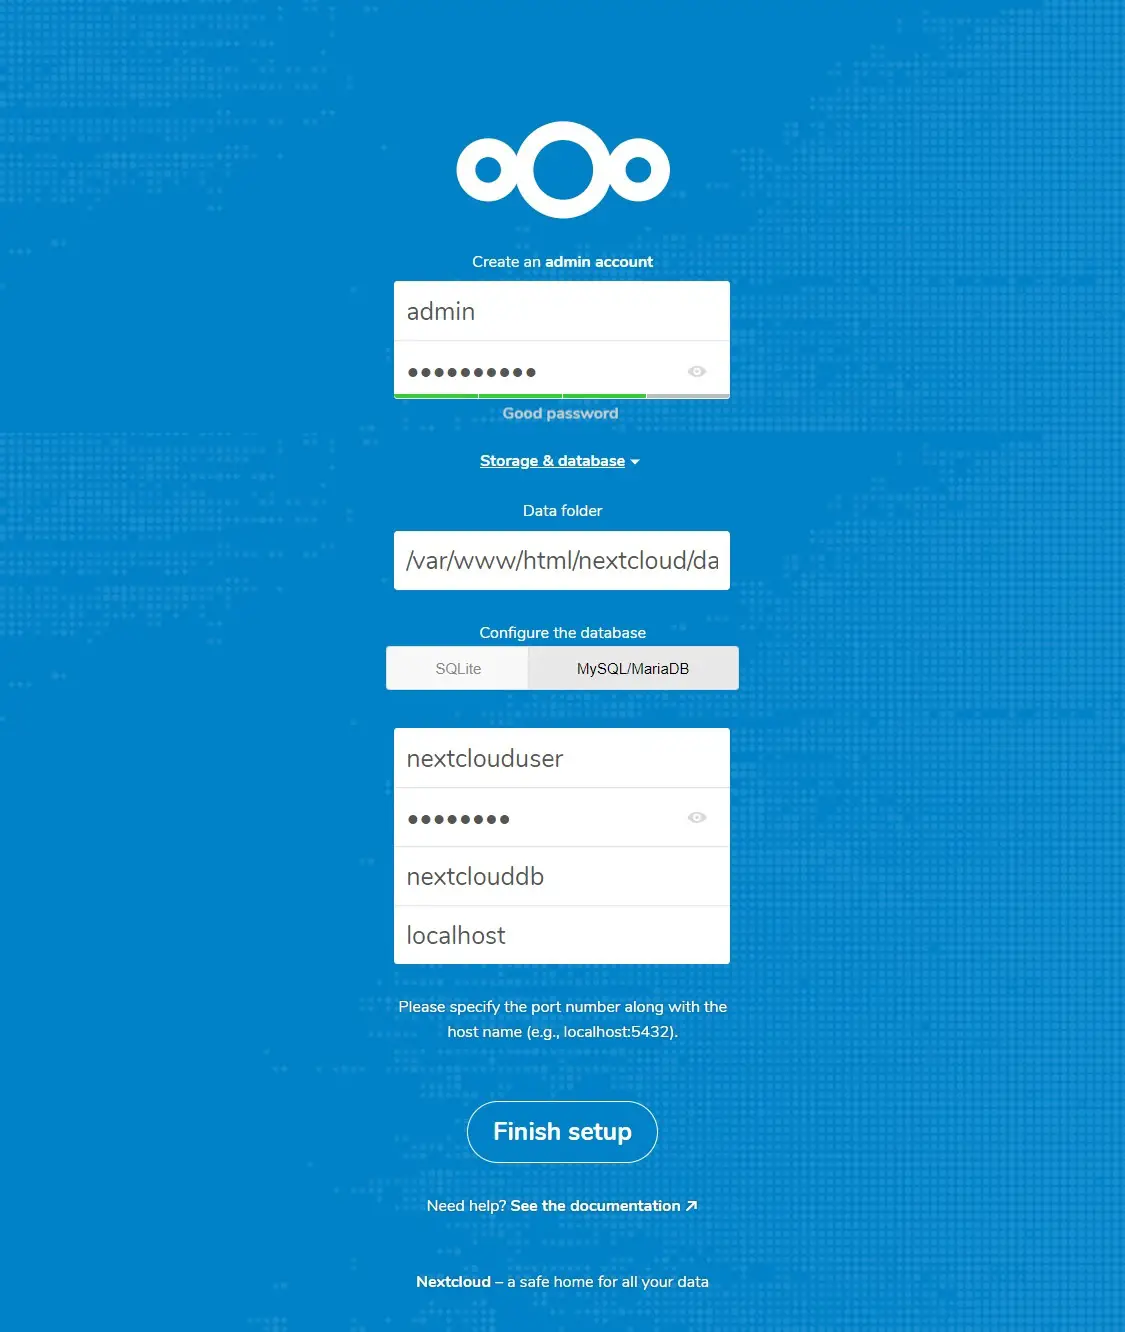
The browser will take you automatically to NextCloud setup page where you have to begin the setup of NextCloud.
You can choose either SQLite or MySQL/MariaDB. If you want to SQLite database, then you do not have to enter database details (not recommended for production use). Whereas MariaDB requires database user, password, and database name.
For this tutorial, we will use MariaDB as a backend database.
Enter admin details (username and password), data folder location where all of your documents get saved, and database information.
Access Nextcloud
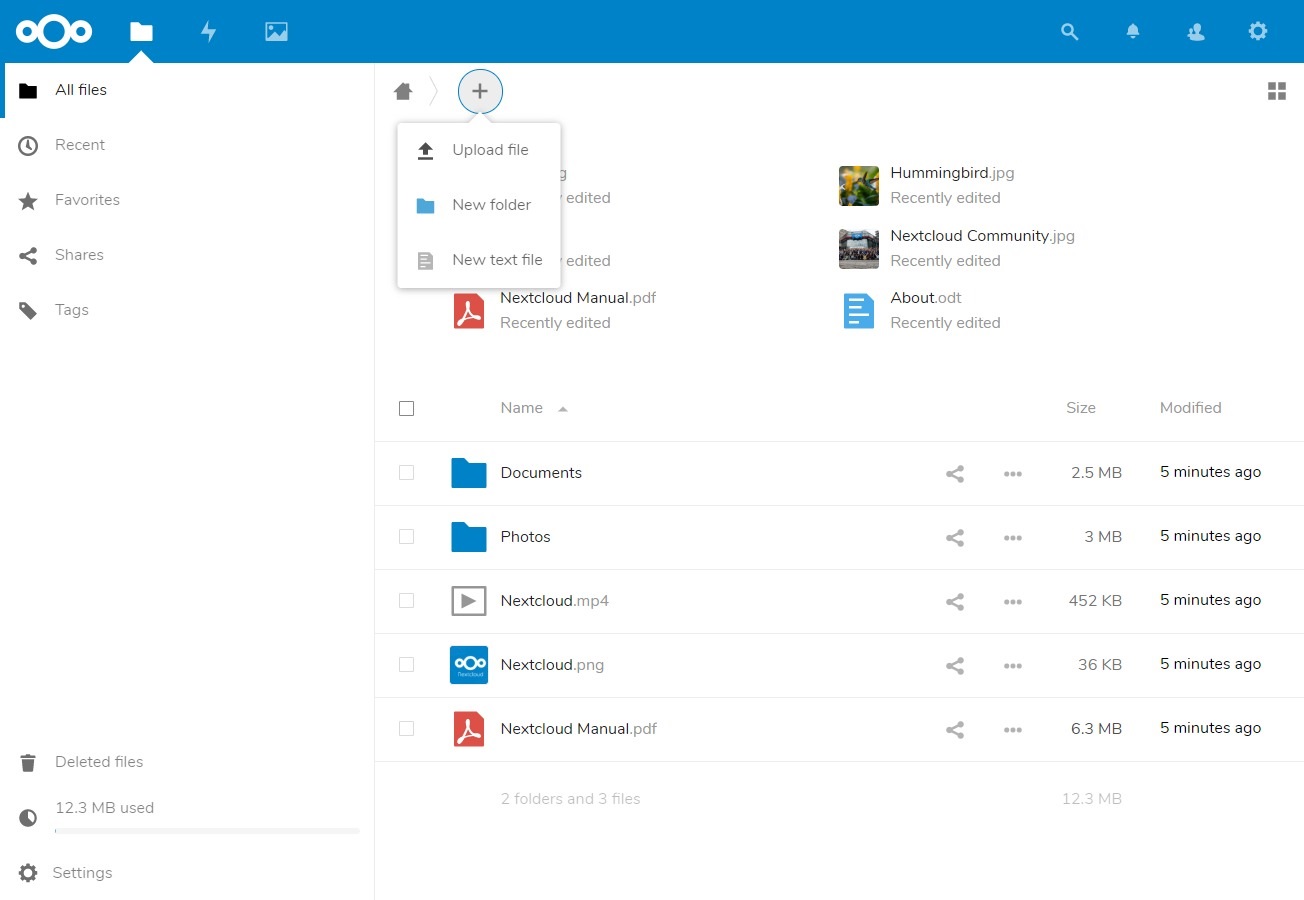
Once the set up is complete, you will get the below popup. Click on close.

The home page of NextCloud will look like below, and you can start uploading the contents using “+ sign” button.
Conclusion
That’s All. I hope you have learned how to install Nextcloud on CentOS 7. Please share your feedback in the comments section.
Comments are closed.