 LAMP Stands for Linux,Apache,MySQL and PHP. Most of the websites works with the above combination. The main purpose of LAMP is testing the application locally by the programmer before going to the production. Below are the steps to install LAMP (Apache, PHP and MySQL) on Fedora.
Installing Linux:
Here i am not going to show how to install Fedora 21. The main purpose of this post is to setup AMP (Apache,MySQL and PHP) only.
Installing Apache:
To start off we will install Apache. Open up the terminal and Swicth to root.
$ su
Name of the package is httpd, type following command on the terminal and then press enter.
# yum install httpd
Start the Apache by using the following command.
# systemctl start httpd.service
To make the apache to start during the every boot, type the following on terminal and hit Enter.
# systemctl enable httpd.service
Configure firewall to allow http request from the external network.
firewall-cmd --permanent --zone=public --add-service=http
firewall-cmd --permanent --zone=public --add-service=https
firewall-cmd --reload
Testing Apache:
To make sure everything installed correctly we will now test Apache to ensure it is working properly.
Open up any web browser and then enter the following into the web address:
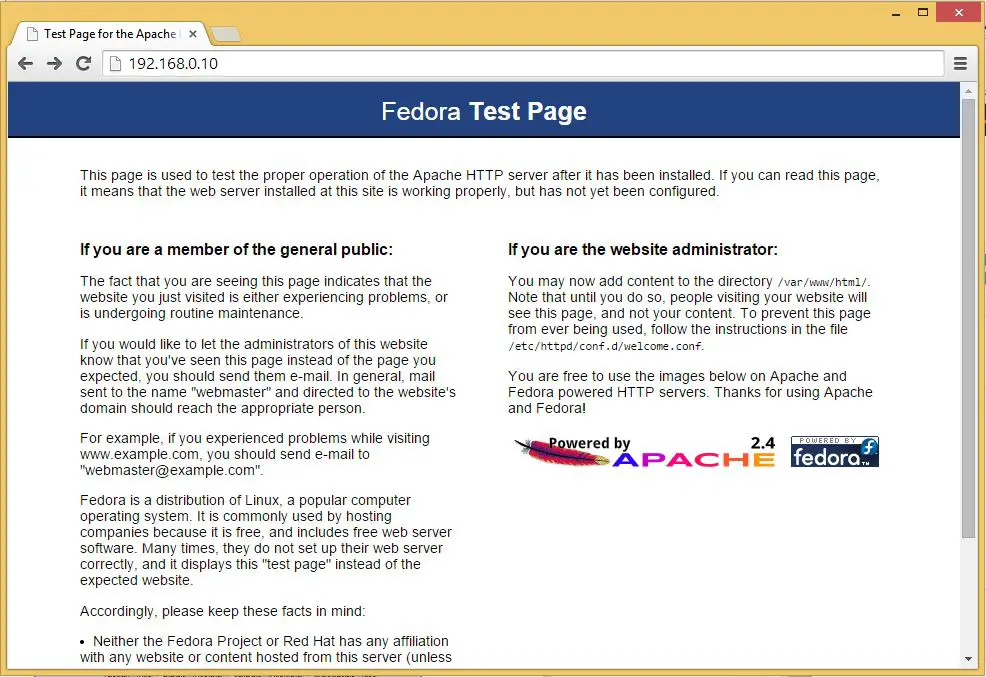
https://localhost/ or https://192.168.0.10
You will get the web page saying “Fedora Test Page”. Now the Apache is working fine. Apache’s default document root is /var/www/html on Fedora, and the configuration file is /etc/httpd/conf/httpd.conf. Additional configurations are stored in the /etc/httpd/conf.d/ directory.
Installing MySQL:
Next is to install the MySQL on the Linux, follow the Steps. Type the following command and then Press Enter.
# yum install mariadb mariadb-server
Start MySQL server.
# systemctl start mariadb.service
To make the MySQL to start during the every boot, type the following on terminal and hit Enter.
# systemctl enable mariadb.service
Nex is to make the MySQL secure by using the mysql_secure_installation command.
This program enables you to improve the security of your MySQL installation in the following ways:
- You can set a password for
rootaccounts. - You can remove
rootaccounts that are accessible from outside the local host. - You can remove anonymous-user accounts.
- You can remove the
testdatabase (which by default can be accessed by all users, even anonymous users), and privileges that permit anyone to access databases with names that start withtest_.
[root@server1 ~]# mysql_secure_installation
NOTE: RUNNING ALL PARTS OF THIS SCRIPT IS RECOMMENDED FOR ALL MariaDB
SERVERS IN PRODUCTION USE! PLEASE READ EACH STEP CAREFULLY!
In order to log into MariaDB to secure it, we’ll need the current
password for the root user. If you’ve just installed MariaDB, and
you haven’t set the root password yet, the password will be blank,
so you should just press enter here.
Enter current password for root (enter for none): <— Enter Root password
OK, successfully used password, moving on…
Setting the root password ensures that nobody can log into the MariaDB
root user without the proper authorisation.
Set root password? [Y/n] y <— Yes, if you want to setup root password
New password: <— Type password
Re-enter new password: <— Re type root password
Password updated successfully!
Reloading privilege tables..
… Success!
By default, a MariaDB installation has an anonymous user, allowing anyone
to log into MariaDB without having to have a user account created for
them. This is intended only for testing, and to make the installation
go a bit smoother. You should remove them before moving into a
production environment.
Remove anonymous users? [Y/n] <— Yes to remove anonymous users
… Success!
Normally, root should only be allowed to connect from ‘localhost’. This
ensures that someone cannot guess at the root password from the network.
Disallow root login remotely? [Y/n] <— Disable remote root login
… Success!
By default, MariaDB comes with a database named ‘test’ that anyone can
access. This is also intended only for testing, and should be removed
before moving into a production environment.
Remove test database and access to it? [Y/n] <— Remove test database
– Dropping test database…
… Success!
– Removing privileges on test database…
… Success!
Reloading the privilege tables will ensure that all changes made so far
will take effect immediately.
Reload privilege tables now? [Y/n] <— Reload privilleges
… Success!
Cleaning up…
All done! If you’ve completed all of the above steps, your MariaDB
installation should now be secure.
Thanks for using MariaDB!
Installing PHP:
By default Apache server supports the HTML language only, not PHP for that we need to install PHP. To install PHP please follow the steps. Type following line on the terminal and press enter, this command includes support package for the MySQL.
# yum install php php-mysql
You need to restart the apache service after the installation of the PHP, to do that type the following on the terminal.
# systemctl restart httpd.service
Testing PHP:
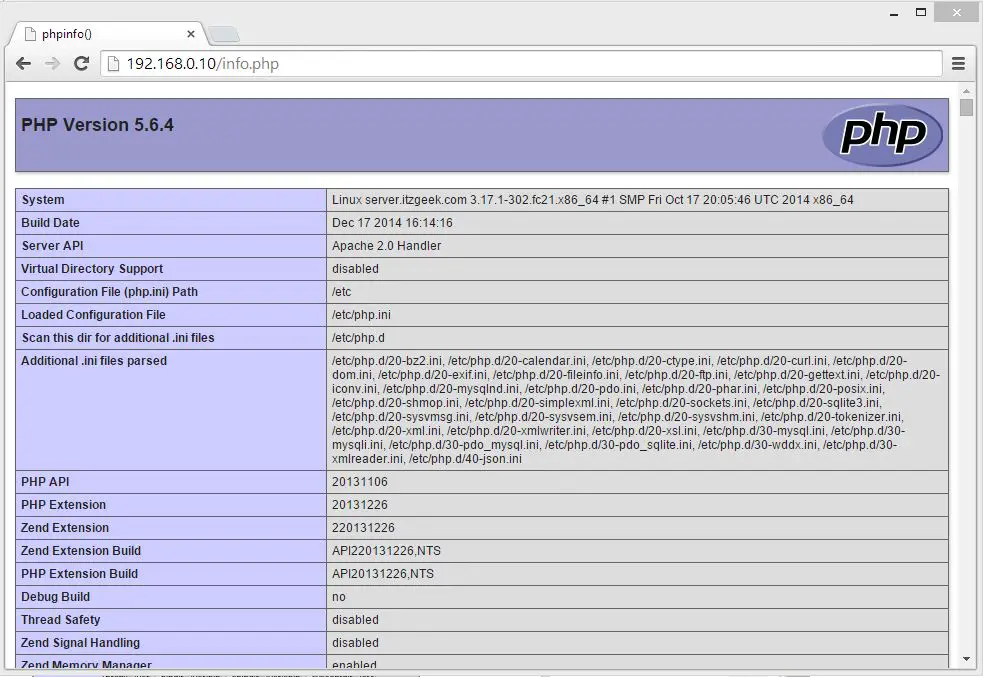
For testing the PHP, Place one PHP file on to the default directory of the Apache. The document root of the default web site is /var/www/html. We will now create a small PHP file (info.php) in that directory and call it in a browser. The file will display lots of useful details about our PHP installation, such as the installed PHP version.
In the terminal copy/paste the following line:
# vi /var/www/html/info.php
This will open up a file called info.php.
Copy/Paste this line into the phpinfo file:
<?php phpinfo(); ?>
Save and close the file. use Esc + ;wq for saving the file.
Now open you’re web browser and type the following into the web address:
https://localhost/info.php or https://192.168.0.10/info.php
The page look like below:
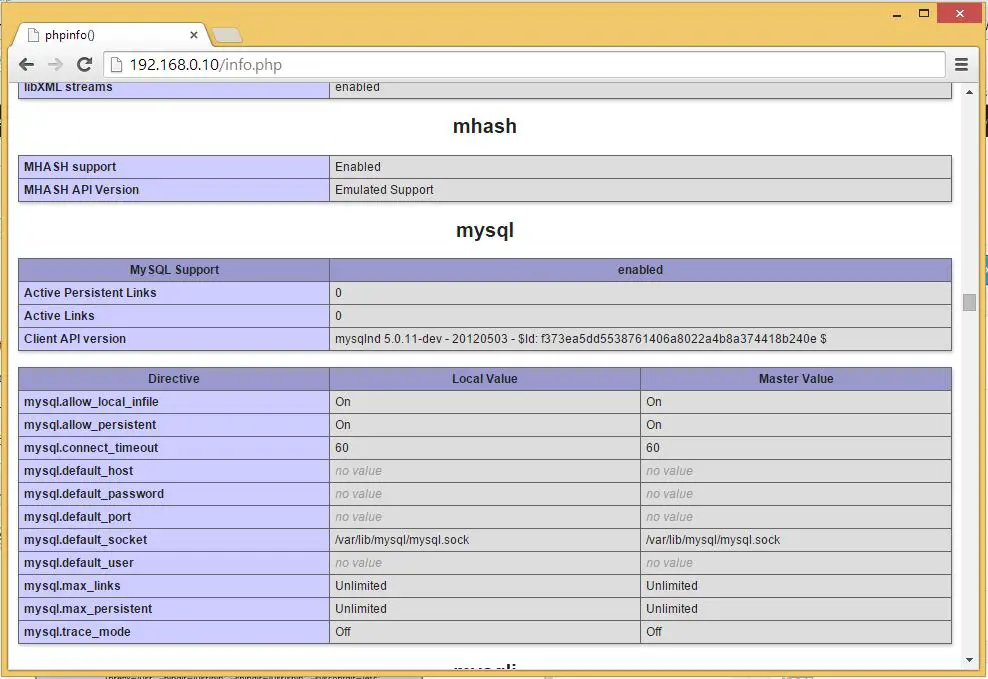
Scroll down the browser to modules section to check the support for the MySQL. you will get the screen like below.
That’s All!