In our previous article, we got to know how to work with Docker containers; covered important commands we use to get the things done from Docker containers. As you already know, Docker images are the basis of containers, whenever we launch a container Docker will try to use images that are stored locally on your host; and if it is not found, it will download images from Docker public registry.
In this article, we will be looking at managing the Docker images, creating our images and upload them to Docker Hub Registry.
Managing Docker Images
As said earlier, Docker downloads the images from Docker public registry in the case of nonavailability of Docker image on the local host. It is now better to look what are the images available locally on the host.
# docker images
REPOSITORY          TAG                 IMAGE ID            CREATED             SIZE
ubuntu              latest              42118e3df429        7 days ago          124.8 MB
hello-world         latest              c54a2cc56cbb        4 weeks ago         1.848 kB
The above command lists the available images on a local host.; it also displays more in details such as repository name from where it came from, image id, created date, the size of the image and tags.
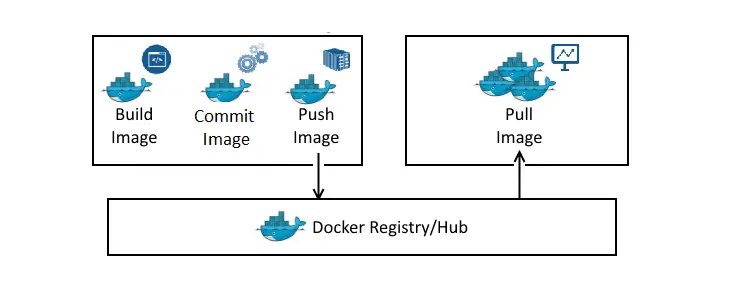
Build Docker Images
Customizing Images
It is nothing but customizing the containers for our requirements and saving them as an image for future usage. For example, let us run the Ubuntu image with option -it and start customizing it.
$ docker run -it ubuntu
Once you executed the above command, you would get an # prompt of the container which will have a container id(6afa8be98b2b).
root@6afa8be98b2b:/#
This container is a plain Ubuntu image. Let us install node.js in it as part of our building the image.
root@6afa8be98b2b:/# apt-get update
root@6afa8be98b2b:/# apt-get install -y nodejs
Committing Images
Docker filesystems are temporary space. If you stop the container, any changes made to the files will be lost; any files you deleted previously will now be back when you start the container again.
This section will show you how to save the state of a container as a new Docker image.
Running Ubuntu container now has a node.js in it, which is different from the image you used to create it.
Now, exit from the container.
root@6afa8be98b2b:/# exit
Commit the changes to a new image using the following command.
When you commit an image, new Docker image will be saved locally, i.e., on your local computer. Later in this article, we will look into the way to push the Docker image to Docker Hub.
$ docker commit -m "Commit Message" -a "Author Name" container_id repository_name/new_image_name
-m –> Commit message to let others know what changes you have made.
-a –> Specify the author details
container_id –> Container id of the customized image (id which you noted during the customizing images section)
repository_name –> Name of the additional repository on Docker Hub (If you don’t have one, it would be your Docker Hub username).
new_image_name –> Name of the new Docker image.
Example:
$ docker commit -m "Installed Node.js" -a "Raj" 6afa8be98b2b itzgeekweb/ubuntu_16.04_nodejs
Once the changes are committed, list down the available images on your computer. It should show the new image as well as the old image from which it was derived.
$ docker images
REPOSITORY                       TAG                 IMAGE ID            CREATED             SIZE
itzgeekweb/ubuntu_16.04_nodejs   latest              69a82e81059b        35 seconds ago      212.5 MB
ubuntu                           latest              42118e3df429        7 days ago          124.8 MB
hello-world                      latest              c54a2cc56cbb        4 weeks ago         1.848 kB
In the above output, ubuntu_16.04_nodejs is the new image, which was derived from the Ubuntu image from the Docker Hub. The size of the Docker image confirms that changes were made, in our example; it was the installation of NodeJS.
When you want to run a container using Ubuntu with NodeJS preinstalled, you can just use the new image.
Pushing Docker Images to Repository
Once after building a new image from an existing image, you may wish to share it with the one you like privately to your organization or publish to a Docker repository so that anyone can make a use of this image.
Pushing Docker Images to a Docker Public Repository
Docker Hub is the cloud-based Docker repository for public to distribute the images over the internet, the images you upload on it become public, and it will be available to everyone to download and use.
This section shows you how to push your image to Docker Hub. Make sure you have an active account on Docker Hub Registry. If not, register there.
If the name of a Docker image is already in the proper format, then you can skip the below steps.
To push an image to a Docker Hub, you need to make sure the name of a Docker image is in repository_name/image:tag format.
Example:
itzgeekweb/ubuntu_16.04_nodejs
So, rename your image using docker tag command.
$ docker tag ubuntu_nodejs itzgeekweb/ubuntu_16.04_nodejs
At first, login to Docker Hub using the following command. Replace “itzgeekweb” with your Docker registry username.
$ docker login -u itzgeekweb
Password:
Login Succeeded
On successful login, push your image to Docker Hub. Replace “itzgeekweb” with your Docker registry username and ubuntu_16.04_nodejs with your image
$ docker push itzgeekweb/ubuntu_16.04_nodejs
You should see the output like below, and this confirms that an image has been pushed to Docker registry.
The push refers to a repository [docker.io/itzgeekweb/ubuntu_16.04_nodejs]
a4b103fb87ae: Pushed
9a39129ae0ac: Mounted from library/ubuntu
98305c1a8f5e: Mounted from library/ubuntu
0185b3091e8e: Mounted from library/ubuntu
ea9f151abb7e: Mounted from library/ubuntu
latest: digest: sha256:d72d9d7d10d72711469aee70218c29d559ba250c7241cc27f7f4205a0a7c2cf3 size: 1362
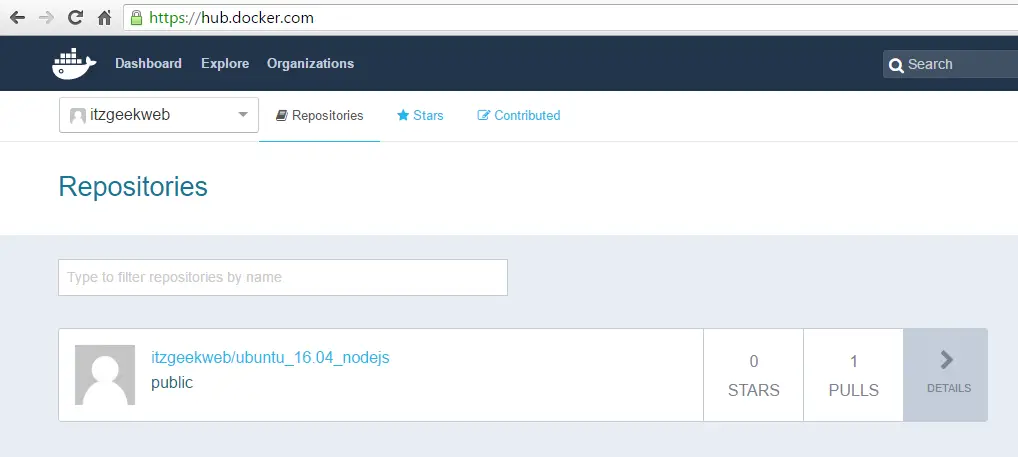
After successful completion of pushing an image to Docker Hub, you should now be able to see the new image on your account dashboard; shown like below.
You may wish to run a container from the pushed image, simply execute the following command in the terminal.
$ docker pull itzgeekweb/ubuntu_16.04_nodejs

$ docker images
REPOSITORY                                 TAG                 IMAGE ID            CREATED             SIZE
docker.io/itzgeekweb/ubuntu_16.04_nodejs   latest              69a82e81059b        About an hour ago   212.5 MB

$ docker run -it docker.io/itzgeekweb/ubuntu_16.04_nodejs
Pushing Docker Images to a Docker Private Repository
Docker private registry is used when your organization doesn’t want your work (custom build images) go public. To push an image to a Docker private registry, you need to make sure the name of a Docker image is in registryserver:portnumber/image name:tag format.
Example,
registry.itzgeek.local:5000/ubuntu:16.04
So, rename your image using “docker tag” command.
$ docker tag itzgeekweb/ubuntu_16.04_nodejs registry.itzgeek.local:5000/ubuntu_16.04:nodejs
Now you are ready to upload the Docker image to a Docker private registry.
READ: How to upload Docker Images to Docker Private Registry.
That’s All.