How to Add Printer in Ubuntu 11.10 | Add Printer in Ubuntu
 If you have installed Ubuntu 11.10 on notebook or PC, you might required to install printer for printing your document. Printer might be attached directly or shared or network, what ever it may i will give some of instruction to install all the type of printer. If you working on Gnome 3 desktop session use the alternate way to add printer, here i used unity interface session.
Open System setting form the Dash. Click on the Printing icon. Click on the Add button.
Shared Printer:
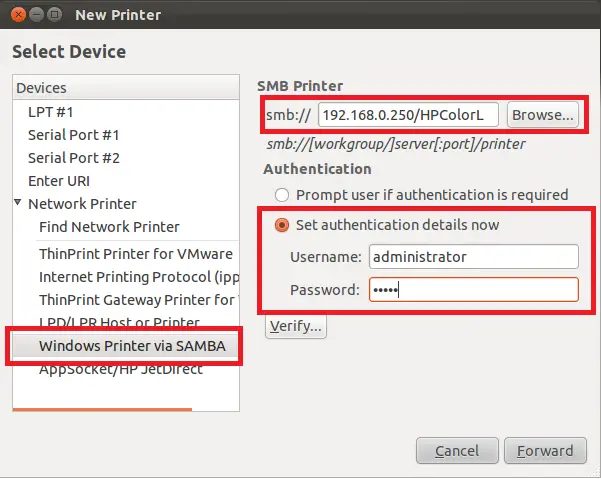
If the printer shared on windows and you want to get it installed on Ubuntu machine, click on Network Printer —-> Windows Printer Via SAMBA. In the right panel type your ip or hostname with the shared printer name (Ex. if ip = 192.168.0.250 shared name=HPColorL type 192.168.0.250/HPColorL). Below that type the authentication information to login on the shared windows machine and the click forward. Follow the on screen instruction to get it installed.
Network Printer:
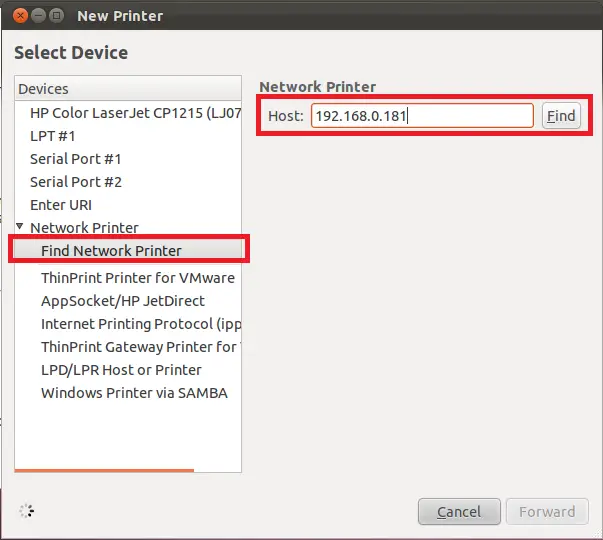
If your printer has dedicated nic, please follow the instruction to install printer. This time click on find printer under network printer section, type the ip-address of the printer on the right side and then click on find. Once printer found on the specified ip, it will show the port no then click forward. Follow the on screen instruction to get it installed.
Directly Attached Printer:
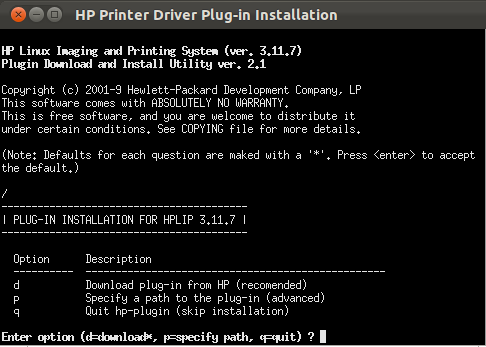
When i connected my HP Color LaserJet CP1215, one driver utility popped up and started to download the driver for my printer.
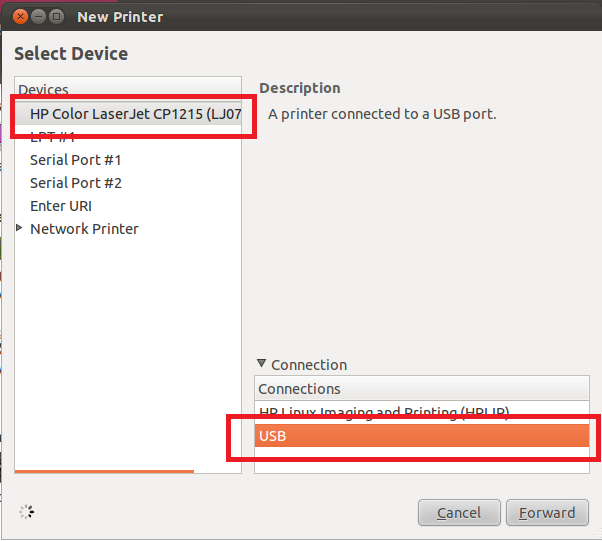
If nothing popped up for driver installation don’t worry click on Add button, your printer should be listed there if it ia a USB printer, otherwise select the LPT #1 or Serial Port #1 or Serial Port #2 for installation according to communication interface of printer. once you selected your printer communication click forward and Follow the on screen instruction to get it installed.
That’s all. You have successfully installed printer on Ubuntu 11.10


