Node.js is an open-source, cross-platform JavaScript runtime environment for developing network tools and web applications. Many of Node.ja modules are written in JavaScript, which simplifies the development of applications using Node.js.
Node.js nothing but a combination of the Runtime environment and JavaScript modules. Node.js interprets JavaScript using Google’s V8 JavaScript engine, and it was developed by Ryan Dahl in 2009.
This guide helps you to install Node.js on CentOS 7 / RHEL 7.
Node.js Versions
There are two versions of Node.js is available for the users. Check out the official page to get the latest version of Node.js.
- v12.x (Long Term Supported)
- v13.x (Current Latest Version)
Install Build Toos (Optional)
You may need to install build tools if you want to compile and install native addons from npm.
yum groupinstall -y 'Development Tools'
Configure Node.js Repository
NodeSource maintains Node.js binary packages for CentOS, Ubuntu and Debian operating systems. You can choose either one of the Node.js version to install on your machine.
Node.js 12.x (LTS)
yum -y install -y curl

curl -sL https://rpm.nodesource.com/setup_12.x | bash -
Node.js 13.x (Latest Version)
yum -y install -y curl

curl -sL https://rpm.nodesource.com/setup_13.x | bash -
Install Node.js
Once after adding the PPA on the server, install the Node.js by using the following command. NPM (Node Package Manager) will also be installed along with Node.js.
yum install -y nodejs
Check the version of Node.js using the following command.
node -v
Output:
v12.16.1
Check the npm version.
npm -v
Output:
6.13.4
Install Yarn
Yarn is another package manager to install and manage packages for Node.js.
To install the Yarn package manager, run:
curl -sL https://dl.yarnpkg.com/rpm/yarn.repo -o /etc/yum.repos.d/yarn.repo

yum install -y yarn
Firewall
In the next section, we will create a web server that will listen on TCP port 8080 to validate the NodeJS application. So, to access the application, we need to allow TCP port 8080 in the firewall.
firewall-cmd --permanent --add-port=8080/tcp

firewall-cmd --reload
Create Test Web Server
If you want to test your Node.js installation, create a web server and run with Node.js.
Let’s create a file called web_server.js.
vi web_server.js
Place the below content into the web_server.js file.
const http = require('http');
const port = 8080;
const server = http.createServer((req, res) => {
   res.writeHead(200, {'Content-Type': 'text/plain'});
   res.end('Hello World\n');
});
server.listen(port, () => {
  console.log(`Server running at https://your-ip-add-ress:${port}/`);
});
Now, start the webserver using the below command.
node --inspect web_server.js
You should get the following message on your terminal.
Debugger listening on ws://127.0.0.1:9229/ef72c217-65e6-4dab-a559-6c2fae7e69c4
For help, see: https://nodejs.org/en/docs/inspector
Server running at https://your-ip-add-ress:8080/
This confirms that the web server has been started and listening on port 8080.
Validate Application
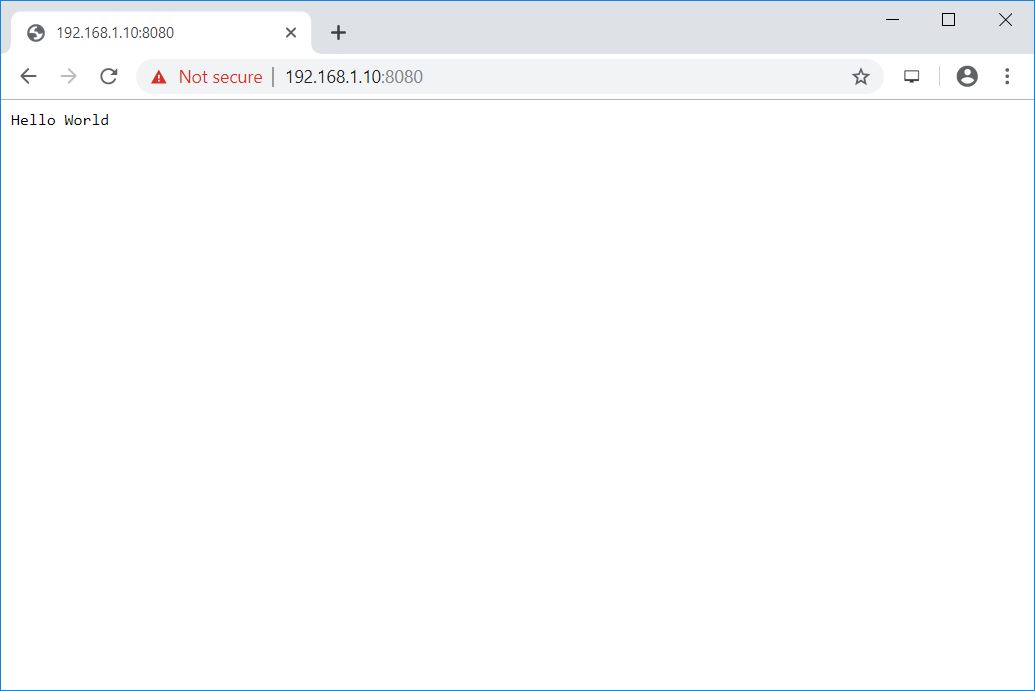
Open your web browser and navigate it to the following web address.
You should get the below web page.
Conclusion
That’s all. You have successfully installed Node.js on CentOS 7 / RHEL 7.