How To Setup Let's Encrypt SSL Certificate With Nginx on Ubuntu 20.04
Let’s Encrypt is a widely known certificate authority that provides free SSL certificates for web sites. It was launched in April 2016. Let’s Encrypt uses client software (certbot) that automates the process of certificate creation, validation, signing, implementation, and renewal of certificates.
Currently, Apache, Nginx, Plex, and Haproxy are supported for the automated process.
Prerequisites
Before you proceed, set up LEMP stack to have the Nginx web server on your Ubuntu system.
READ: How to Install LEMP Stack on Ubuntu 20.04.
Install Certbot
As said earlier, we need to install the Certbot ACME client to generate and install certificates.
sudo apt update

sudo apt install -y software-properties-common

sudo add-apt-repository universe

sudo apt update
Now, install the certbot client.
sudo apt install -y certbot
Create Nginx Virtualhost
We will now create an Nginx virtual host configuration file for the domain www.itzgeek.net.
This virtual host serves the HTTP version of your domain.
sudo nano /etc/nginx/conf.d/www.itzgeek.net.conf
Use the below information.
server {
   server_name www.itzgeek.net;
   root /sites/www.itzgeek.net;

   location / {
       index index.html index.htm index.php;
   }

   access_log /var/log/nginx/www.itzgeek.net.access.log;
   error_log /var/log/nginx/www.itzgeek.net.error.log;

}
Add below lines to the above server block in order to have PHP support in Nginx.
   location ~ \.php$ {
      include /etc/nginx/fastcgi_params;
      fastcgi_pass 127.0.0.1:9000;
      fastcgi_index index.php;
      fastcgi_param SCRIPT_FILENAME $document_root$fastcgi_script_name;
   }
Create a document root to hold your HTML files.
sudo mkdir -p /sites/www.itzgeek.net
Change the ownership of the directory.
sudo chown -R www-data:www-data /sites/www.itzgeek.net/
Place the test HTML file in the document root of your domain.
echo "This is a test site @ www.itzgeek.net" | sudo tee /sites/www.itzgeek.net/index.html
Restart the Nginx service.
sudo systemctl restart nginx
Update / Change DNS Record
Access your DNS management tool or Domain registrar and create an A/CNAME record for the domain. Ex: www.itzgeek.net.

Wait for some time to let the A record propagate.
Check the DNS propagation with Nslookup sudo apt install -y dnsutils utility.

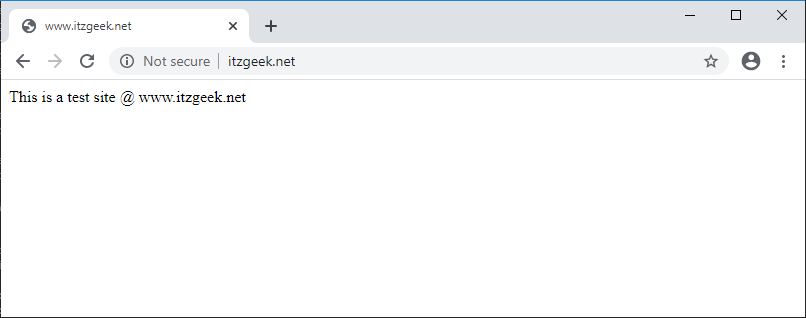
Validate your HTTP web site by using the web browser.
Install Let’s Encrypt SSL Certificate
Use the certbot command to create a Let’s Encrypt certificate.
sudo certbot certonly --webroot
Follow the interactive prompt and generate the required certificate.
Saving debug log to /var/log/letsencrypt/letsencrypt.log
Plugins selected: Authenticator webroot, Installer None
Enter email address (used for urgent renewal and security notices) (Enter 'c' to
cancel): [email protected]  << Email ID to receive renewal notification

- - - - - - - - - - - - - - - - - - - - - - - - - - - - - - - - - - - - - - - -
Please read the Terms of Service at
https://letsencrypt.org/documents/LE-SA-v1.2-November-15-2017.pdf. You must
agree in order to register with the ACME server at
https://acme-v02.api.letsencrypt.org/directory
- - - - - - - - - - - - - - - - - - - - - - - - - - - - - - - - - - - - - - - -
(A)gree/(C)ancel: A  << Accept Terms

- - - - - - - - - - - - - - - - - - - - - - - - - - - - - - - - - - - - - - - -
Would you be willing to share your email address with the Electronic Frontier
Foundation, a founding partner of the Let's Encrypt project and the non-profit
organization that develops Certbot? We'd like to send you email about our work
encrypting the web, EFF news, campaigns, and ways to support digital freedom.
- - - - - - - - - - - - - - - - - - - - - - - - - - - - - - - - - - - - - - - -
(Y)es/(N)o: Y  << Subscribe to newsletter
Please enter in your domain name(s) (comma and/or space separated)  (Enter 'c'
to cancel): www.itzgeek.net  << Domain name
Obtaining a new certificate
Performing the following challenges:
http-01 challenge for www.itzgeek.net
Input the webroot for www.itzgeek.net: (Enter 'c' to cancel): /sites/www.itzgeek.net/  << Document root of Domain
Waiting for verification...
Cleaning up challenges

IMPORTANT NOTES:
 - Congratulations! Your certificate and chain have been saved at:
   /etc/letsencrypt/live/www.itzgeek.net/fullchain.pem  << Certificate location
   Your key file has been saved at:
   /etc/letsencrypt/live/www.itzgeek.net/privkey.pem  << Certificate Key file location
   Your cert will expire on 2020-08-05. To obtain a new or tweaked
   version of this certificate in the future, simply run certbot
   again. To non-interactively renew *all* of your certificates, run
   "certbot renew"
 - Your account credentials have been saved in your Certbot
   configuration directory at /etc/letsencrypt. You should make a
   secure backup of this folder now. This configuration directory will
   also contain certificates and private keys obtained by Certbot so
   making regular backups of this folder is ideal.
 - If you like Certbot, please consider supporting our work by:

   Donating to ISRG / Let's Encrypt:   https://letsencrypt.org/donate
   Donating to EFF:                    https://eff.org/donate-le
Edit the Nginx virtual host to add the SSL certificate.
server {
   server_name www.itzgeek.net;
   root /sites/www.itzgeek.net;

   location / {
       index index.html index.htm index.php;
   }

   access_log /var/log/nginx/www.itzgeek.net.access.log;
   error_log /var/log/nginx/www.itzgeek.net.error.log;

   # Let's Encrypt SSL certificate
   listen 443 ssl;
   ssl_certificate /etc/letsencrypt/live/www.itzgeek.net/fullchain.pem;
   ssl_certificate_key /etc/letsencrypt/live/www.itzgeek.net/privkey.pem;
}
Redirect HTTP to HTTPS with Nginx (optional)
We will now configure the Nginx server to redirect the traffic comes for the HTTP site to the HTTPS site.
Here, we will use the same configuration file that we created for the HTTP version of the site to place the HTTPS redirection server block.
sudo nano /etc/nginx/conf.d/www.itzgeek.net.conf
Add the below information at the end of the file.
# Redirect WWW HTTP to WWW HTTPS

# http://www.itzgeek.net >> https://www.itzgeek.net

server {
    if ($host = www.itzgeek.net) {
        return 301 https://$host$request_uri;
    }

    server_name www.itzgeek.net;
    listen 80;
    return 404;

}
# Redirect NON-WWW HTTP to WWW HTTPS

# http://itzgeek.net >> https://www.itzgeek.net

server {
    if ($host = itzgeek.net) {
        return 301 https://www.itzgeek.net$request_uri;
    }

   server_name itzgeek.net;
    listen 80;
    return 404;

}
Restart the Nginx service.
sudo systemctl restart nginx
Verify Let’s Encrypt SSL Certificate
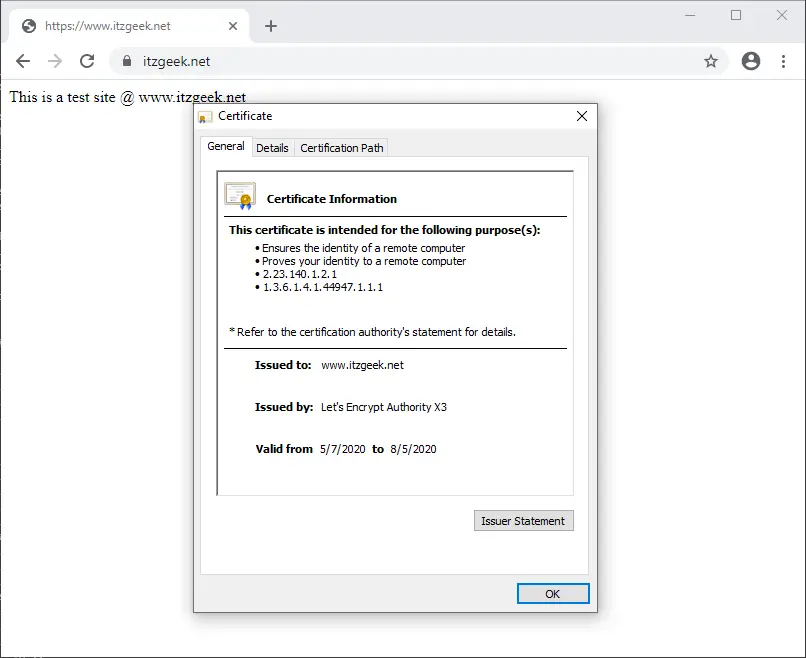
Verify the Let’s Encrypt certificate by visiting the HTTPS version of your website.
OR
You should get an HTTPS version of your site now.
Test Let’s Encrypt SSL Certificate
Test your SSL certificate for any issues and its security ratings by going to the below URL.
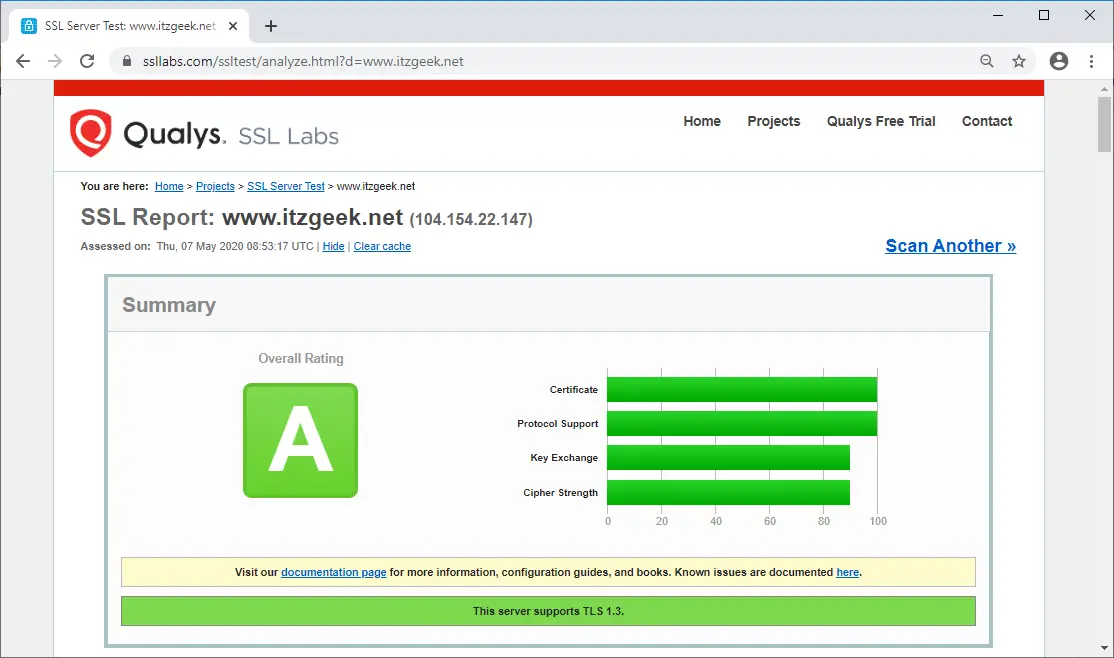
Renew Let’s Encrypt SSL Certificate
Let’s Encrypt certificates have a validity of 3 months, and it is highly advisable to renew your installed certificates before they expire.
Certbot client places scheduler (cron job) that runs twice a day to renew certificates that are going to expire.
You can simulate the certificate renewal process with the below command to ensure the renewal goes smoothly.
sudo certbot renew --dry-run
Output:
Saving debug log to /var/log/letsencrypt/letsencrypt.log

- - - - - - - - - - - - - - - - - - - - - - - - - - - - - - - - - - - - - - - -
Processing /etc/letsencrypt/renewal/www.itzgeek.net.conf
- - - - - - - - - - - - - - - - - - - - - - - - - - - - - - - - - - - - - - - -
Cert not due for renewal, but simulating renewal for dry run
Plugins selected: Authenticator webroot, Installer None
Renewing an existing certificate
Performing the following challenges:
http-01 challenge for www.itzgeek.net
Waiting for verification...
Cleaning up challenges

- - - - - - - - - - - - - - - - - - - - - - - - - - - - - - - - - - - - - - - -
new certificate deployed without reload, fullchain is
/etc/letsencrypt/live/www.itzgeek.net/fullchain.pem
- - - - - - - - - - - - - - - - - - - - - - - - - - - - - - - - - - - - - - - -

- - - - - - - - - - - - - - - - - - - - - - - - - - - - - - - - - - - - - - - -
** DRY RUN: simulating 'certbot renew' close to cert expiry
**          (The test certificates below have not been saved.)

Congratulations, all renewals succeeded. The following certs have been renewed:
  /etc/letsencrypt/live/www.itzgeek.net/fullchain.pem (success)
** DRY RUN: simulating 'certbot renew' close to cert expiry
**          (The test certificates above have not been saved.)
- - - - - - - - - - - - - - - - - - - - - - - - - - - - - - - - - - - - - - - -

IMPORTANT NOTES:
 - Your account credentials have been saved in your Certbot
   configuration directory at /etc/letsencrypt. You should make a
   secure backup of this folder now. This configuration directory will
   also contain certificates and private keys obtained by Certbot so
   making regular backups of this folder is ideal.

The above output confirms that the renewal will work as expected.
Conclusion
That’s All. I hope you learned how to set up Let’s Encrypt SSL Certificate with Nginx on Ubuntu 20.04. Please share your feedback in the comments section.

![How To Upgrade To Ubuntu 20.04 From Ubuntu 18.04 / Ubuntu 19.10 [Detailed Guide]](/post/how-to-upgrade-to-ubuntu-20-04/featured_hu8b7fad8701aaa8998bccee63d00edef2_86059_550x0_resize_q90_lanczos.jpg)




![How To Upgrade To Linux Mint 20 From Linux Mint 19 [Detailed Guide]](/post/how-to-upgrade-to-linux-mint-20/featured_hu3b6c6a25dd04b6406f79faf78c8c0be6_108894_550x0_resize_q90_lanczos.jpg)


