Enable MultiSite in WordPress 3.0 | WordPress 3.0 MultiSite Setup
WordPress 3.0 signaled the merge of WordPress and WordPress MU, and allows you to manage a network of sites in WordPress. In this post, I will show you how to enable the Network screen and the MultiSite features in WordPress 3.0. Follow the below steps to enable the Multiste feature of WordPress 3.0, for enabling the multiste feature the WordPress website must be newly installed.
Enable Network Menu
Add the following line to wp-config.php:
define( 'WP_ALLOW_MULTISITE', true ); |
Create a Network
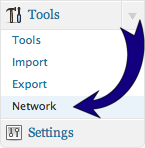
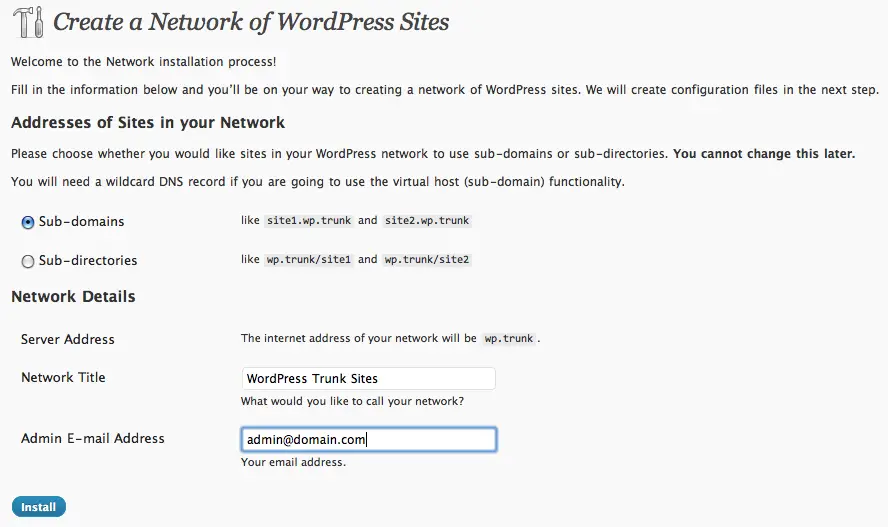
 Log in to the WordPress back-end and go to the Network screen under Tools. WordPress allows you to choose between sub-domain and sub-directory based installs for your network of sites. You can choose one or the other, but it’s not easy to change later, so you must decide before you proceed.
Sub-domains:
A sub-domain install allows you to have new sites as sub-domains of your WordPress installation. For example, you can have site1.domain.com and site2.domain.com for a WordPress installation at domain.com. You will need to add a wildcard domain alias for your webserver and a wildcard DNS record for your domain.
Sub-directories:
A sub-directory install allows you to have new sites as sub-directories of your WordPress installation. For example, you can have domain.com/site1 and domain.com/site2 for a WordPress installation at domain.com.
Enable Network
Create Media Directory:
Create a blogs.dir directory under wp-content for all uploaded media files for all sites in the network. You must ensure that the new directory has the correct permissions so it is writable by the web-server (apache user).
Update wp-config.php:
Add the following lines to wp-config.php, it must be placed above the following line /* That’s all, stop editing! Happy blogging. */
define( 'MULTISITE', true );define( 'SUBDOMAIN_INSTALL', true ); //false for sub-directory install$base = '/';define( 'DOMAIN_CURRENT_SITE', 'domain.com' ); //replace domain.com with your installdefine( 'PATH_CURRENT_SITE', '/' );define( 'SITE_ID_CURRENT_SITE', 1 );define( 'BLOG_ID_CURRENT_SITE', 1 ); |
Update/Create .htaccess:
Create a file named .htaccess in the root WordPress directory if doesn’t exist or update the file by adding the following:
Apache and sub-directory installs:
RewriteEngine OnRewriteBase /RewriteRule ^index\.php$ - [L]# uploaded filesRewriteRule ^([_0-9a-zA-Z-]+/)?files/(.+) wp-includes/ms-files.php?file=$2 [L]# add a trailing slash to /wp-adminRewriteRule ^([_0-9a-zA-Z-]+/)?wp-admin$ $1wp-admin/ [R=301,L]RewriteCond %{REQUEST_FILENAME} -f [OR]RewriteCond %{REQUEST_FILENAME} -dRewriteRule ^ - [L]RewriteRule ^([_0-9a-zA-Z-]+/)?(wp-(content|admin|includes).*) $2 [L]RewriteRule ^([_0-9a-zA-Z-]+/)?(.*\.php)$ $2 [L]RewriteRule . index.php [L] |
Apache and sub-domain installs:
RewriteEngine OnRewriteBase /RewriteRule ^index\.php$ - [L]# uploaded filesRewriteRule ^files/(.+) wp-includes/ms-files.php?file=$1 [L]RewriteCond %{REQUEST_FILENAME} -f [OR]RewriteCond %{REQUEST_FILENAME} -dRewriteRule ^ - [L]RewriteRule . index.php [L] |
Replace all WordPress related .htaccess rules with the ones above if the file already exists.
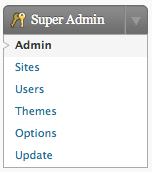
Return to the WordPress back-end. You will have to log-in again and now you’ll see a Super Admin menu item. You can manage your network of sites from this menu.


