![]()
Fedora Server 22 has been released today (26-05-2015), here I am bringing you the guide on step by step installation of fedora release 22. Fedora offers three installation images separately for workstation, server and cloud. The following guide is created based on Fedora Server 22.
What’s new in Fedora Server 22:
- Fedora 22 comes with latest version of kernel 4.0.0.
- Manual partitioning scheme now has an option to add zFCP devices, also having Refresh button to refresh list of devices.
- XFS filesystem is the default filesystem for Fedora server 22.
- Ipsilon identy provider is now included in updates repository.
- The yum package manager is replaced by DNF.
- Elasticsearch is now available in Fedora server 22 updates repository.
More details can be found here.
System Requirements:
The following is the recommended system configuration for Fedora 22.
1GHz or faster processor
1GB System Memory
10GB unallocated drive space
Find full requirements here. Download Fedora Server 22 from here, put the CD on the CD-ROM drive, change the boot sequence accordingly, so that CD-ROM can boot first.
Fedora Server 22 Installation:
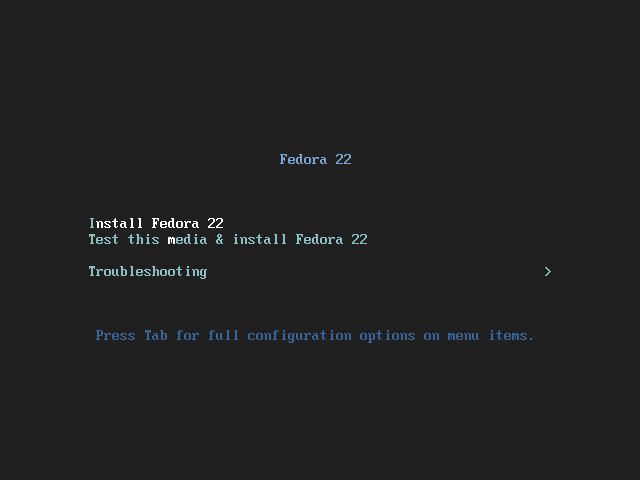
Step 1: For installing the Fedora, Select Install Fedora Server 22.
PS: Installation of Fedora 22 is no difference from the installation of Fedora 21, so you would find most of the screenshots are of Fedora server 21 installation.
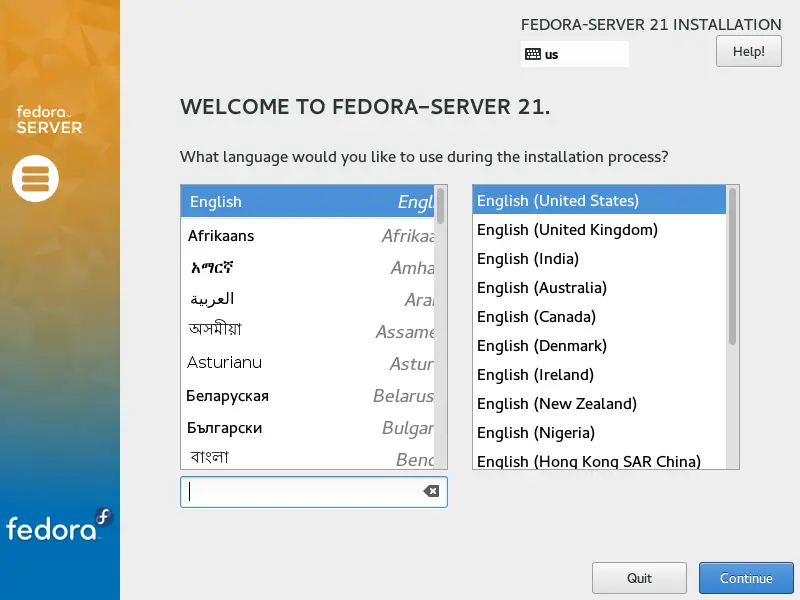
Step 2: Select the language and continue.
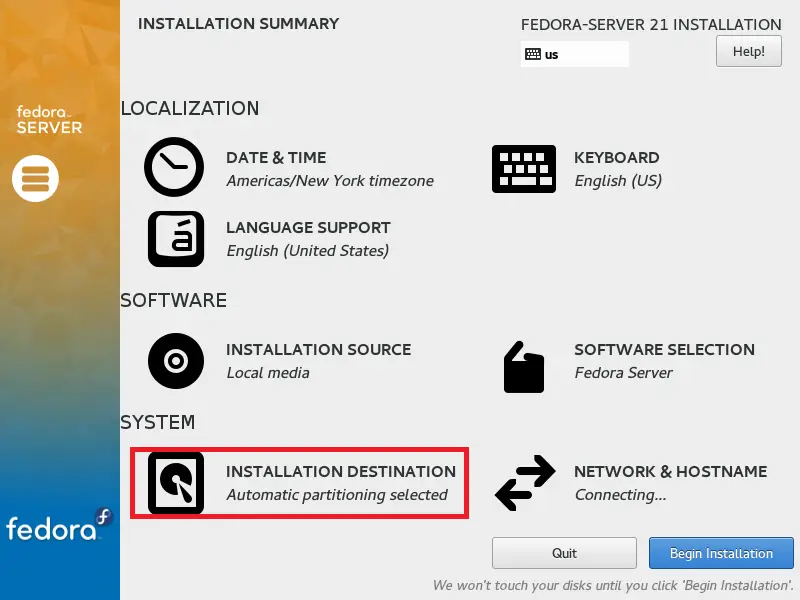
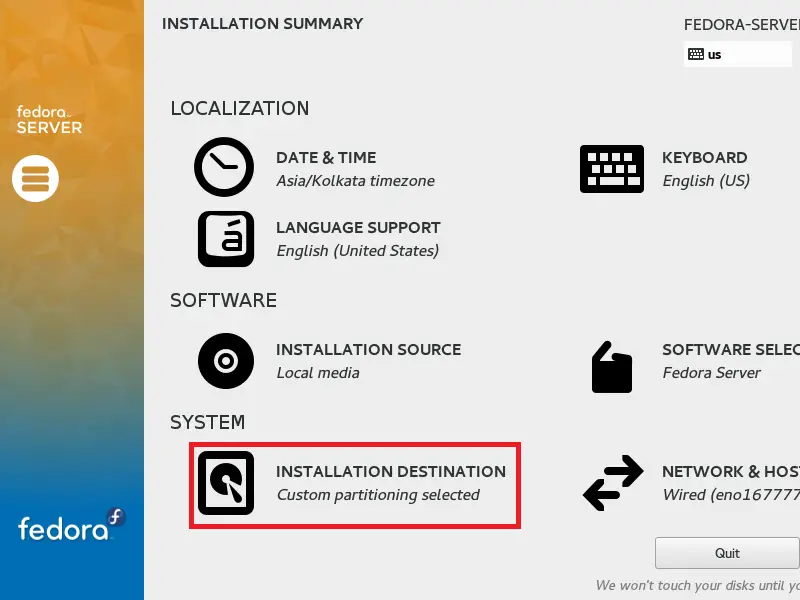
Step 3: Next step is the installation summary, you must require to give an input to clear the warning messages. Other settings are optional. If you want to change the setting, you can click on it; corresponding page will open.
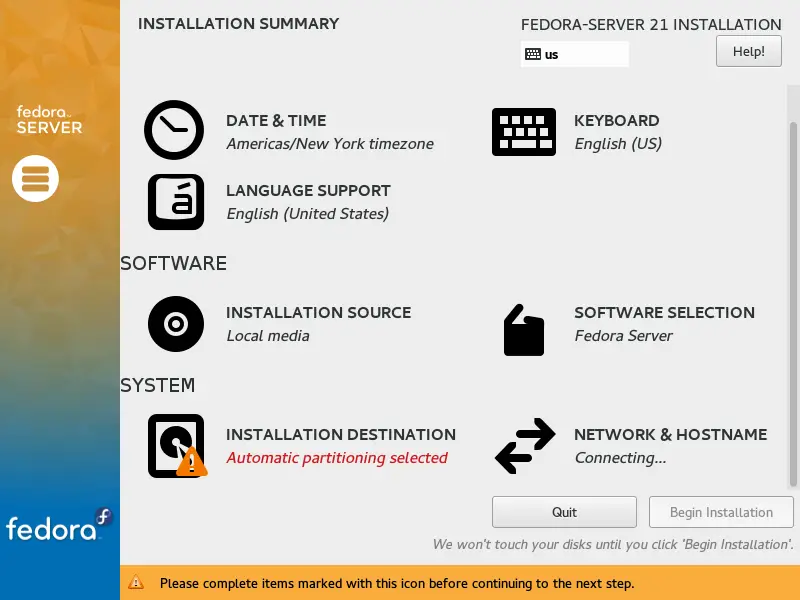
Step 4: As per the above screen shot, i have a warning for installation destination. I’ve clicked on Installation destination to create a partition for the installation.
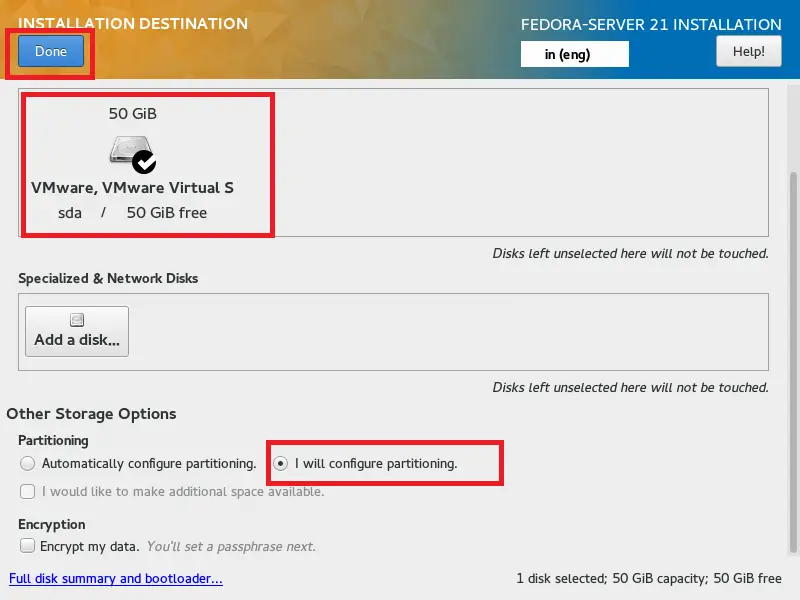
You can choose either automatic partition or manual partition.
Automatic Partitioning:
Instead of creating any partition, you can click on done button to tell the system to create an automatic partition.
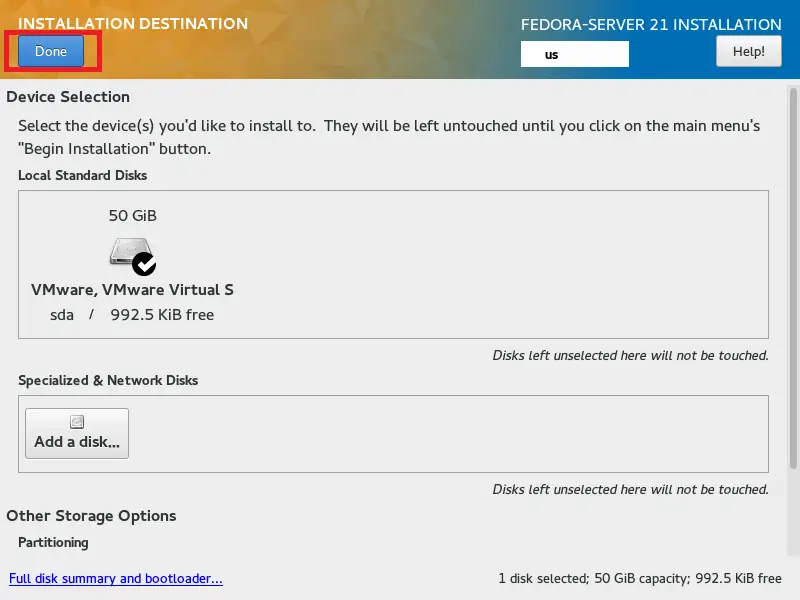
Once you clicked, you will go back to installation summary where you can find the installation destination is “Automatic Partitioning Selected”
You can skip the following step and go to step 5.
Manual Partitioning:
Partition scheme will be like below, / partition is with LVM.
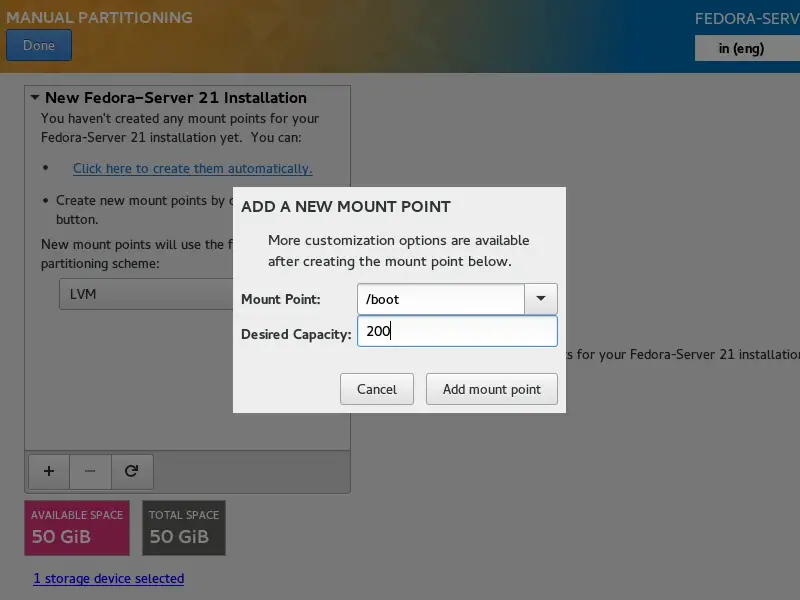
/boot – 200MB
swap – 2048MB
/ – remaining (45GB)
Select hard disk and choose i will configure partitioning, then click on Done button.
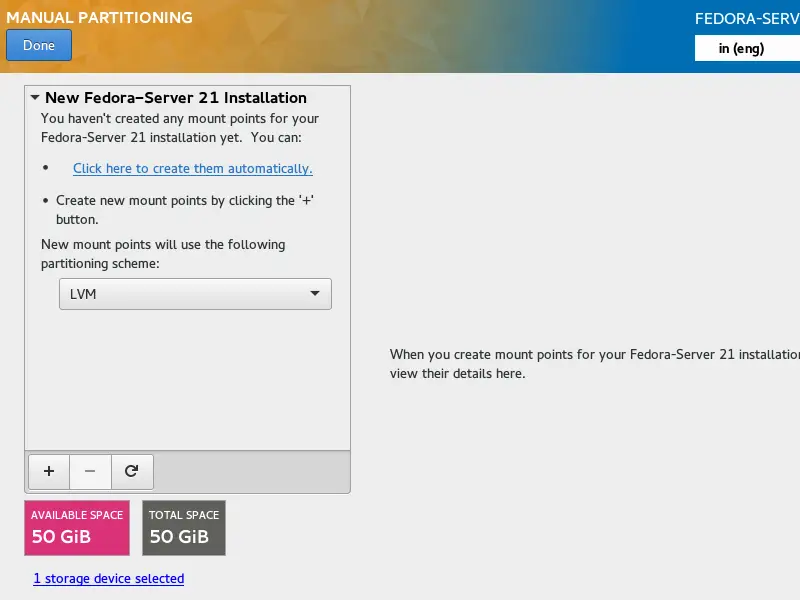
You will get the following page, where you can create a partitions. By default, LVM partitioning scheme is selected, so whatever partition you are creating here will be logical instead on standard partition. You can click on scroll button (LVM) for more partitioning scheme.
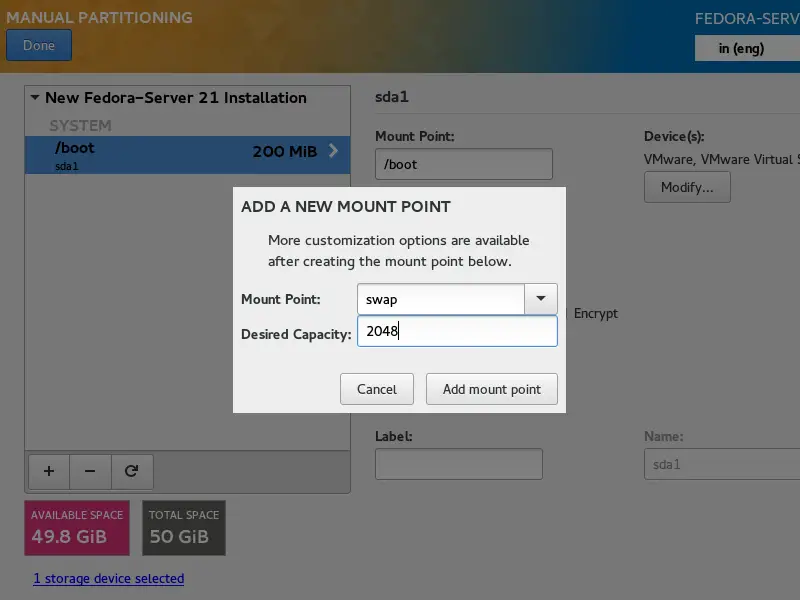
Click on + sign at the bottom to create partitions. Following shows for /boot partition.
Following for swap partition, make sure you to select mount point as swap.
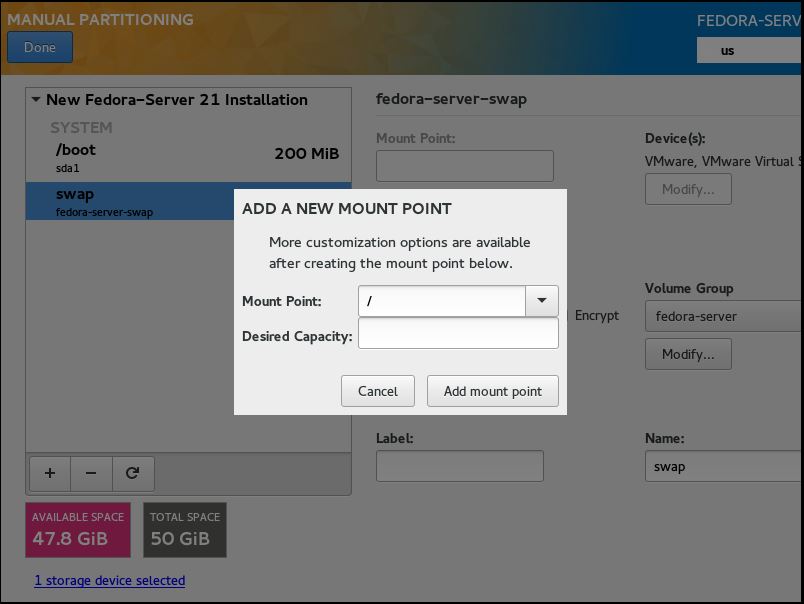
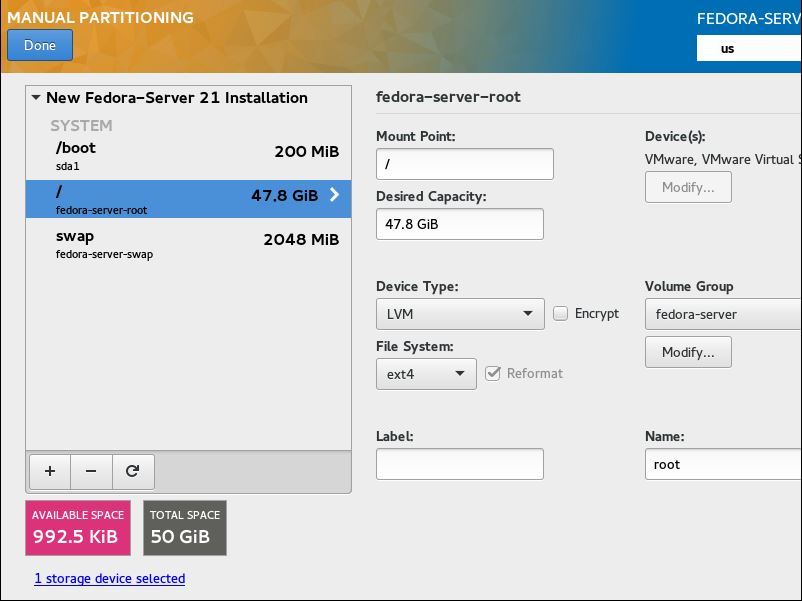
Following for / (root) partition, if you do not enter any amount; it will take all remaining space.
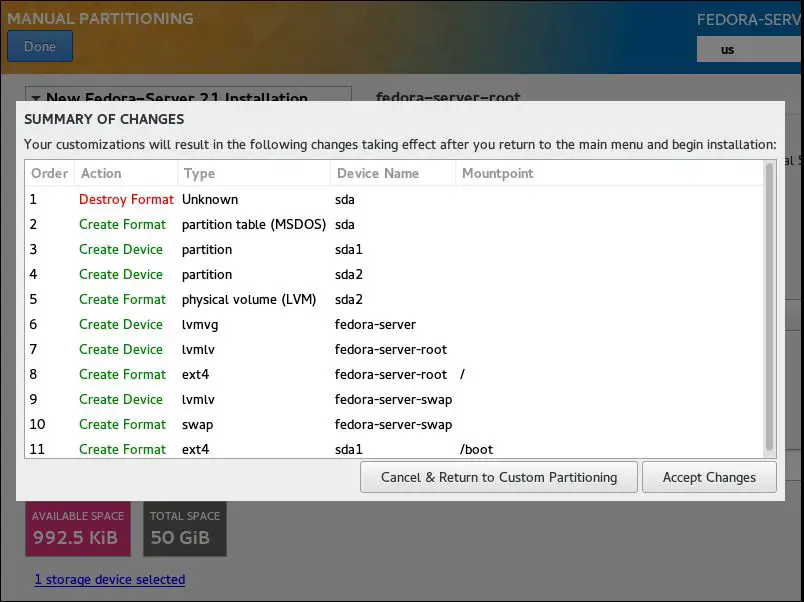
The following is the summary of partitions that we had created. Click on done.
Click on accept changes for formatting the partitions.
Once you clicked, you will go back to installation summary where you can find the installation destination is “Custom Partitioning Selected”
Step 5: If you click on Date and Time, you will get the following page to change the Date and Time / Time zone. Click on done to save.

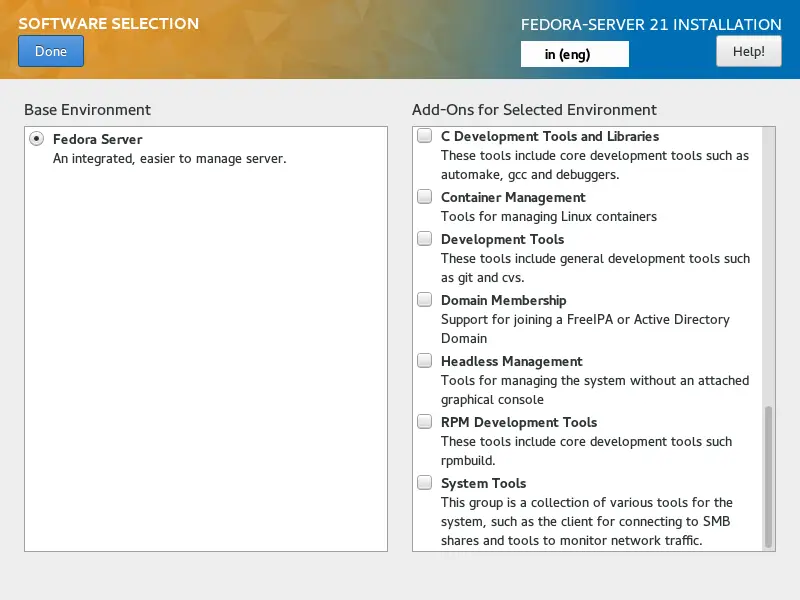
Step 6: If you click on Software Selection, you will get the following page to change the type of installation. Click on done to save.
Step 7: If you click on Network and Host name, you will get the following page to set up network and host name. Set hostname in Hostname field.
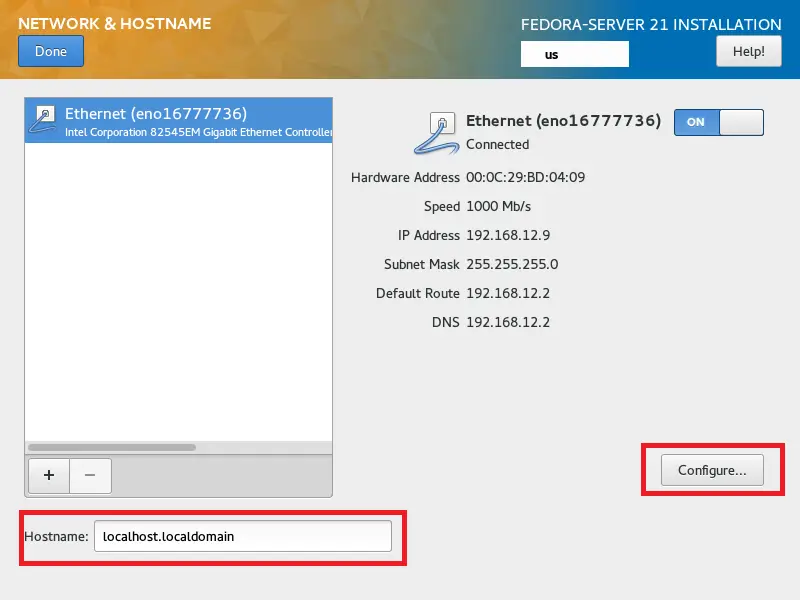
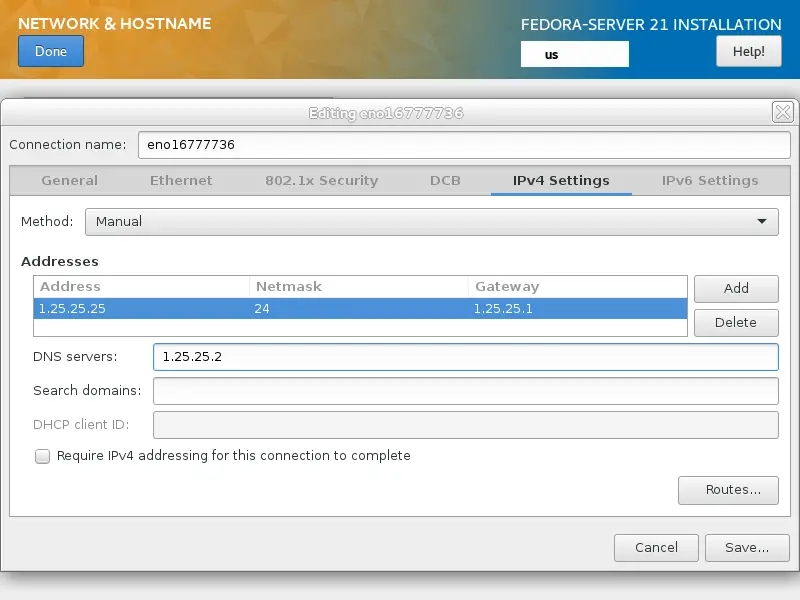
Click on configure to set IP address. Once completed, click on save and then click on Done.
Step 8: Click on begin installation to start the installation.

Step 9: Once you clicked, installer will start to install the packages. In the mean time, we need to clear the following warning.
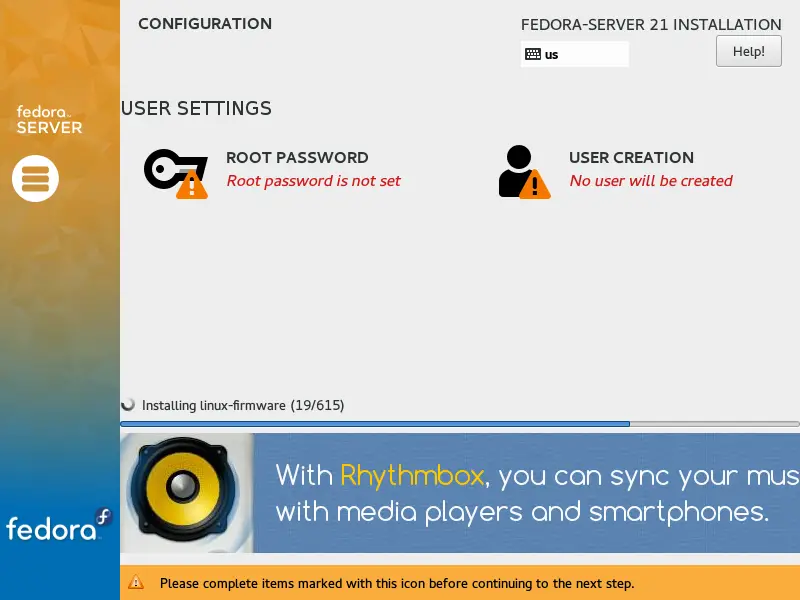
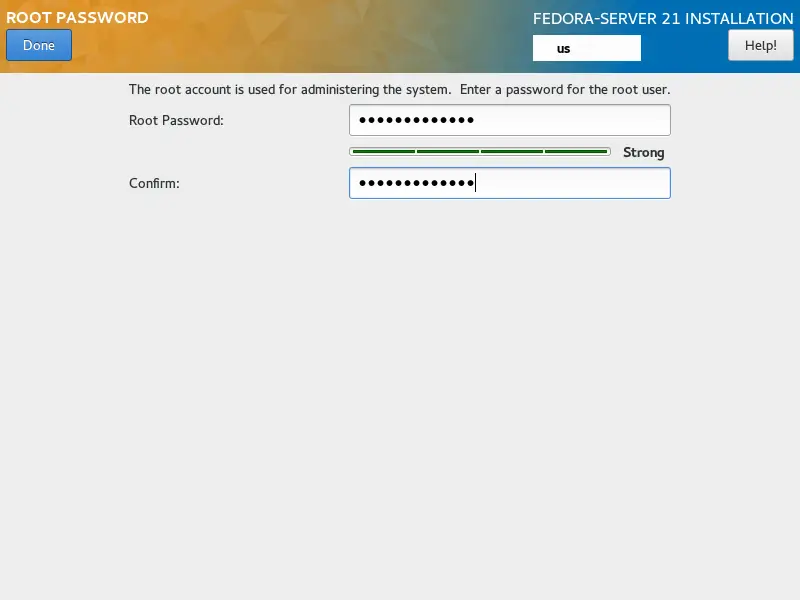
Step 10: Set root password by clicking on ROOT PASSWORD.
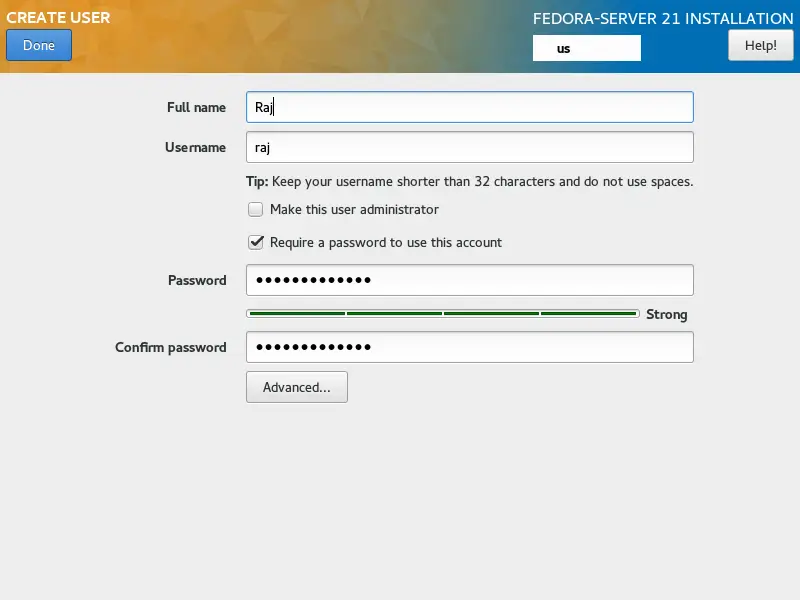
Step 11: Create a new user by clicking on USER CREATION.
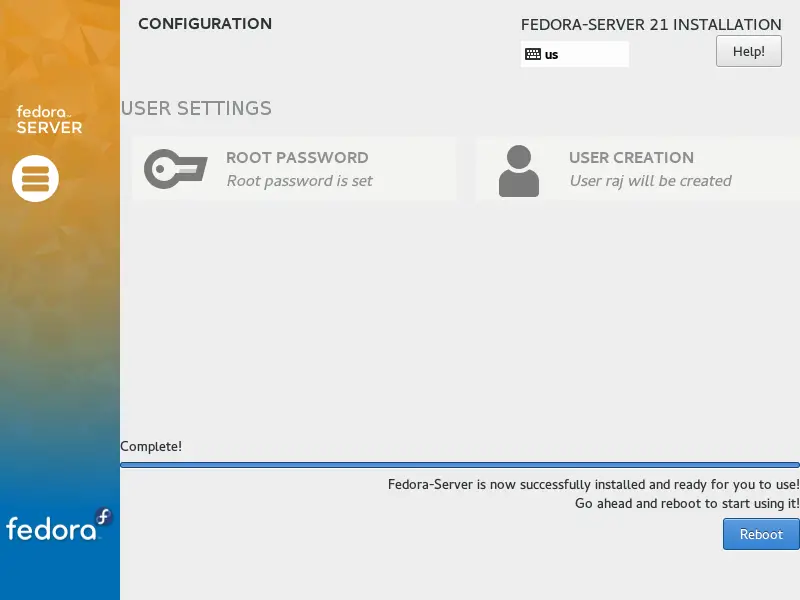
Step 12: Once the installation is completed, click on reboot.
The following screenshot shows login screen of Fedora Server 22.

That’s All.