In our previous article, we got to know how to install Docker engine and covered some important Docker commands we use to get the things done from Docker containers.
As you are already aware, Docker images are the base of containers. Whenever you provision or launch a container, Docker will search for the image locally on your Docker host and try to use them. In case the image is not found locally then it will download images from Docker public registry.
Docker images you get from public registry may not have something you want, may have something you don’t want. So in this case, you can build Docker images with a set of application on it and launch a container with that set of application which will help to improve your productivity.
Docker container images can be built in three ways,
1. Commit
2. Dockerfile
3. Compose
READ: How to build Docker images through Docker Commit command
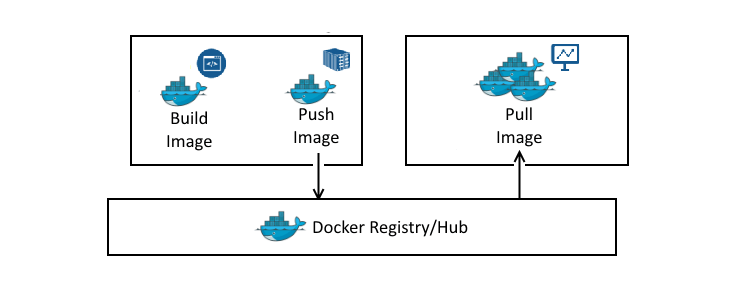
Here, in this article, we will build Docker images using Dockerfile as per our requirements and then upload them on to Docker Hub Registry or Private registry.
Prerequisites:
Install Docker community edition on your machine in which you are going to build an image.
READ: How to install Docker CE on CentOS 7
READ: How to install Docker CE on Ubuntu 16.04
READ: How to install Docker CE on Fedora 25
Dockerfile is a simple text file which contains all the commands (set of Linux commands and Docker keywords) which are executed automatically when we build a Docker image.
Docker Keywords:
FROM:
The From keyword tells the Docker to use this image as Base Image for building the Docker container image. If the Base image is not found locally, Docker will fetch the image either from Docker Hub or Private Registry server.
Docker file must have FROM on the first line of instruction; you can use FROM multiple times within a single Dockerfile to create multiple images.
Example,
FROM centos:7
LABEL:
Use LABEL keyword to have your information like “Project name, Vendor, Version, Release date, Licensing. Maintainer, etc..” recorded onto Docker images.
Example,
LABEL poject="ITzGeek Demo image"
LABEL maintainer "[email protected]"
RUN:
The RUN instruction is used to execute commands on the Docker image (centos:7) and commit the results. For simple understanding, use this RUN to install packages, run shell commands, and almost any commands you use in an operating system.
Example,
RUN yum makecache
RUN yum install -y httpd
RUN echo "This Page Designed by ITzGeek, for Docker Build"
CMD:
The CMD is used to run the application installed on your Docker image. For Ex, if you want to run a Apache server when a container is launched from a Docker image; you should add the following line.
Note: JSON format is used when you want to run a “command” without a shell.
Example,
CMD ["apache2","-DFOREGROUND"]
To run an application with a shell and get a bash prompt,
CMD service httpd restart && /bin/bash
PS: If you have more than one CMD then only the last CMD will take effect.
ENTRYPOINT:
The ENTRYPOINT is also similar to CMD.
Example,
ENTRYPOINT service httpd restart && /bin/bash
You can also use ENTRYPOINT and CMD together. When combining ENTRYPOINT and CMD, ENTRYPOINT will take arguments from CMD. To start the httpd service when a container is launched from a Docker image, you need to add the following line.
ENTRYPOINT [ "/usr/sbin/httpd" ]
CMD ["-D", "FOREGROUND"]
EXPOSE:
The EXPOSE instruction will be used to expose the application (httpd) port from a container.
Example,
EXPOSE 80
ENV:
Use ENV keyword to set an environmental variable or shell variable for your application. If you want to set a JAVA variable, you can add the following line.
Example,
ENV JAVA_HOME=/usr/jdk1.8.0_05
ADD Or COPY:
The function of ADD or COPY are similar, COPY is preferred. COPY helps you to copy the local files into the container. ADD has some advanced features such as local file auto-tar extraction to the image and remote download support.
Example,
COPY requirements.txt /tmp/
ADD https://example.com/requirements.txt /tmp
VOLUME:
With VOLUME, you can create a mount point inside the container and make it available to native hosts or other containers. “VOLUME /data” creates “/data” mount point inside the container, the files inside “/data” will be persistent and same can be attached to an external host using -v or –volumes-from when launching a container from Docker image.
VOLUME /data
USER:
The USER sets the username or UID for RUN, CMD and ENTRYPOINT keywords.
Example,
USER root
COPY test.txt /
The above example will make the owner of the copied file as root.
Find more Keywords here. (https://docs.docker.com/engine/reference/builder/)
Creating DockerFile:
Let’s create a file called “Dockerfile” inside /mydocker directory.
Note: Name of the docker file must be “Dockerfile”.
Add keywords to Dockerfile by editing the file with vi editor.
mkdir /mydocker ; cd /mydocker

vi Dockerfile
Here, we will create a Docker image for Apache web server. The DockerFile for Apache web server will look like below.
To build an Apache Web Server image based on Ubuntu 16.04:
FROM ubuntu:16.04

LABEL project="ITzGeek Demo image"
LABEL maintainer "[email protected]"

RUN apt-get update
RUN apt-get install -y apache2
RUN echo "This Page Designed by ITzGeek, for Docker Build; Running on Ubuntu 16.04" > /var/www/html/index.html

VOLUME /var/www/html

ENV APACHE_RUN_USER www-data
ENV APACHE_RUN_GROUP www-data
ENV APACHE_LOG_DIR /var/log/apache2
ENV APACHE_PID_FILE=/var/run/apache2/apache2$SUFFIX.pid
ENV APACHE_LOCK_DIR=/var/lock/apache2

RUN mkdir -p $APACHE_RUN_DIR $APACHE_LOCK_DIR $APACHE_LOG_DIR

EXPOSE 80

CMD ["apache2","-DFOREGROUND"]
To build an Apache Web Server image based on CentOS 7:
FROM centos

LABEL project="ITzGeek Demo image"
LABEL maintainer "[email protected]"

RUN yum -y install httpd

EXPOSE 80

VOLUME /var/www/html

ENTRYPOINT [ "/usr/sbin/httpd" ]
CMD ["-D", "FOREGROUND"]
Building Docker Image:
Assuming that you are in “/mydocker” directory and run “docker build” command.
docker build -t mycentos:httpdv1.0 .
The above command builds a Docker image with the name “mycentos:httpdv1.0”.
See whether the new image is built or not using the following command.
docker images
Output:

Launching Container:
Create a directory called “/data” on Docker host, “/data” directory will hold the files of Apache DocumentRoot “/var/www/html”
mkdir /data
Launch a container using the following command.
docker run -td -p 80:80 -v /data:/var/www/html --name=web mycentos:httpdv1.0
Check whether the new container is created or not.
docker ps
Output:

Place “index.html” inside “/data” directory which equivalent to placing it on container “web” under “/var/www/html“.
echo "This Page Designed by ITzGeek, for Docker Build; running on CentOS 7 but the Data is on Host" > /data/index.html
Open up your internet web browser and point to the URL of Docker host
Ex. “https://build.itzgeek.local” or “https://192.168.12.20“.
You should get the following page.

What Next:
You might be interested reading below articles.
READ: How to upload Docker Images to Docker private Registry
READ: How to upload Docker Images to Docker Hub
That’s All. Share your suggestions and views related to this article, thank you.