MySQL is an open source relational database management system, commonly used in web applications to store and retrieve records and information.
MySQL was first developed by MYSQL AB, now owned by Oracle Corporation. It was the primary database application for Linux operating system until MariaDB, a fork of MySQL, came into the picture.
In this article, we will work on the task of how to Install MySQL 5.7 on Ubuntu 16.04 / Ubuntu 14. 04 & Debian 9 / Debian 8.
Add MySQL Repository
MySQL server is no longer distributed through base operating system image or OS repositories due to software licensing. So, you would need to add its official repository to install MySQL community server.
wget https://dev.mysql.com/get/mysql-apt-config_0.8.9-1_all.deb
Install the repository package using the dpkg command.
sudo dpkg -i mysql-apt-config_0.8.9-1_all.deb
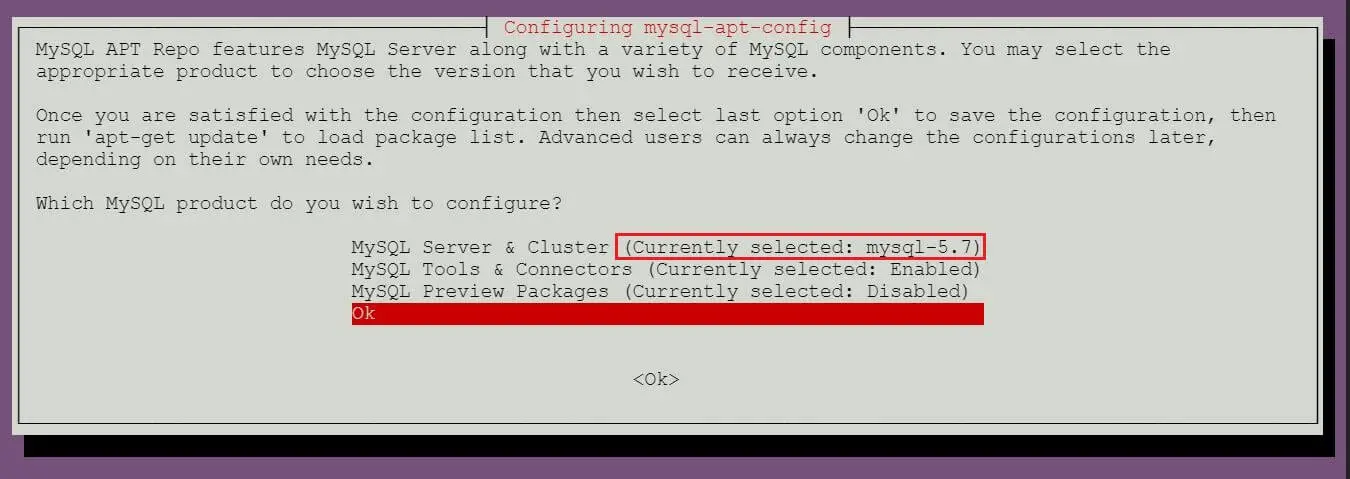
The package installer will prompt you to select the MySQL repository. Based on your selection, the installer will configure repositories to receive the appropriate version of MySQL.
Here, I will choose the MySQL 5.7 which is the default one. Then select OK and then press enter.
Install MySQL Community Server
Oracle currently offers both stable version and beta versions of MySQL server. You can choose the one you want to install it on your machine.
Install MySQL 5.7
Update the repository index using the apt-get update command.
sudo apt-get update
Use the apt command to install the latest stable version of MySQL.
sudo apt-get -y install mysql-community-server
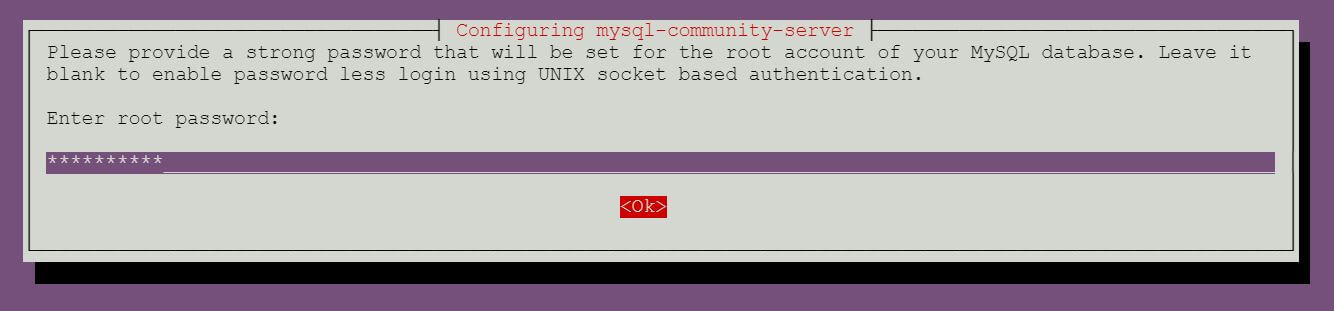
The package installer will prompt you to set the MySQL root password.
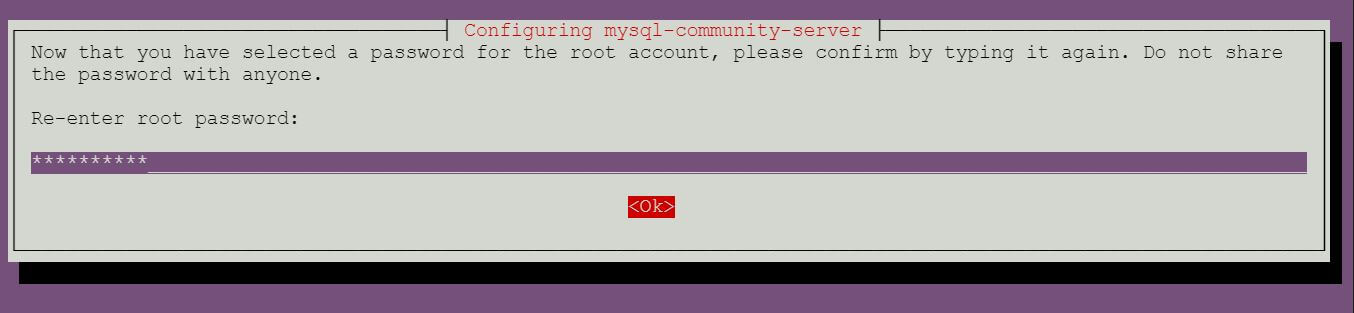
Re-enter the password.
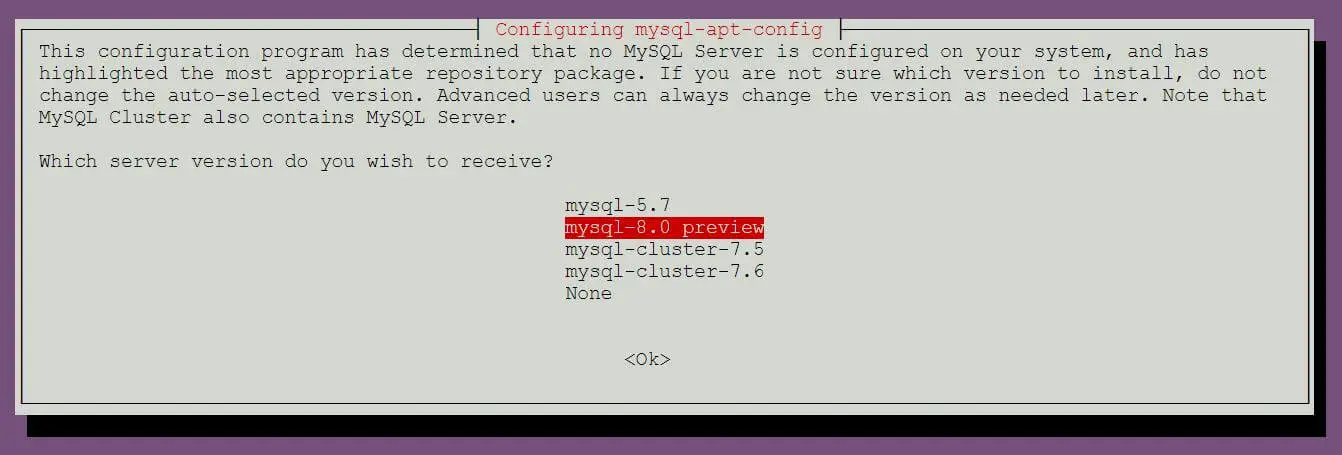
Install MySQL 8.0 RC
Run the dpkg-reconfigure command to update the MySQL repository configuration.
sudo dpkg-reconfigure mysql-apt-config
Press enter to change the MySQL version on this page.
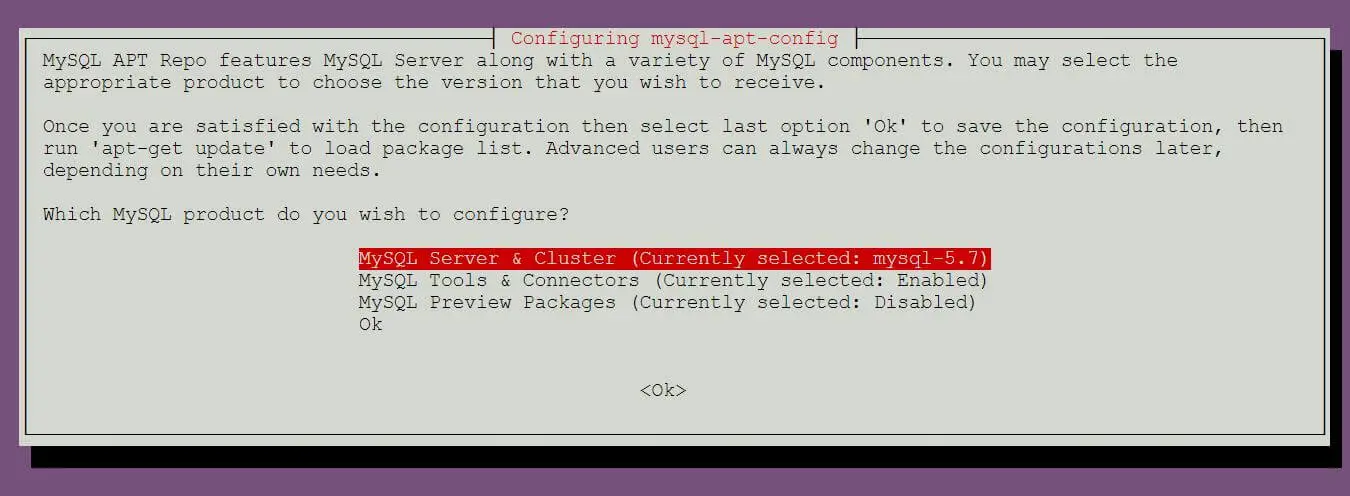
Choose the mysql-8.0 preview and then press enter.
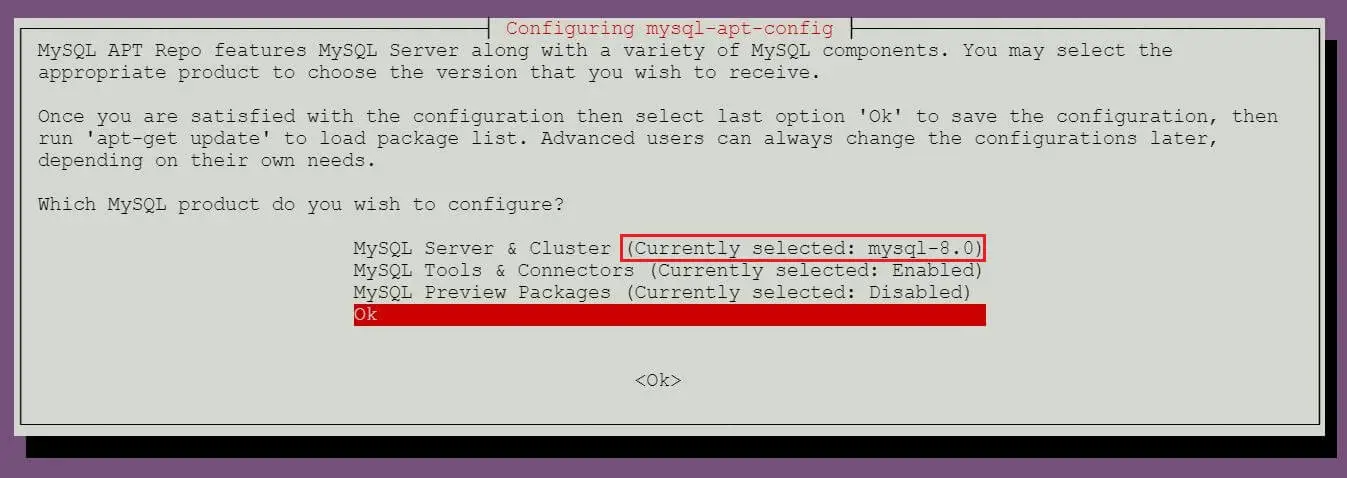
Press enter to accept the warning message.

Choose the OK and then press enter.
Update the repository index using the apt command.
sudo apt-get update
Run the following command to install MySQL 8.0 RC on your machine.
sudo apt-get -y install mysql-community-server
The package installer will prompt you to set the MySQL root password.
Re-enter the password.
Start MySQL server
After the installation of MySQL, you can start MySQL server using the following command.
### Ubuntu 16.04 / Debian 9/8 ###

sudo systemctl start mysql

### Ubuntu 14.04 ###

sudo service mysql start
Enable MySQL server at system startup.
### Ubuntu 16.04 / Debian 9/8 ###

sudo systemctl enable mysql

### Ubuntu 14.04 ###

sudo update-rc.d mysql defaults
Verify that MySQL server service is started using the following command.
### Ubuntu 16.04 / Debian 9/8 ###

sudo systemctl status mysql

### Ubuntu 14.04 ###

sudo service mysql status
Output
Ubuntu 16.04 / Debian 9/8:
● mysql.service - MySQL Community Server
   Loaded: loaded (/lib/systemd/system/mysql.service; enabled; vendor preset: enabled)
   Active: active (running) since Mon 2018-03-05 11:43:12 UTC; 7min ago
 Main PID: 13623 (mysqld)
   CGroup: /system.slice/mysql.service
           └─13623 /usr/sbin/mysqld --daemonize --pid-file=/var/run/mysqld/mysqld.pid

Mar 05 11:43:11 mysqub systemd[1]: Starting MySQL Community Server...
Mar 05 11:43:12 mysqub systemd[1]: Started MySQL Community Server.
Mar 05 11:49:13 mysqub systemd[1]: Started MySQL Community Server.
Ubuntu 14.04:
* MySQL Community Server 8.0.3-rc-log is running
Work with MySQL Server
Login to MySQL with the root user and the password you set during the installation.
mysql -u root -p
Output
MySQL 5.7:
Enter password:
Welcome to the MySQL monitor.  Commands end with ; or \g.
Your MySQL connection id is 4
Server version: 5.7.21 MySQL Community Server (GPL)

Copyright (c) 2000, 2018, Oracle and/or its affiliates. All rights reserved.

Oracle is a registered trademark of Oracle Corporation and/or its
affiliates. Other names may be trademarks of their respective
owners.

Type 'help;' or '\h' for help. Type '\c' to clear the current input statement.

mysql>
MySQL 8.0:
Enter password:
Welcome to the MySQL monitor.  Commands end with ; or \g.
Your MySQL connection id is 7
Server version: 8.0.3-rc-log MySQL Community Server (GPL)

Copyright (c) 2000, 2017, Oracle and/or its affiliates. All rights reserved.

Oracle is a registered trademark of Oracle Corporation and/or its
affiliates. Other names may be trademarks of their respective
owners.

Type 'help;' or '\h' for help. Type '\c' to clear the current input statement.

mysql>
Install phpMyAdmin
phpMyAdmin is an open source web-based management interface to manage MySQL and MariaDB database servers.
Install phpMyAdmin using the apt command.
sudo apt-get install -y phpmyadmin
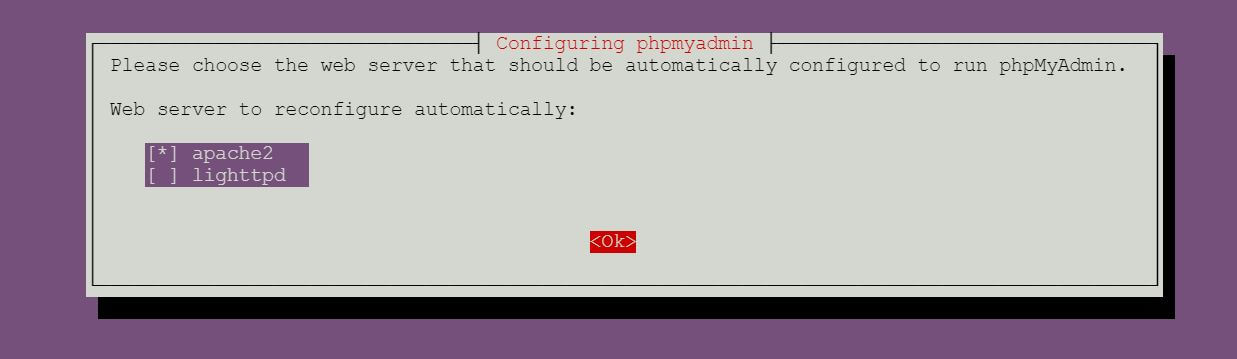
Follow the on-screen prompt to configure phpMyAdmin.
Select the web server.
Set the phpMyAdmin application password.
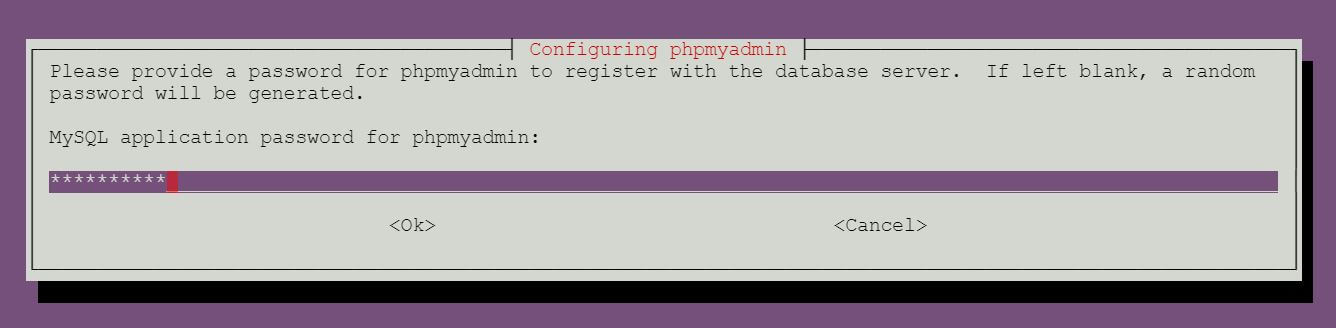
Re-enter the phpMyAdmin application password.

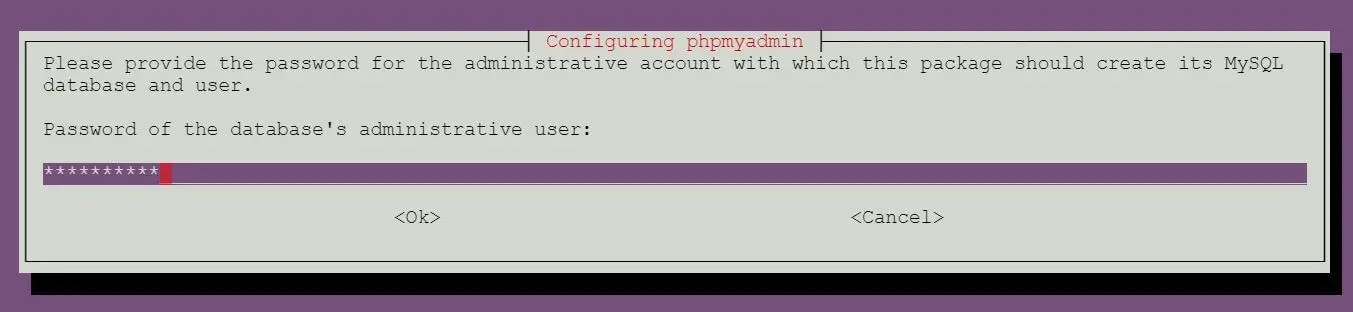
Enter the MySQL root password you set during the installation of MySQL community server.
Access phpMyAdmin web interface
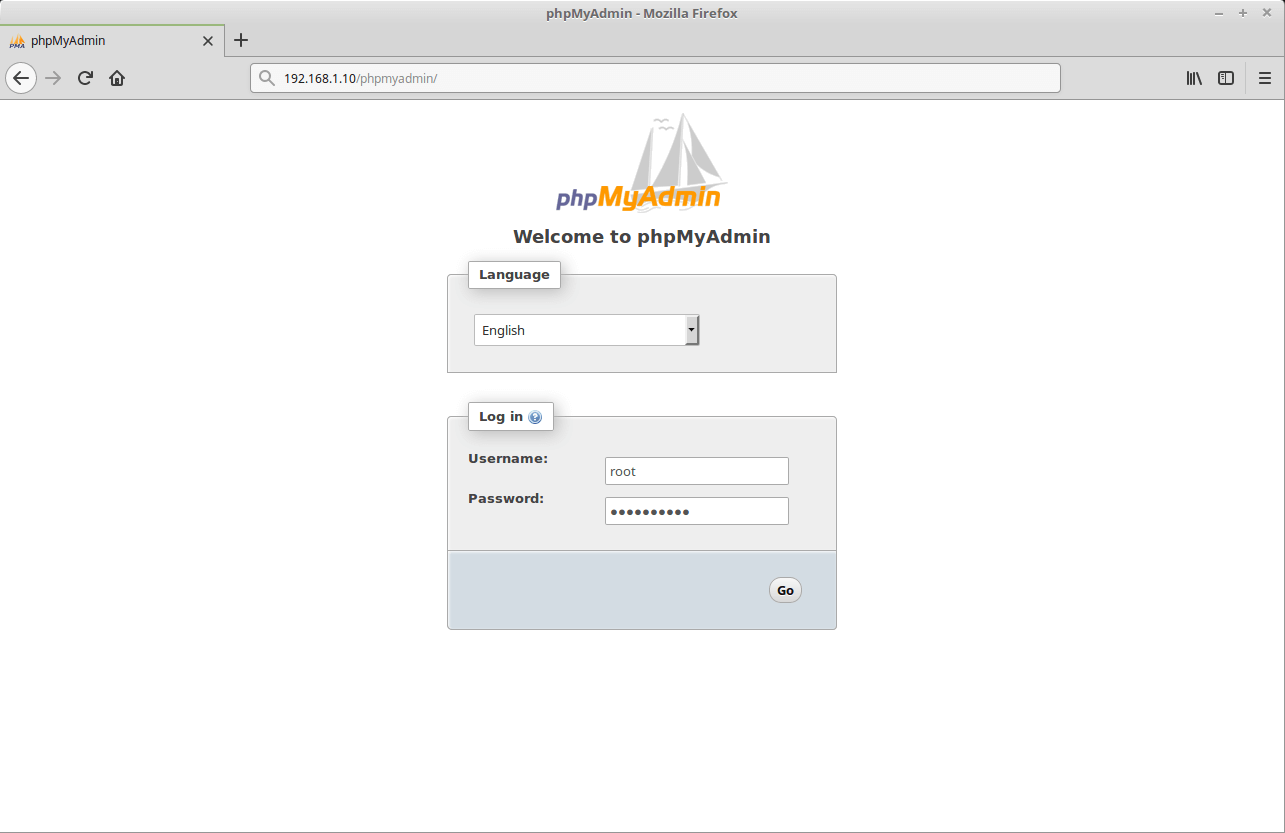
Open up your web browser and enter the following URL.
Log in as a MySQL root user.
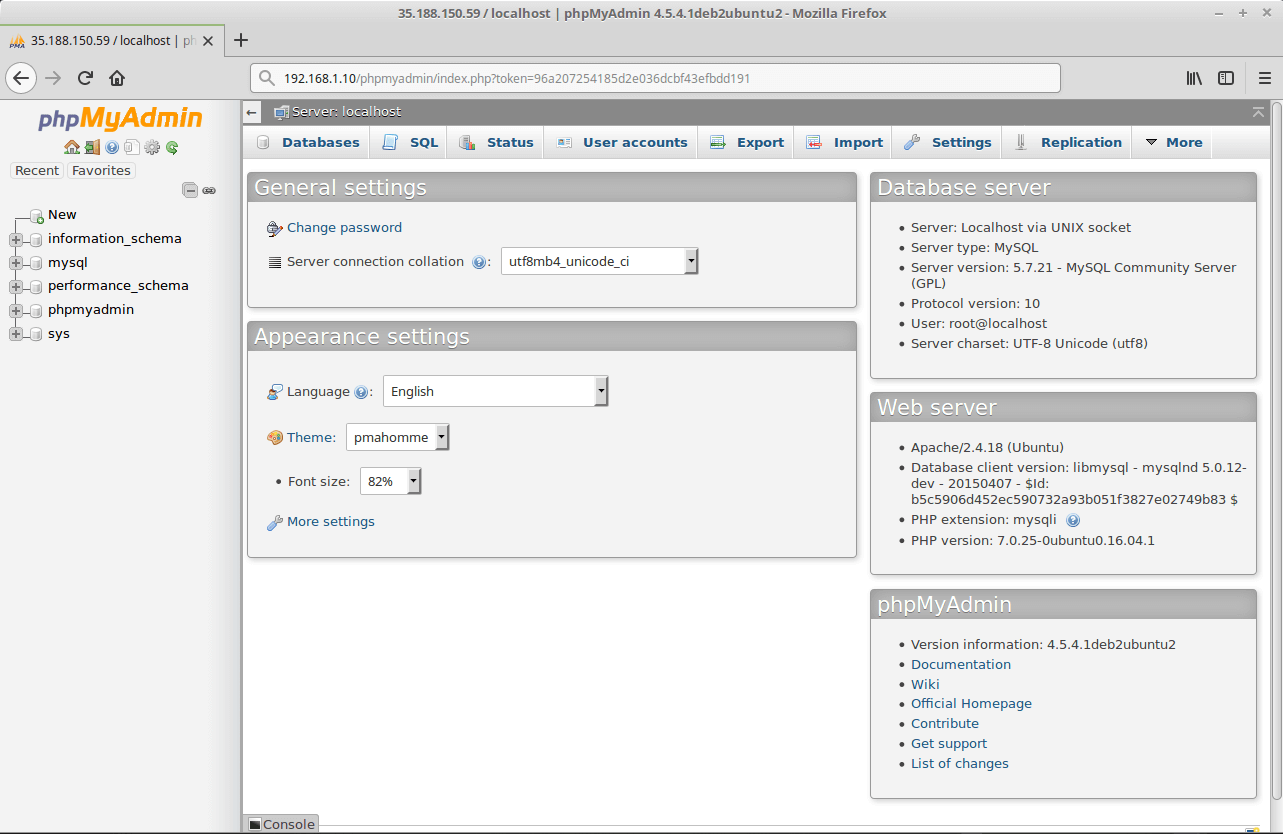
phpMyAdmin home page:
That’s All.