KVM stands for Kernel-Based Virtual Machine, is a virtualization software which provides an ability to run a multiple guest operating systems with the help of hardware virtualization extensions. It supports the wide variety of guest operating system’s such as Linux, Windows, Solaris, Haiku, REACT OS and much more. KVM can be managed using the command line or available graphical tools.
Virt-Manager (Virtual Machine Manager) is the most widely used application for managing KVM based virtual machines, and it supports creating, editing, starting and stopping KVM-based virtual machines, as well as the live or cold migration of guest machines between hosts.
Prerequisites
As said earlier, KVM will work only if the CPU has the support of hardware virtualization, either Intel VT or AMD-V.
To find whether your CPU supports VT features, run the following command.
sudo egrep '(vmx|svm)' /proc/cpuinfo

If the above command returns with output showing VMX or SVM, then your hardware supports VT else it does not.
Configure bridged networking so that VMs can be accessed from external machines.
READ: Creating bridged networking with Virt Manager
Install KVM
Update the repository cache.
apt-get update
Issue the following command to install latest qemu package and also virt-manager which provides the graphical interface to manage virtual machines.
sudo apt-get install -y qemu-kvm qemu virt-manager virt-viewer libvirt-bin
- qemu-kvm = Kernel-based Virtual machine, QEMU uses it for CPU virtualization.
- qemu = CPU emulator.s
- virt-viewer – Graphical console
Create Virtual Machine
Once you have installed KVM and other tools, it is all set to start creating virtual machines. We will look be looking at creating virtual machines in both command line and graphical mode.
Command Line Mode
virt-install is used to create virtual machines using the command line; this command needs multiple inputs from us to create a virtual machine such as CPU, Memory, disk, network, installation media location, OS variant and more.
sudo virt-install --name=itzgeekguest --ram=1024 --vcpus=1 --cdrom=/var/lib/libvirt/images/CentOS-6.9-x86_64-minimal.iso --os-type=linux --os-variant=rhel7 --network bridge=br1 --graphics=spice --disk path=/var/lib/libvirt/images/itzgeekguest.dsk,size=4
Note: The above command uses bridged networking “br1” for allowing virtual machines to communicate with outside network.
–name – Name of the Virtual machine
–ram – Memory size in MB
–vcpus – Virtual CPU’s in numbers
–cdrom – Location of the ISO image
–os-type – OS types like Linux, Windows, and Unix
–os-variant – OS variant like RHEL 6, Solaris
–network – Networking
–graphics – Guest display settings
–disk path – Location of the disk with size of 4 GB
Once you’ve issued the above command, virt-install will create a virtual machine and starts virt viewer console for OS installation.
Graphical Mode
Type the following command in the terminal in GUI mode.
sudo virt-manager
OR
Dash Home >> Search For >> Virtual Machine Manager.
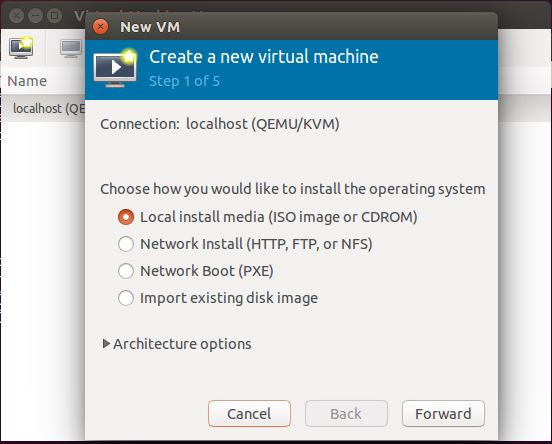
You may be asked to enter the password if you don’t have root access. Once it is opened, right-click on localhost(QEMU) and Click on New. Virtual Machine Manager will start a new wizard for creating a virtual machine, and you will find no difficulty in using this graphical mode.
Step 1: You would be asked to choose how would you like to install the operating system. Here I chose to install it from ISO image or CD-ROM.
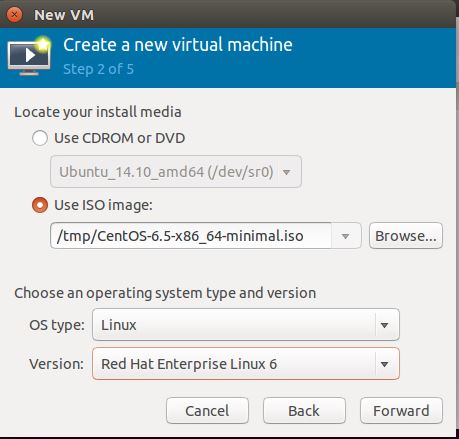
Step 2: Enter the location of ISO image, do not forget to choose operating system type and version.
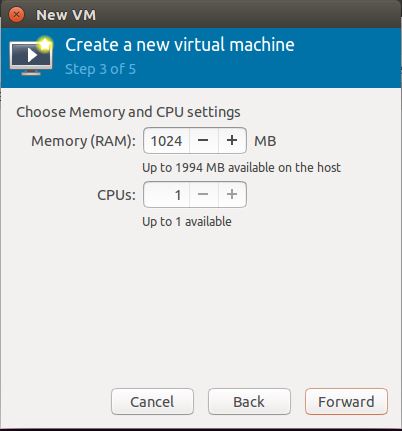
Step 3: Configure CPU and memory for the virtual machine.
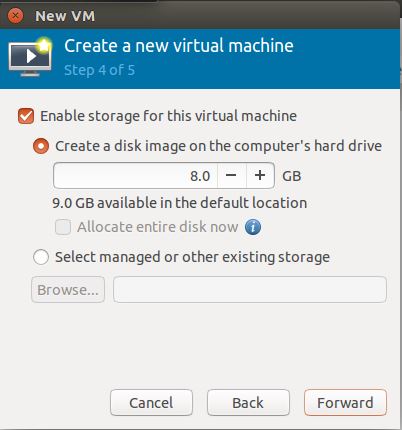
Step 4: You have to mention the amount of storage that you want to assign to a virtual machine.
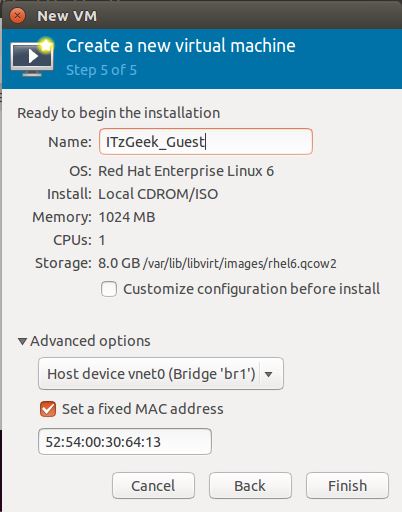
Step 5: Summary of all the settings, click on advanced settings to select bridged networking to allow the virtual machine to communicate outside networks. Click on Finish.
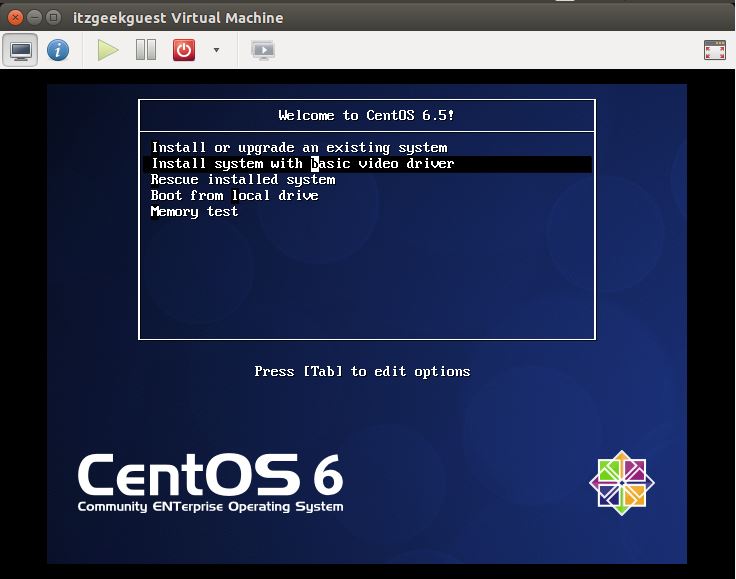
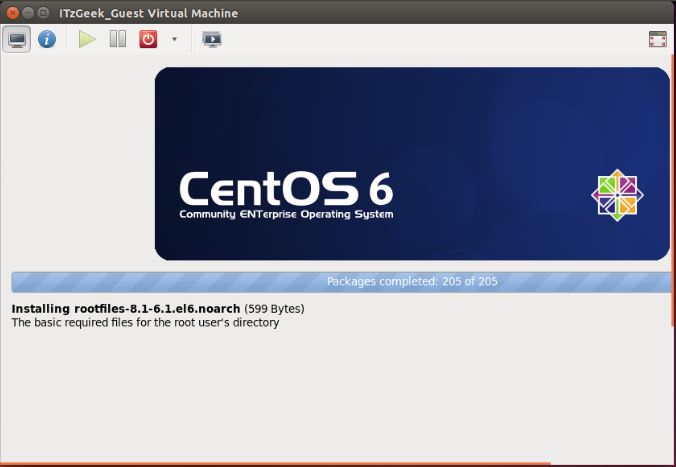
Step 6: KVM will start to create a virtual machine depends on our input, once VM is created. Virt manager will start a console for OS installation. The following screen shows the installation screen of CentOS 6.
Manage Virtual Machine
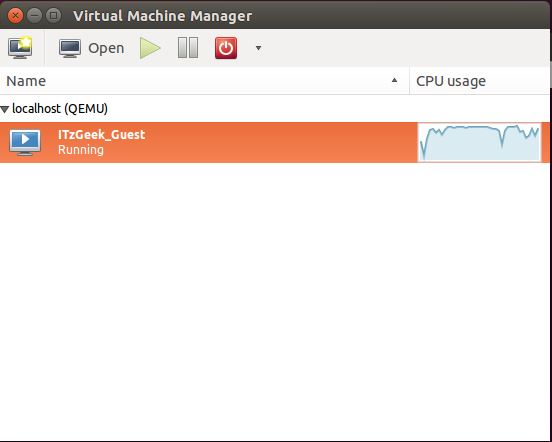
With the Virtual Machine Manager, you can perform VM’s life cycle actions such as start, power off, reset, clone and migration by right-clicking on the selected virtual machine.
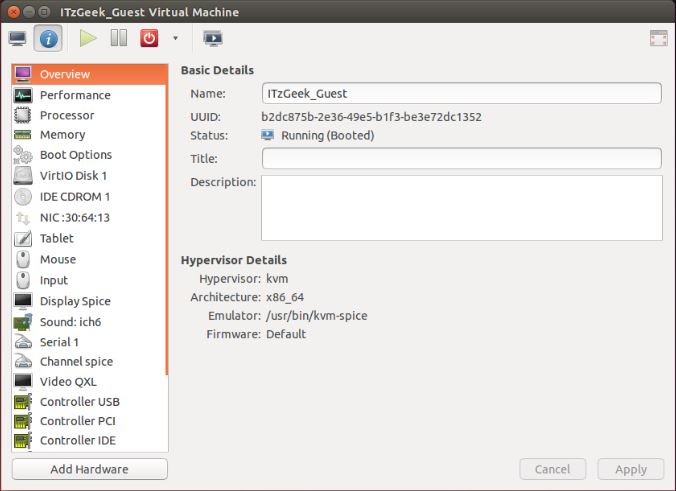
Managing virtual machine using virt manager is very simple, you can just click on “info” icon in the VM console. Here you can add, modify and remove devices.
That’s All.