
openQRM is an open source cloud computing management platform for managing heterogeneous datacenters, this guide helps you to Install OpenQRM Cloud Computing Platform In Ubuntu 14.04 / 15.04 / Debian Wheezy.
It supports following virtualization platforms.
- KVM
- Linux-VServer
- OpenVZ
- VMware ESX
- Xen
Contents:
1. Editions
2 Features
4. Installation
Editions:
openQRM is available in two edition,
Community Edition – supported by openQRM community.
Enterprise Edition – Comercially supported by openQRM
You can compare both editions here.
Features:
- Private/ Hybrid/ Public and Bare-Metal platforms
- Manages physical and virtualized server systems
- Integration with Amazon AWS, OpenStack, Ubuntu UEC and Eucalytus
- Integrates with all major open and commercial storage technologies
- Supports Windows, Linux, OpenSolaris or *BSD
- Supports: KVM, XEN, Citrix XenServer, VMWare ESX(i), lxc, OpenVZ and VirtualBox.
- Supports P2V, P2P, V2P, V2V Migrations and High-Availability.
- Integrates with the DevOPS – like puppet, nagios/Icinga or collectd
- Over 50 plugins for extended features and integration with your infrastructure
- Self-Service Portal for end-users
- Integrated billing system
- Multiple datacenters can be managed from one web console
System Requirements:
Make sure your server meets below requirements.
Minimum:
virtual or physical system
1 GB RAM
20+ GB free hard disk space
1 network interface card (1 Gbit/s)
Recommended:
Physical system
4 GB or more RAM
100+ GB free hard disk space
1 network interface card (1 Gbit/s)
Simple POC setup:
If you are planning to evaluate openQRM, your system should atleast meet below requirement.
Physical system
VT CPU extension (full virtualization support) activated
1 GB RAM
20GB HDD
1 network interface card (1 Gbit/s)
Installation:
Now, we will install openQRM Community Edition on Ubuntu 14.04 / 15.04.
Download the latest available version from here.
$ sudo apt-get update

$ wget https://downloads.sourceforge.net/project/openqrm/openQRM-Community-5.2/openQRM-5.2.1.1-Community-Edition.tgz

$ sudo tar -zxvf openQRM-5.2.1.1-Community-Edition.tgz

$ cd openQRM-5.2.1.1-Community-Edition/

$ sudo ./install-openqrm.sh
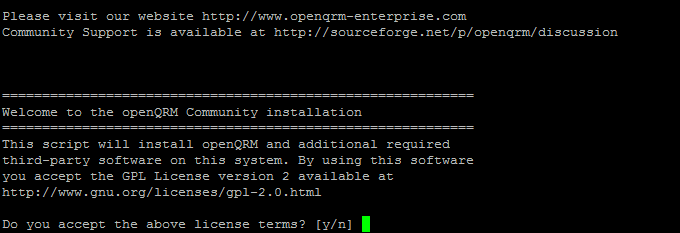
Press “Y” accept the license and proceed to the installation of openQRM.
During the installation, you will be asked to update php.ini file.

Enter MySQL root user password.

Re-enter root password.

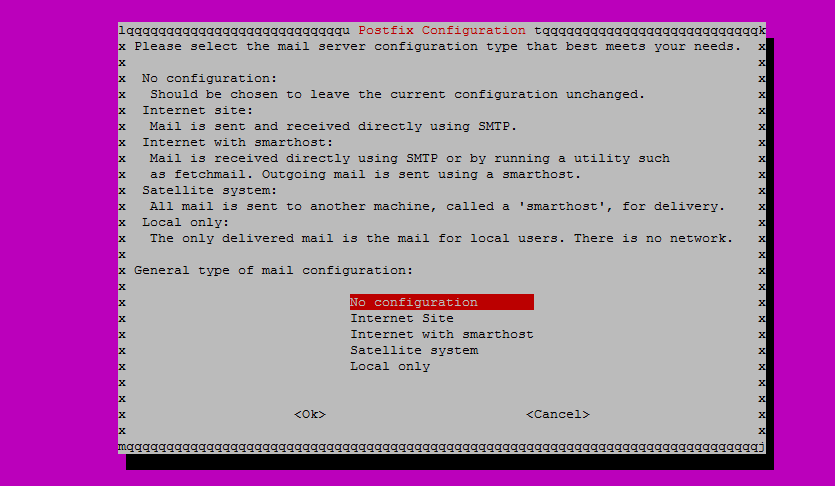
Select the mail server configuration type, select “No configuration” incase if you want to configure this later.
Enter the Nagios administration password.
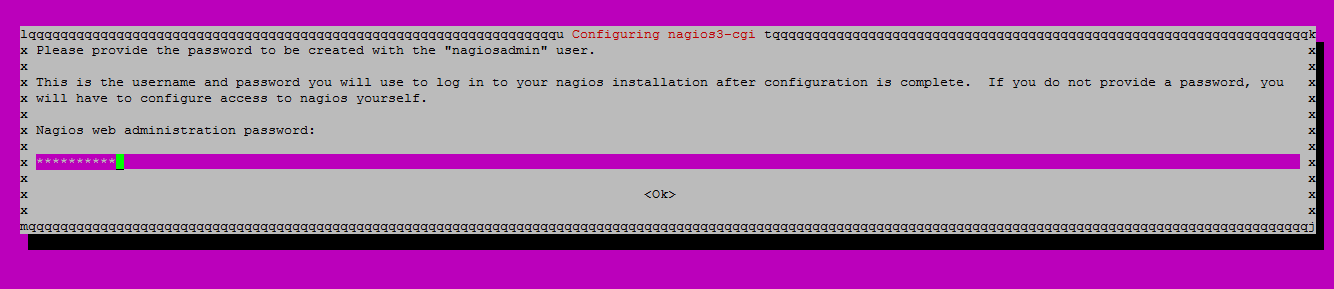
Re-enter the nagios administration password.

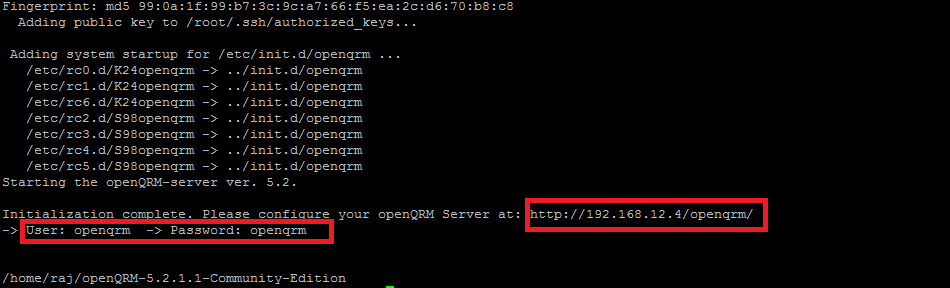
Once the installation is completed, you will get the openQRM configuration URL along with username and password.
Configuration:
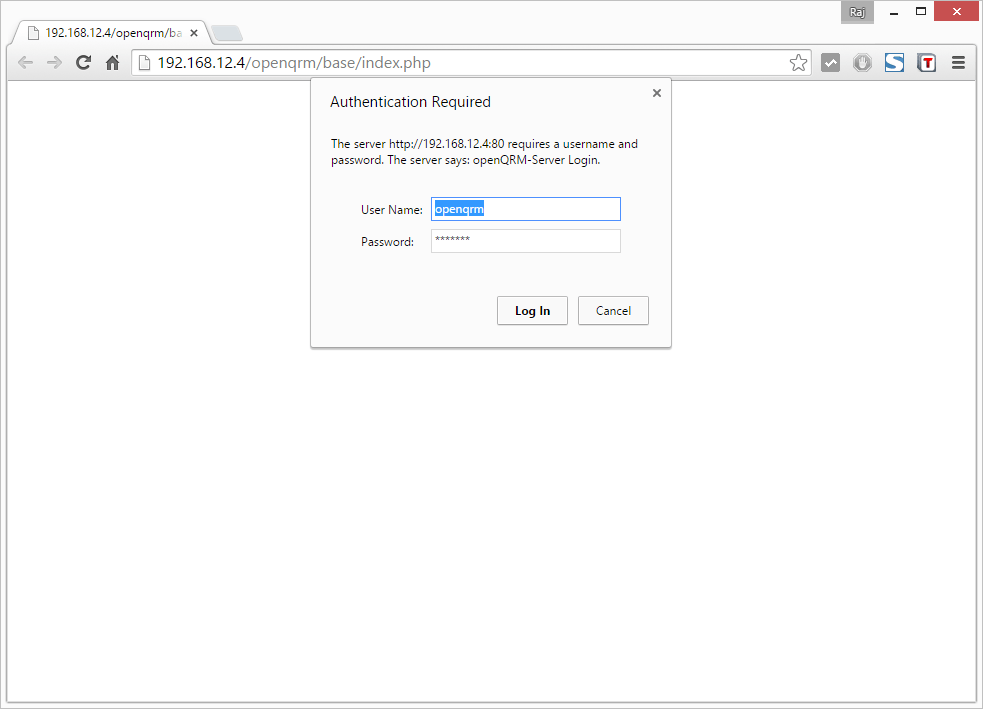
Open up your web browser and navigate to the URL https://ip-address/openqrm.
The default username and password is: openqrm/openqrm
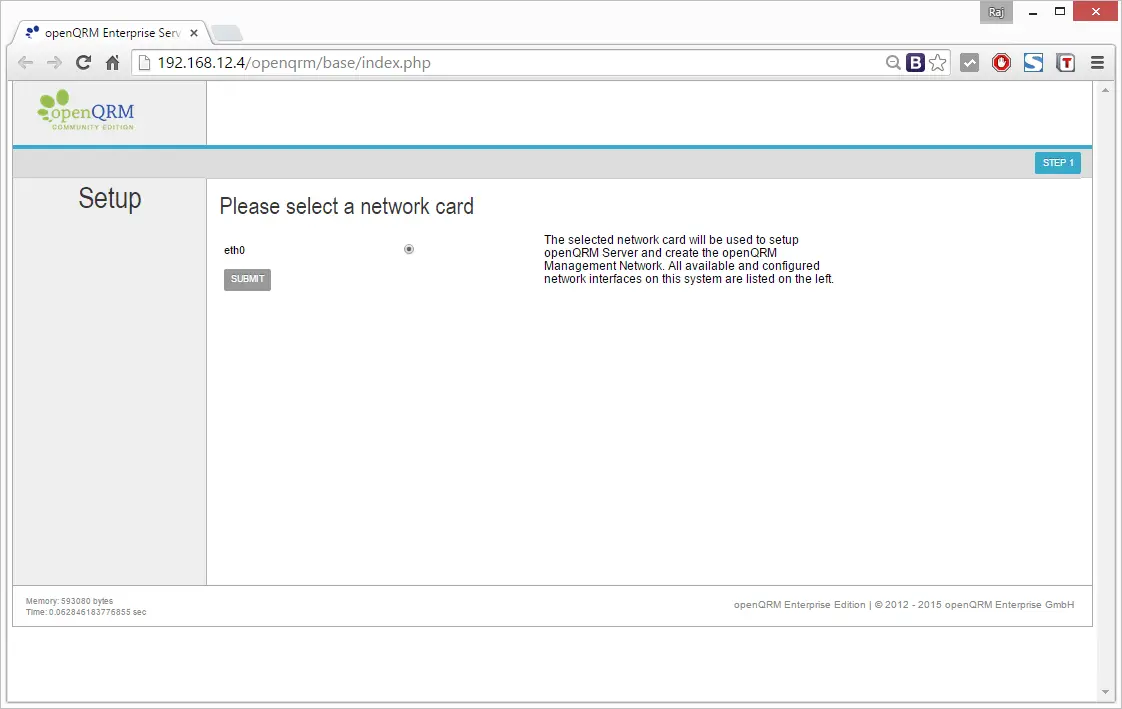
Select a network card to use for the openQRM management network.
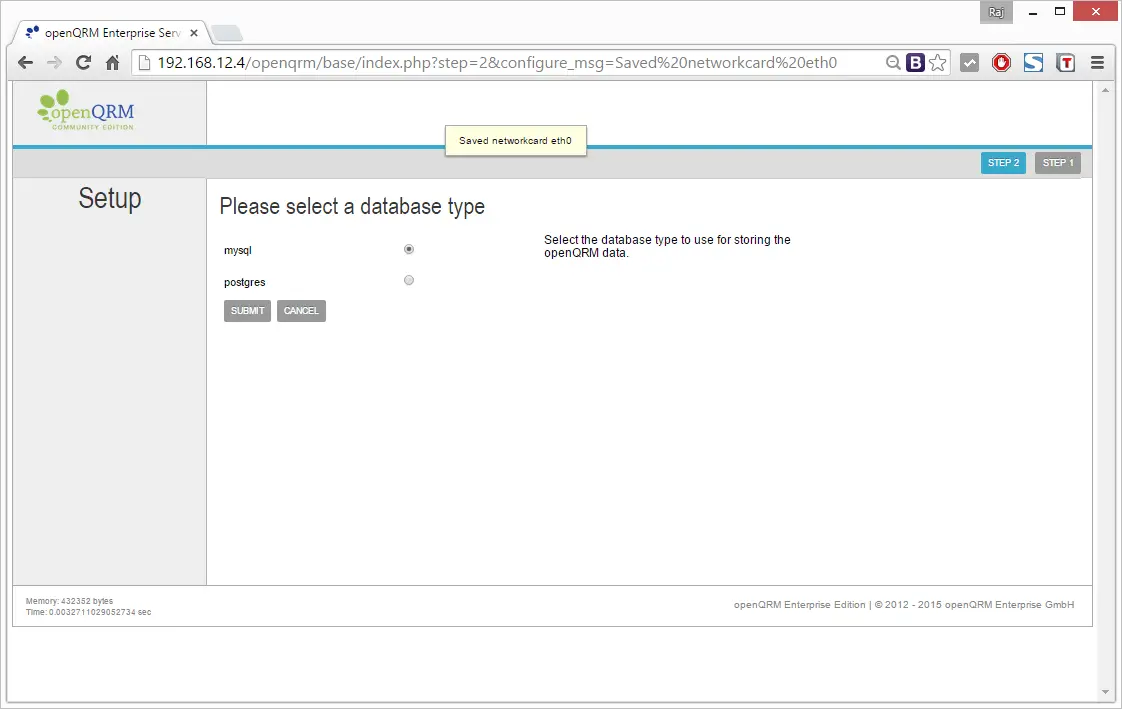
Select a database type, here we will be using MySQL.
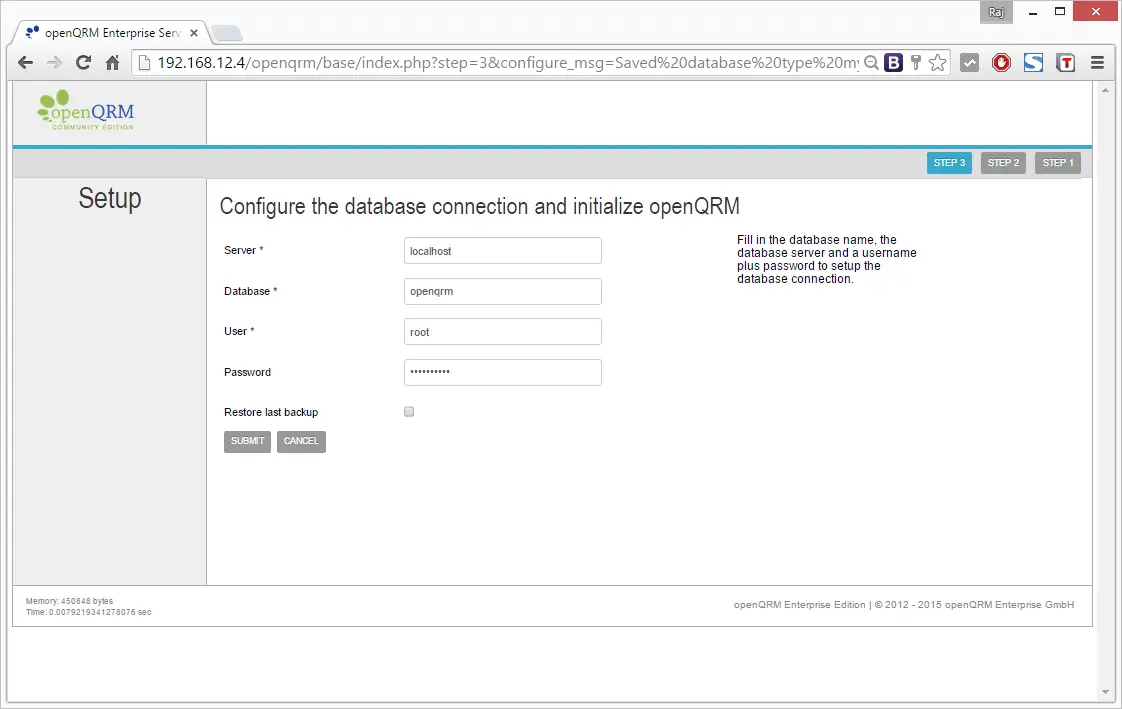
Now, configure the database connection and initialize openQRM. Fill up database, user and password details. You should enter the MySQL root user password that you have created while installing openQRM.
PS: You do not have to create database manually, this will be taken care automatically by openQRM.
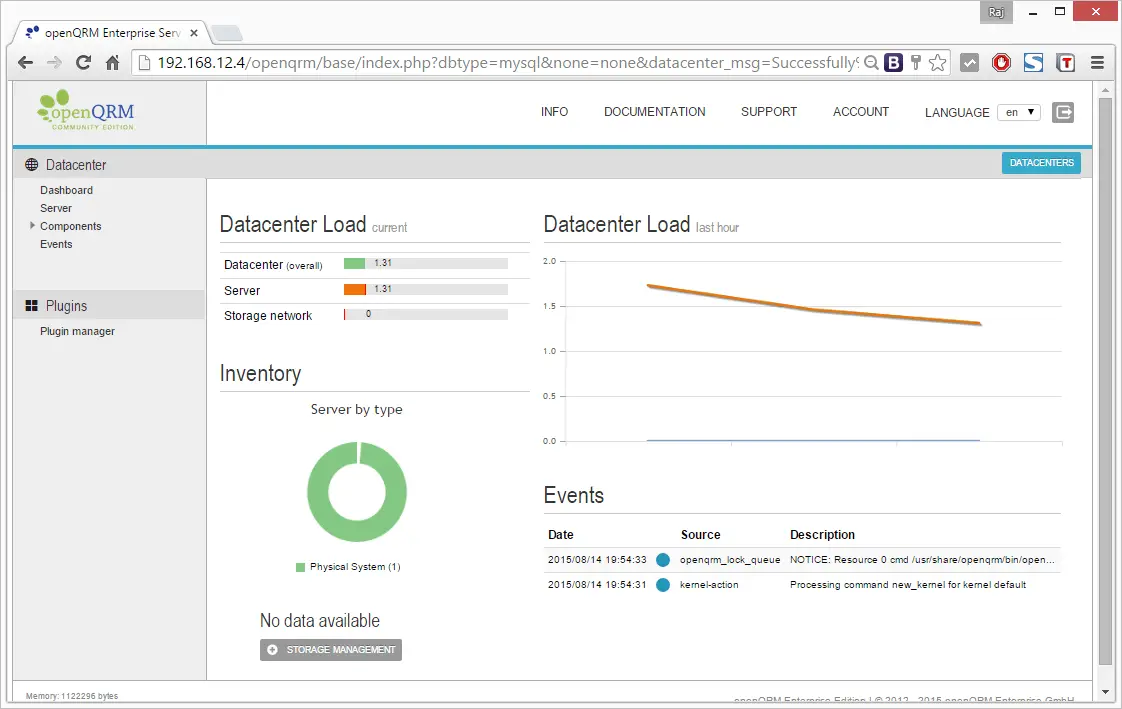
Now, openQRM has been installed and configured, it will take you to openQRM dashboard.
That’s All!!!, To create a private cloud infrastructure, consider reading openQRM administration guide.