MySQL is an open source database management system commonly used in web application stacks to store and retrieve records and information.
MySQL was the primary database application for Linux operating system until MariaDB, a fork of MySQL, came into the picture. MySQL was first developed by MYSQL AB, now owned by Oracle Corporation.
In this guide, we will see through the steps to Install MySQL 8 on Ubuntu 18.04.
What Is New in MySQL 8.0
- MySQL now incorporates a transactional data dictionary
- Supports roles, a collection of privileges.
- Stores password history
- Default character set has changed from latin1 to utf8mb4.
- Enhancements in InnoDB and JSON
- Better resource management
- Error logging has been rewritten to use the MySQL component architecture
- Enhancements to MySQL Replication
Install MySQL 8.0 on Ubuntu 18.04
As you already know MySQL server is no longer distributed through base operating system image or OS repositories due to licensing issues.
As the first step, we will now set up the MySQL official repository on the system.
wget https://dev.mysql.com/get/mysql-apt-config_0.8.10-1_all.deb
Install the repository package using the dpkg command.
sudo dpkg -i mysql-apt-config_0.8.10-1_all.deb
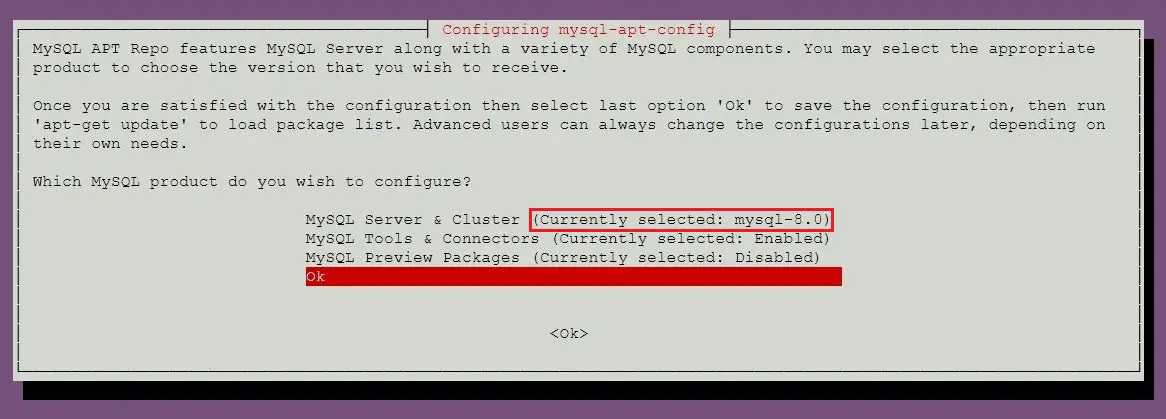
The MYSQL installer will prompt you to select the MySQL repository. Based on your selection, the installer will configure repositories on the system to receive the appropriate version of MySQL.
Here, I will choose the MySQL 8.0 which is the default one. Then select OK and then press enter.
To install MySQL 5.7, then go to install MySQL 5.7 section to know more about selecting MySQL 5.7 repository.
Update the repository index using the apt-get update command.
sudo apt-get update
Use the apt command to install the latest stable version of MySQL.
sudo apt-get -y install mysql-server
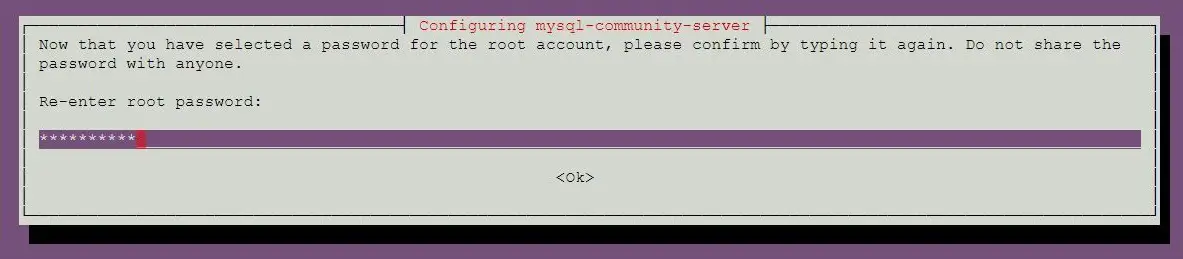
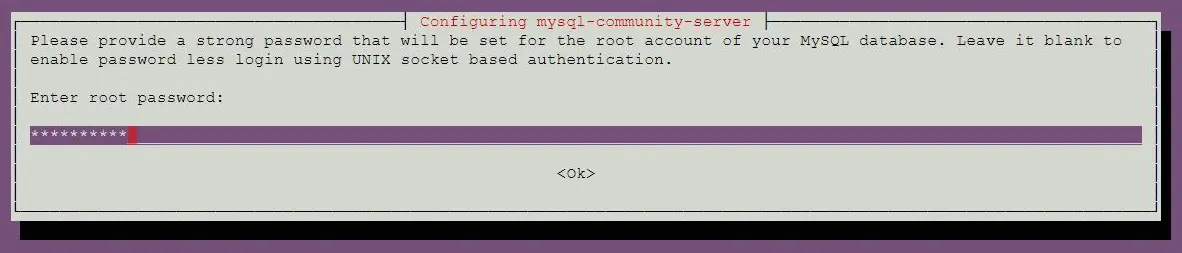
The package installer will prompt you to set the MySQL root password.

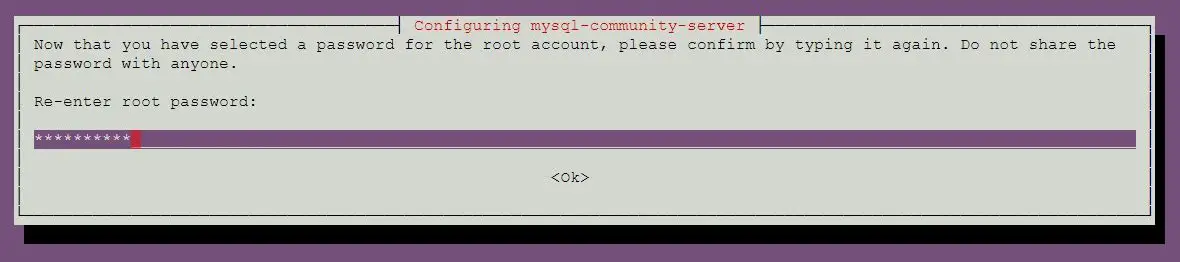
Re-enter the password.
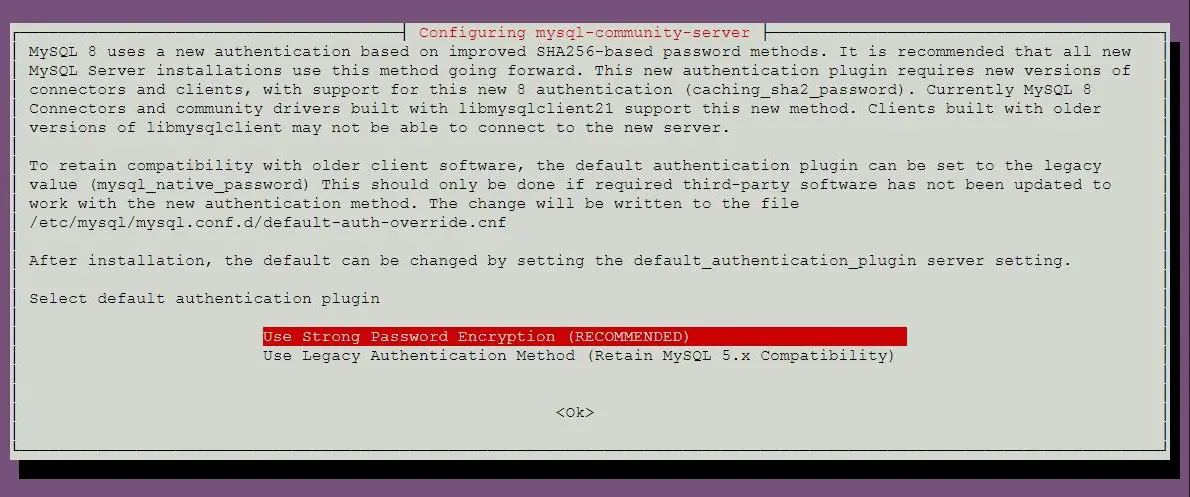
MySQL 8.0 uses a new authentication based on improved SHA 256 password methods. If you choose this option, old clients may not be able to connect to the server. You can change the default authentication any time by setting default-authentication-plugin = mysql_native_password in the config file.
Select default authentication plugin.
Install MySQL 5.7 on Ubuntu 18.04
We will now set up the MySQL official repository on the system.
wget https://dev.mysql.com/get/mysql-apt-config_0.8.10-1_all.deb
Install the repository package using the dpkg command.
sudo dpkg -i mysql-apt-config_0.8.10-1_all.deb
OR
In case the system already has the MySQL repository package, and you want to install MySQL 5.7 on the system.
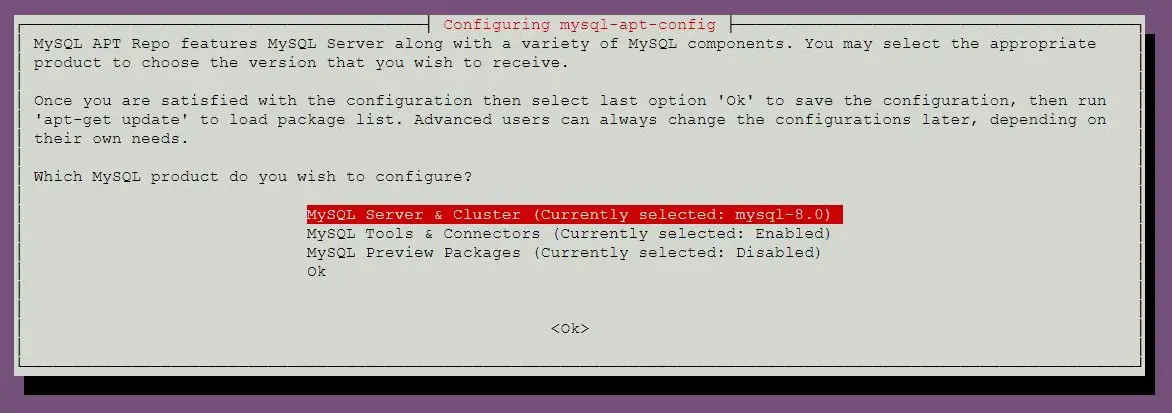
sudo dpkg-reconfigure mysql-apt-config
The MySQL package installer will prompt you to select the MySQL repository. Based on your selection, the installer will configure repositories to receive the appropriate version of MySQL.
Press enter key to change the MySQL version on this window.
Choose the mysql-5.7 and then press enter.
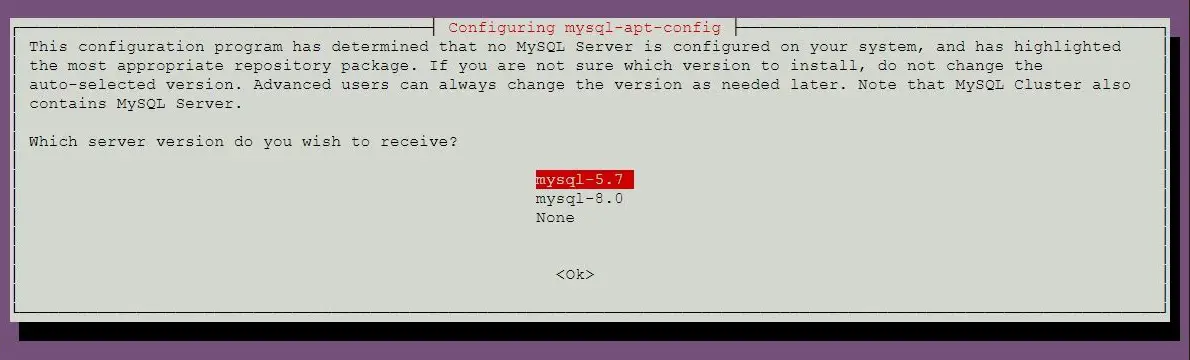
Choose the OK and then press enter.

Update the repository index using the apt command.
sudo apt-get update
Run the below command to install MySQL 5.7 on your machine.
sudo apt-get -y install mysql-server
The package installer will prompt you to set the MySQL root password.
Re-enter the password.
Start MySQL server
After the installation of MySQL, you can start MySQL server using the following command.
sudo systemctl start mysql
Enable MySQL server at system startup.
sudo systemctl enable mysql
Verify that MySQL server service is started using the following command.
sudo systemctl status mysql
Output:
● mysql.service - MySQL Community Server
   Loaded: loaded (/lib/systemd/system/mysql.service; enabled; vendor preset: enabled)
   Active: active (running) since Mon 2018-05-14 11:15:52 UTC; 27min ago
 Main PID: 3269 (mysqld)
    Tasks: 27 (limit: 1997)
   CGroup: /system.slice/mysql.service
           └─3269 /usr/sbin/mysqld --daemonize --pid-file=/var/run/mysqld/mysqld.pid

May 14 11:15:51 mysqlub18 systemd[1]: Starting MySQL Community Server...
May 14 11:15:52 mysqlub18 systemd[1]: Started MySQL Community Server.
Secure MySQL Server
As a first step after the installation, we need to run MySQL secure script that comes with the package to make this MySQL instance more secure.
sudo mysql_secure_installation
This command requires MySQL root password.
Securing the MySQL server deployment.

Enter password for user root: <-- Enter MySQL root password

VALIDATE PASSWORD PLUGIN can be used to test passwords
and improve security. It checks the strength of password
and allows the users to set only those passwords which are
secure enough. Would you like to setup VALIDATE PASSWORD plugin?

Press y|Y for Yes, any other key for No: n <-- N for not to validate the password
Using existing password for root.
Change the password for root ? ((Press y|Y for Yes, any other key for No) : no <-- No, as we have already set root password

 ... skipping.
By default, a MySQL installation has an anonymous user,
allowing anyone to log into MySQL without having to have
a user account created for them. This is intended only for
testing, and to make the installation go a bit smoother.
You should remove them before moving into a production
environment.

Remove anonymous users? (Press y|Y for Yes, any other key for No) : y <-- Remove anonymous users
Success.


Normally, root should only be allowed to connect from
'localhost'. This ensures that someone cannot guess at
the root password from the network.

Disallow root login remotely? (Press y|Y for Yes, any other key for No) : y <-- Disallow root login
Success.

By default, MySQL comes with a database named 'test' that
anyone can access. This is also intended only for testing,
and should be removed before moving into a production
environment.


Remove test database and access to it? (Press y|Y for Yes, any other key for No) : y <-- Remove test database
 - Dropping test database...
Success.

 - Removing privileges on test database...
Success.

Reloading the privilege tables will ensure that all changes
made so far will take effect immediately.

Reload privilege tables now? (Press y|Y for Yes, any other key for No) : y <-- Reload privilege table
Success.

All done!
Work with MySQL Server
Login to MySQL server with the user root and the password you set during the MySQL installation.
mysql -u root -p
MySQL 8.0:
Enter password:
Welcome to the MySQL monitor.  Commands end with ; or \g.
Your MySQL connection id is 8
Server version: 8.0.11 MySQL Community Server - GPL

Copyright (c) 2000, 2018, Oracle and/or its affiliates. All rights reserved.

Oracle is a registered trademark of Oracle Corporation and/or its
affiliates. Other names may be trademarks of their respective
owners.

Type 'help;' or '\h' for help. Type '\c' to clear the current input statement.

mysql>
MySQL 5.7:
Enter password:
Welcome to the MySQL monitor.  Commands end with ; or \g.
Your MySQL connection id is 4
Server version: 5.7.21 MySQL Community Server (GPL)

Copyright (c) 2000, 2018, Oracle and/or its affiliates. All rights reserved.

Oracle is a registered trademark of Oracle Corporation and/or its
affiliates. Other names may be trademarks of their respective
owners.

Type 'help;' or '\h' for help. Type '\c' to clear the current input statement.

mysql>
That’s All.