Setup Command Transport
This page tells how you want to send commands to your monitoring instance.
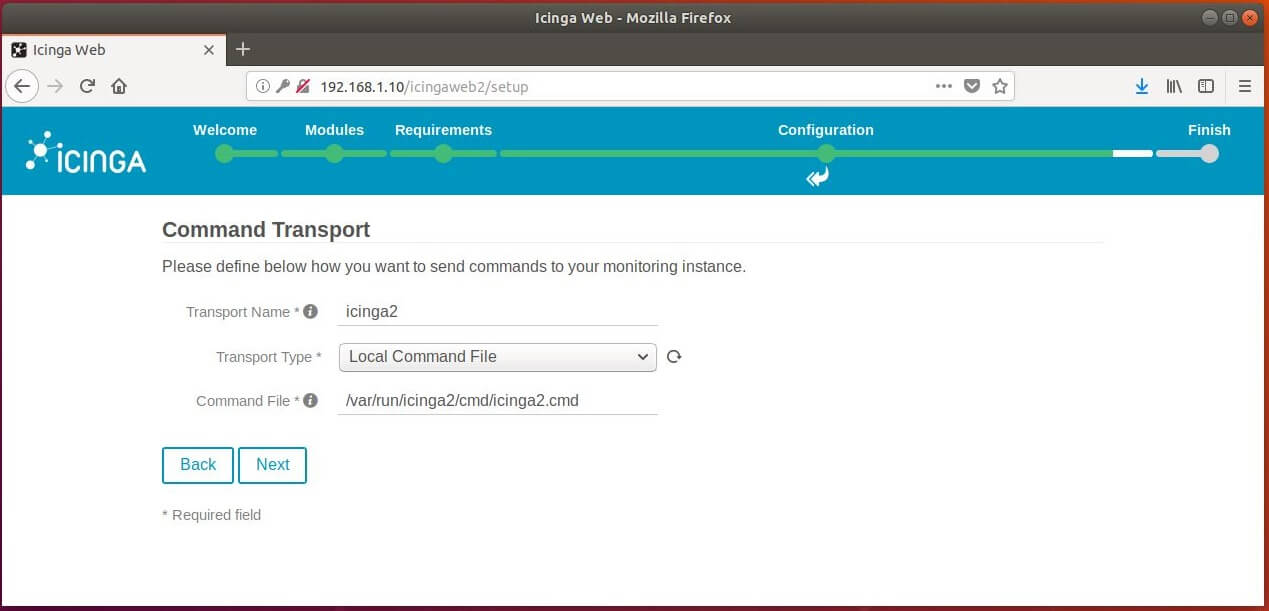
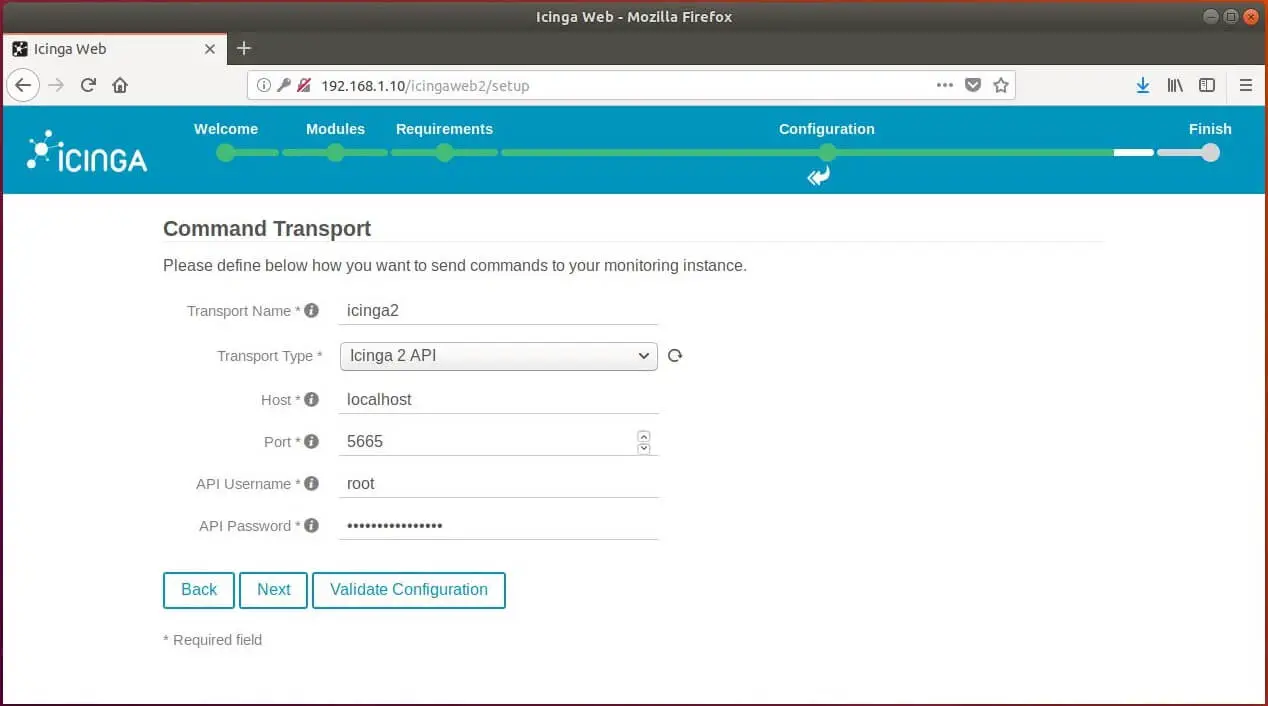
Icinga Web 2 supports Local Command File, Remote Command File, and Icinga 2 API as a Command Transport. You can define multiple command modes of transport in Icinga Web 2.
Here, for this demo, we will configure Icinga Web 2 with single command transport. Choose either one of the command transports.
- Local Command File
- Icinga 2 API (Recommended)
- Remote Command File
Local Command File
Icinga 2 API
Run the below command to setup Icinga 2 API.
icinga2 api setup
Output:
information/cli: Generating new CA.
information/base: Writing private key to '/var/lib/icinga2/ca//ca.key'.
information/base: Writing X509 certificate to '/var/lib/icinga2/ca//ca.crt'.
information/cli: Generating new CSR in '/var/lib/icinga2/certs//server.itzgeek.local.csr'.
information/base: Writing private key to '/var/lib/icinga2/certs//server.itzgeek.local.key'.
information/base: Writing certificate signing request to '/var/lib/icinga2/certs//server.itzgeek.local.csr'.
information/cli: Signing CSR with CA and writing certificate to '/var/lib/icinga2/certs//server.itzgeek.local.crt'.
information/pki: Writing certificate to file '/var/lib/icinga2/certs//server.itzgeek.local.crt'.
information/cli: Copying CA certificate to '/var/lib/icinga2/certs//ca.crt'.
information/cli: Adding new ApiUser 'root' in '/etc/icinga2/conf.d/api-users.conf'.
information/cli: Enabling the 'api' feature.
Enabling feature api. Make sure to restart Icinga 2 for these changes to take effect.
information/cli: Updating 'NodeName' constant in '/etc/icinga2/constants.conf'.
information/cli: Created backup file '/etc/icinga2/constants.conf.orig'.
information/cli: Updating 'ZoneName' constant in '/etc/icinga2/constants.conf'.
information/cli: Backup file '/etc/icinga2/constants.conf.orig' already exists. Skipping backup.
Done.

Now restart your Icinga 2 daemon to finish the installation!
Get the API user details from /etc/icinga2/conf.d/api-users.conf file.
cat /etc/icinga2/conf.d/api-users.conf
Output:
/**
 * The APIUser objects are used for authentication against the API.
 */
object ApiUser "root" {
  password = "b3850b80f22841ee"
  // client_cn = ""

  permissions = [ "*" ]
}
Restart the Icinga 2 service.
systemctl restart icinga2
Use the above username and password on the below command transport page.
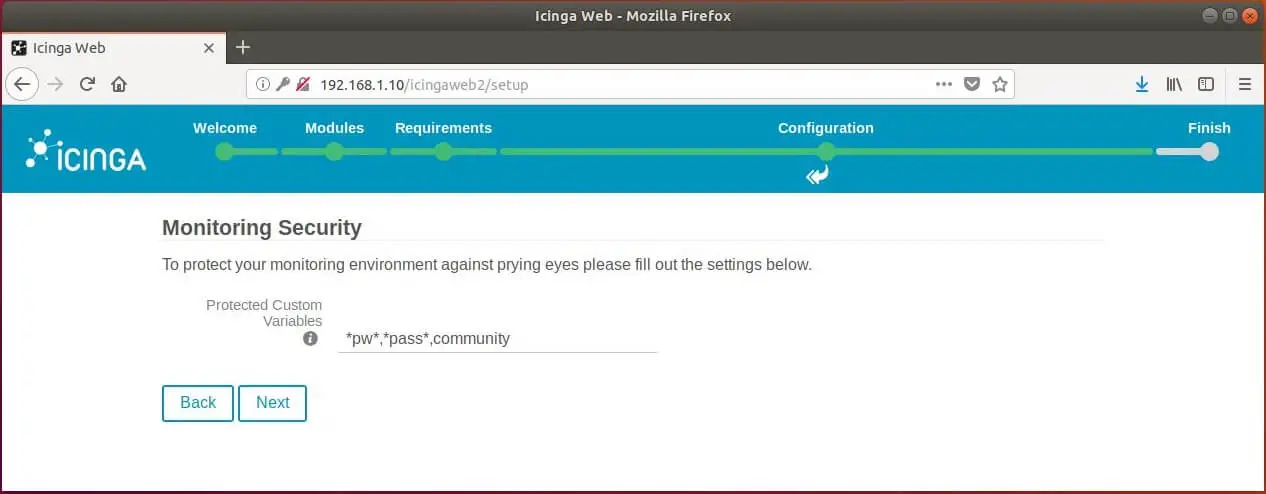
Enter the variables information to protect from bad ones. Click Next.
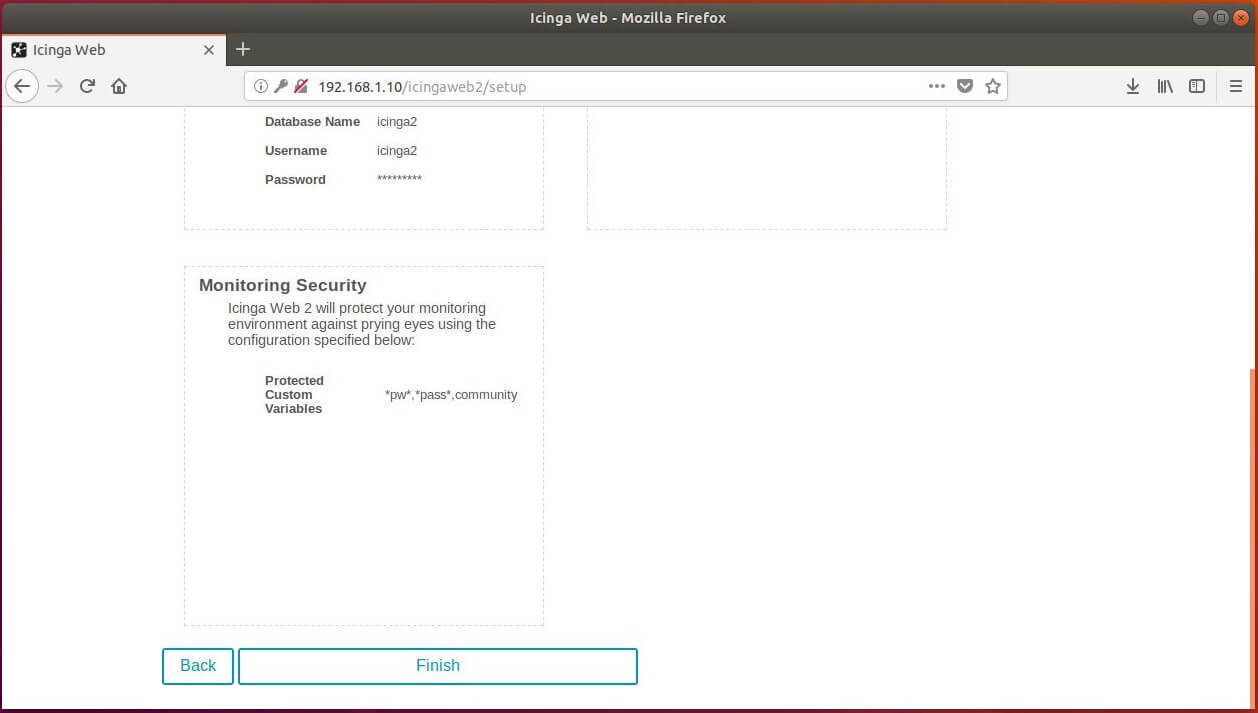
Review your monitoring configurations.

The following screen tells you that Icinga Web 2 has been successfully set up.
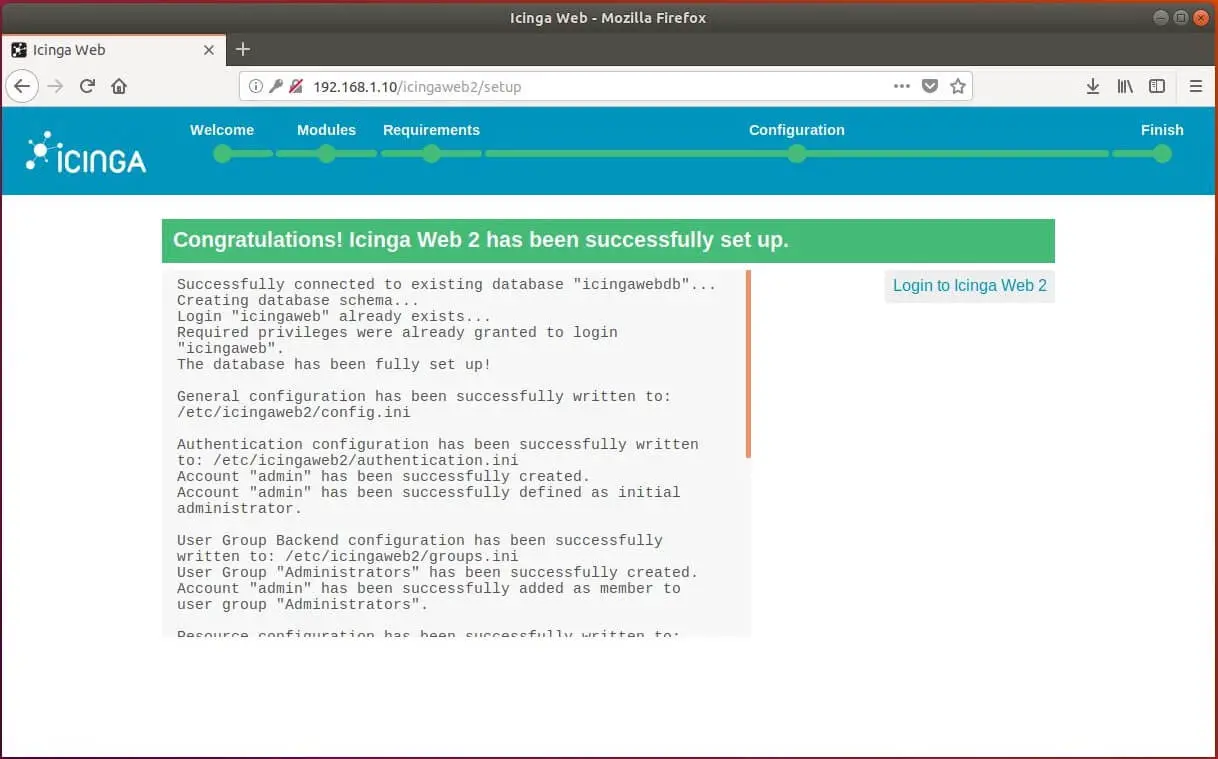
Click on Login to Icinga Web 2.
Access Icinga Web 2
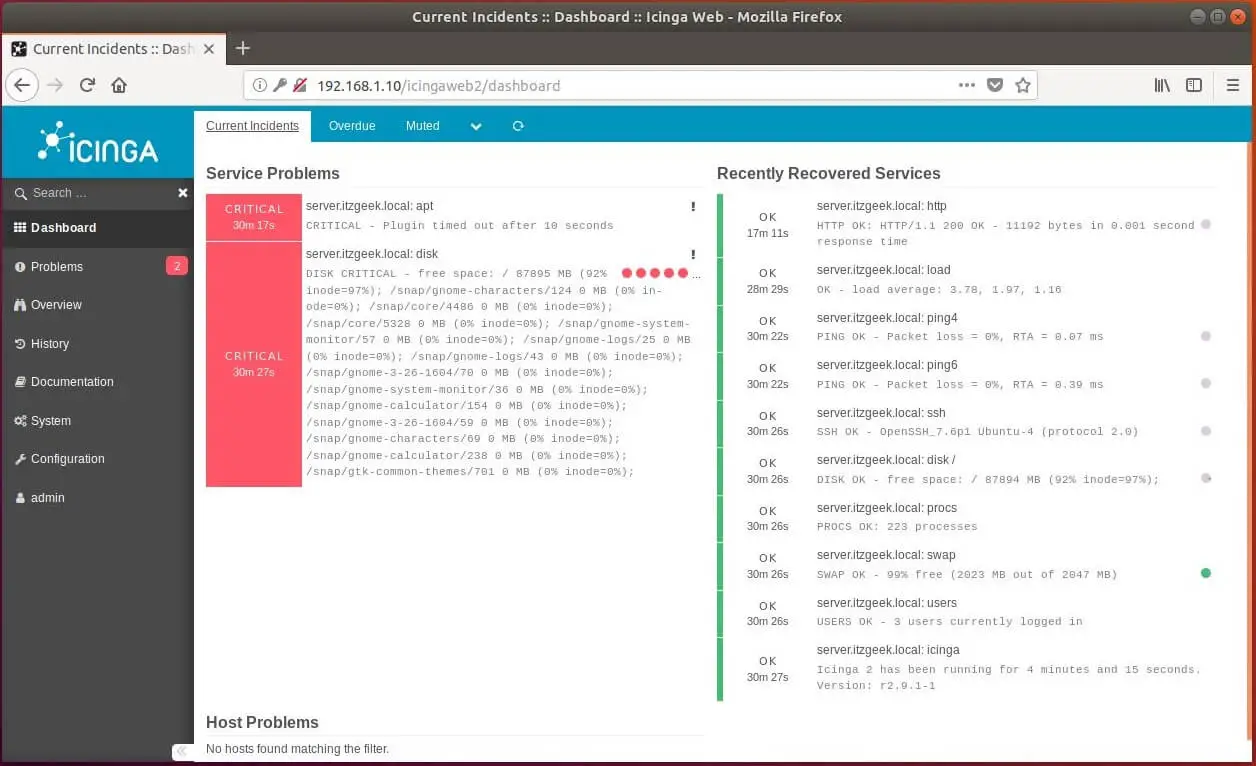
Login to Icinga Web 2 using admin account we created earlier.

You would get the Icinga Web 2 dashboard. Here where Icinga Web 2 reports for issues.
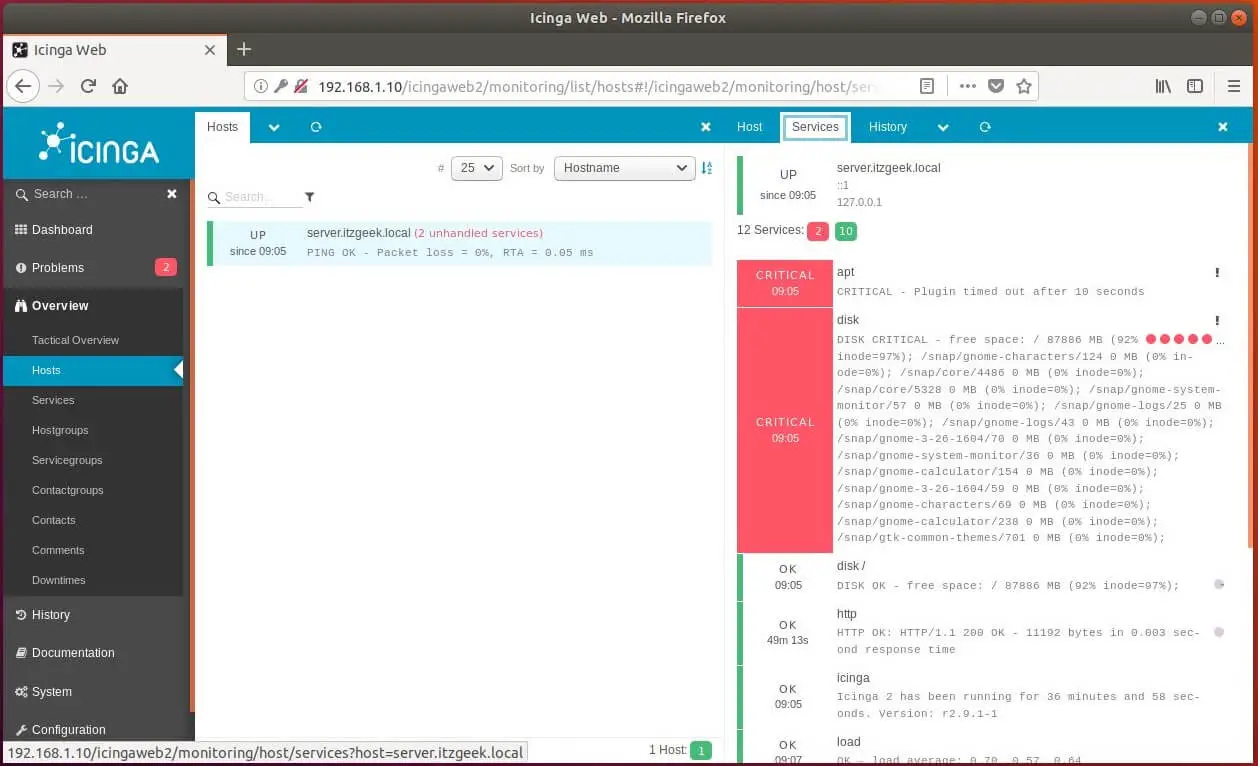
Go to Overview >> Hosts to see all the hosts connected to Icinga 2.
In our next tutorial, we will see how to add remote Linux machines to Icinga 2.
That’s All.