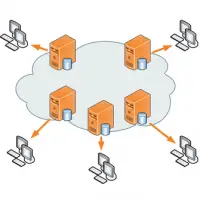
CDN is a Content Delivery Network of highly-optimized servers all around the world working together to distribute your content (CSS and Javascript files, downloadable objects, applications, real-time media streams, and much more) through hundreds of servers instead of a single host. This “smart route” technology makes sure each visitor to your site gets their data from the city closest to them.
Who needs CDN?
Small or large, if you’re looking to grow your business online, a CDN is a must-have. By bringing your content closer to the user’s connection point, the commercial CDN provider unleashes the potential of your site with much faster load times, superior scalability, and guaranteed uptime. A faster loading site not only makes your visitors happy, it can also earn you a few extra points toward a higher ranking on the major search engines – and what business owner or webmaster wouldn’t want that!
But if your Using a CDN for a small website or blog would be expensive. So is there a way we can set up our own CDN from which we can serve the static content?
The following steps will help you to setup own CDN for small wordpress blog or website.
First need to create the subdomain for that. if your website like “rajs.in”. make subdomain something like “cdn.rajs.in”. and create the A record with same ip address of “rajs.in”
In my case my domain register and Hosting provider are different. So it required two step for creating the Subdomain. if domain register and hosting provider or same, do only the second step for creating the subdomain.
Step 1: Creating Subdomain in domain register.
A – Record Should be same of “rajs.in”

Step 2 : Creating subdomain in Hosting Provider.
The document root of the subdomain should be the same of “rajs.in”

After that it will look like this.

Step 3: Installing W3 Total Cache.
For simple type of CDN can be done with the use of W3 Total Cache plugin. Install it by using Wp-admin.
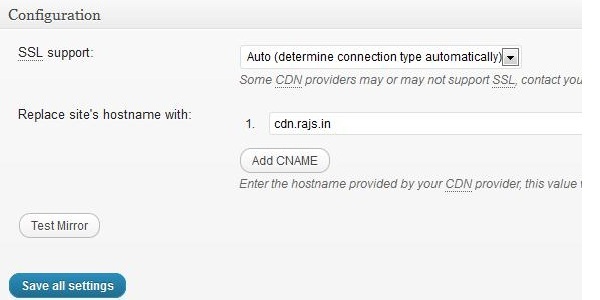
In the left pane you will find Performance Section —–> CDN —–> Configuration. Type your CDN host name.

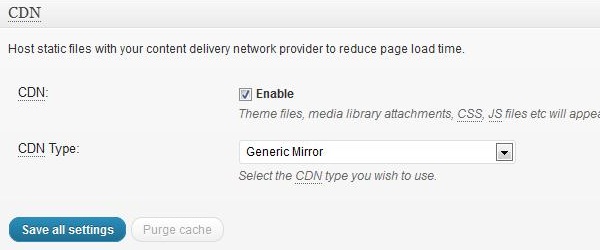
After that Again in Performance Section ——> General Settings —–> CDN

Keep all other settings as it is. Now CDN has been successfully created. Now all the images and other css files will be served by “cdn.rajs.in” instead of main domain “rajs.in”
